
My original NTSC all-sky camera had degraded to the point where it was useless. The main problem was that the acrylic dome had weathered and aged to a fogged up brown color, but I also decided it was time for a high resolution digital solution that would give me a live online feed. ZWO sells a number of planetary cameras that include a wide angle lens advertised for use as an all-sky camera. Originally I was looking at the $169 ASI120MC, but decided to go for a bit more horsepower with the USB 3.0 ASI290MC. At 1280×960, the ASI120MC is basically twice the ~640×480 of the NTSC camera (4x if you go by the total number of pixels), but the other big difference is the direct digital output vs. the analog video output being digitized by the security DVR. The ASI290MC was on sale for $299 at the time and being USB3.0 sounded like a good idea for real-time recording. It uses a 1936×1096 pixel sensor (basically a 1080P camera), that I thought had a wider field of view based on the published specs, but that ended up just being due to the 16:9 format chip being wider horizontally the 4:3 format, so the actual sky coverage vertically wasn’t very good.
The original NTSC Camera and Dome
More importantly, the USB 3.0 functionality was very poor, with the ASCOM driver hanging if you tried take images at less than once a second, and the DirectShow driver crashing constantly. The poor USB 3.0 performance was frustrating since I’d invested in the only USB 3.0 capable stick PC to put in the camera, but moving down to USB 2.0 speeds meant that I could eliminate the computer in the camera housing and just go to a good USB 2.0 extender that worked over the CAT6 cable I have running to the camera location. The DirectShow driver still crashed, but at least I could get something going with ASCOM. However, given the total set of problems, including the poorly represented field of view, I decided to return the ASI290MC. Unfortunately ZWO was still the only solution in this price range, so I ended up moving up to the $369 ASI178MC whose Y dimension of the sensor is about the same 5mm as the X dimension on the ASI290MC. That meant that for a lens that hit the full field of view (FOV) only in the X direction on the ASI290MC, it would produce a full 360 degree FOV on the ASI178MC. And at 3096×2080, the nearly 2x increase in vertical resolution was well worth the difference in price. The camera still had the same driver problems as the ASI290MC, but at least it gave a better FOV with the default lens that came with it.
After some time and several posts on their forum, ZWO did eventually make a fix to the DirectShow driver opening up the option to use iSpy Connect software, which is an open source security camera monitoring software. I’d need to make a few modifications to it to get some of the features I want, but the DirectShow driver has a built-in auto-exposure and automatic gain control loop that will track the broad change in brightness between day and night operation. At the moment thought I’m concentrating on the ASCOM version of a software called AllSkEye, which while it also doesn’t do everything exactly as I’d like, is coming along nicely. Being that it’s targeted specifically to running an all sky camera, the potential there is good and the developer Michael Poelzl has been quite responsive in making updates.
Currently the live view of the camera is available under the webcam link on the weather page. At the moment that points straight to the latest image that is updated once a minute. You just need to refresh the page to get a new image. Eventually I intend to embed that in an HTML wrapper though, to be able to provide an image history, so that’s likely to change. You can find the first light images for the ASI178MC in this gallery, including a couple of all night video animations which are pretty incredible (be sure to watch them full screen). I’ve also created a meteors folder and added a few star trail images. Below are a few highlights.
This image highlights the locations of all of the cities producing the light pollution along my horizon, most of which is from the Austin, TX metropolitan area. The stock lens doesn’t quite get full horizon-to-horizon coverage in the north/south direction.
An all-night, all-sky star trail photo! The camera’s not quite aligned as Polaris is to the left of straight up.
The design, construction, and installation of the two versions of the camera can be found in this gallery. As mentioned, initially I’d intended to use a stick PC and had planned on a fan cooled housing, but when I decided to go with the USB 2.0 extender, I scaled back those plans. Unfortunately the ASI290MC runs very hot to the point where it was enough to deform the original PLA base piece I’d mounted it to. The sealed dome also had a humidity problem causing condensation on the inner surface of the dome that wouldn’t dissipate despite the higher temperature inside the housing.
Initial version installed on PVC mount over roof.
PLA mounting plate deformed by heat of camera.
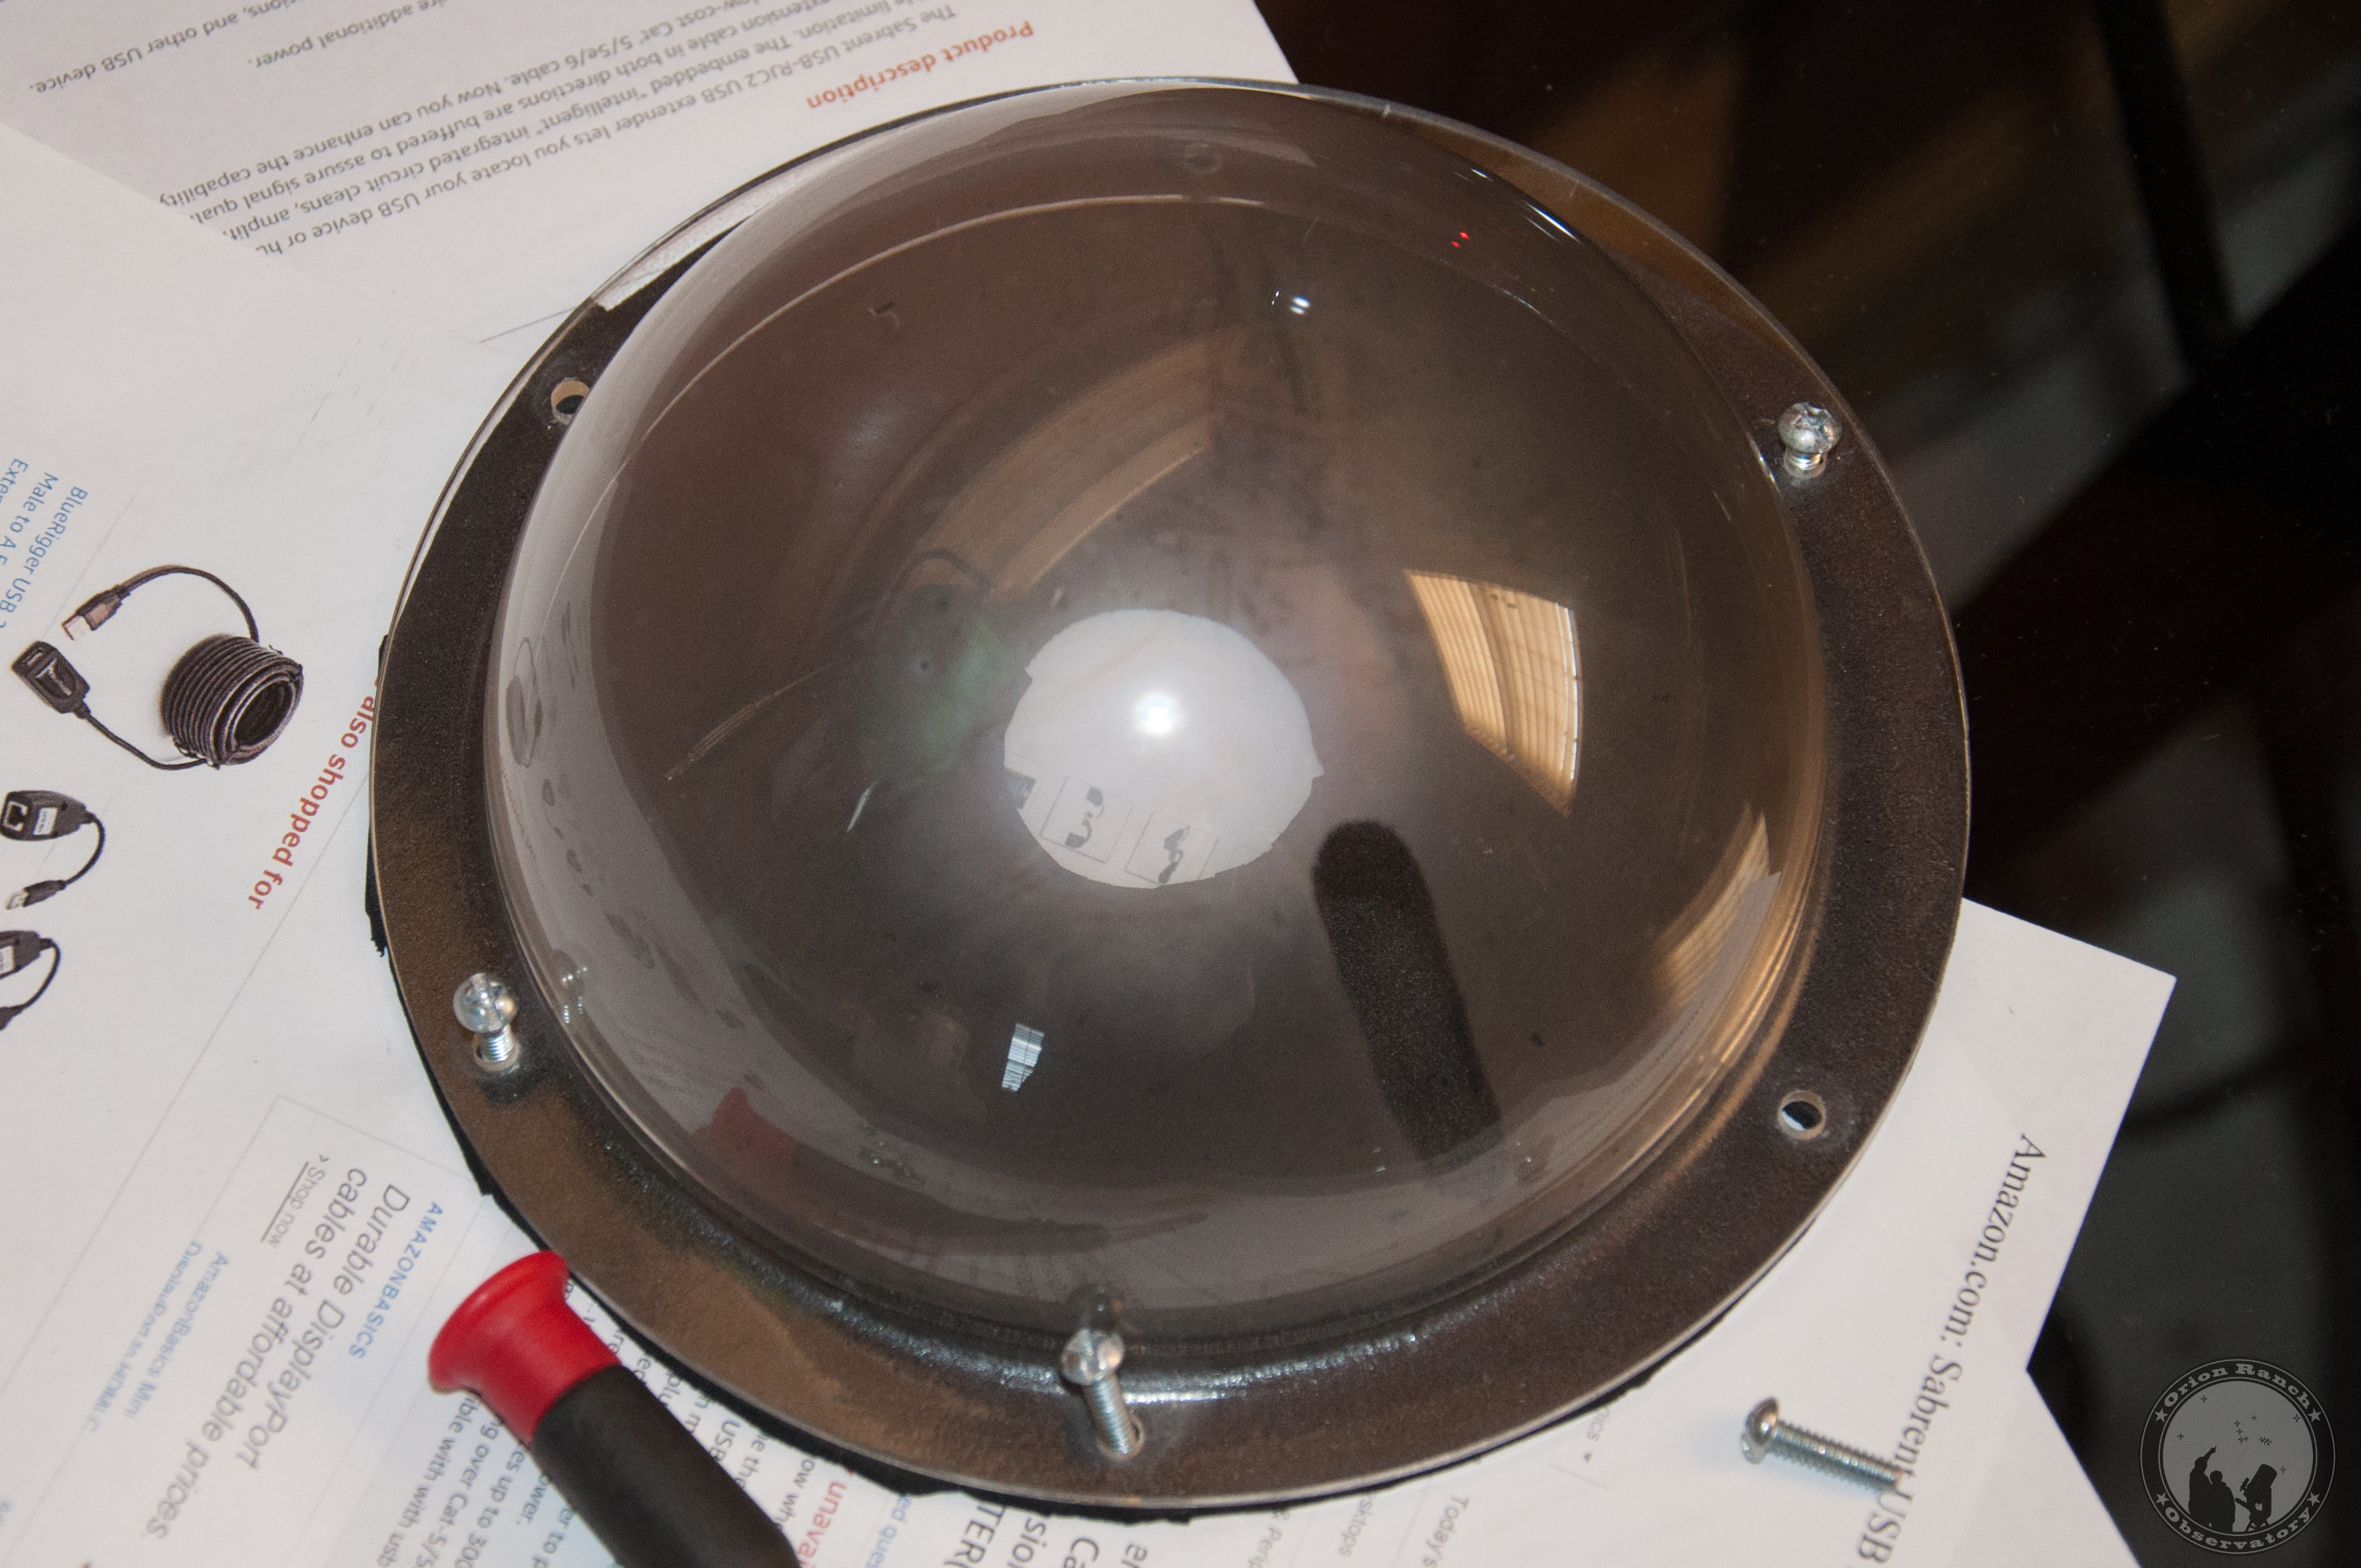
Condensation in the dome.
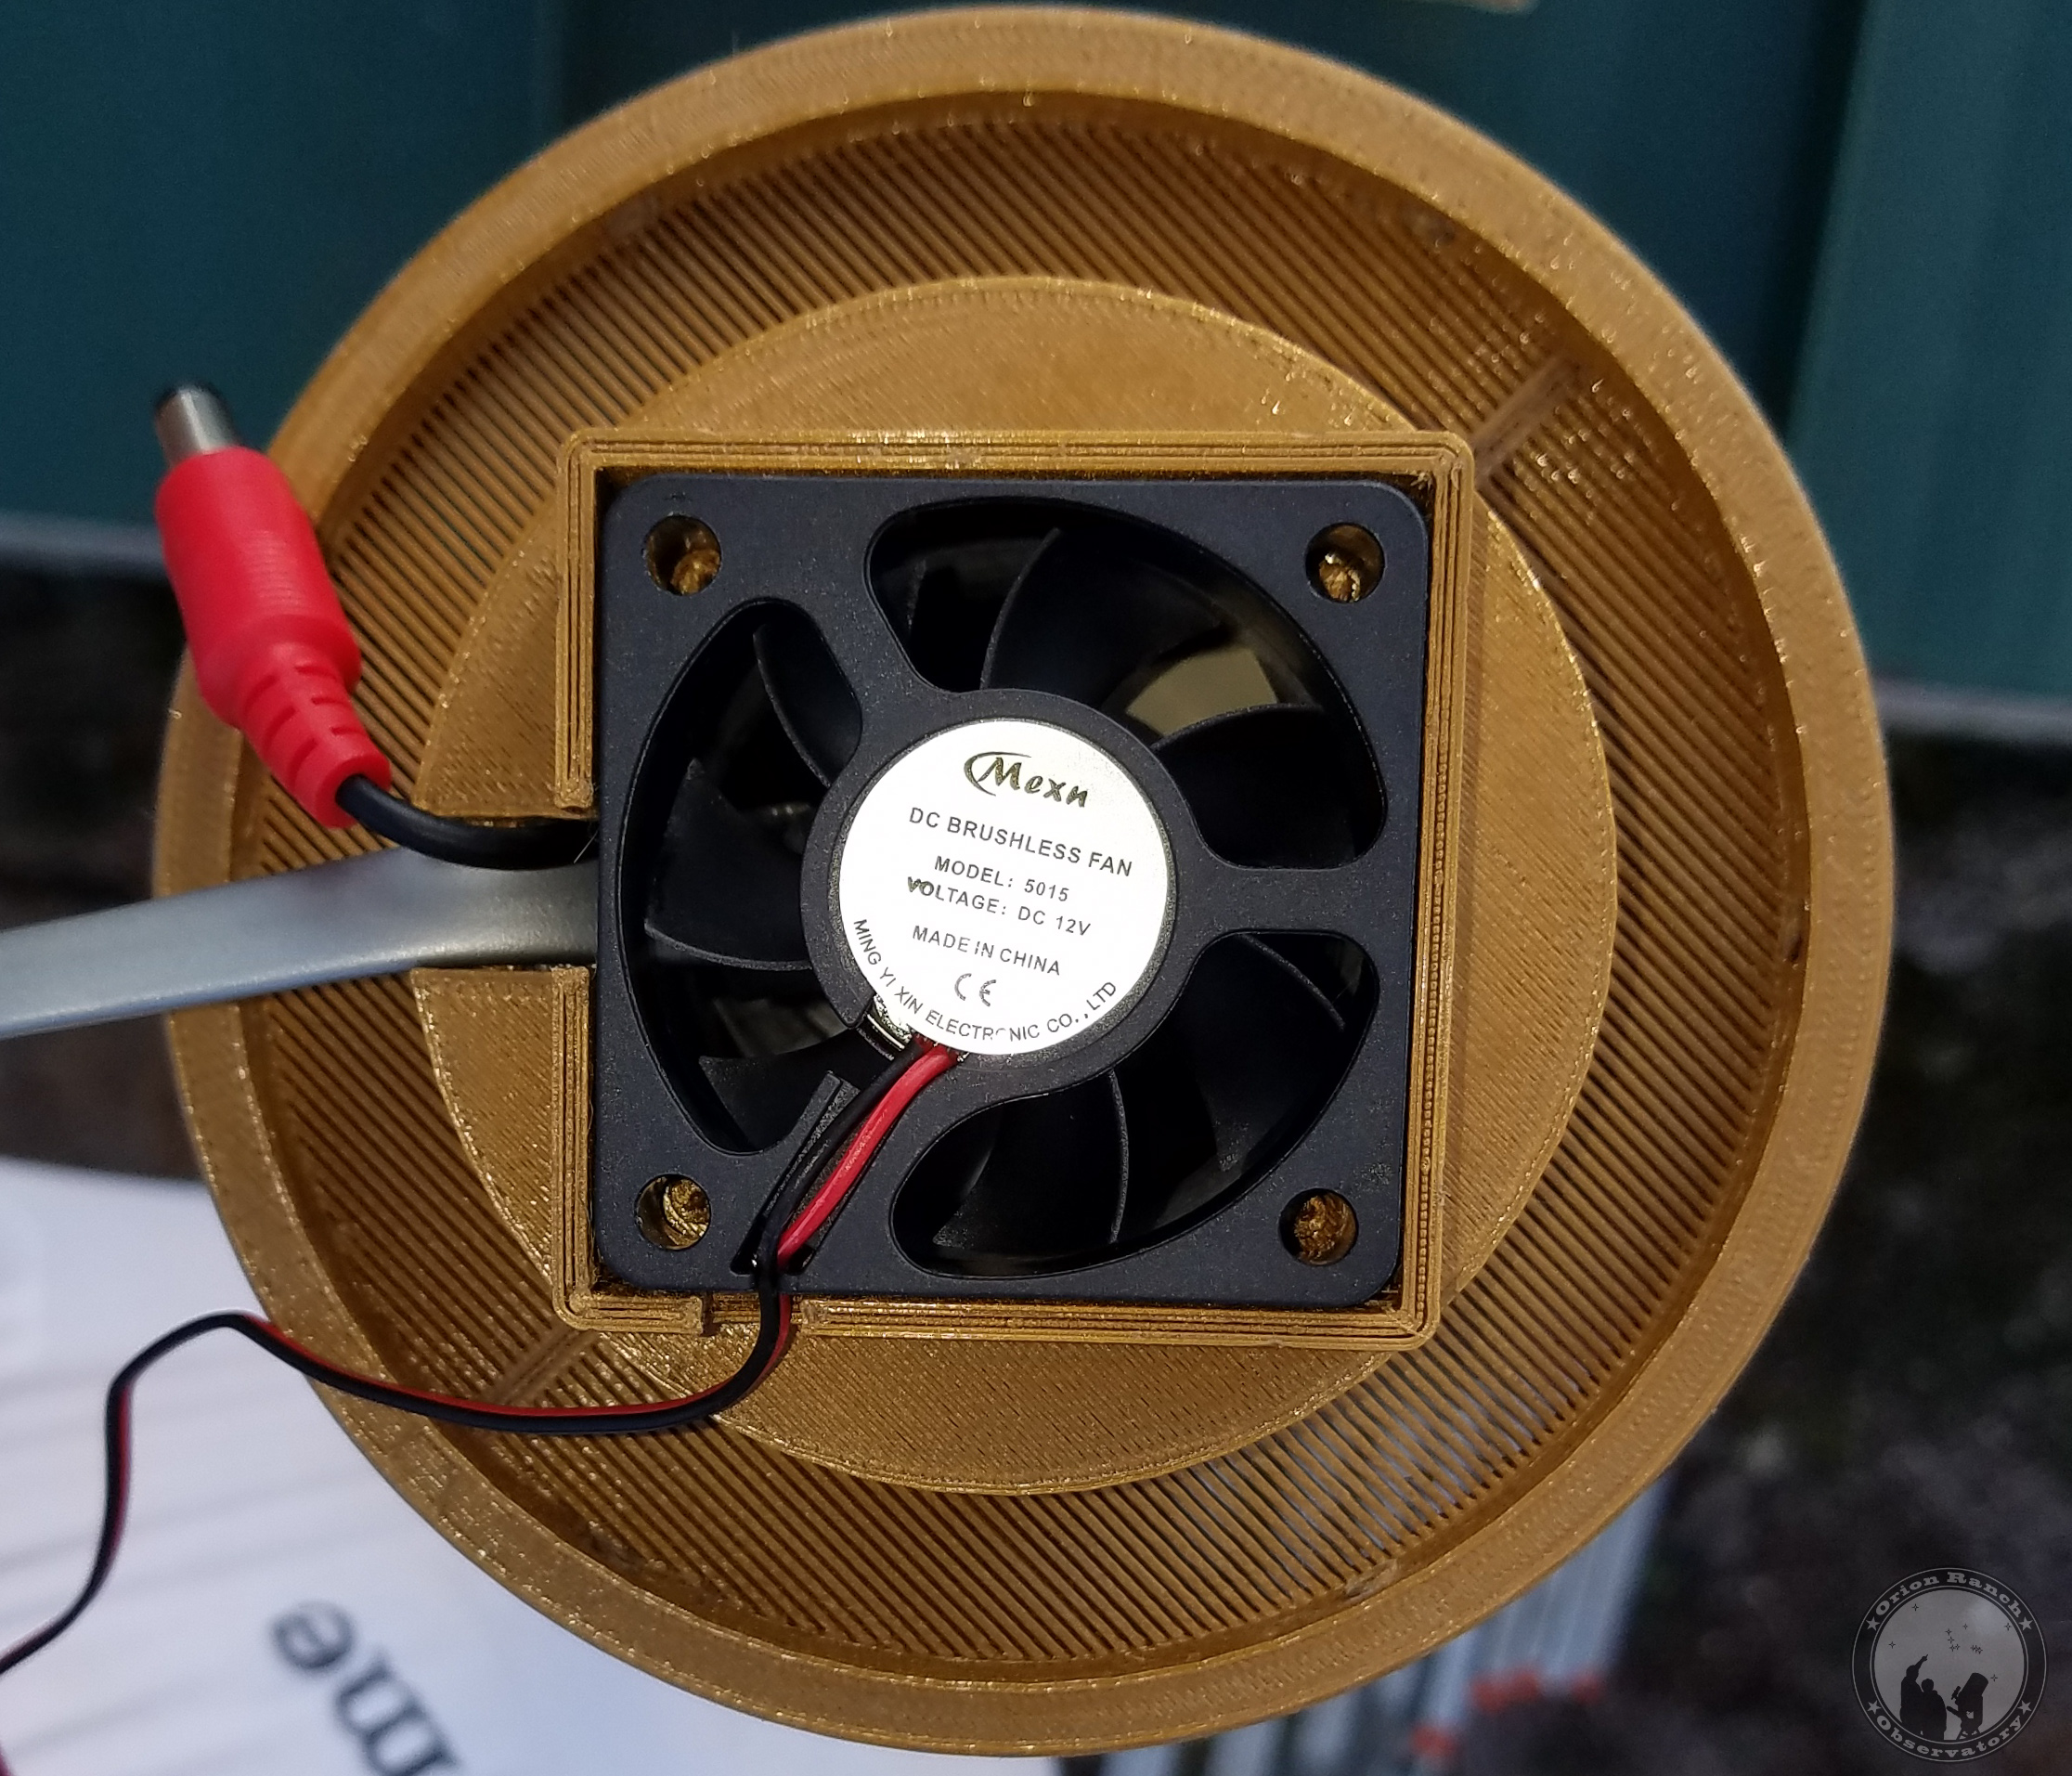
This took me back to my original concept for the stick PC solution since I was going to need to ventilate it. To minimize the chances of water/humidity and dust ingress, the plan was to pull the air through the conduit, which would pull it from inside the wall. Ideally the air would be cooler and cleaner than the outside air. Below is the 3D CAD model showing the overall design, with a duct and support for the camera that blows the air up through the middle and circulates it around the camera body, then out past the lens into the dome before it exhausts down the sides past the power supply and USB extender and out the ventilated base. I also switched to an O-ring instead of a gasket for the dome to housing transition.
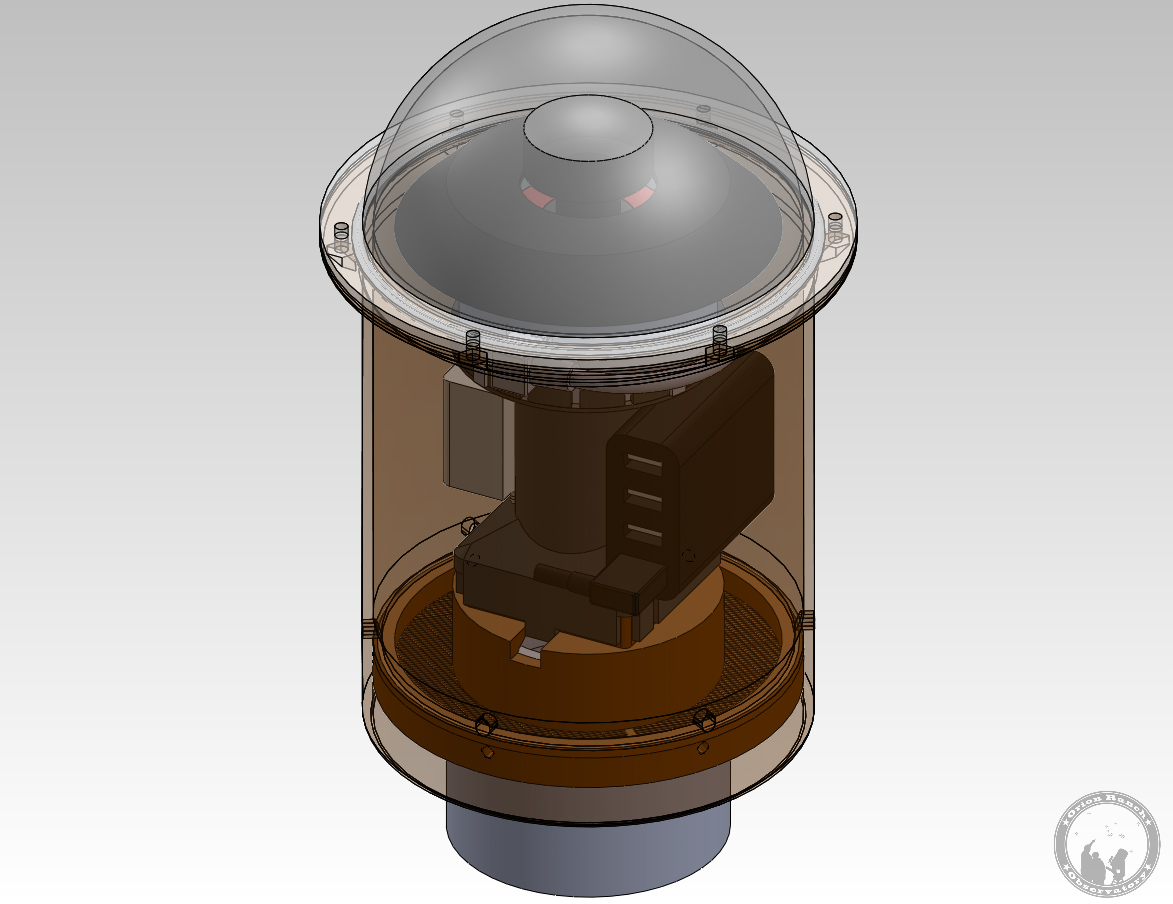
Solidworks CAD model of the finished design.

Cut-away view of the components showing the fan, duct, and circulating camera mount.
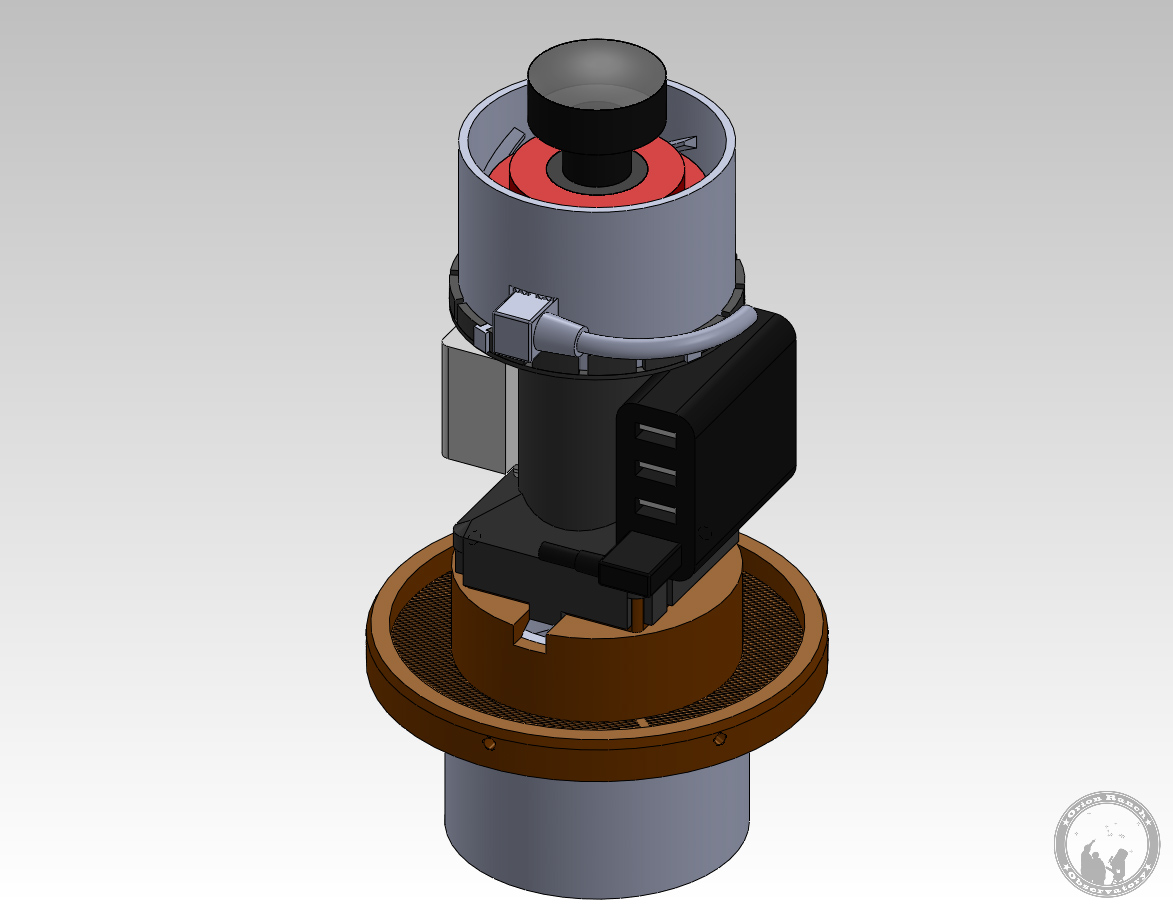
Internal view with the outer housing, dome, and camera shroud removed.
Below are all the new printed parts and components and a few pictures of the build-up and test fit. Follow the links to the gallery page to view the entire step-by-step assembly.
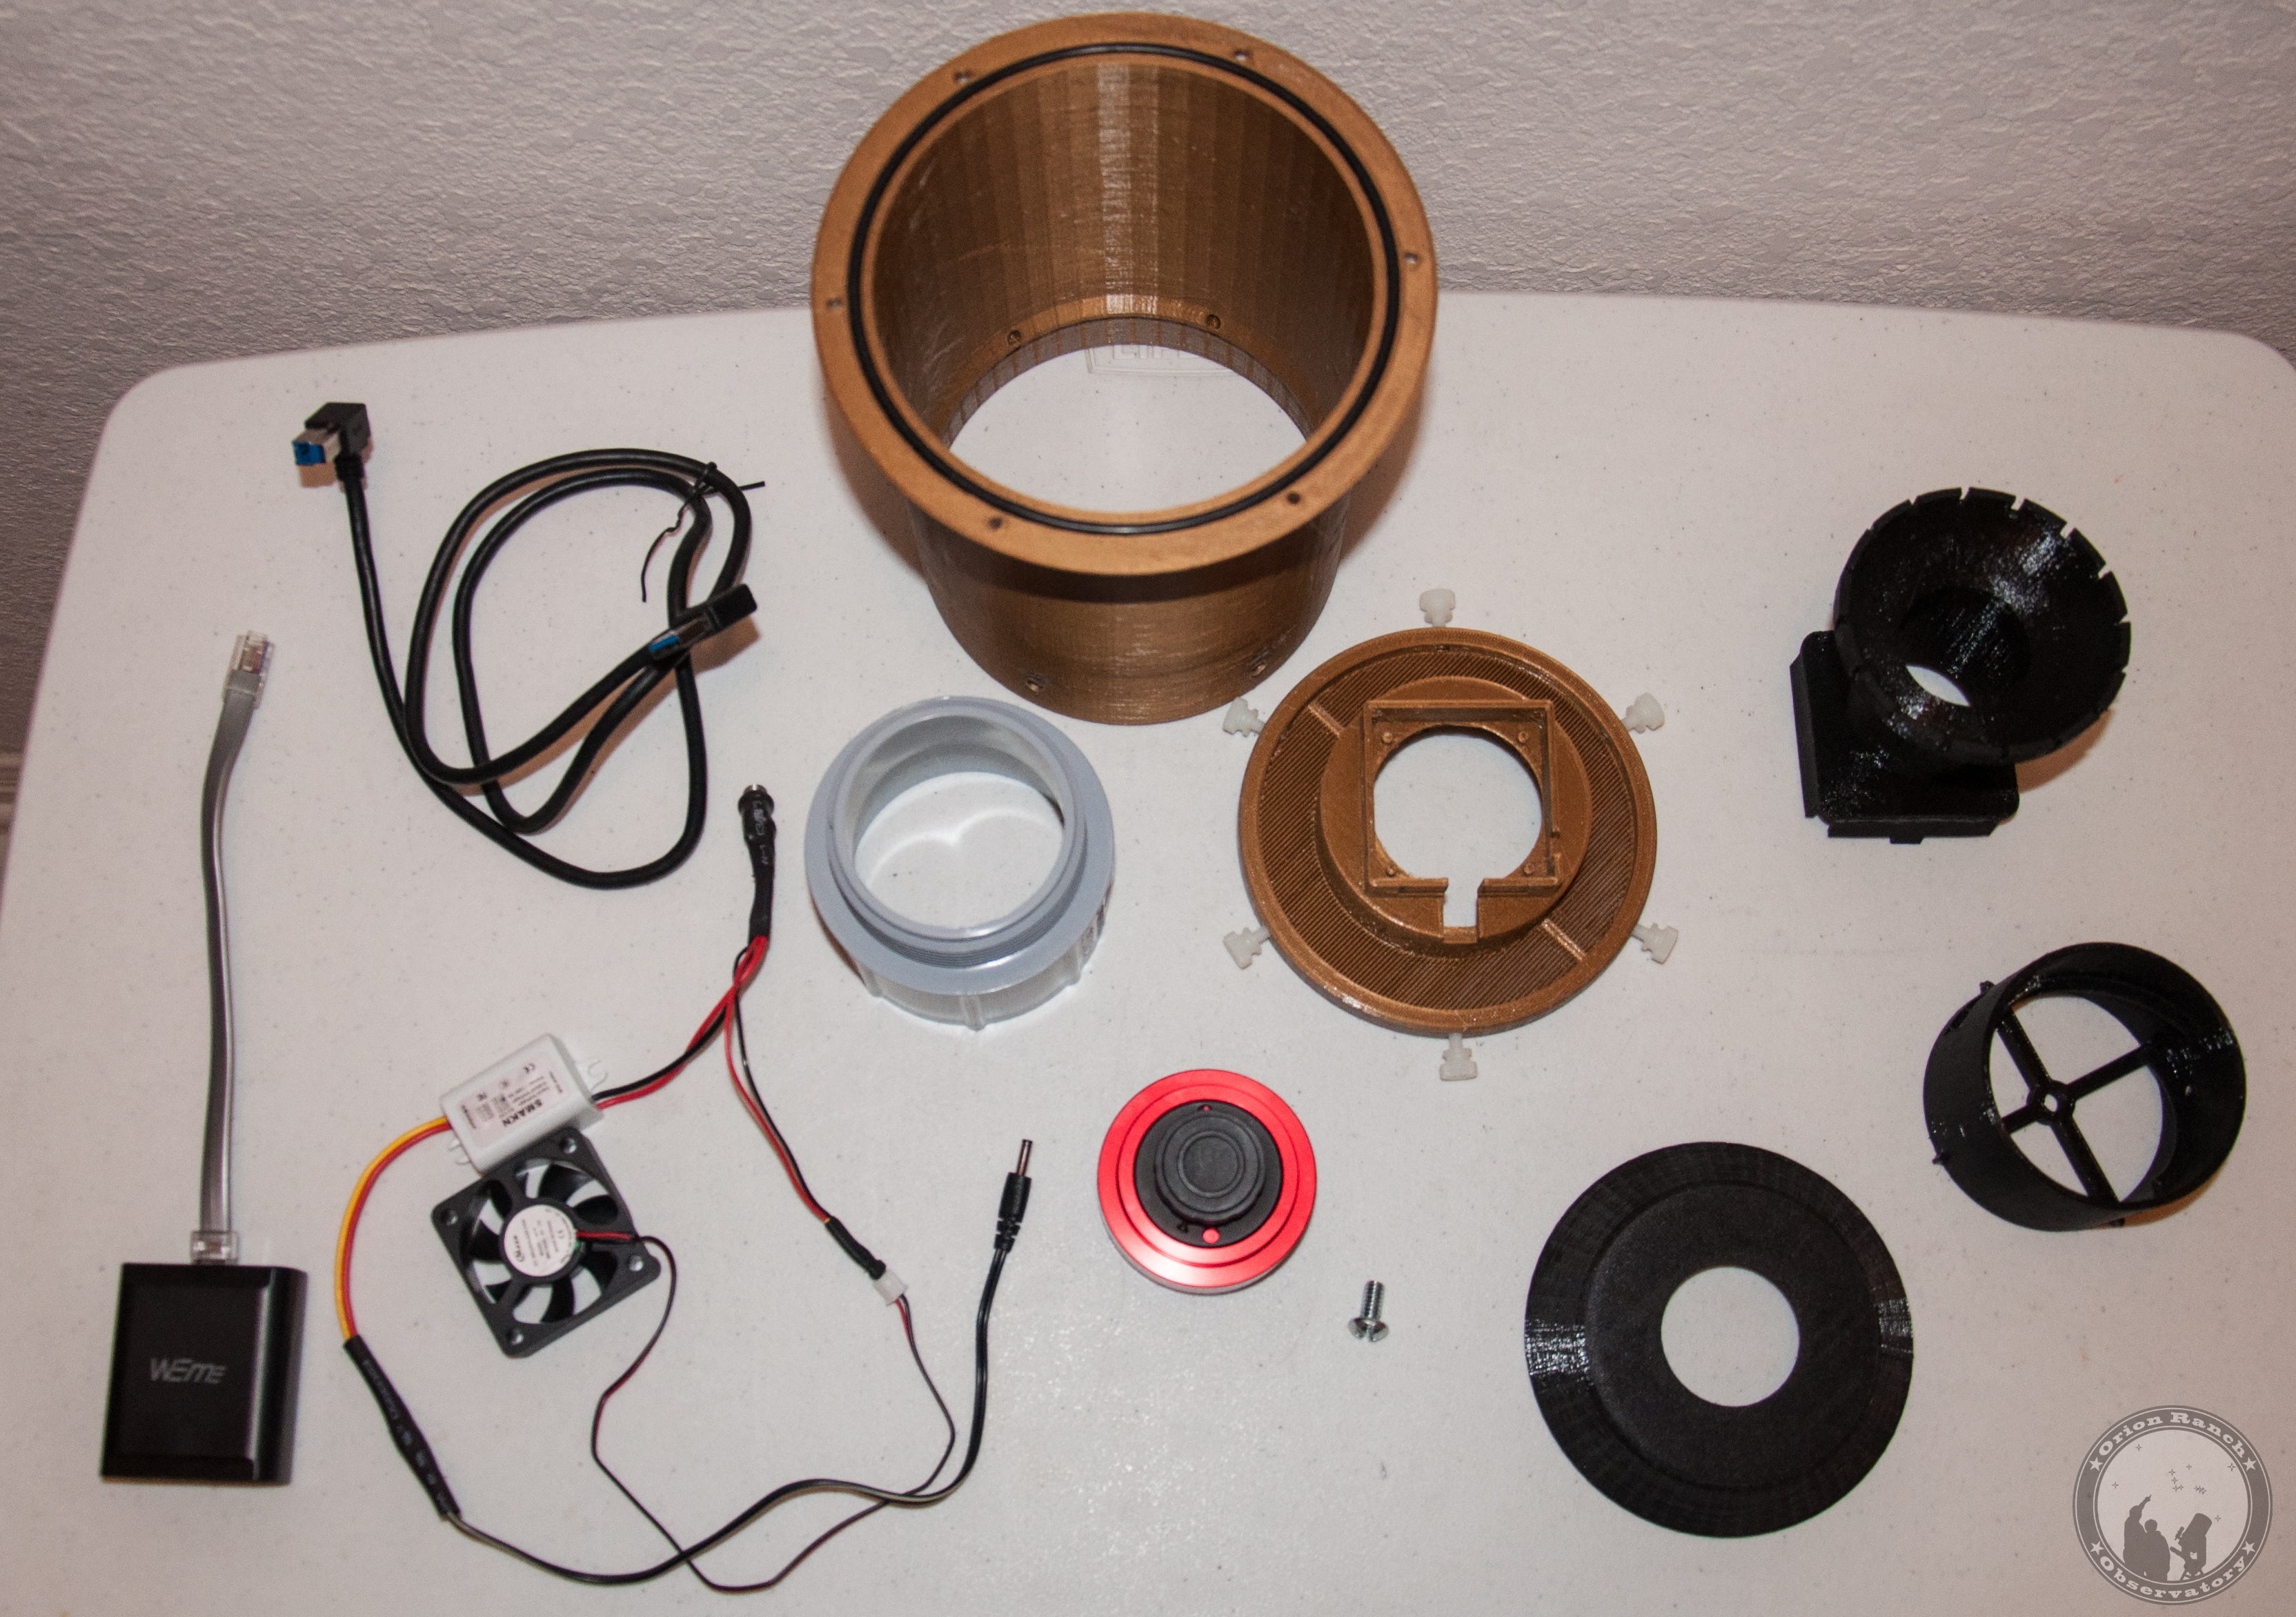
All new parts with for the camera assembly.

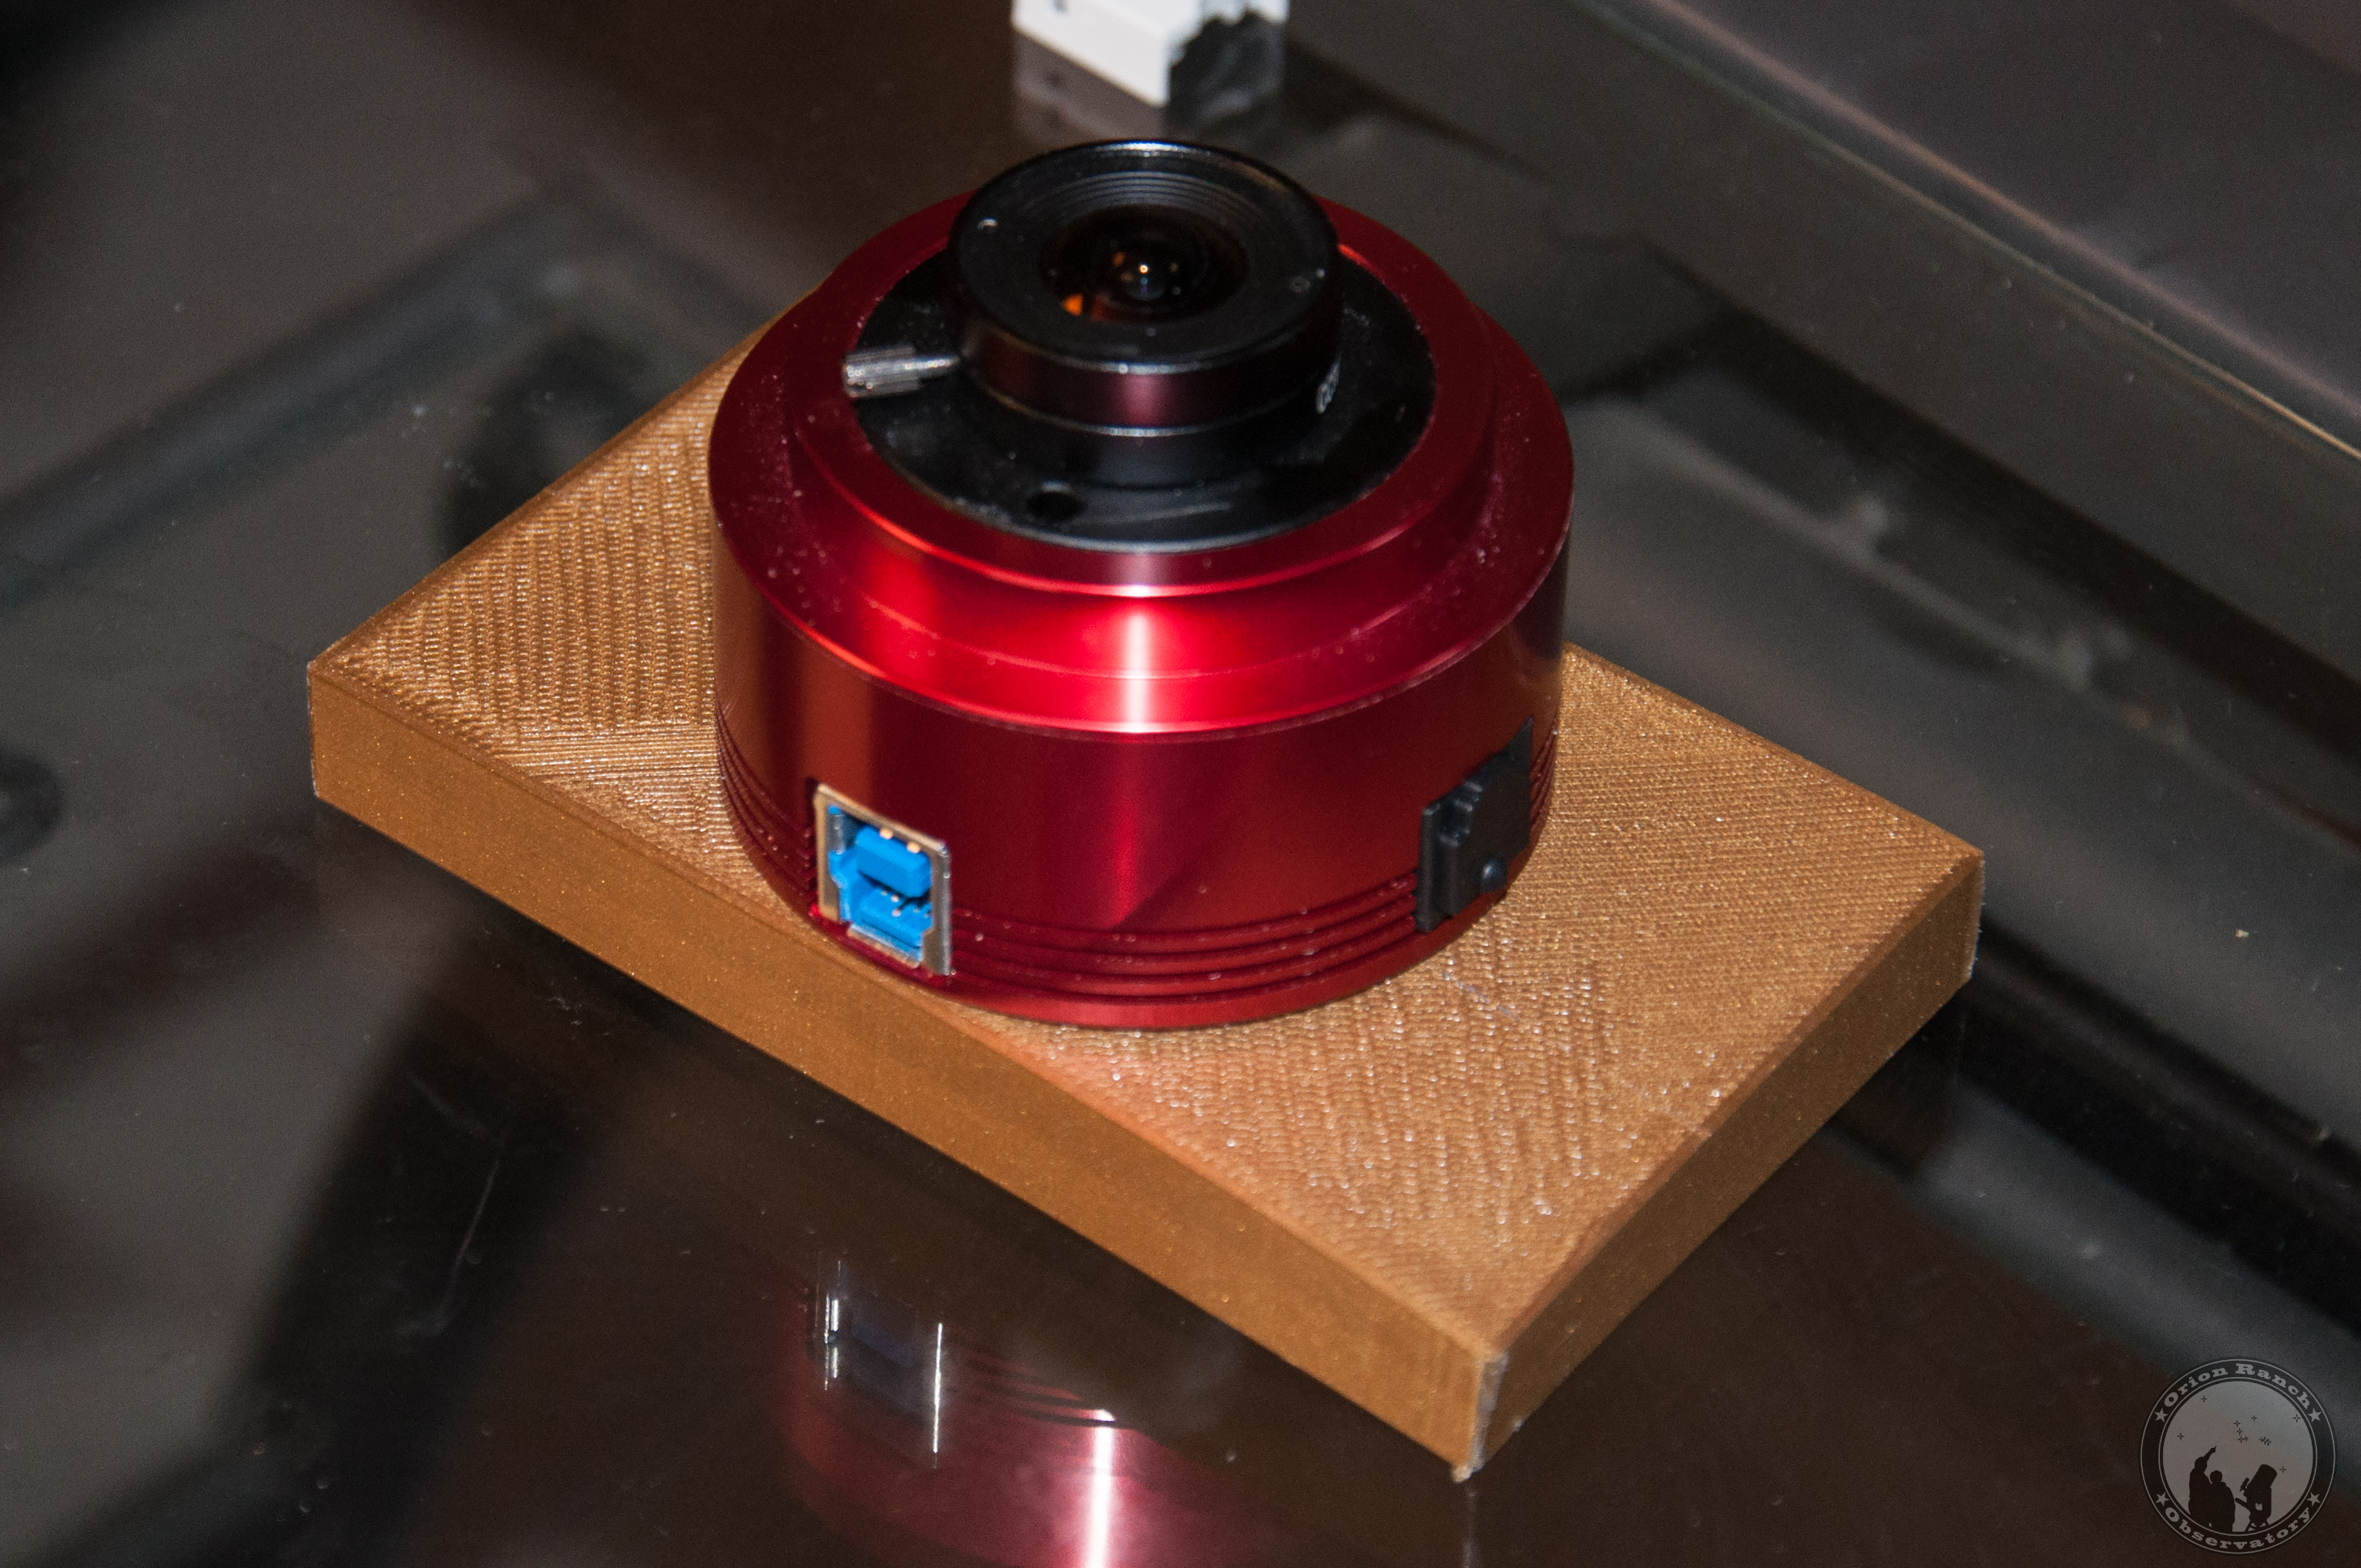
The camera mounts into a ducted part that goes on top of the duct column. Spiral vanes circulate the air about the camera and should also help push some of the air through the heatsink slots at the base of the camera.

The camera attaches with a 1/4-20 screw and has to be mounted to allow access to the USB cable connection. The slots in the duct allow for 22.5 degree adjustment of the camera orientation with fine tuning from the threaded base. The narrowed duct is to allow the extender and power supply components to be attached around it.
With all the new parts printed and test-fitted, it’s time to do the install. Again, there are lots more pictures in the gallery.
The vented base screws onto the conduit and the 12V power and a short Ethernet cable jumper feeds out under the fan.

Stacking up all the components and strapping the cables on, the assembly is almost complete.

A second view, now with the camera shroud and diverter installed.

With the housing installed, the camera is finished. The shell and dome remain together and the thumbscrews hold it on at the base.
I hope you enjoyed seeing this build. Keep an eye on the galleries for minor adjustments going forward.


2 Responses to New All-Sky Camera