Observatory Rail Site Prep

December 31st, 2025

I decided to go ahead and do something I didn’t do previously, which is to level a pad under the rail system.  That should make it easier to install each rail using the bucket on the tractor by getting it closer to level.  Taking the rails down with the crooked bucket was problematic.

Unfortunately, as my luck would have it, I decided to use my far too big and heavy rock filtering bucket and managed to blow out a hose on the bucket.  I won’t get a replacement until mid-week, so I won’t be able to finish the pad until next weekend.  Hopefully I can at least make some progress with posts tomorrow.

I did at least get the middle brace out as well.  It wasn’t very deep into the wall.

I also got the temporary power installed for running the welder.  I still need to finish putting together the extension cable I’ll be using based on the 2 AWG wire that used to feed the old shack out there instead of using a few 6 AWG extensions.  With the 2 AWG, it will be just like being plugged in directly.  I’ll finish the extension tomorrow.

January 3rd, 2026

I made a bit more progress, although never as much as I hope!  I started by getting out my self-leveling three-beam laser and attempting to transfer the centerline of the angle iron to the ground.  Tough to do with the Sun up, but still not everything I need to ensure things are perfectly aligned.

I then proceeded to remove the post bases and run strings to determine how well those center studs aligned with my mark.  Looks like things are within half an inch.  I’ll try a few other steps before I lock anything down completely.

I then proceeded to cut off a 6″ strip from the 2′ x 4′ x 1/4″ plate that I bought that’s on the trailer under the beams so that I can’t actually pull it out completely!  I then sliced that into four ~ 6×6″ squares and drilled a large center hole and four corner holes.  I was going to do 8×8″ base plates, but those would end up hanging off the round piers on the West side where they weren’t poured in the right place (I’d aligned them off the slab, which turned out to be crooked!)  Instead, I plan to rotate the base 45 degrees so that there are triangular tabs on each side giving me more room to install additional anchor bolts after the post is in place.  Since I plan to add the corner anchor bolts after everything is in place, the center stud will be the only thing holding the plate and post initially.   I’m debating whether or not I’ll actually put the nut on the center stud or not.  I don’t expect to ever need to remove the steel, and anyone taking it down would be chopping up steel anyway, so who cares if they have to cut the post bottoms too?!!  I just want to be sure I can shift the base a bit in the oversized center hole if needed.

Finally, I put together the 2 AWG welder cable with the new plug that arrived from Amazon.  Unfortunately, I realized after the fact that the outlet I’d bought at the local big box store years ago and never used wasn’t actually the correct 50 Amp outlet, but a 30 Amp one (right angle ground and a narrower slot).  At this point I’ll just take off the cover and widen the slot, but annoying nonetheless!

I should have the tractor repaired by next weekend and can hopefully get some posts in place!

January 10th, 2026

I received the replacement hose last Tuesday and was able to repair the front end loader on my tractor.  It wasn’t exactly as advertised (rated for 4785 PSI instead of the listed 5300) and doesn’t quite fit and bend like the original, but at least I’m operational again.  The cows were happy to get another bale of hay!

I didn’t get to putting up any steel yesterday, but I did get a nicely leveled pad in place.  Still a bit more to do to it, but this will probably do for now.

January 12th, 2026

In answer to one of the questions on Cloudy Nights regarding where I got my steel and what it cost, I checked with several local (Austin metro area) houses and the two that gave me quotes were in the same ballpark.  On the other hand, Metal Mart, which is in my back yard, comparatively, was worthless to try to work with!  At any rate, with tax, the lot was $4153.  For piece part prices (excluding tax) a 24′ 4x4x0.25 for my posts weighs 293 lbs and was $313.44.  A 25′ W12x14 H-beam was 350 lbs and $406.  A 24′ 2x4x0.120 for my cross braces was $125.52 for 114 lbs.  So, on average, figure about $1.05-1.15 per pound here in Central Texas at least.  That was with me picking it up.

And just as a reminder, this is already way overkill in terms of strength for replacing the wood that I took down.  And just for grins, I calculated what replacing all the wood from Home Depot would cost and it was $770.56 plus tax.  I’m sure I could have easily been strong enough at half the cost or even a third, but I’m confident this won’t be going anywhere, assuming I can get it welded right!

The main reason I ended up at the size I did for the beams was to attempt to have something that would be close to the same dimension as the original rail to fit the slots in the observatory cleanly.  I really wanted something wider that could have had the flange act as my capture mechanism, but I needed to keep the web directly under the angle iron, so that limited my options.  Thus, I have to use a 1×3 tube to add that.  I debated just coming up with a hook for the end of the roof only, which would probably have been sufficient, but oh well…

January 17th, 2026

I still didn’t get to welding anything, but spent most of my time stringing guides from the sides of the observatory to check on the alignment.

Translating that inward by the distance marked on the observatory slab using the laser gives me a 189 inch separation. The actual rail separation is 188.5″, so that’s not perfect, but close.  I’m going to try the laser level again after dark to see if it’s one side or the other or just split the difference. A quarter inch isn’t going to make much difference one way or another.

The biggest problem is that the centerline is outside the existing studs, putting it even further to the edge of the western piers, so that one corner is going to hang over the edge.

The east side is looking right on center, where sadly there’s already the original stud cut off!

I’m going to have to either re-drill that center hole on the plates or possibly even just remove the existing stud and just use the corners.  I know I should really just knock out the off-center piers and re-pour them (probably should have poured them with a welding plate embedded) but I didn’t want to take the time or effort.  I may come back and pour an additional side to the west piers, although I don’t really think I need them structurally.

I went ahead and removed the two end pieces of the capture rail/trim system in order to expose the end of the rail and allow access to the last wheel.  That will let me wedge in some support and remove the end of the cap rail under the wheel.

I also took the oscillating saw with a small blade to the ground pin socket on the plug let me open it up to take the 50 Amp ground pin.

January 18th, 2026

Aligning the self leveling laser on the marks from yesterday, they hit the V-groove angle iron rail pretty well, but if you look closely, there’s a bit of front-to-back variation on where it’s hitting.  The other side was about the same.

Adjusting the west side by about half an inch to shoot for the 88.5″ separation still looks about the same on the angle iron.

However, attempting to align the laser down the center of the V-groove angle iron, it hits the bolts perfectly!  Same for the other side.  Not sure the spacing is quite wide enough, but I’d be much happier to be centered on those bolts!  I still think I’ll have to widen out to 88.5″, but we’ll see how that goes.

January 19th, 2026

Going back and reminding myself of the original rail design, the angles are centered on the 2×4 walls, so (16′ = 192″) – 3.5″ = 188.5″, while the old posts for the rails were 6×6’s, so 192″ – 5.5″ = 186.5″.  Thus, to center the new posts, under the angle, I need to move them out 1″ each side.  The old posts weren’t centered under the rail, they were aligned to the outside.

The 6×6 post was 1″ offset from the center of the rail, so I need to offset the center stud hole. This was the 1/2″ pilot hole that then gets expanded to give some play to the location.

I then have to widen the holes out to give some play.

To get an idea of how close the post will end up to the new hole, I drew these lines 2″ from center and 1/4″ inside that.

I moved the strings over to map out the centerline for each beam and adjust the spacing as needed. I then drew the 4″ wide lines for the post location. These pictures were taken around the time or just after the Sun was at Zenith, so the shadow of the string was right on my line!

I then installed the plates on center and polished them with a wire brush wheel to remove all paint, etc. I had to cut out between the holes on one in order to get it to the right spot. I then scored a 4×4 guide into each plate.

I also cut back a couple of the washers to be sure they didn’t interfere with the post.

I then cut the 24′ 4×4’s into four posts.  Unfortunately the length needed to be a bit more than 8′, so I couldn’t get three posts out of one piece as I’d originally planned.  Ah well.  I cut the posts at 8′ 2″ that should have them a bit long.  Once they’re installed, I’ll mark them with the laser level at the required cut height so that they’re all at the same level.  That’s still a bit problematic as there is some variation in the size of the beams.

The last cut!

It was getting too late to drag out the welder, but I had to put one post in place temporarily just to get a look!

January 25th, 2026

After 2.6″ of rain followed by ~1/8″ accumulation of freezing rain, we had about an inch or so of graupel snow (between snow and sleet) overnight.  Some nice 18″ drifts where it all came off the valleys of our roof.  Thus, the lack of progress on the construction this weekend!


Posted in Uncategorized | Leave a comment

Observatory Rail Deconstruction

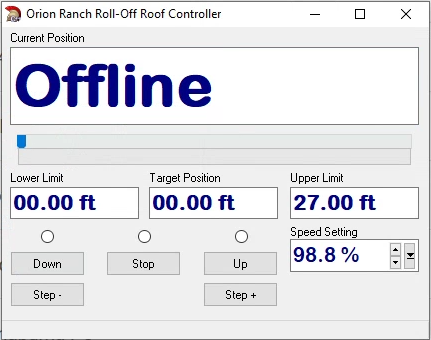
As mentioned in the last post, in late October the roof bound up on the rail system when opening.  I just happened to be there when I was opening to hear a long wood on wood squeal as something dragged for the last couple of feet.  Luckily I was only going halfway open to begin with.  I imaged overnight, and in the morning, on trying to close the roof, it moved about a foot before stalling and losing the new web interface I’d developed.  Turns out it blew the fuses on the motorbase rather than tripping the breaker.  I was able to climb up and swap them and get things closed, but figured I’d better not try to open it again until I’d done a more thorough inspection.

Two years ago, I’d discovered some bad rot on one of the posts and diagonal braces, so had braced all of that and reinforced it, but a hammer tap test around the rest of the rail system didn’t show any soft spots.

Initially, I’d planned to redo the entire rail system in steel that winter and had started working on an I-beam (really a wide H-beam) design to replace it.  Unfortunately, with the new job I really haven’t had time to take off to do that (or even finish the design).  The re-braced and reinforced post has held up pretty well, with no evident growth in the rot, so I was actually debating just replacing that one post and seeing how much longer I could go.

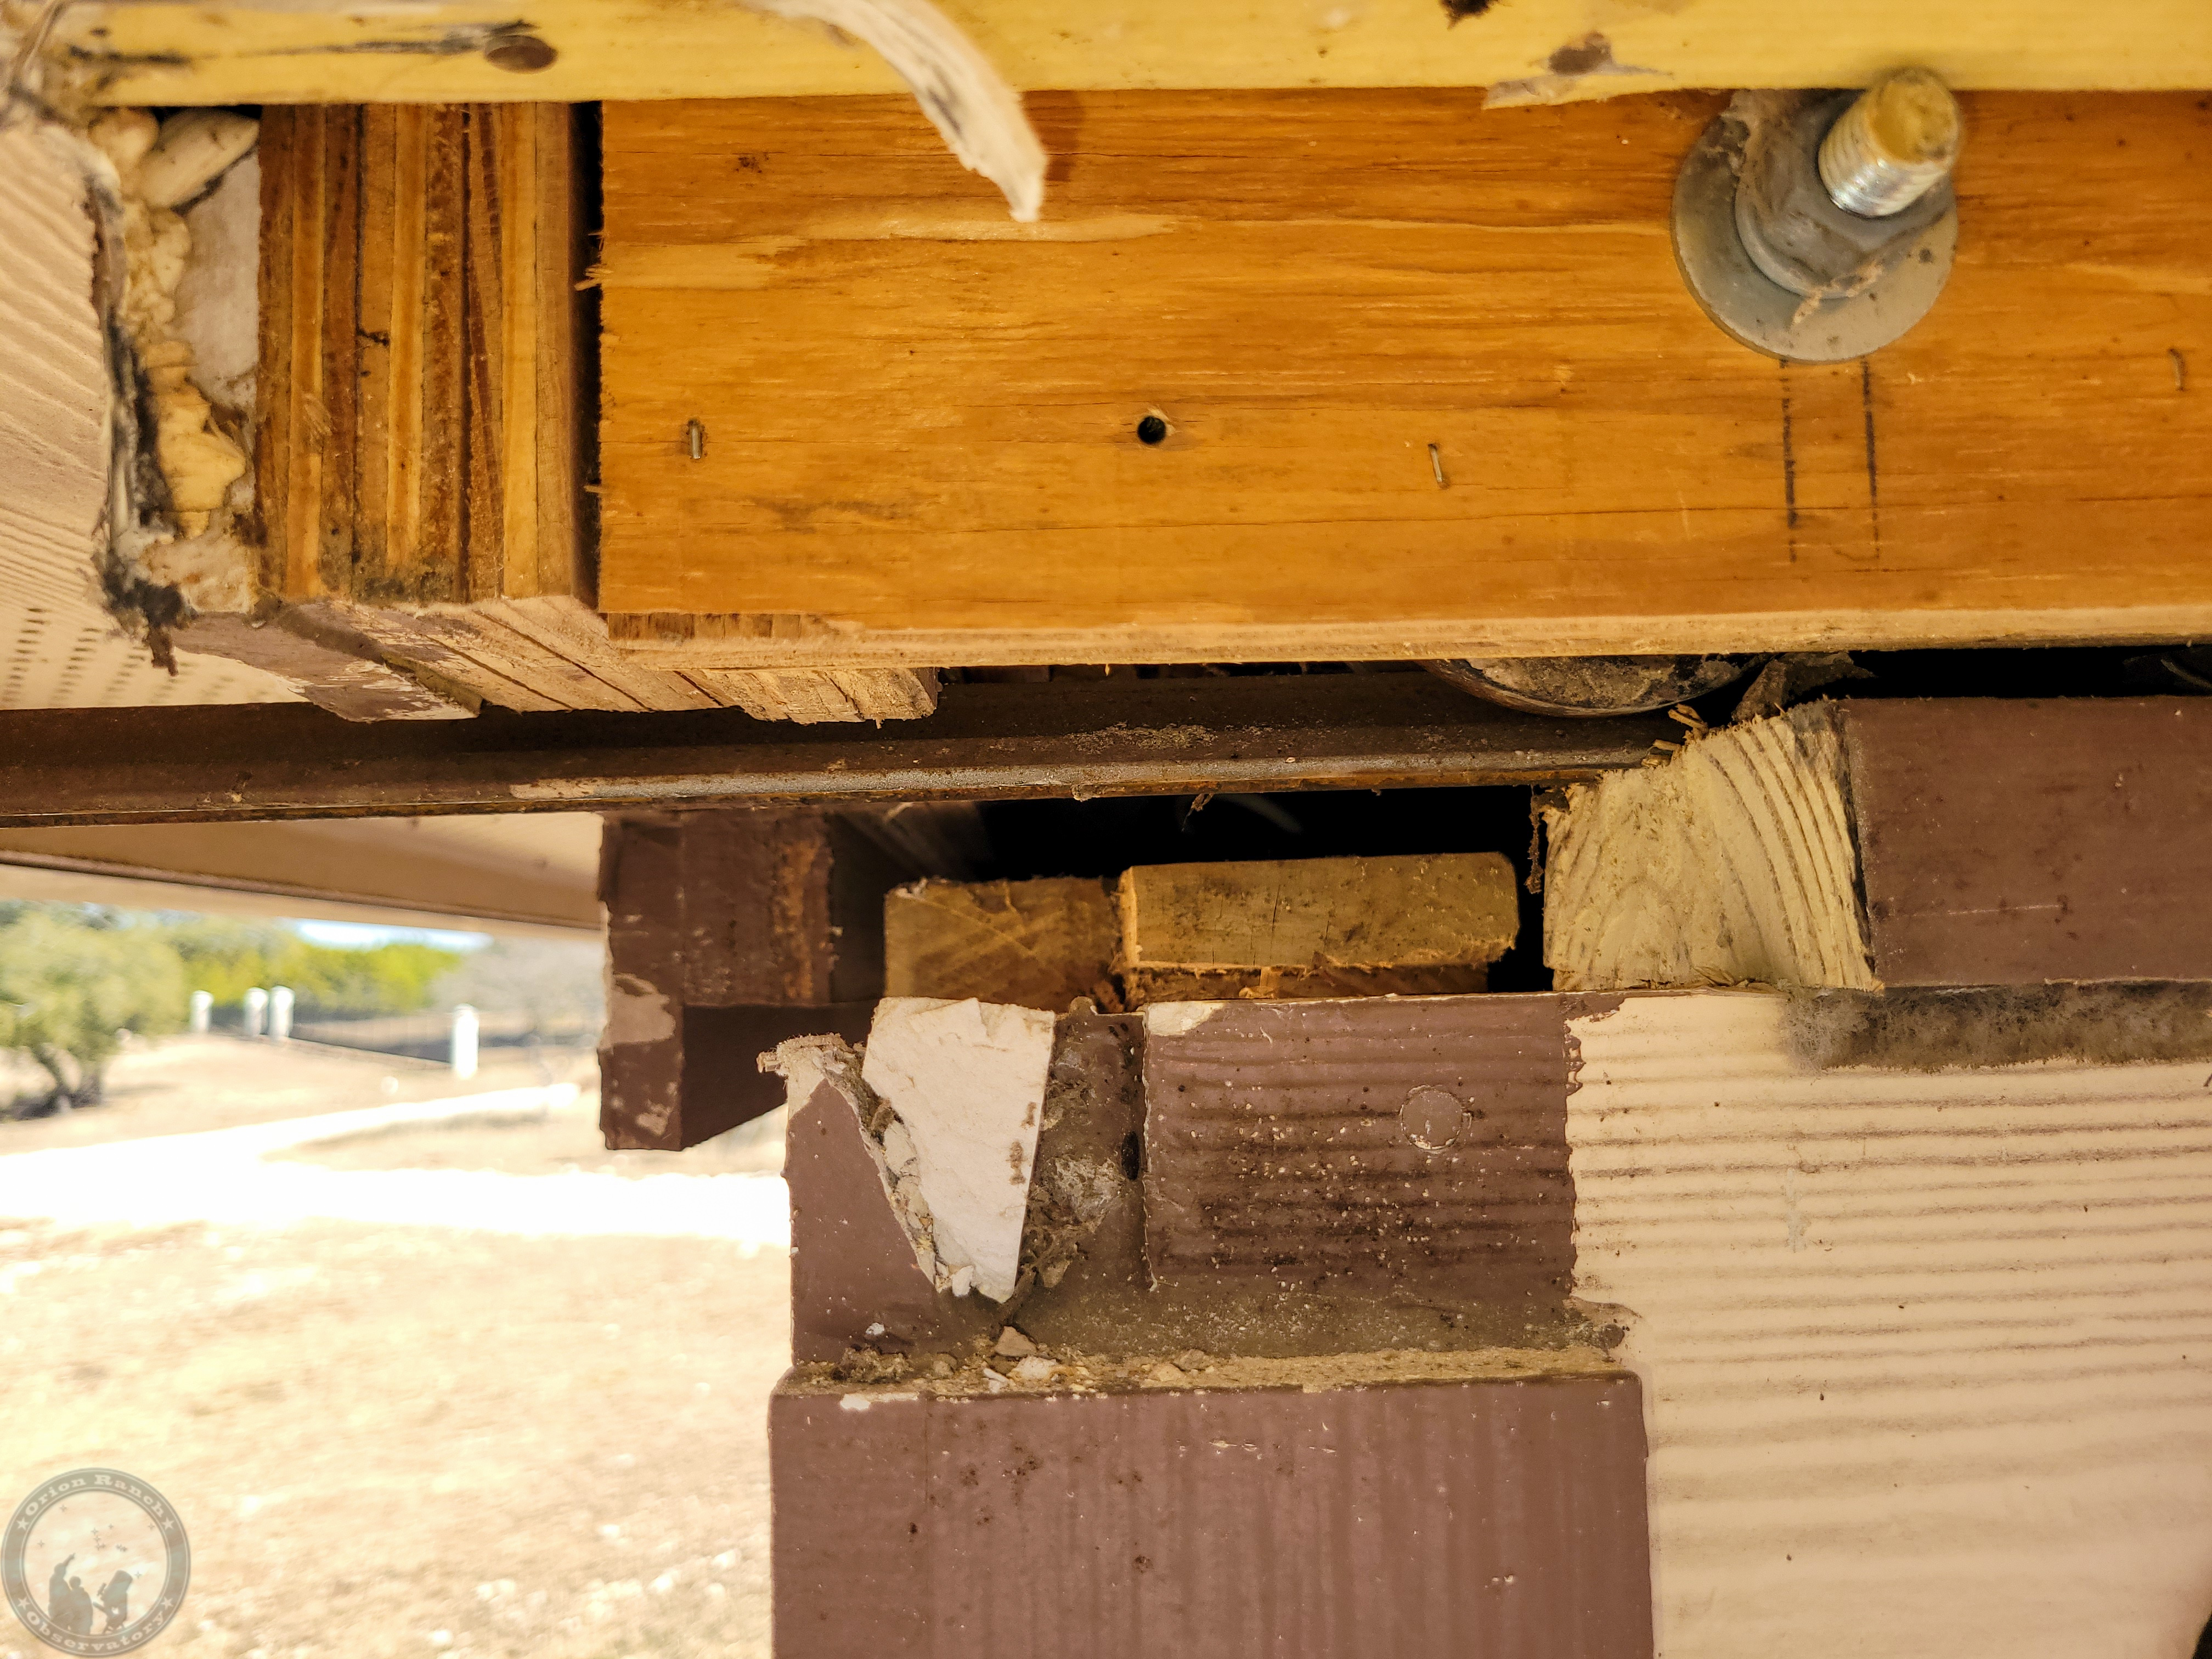
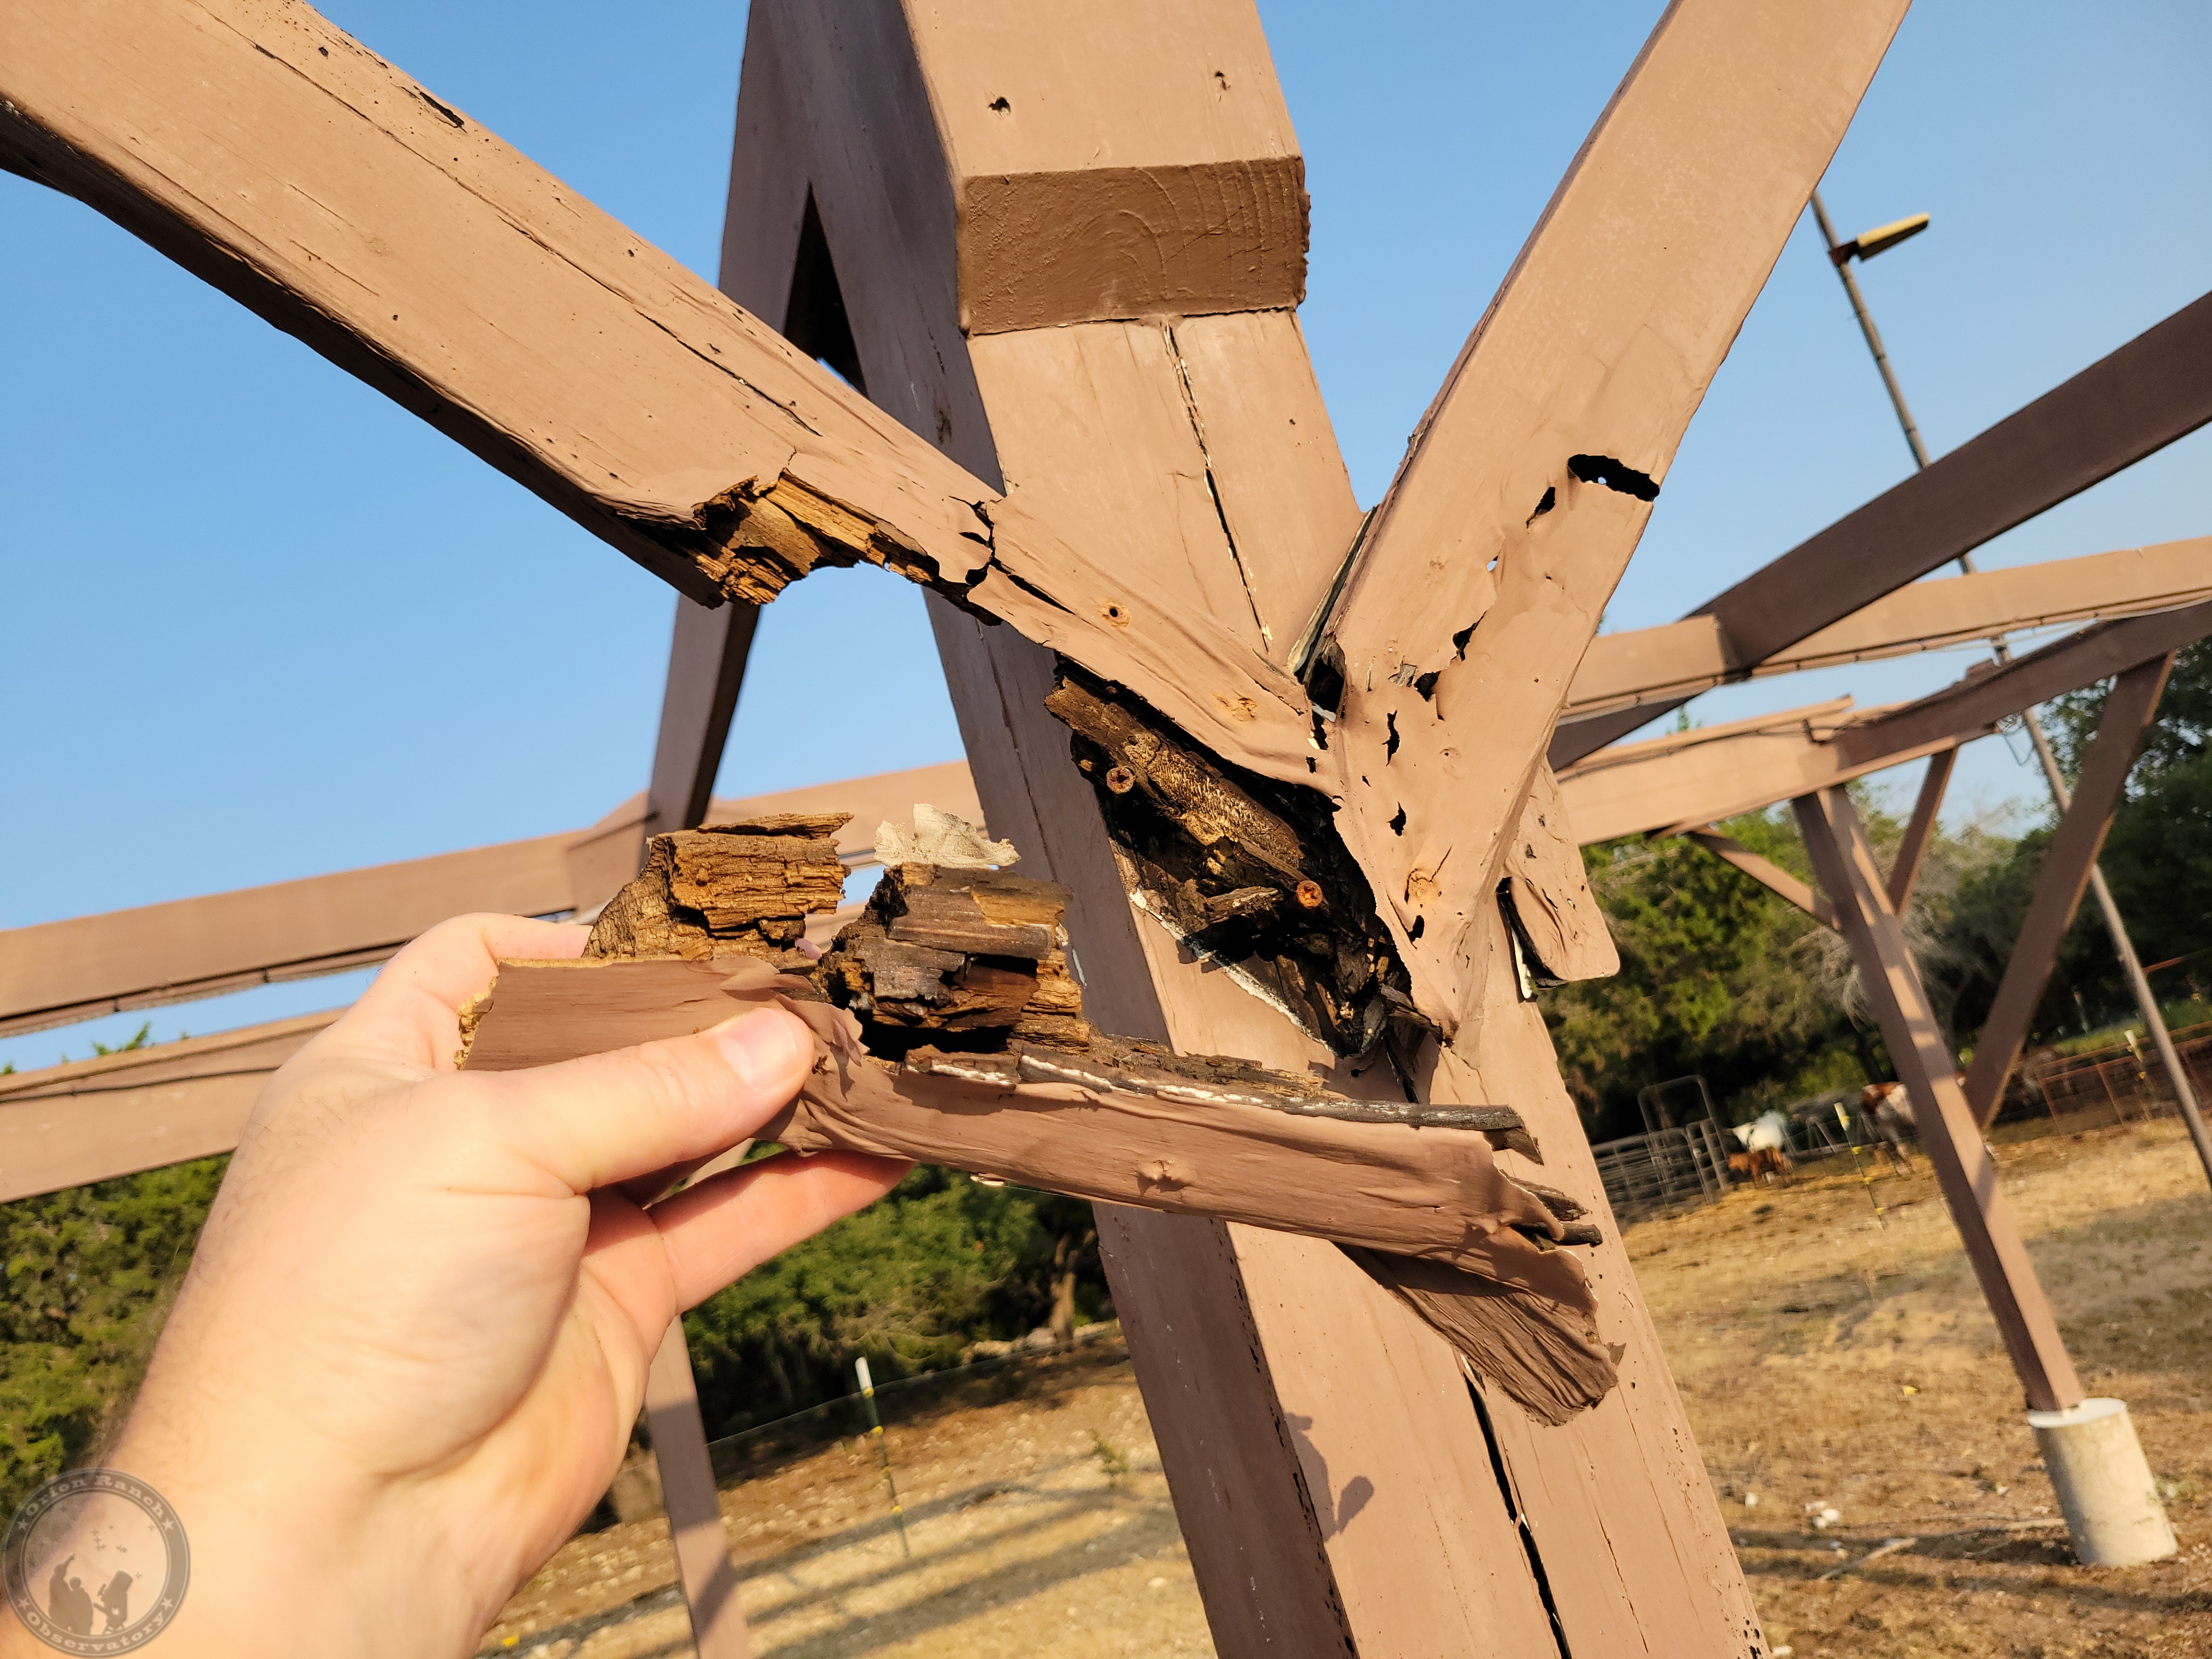
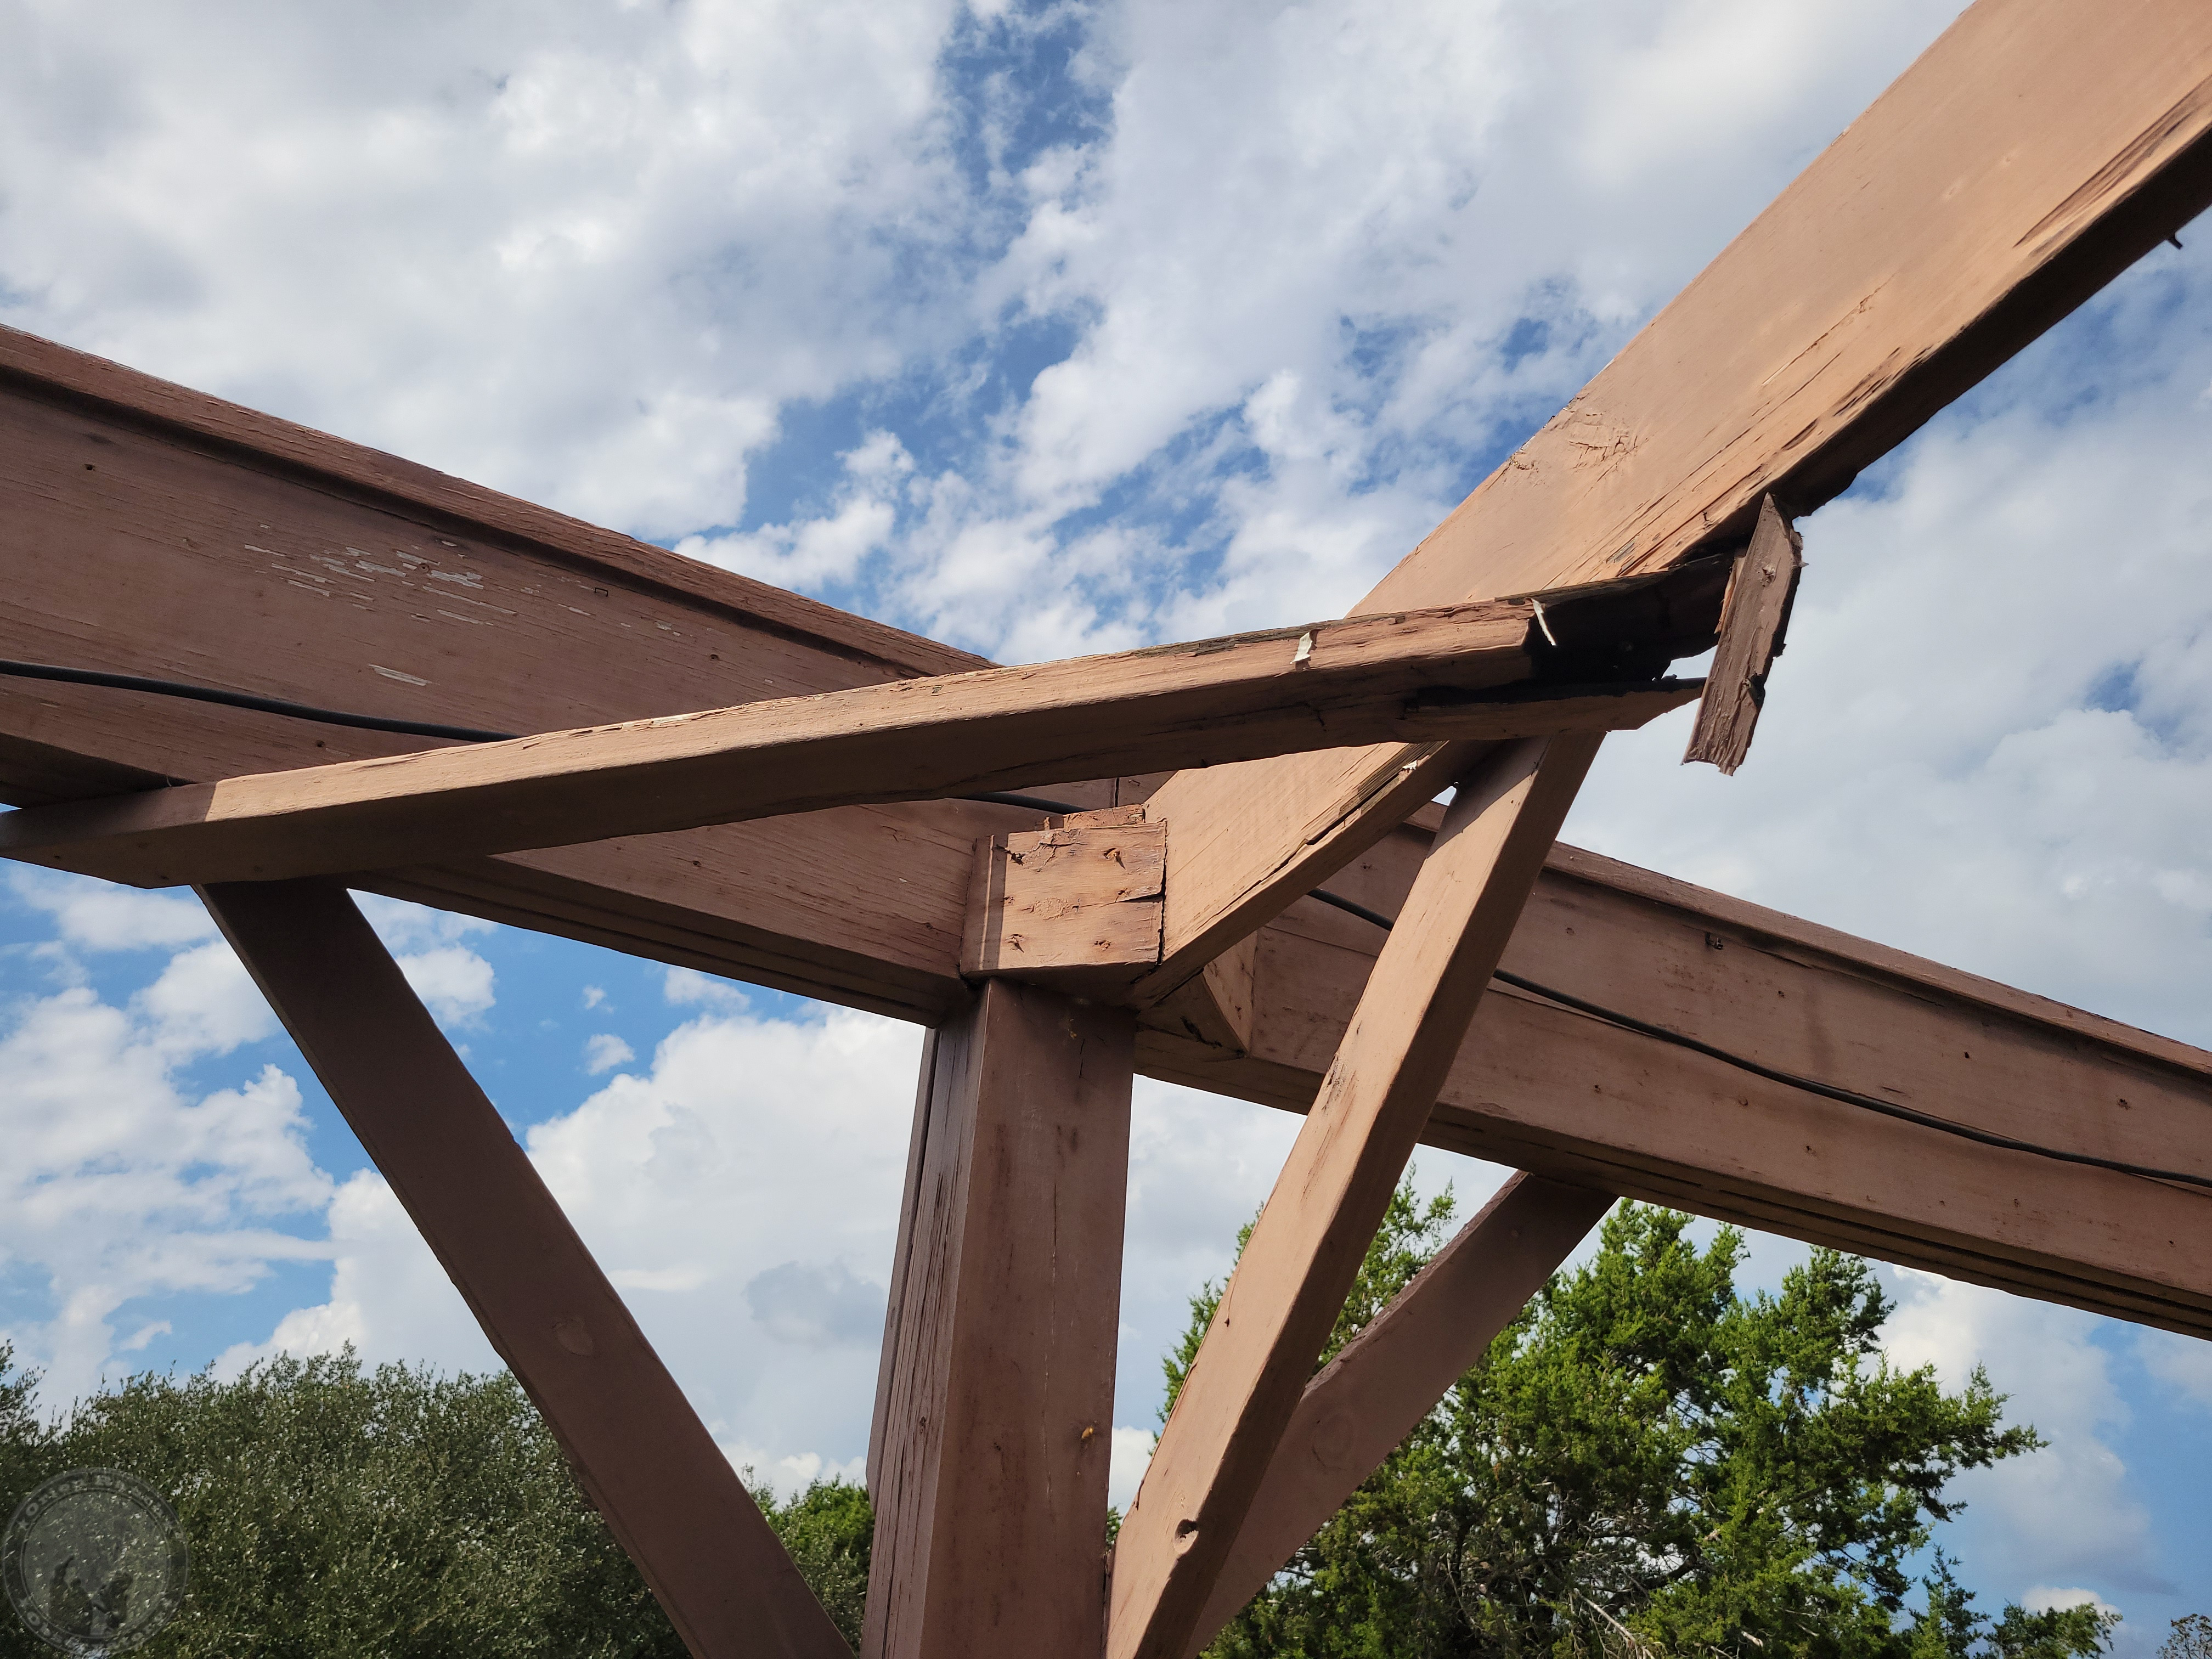
Sadly, after doing a more thorough inspection of the rail system, it was in pretty bad shape and not something that a bit of maintenance would easily address.  Certainly not something worth throwing money away on more wood.  The diagonal braces on the opposite side middle post were shot.

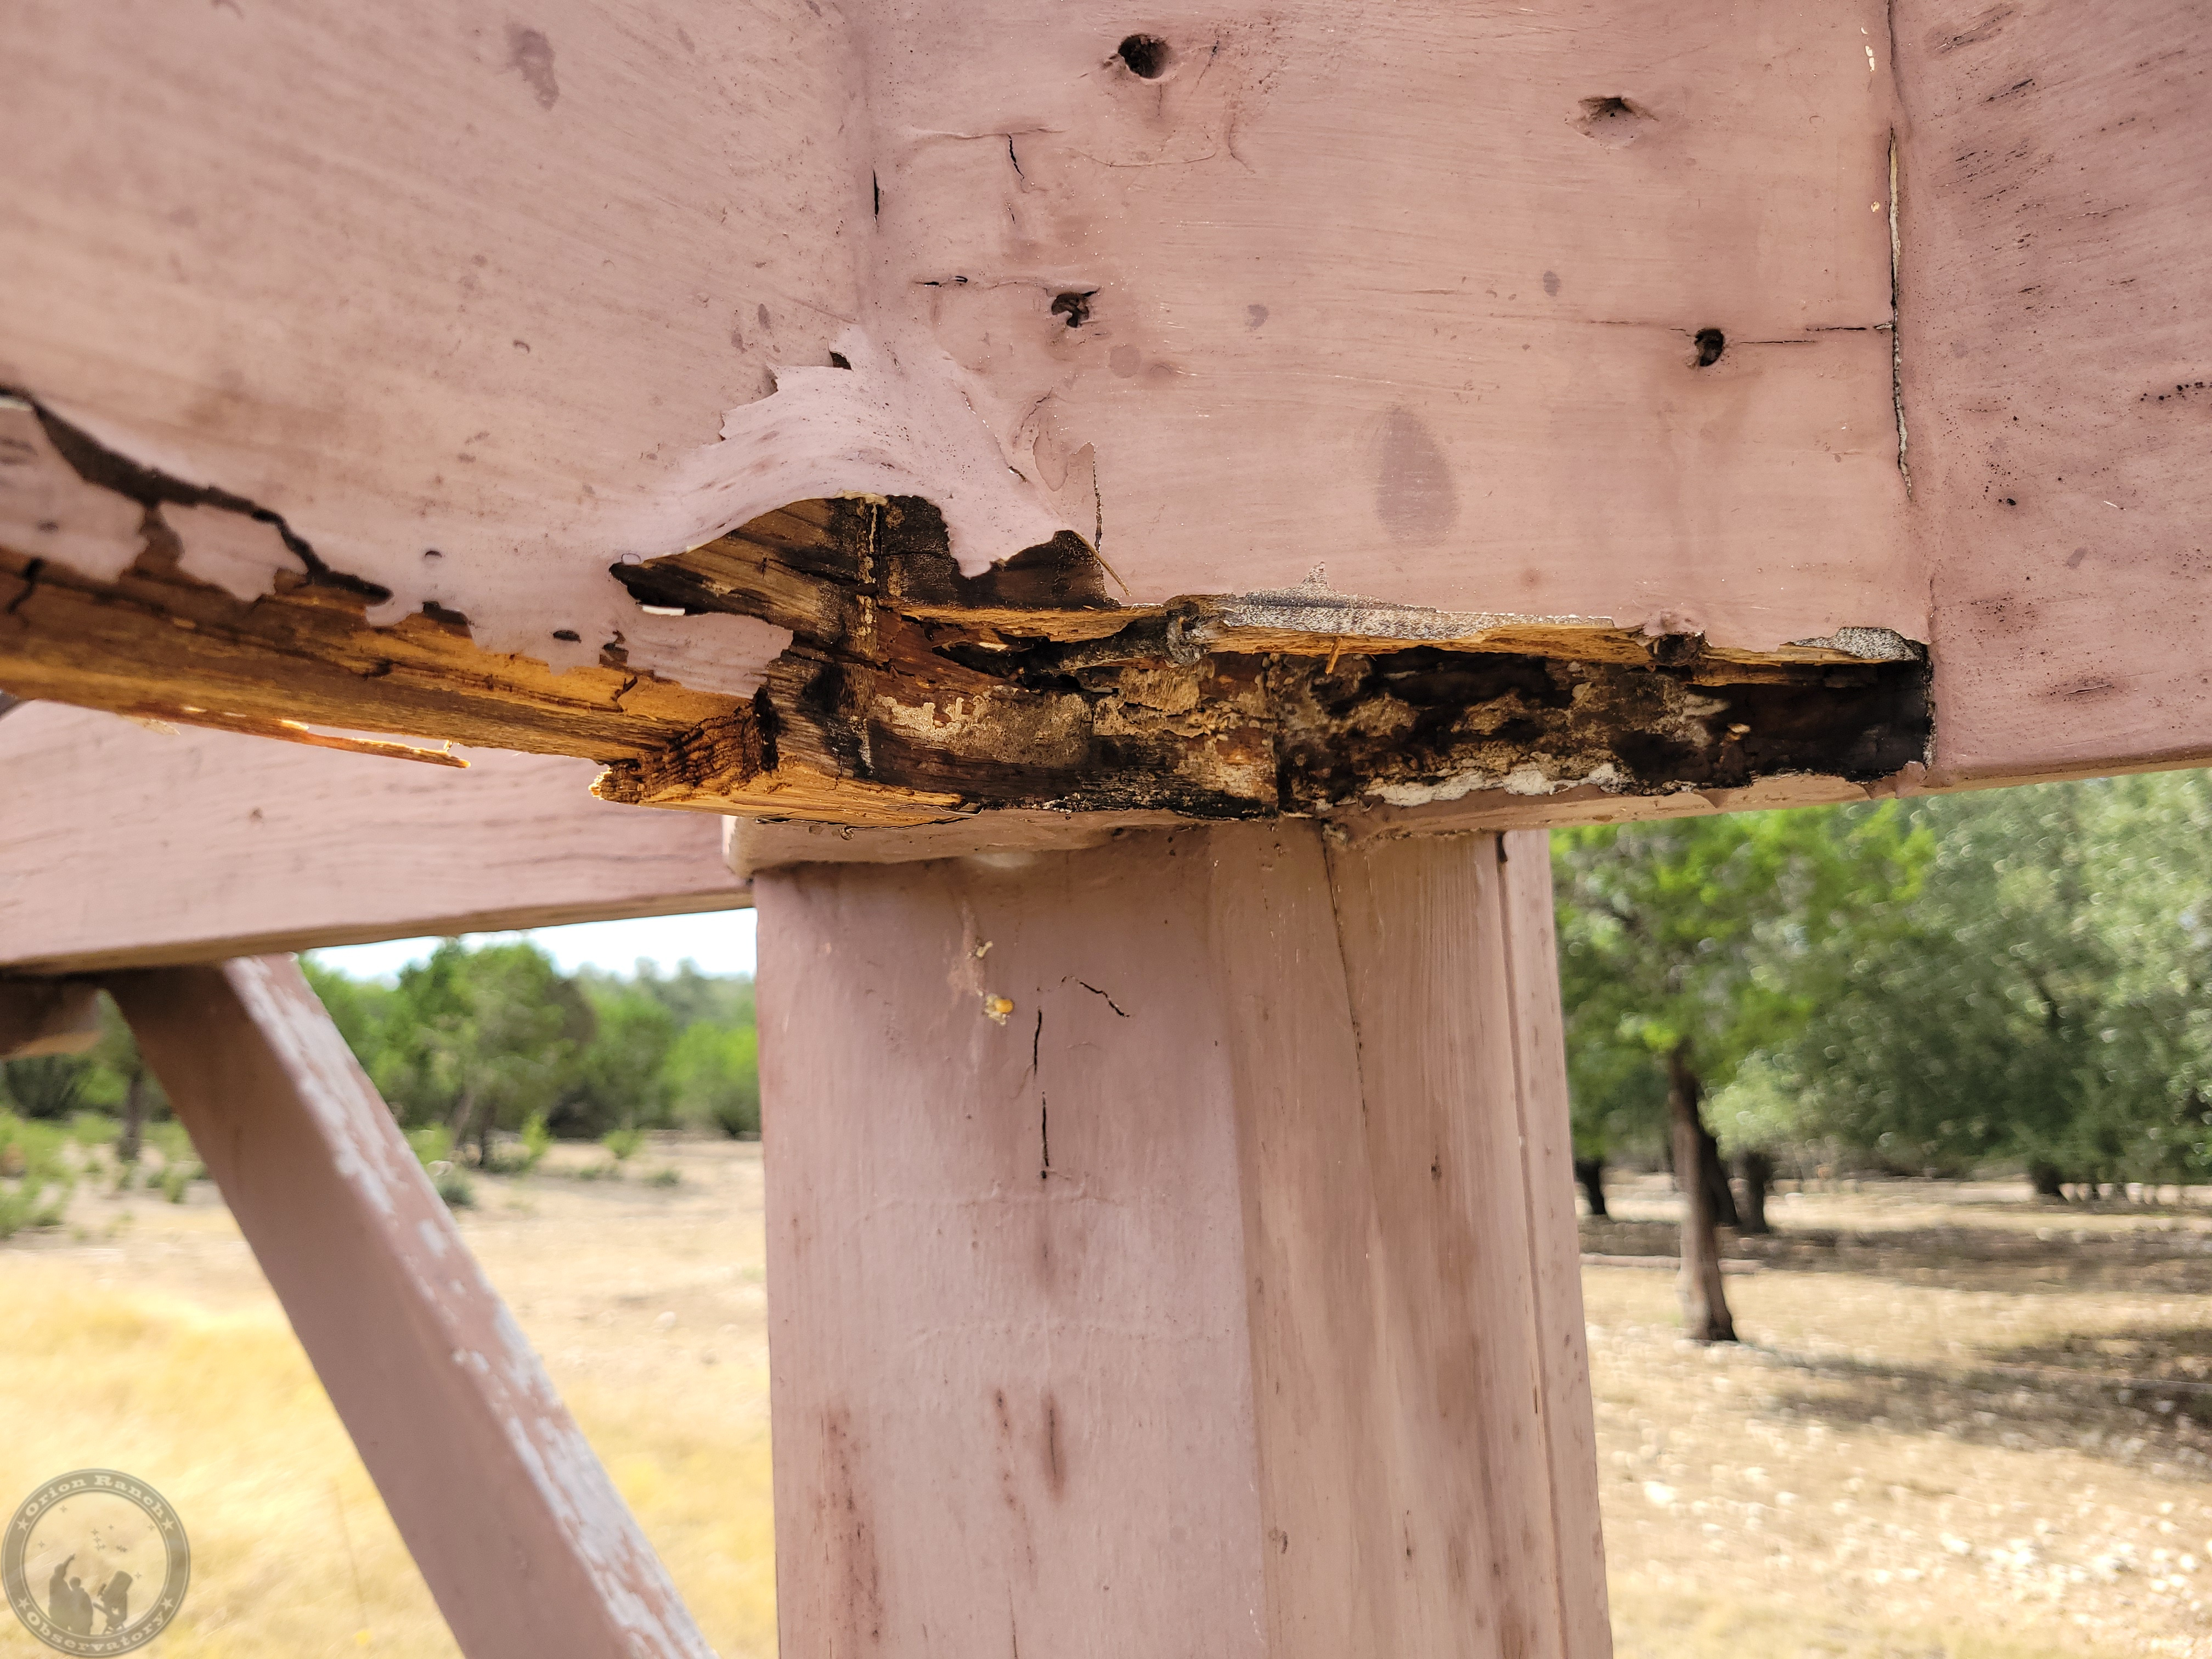
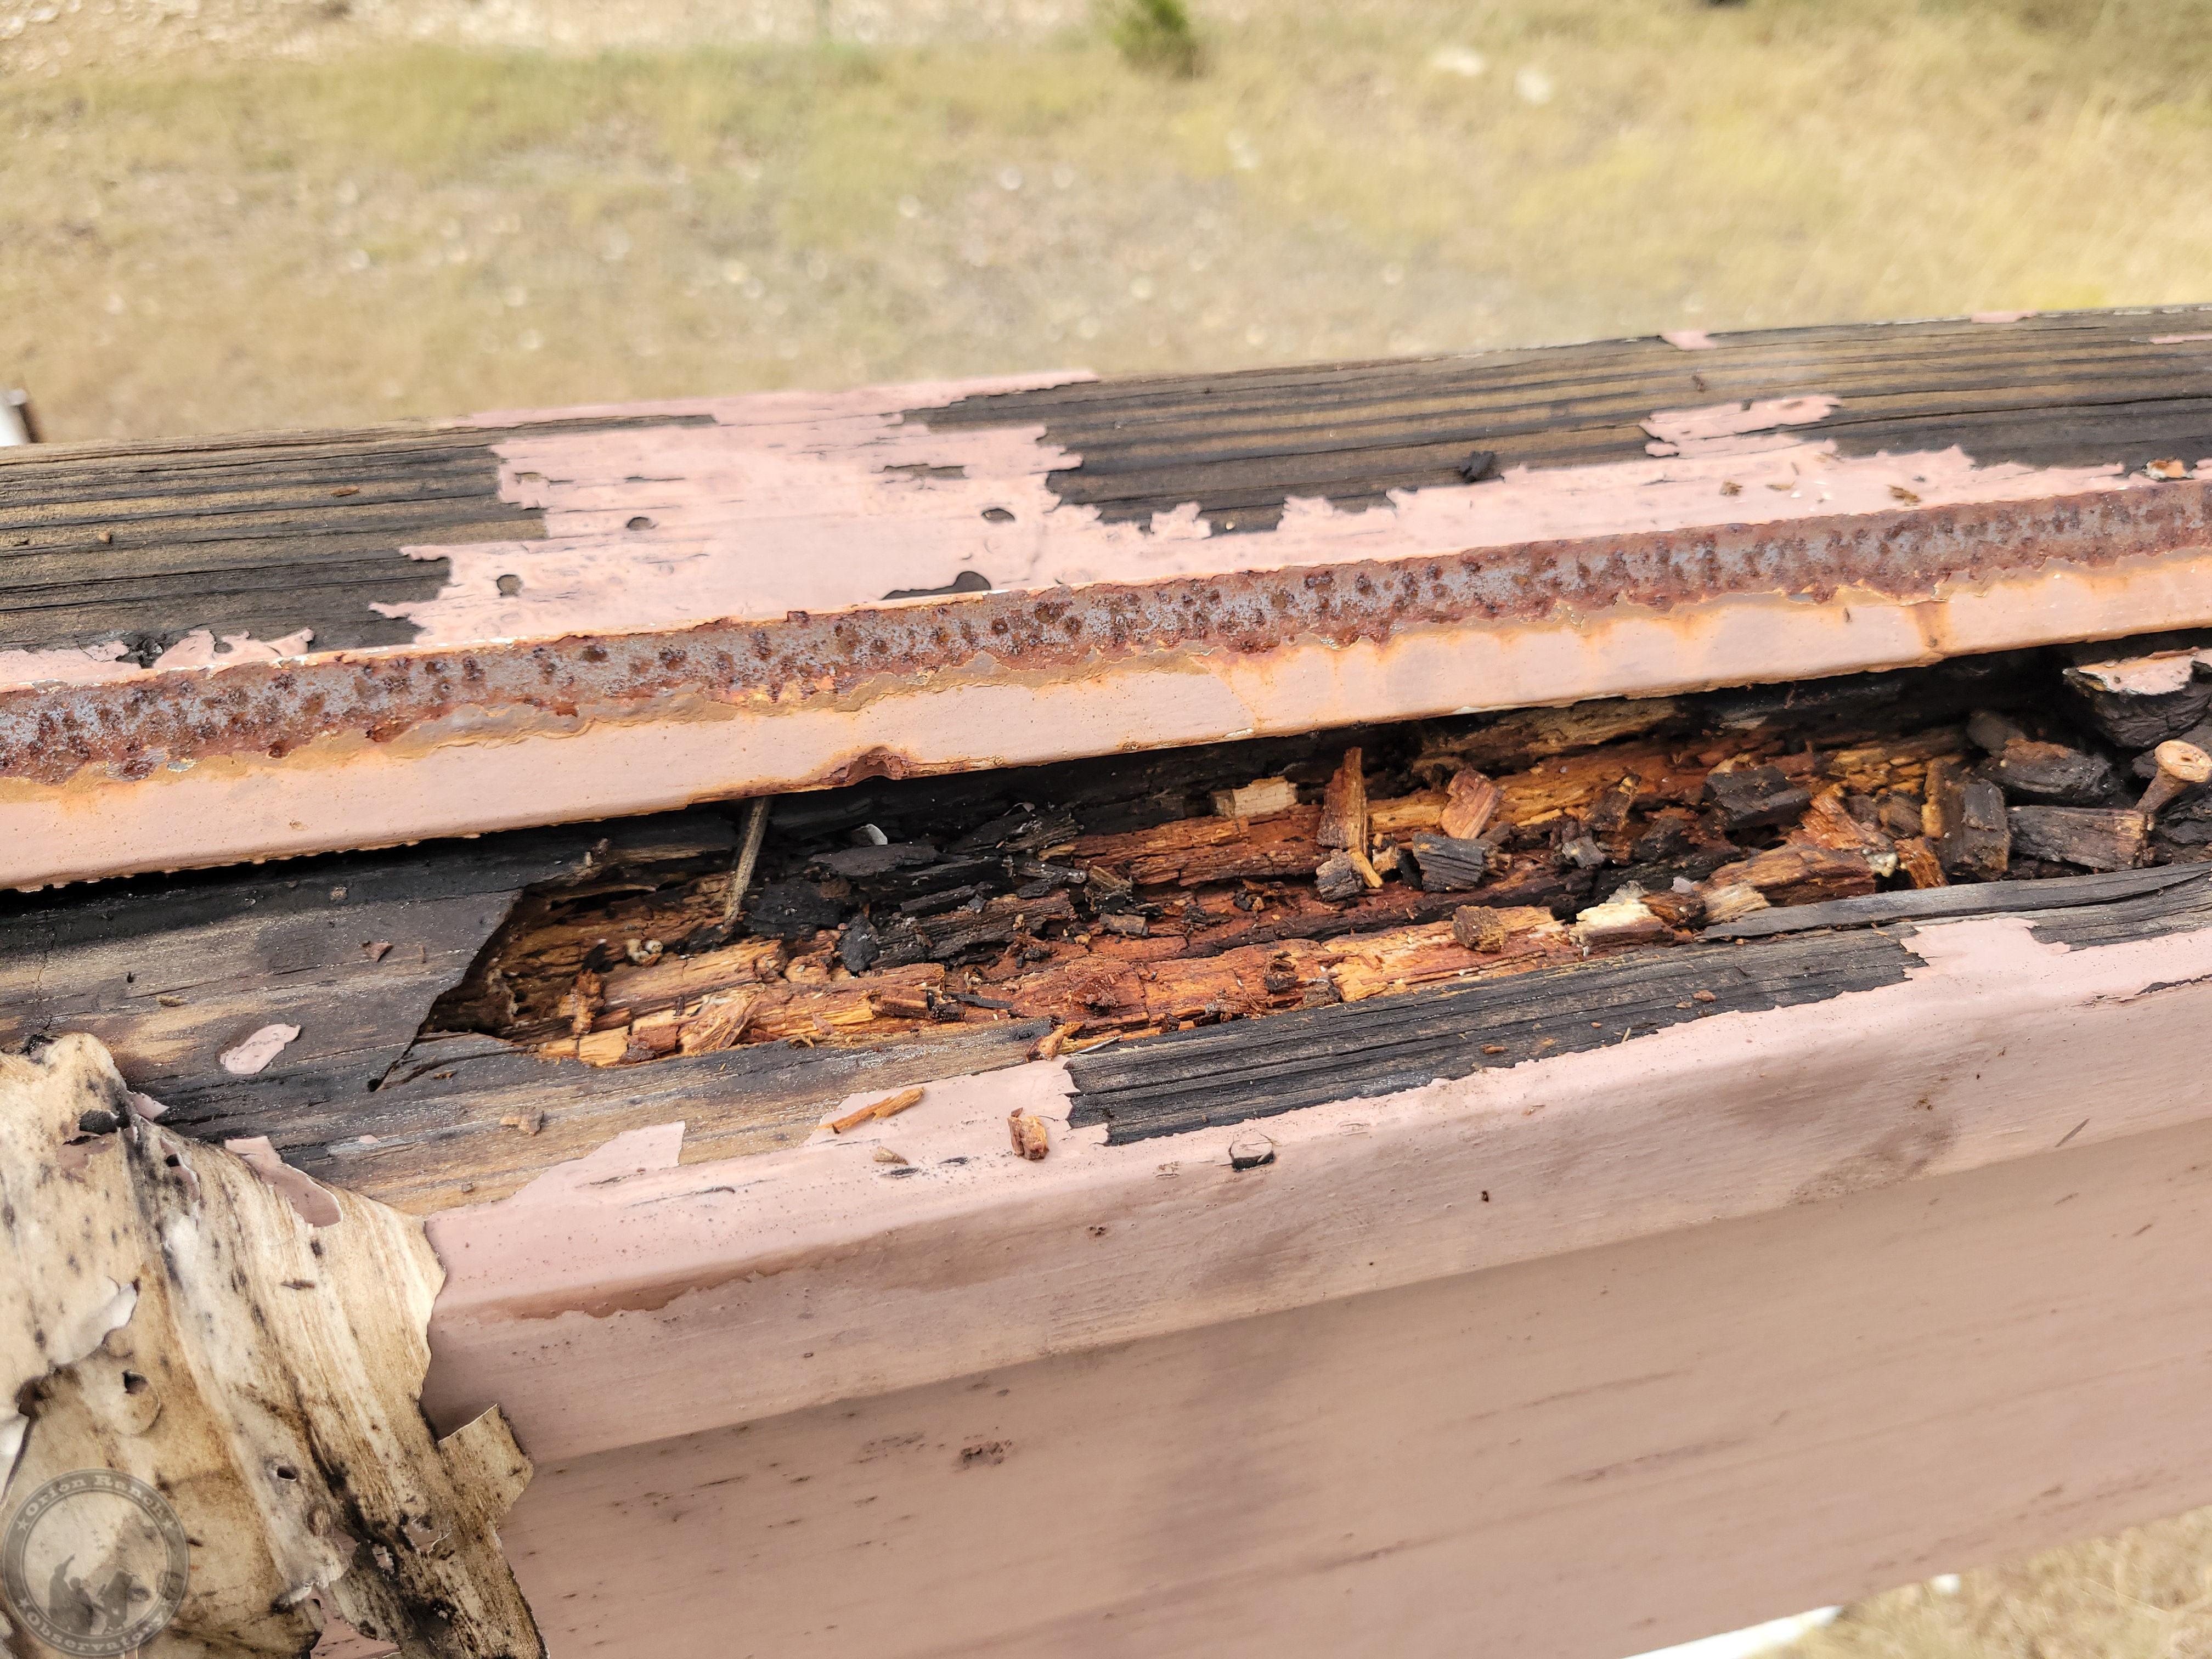
And the bottom of the cross member was rotting away too.

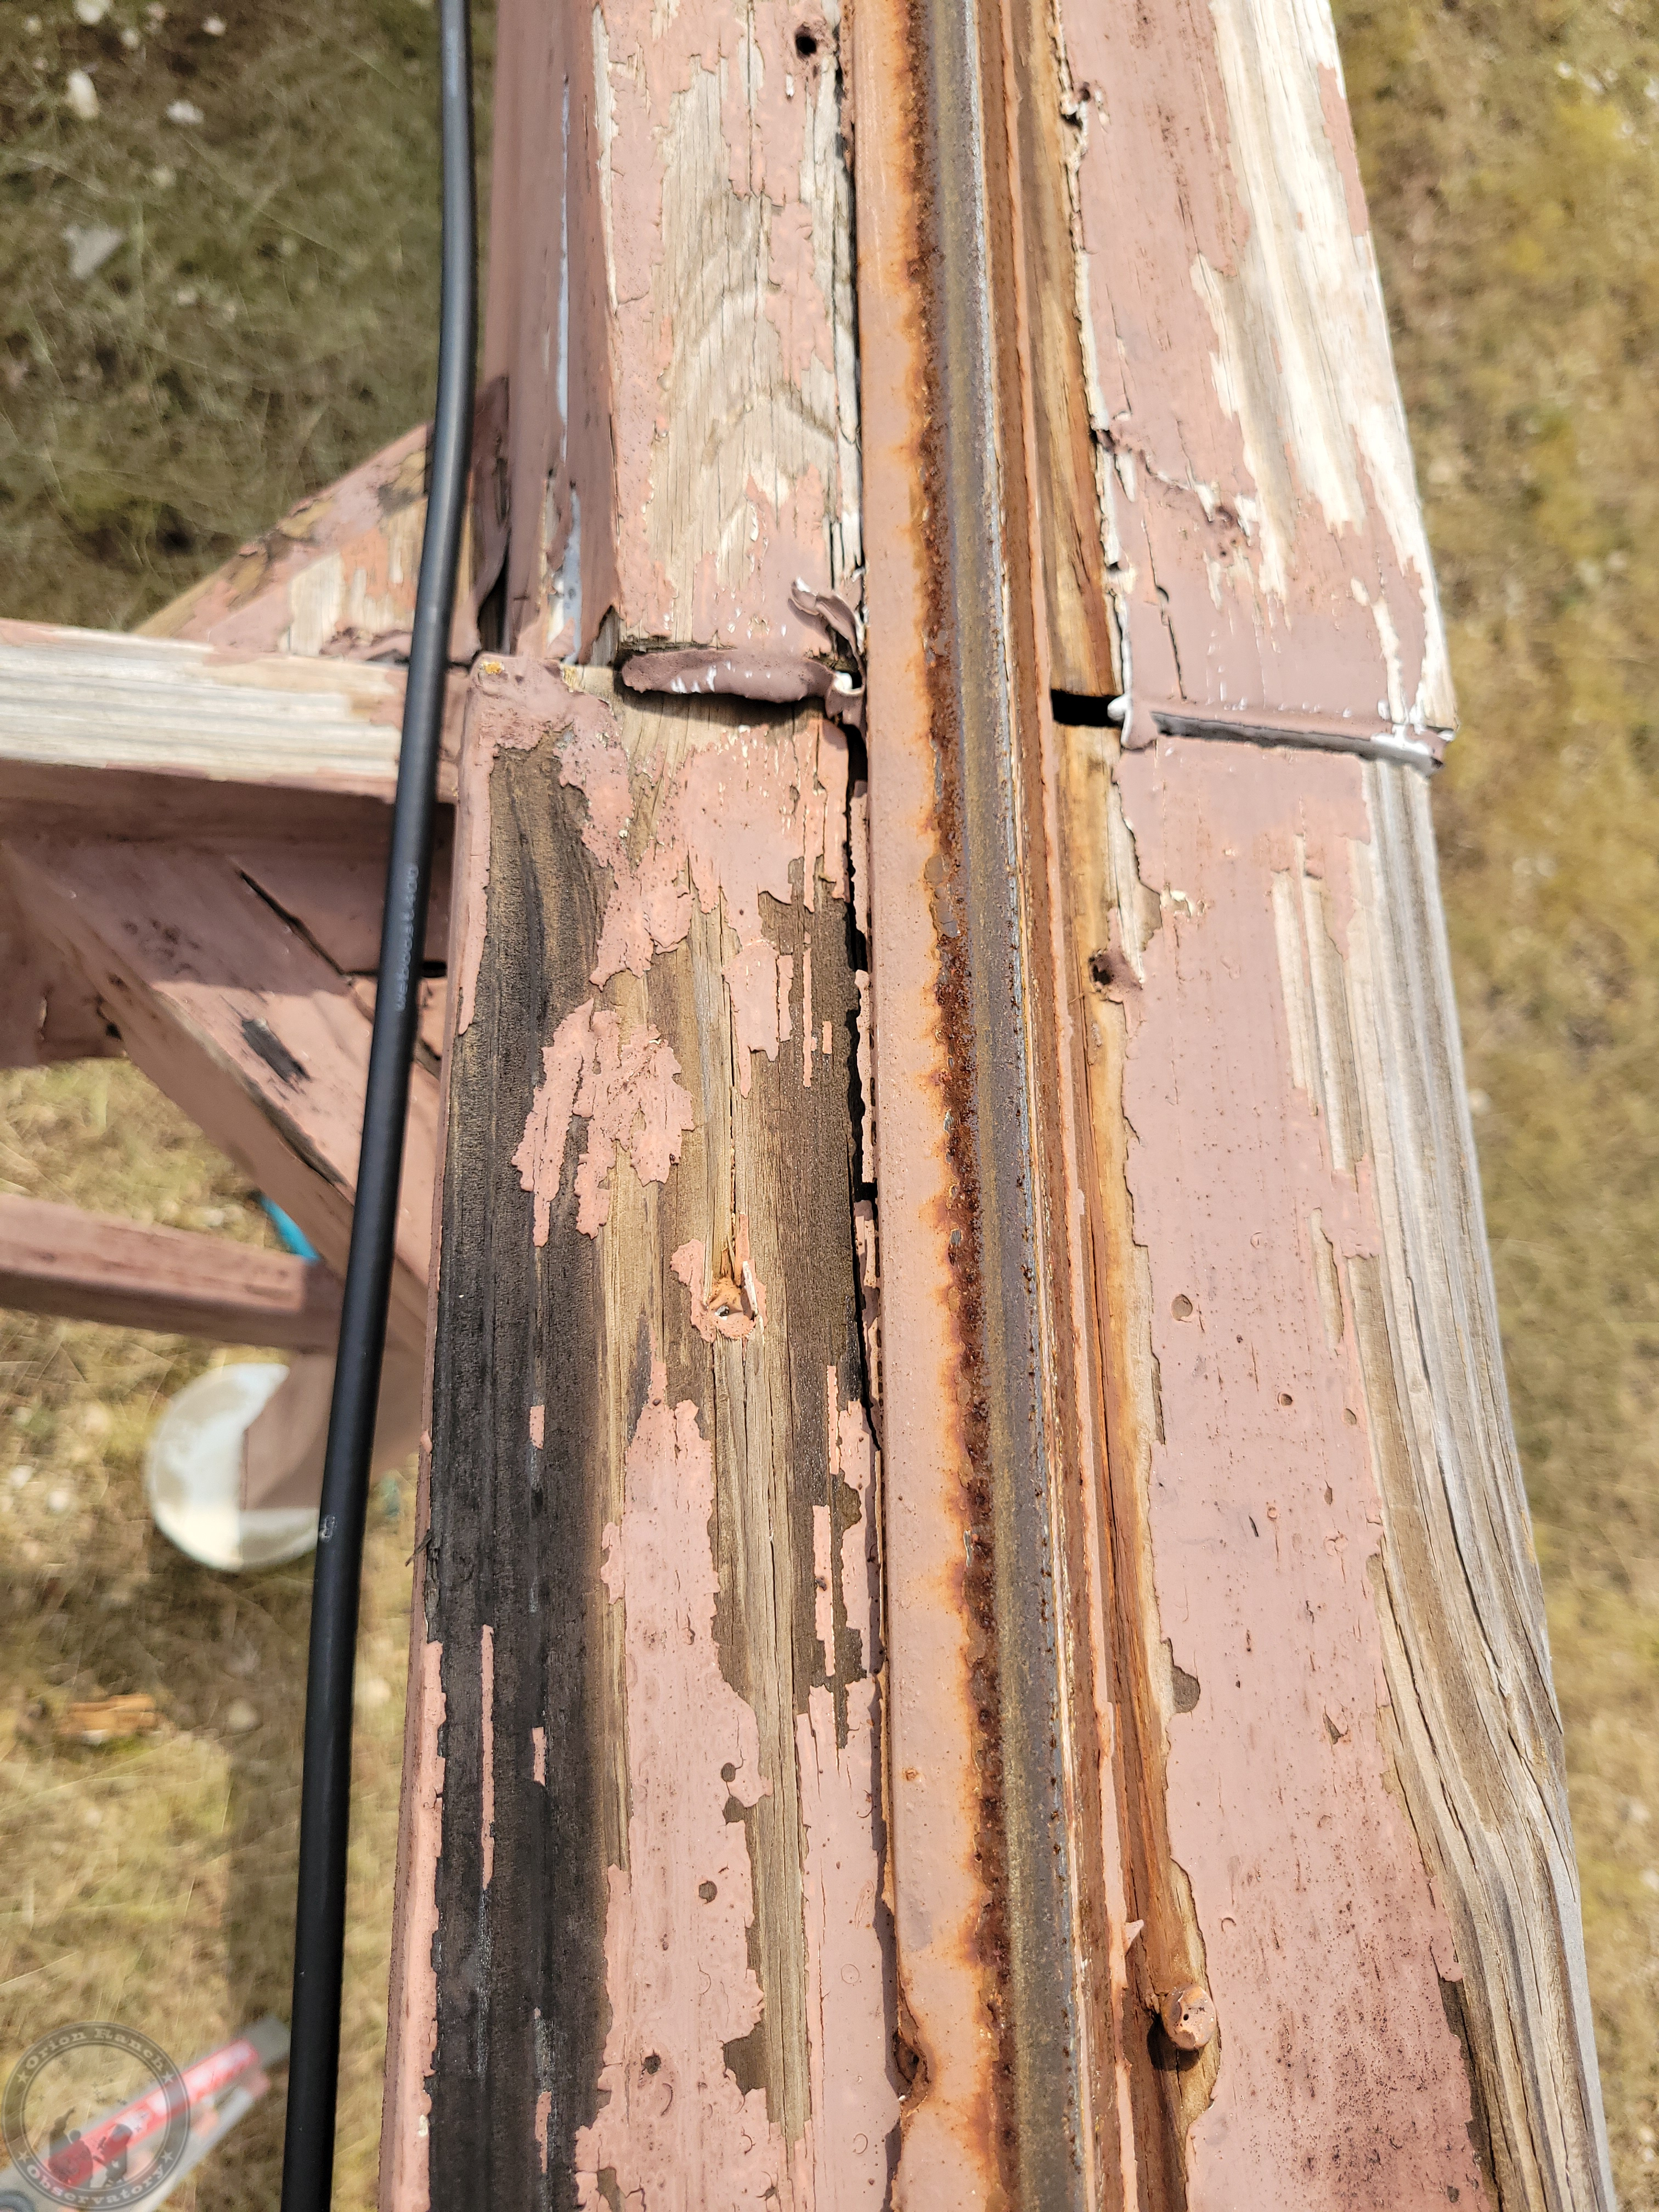
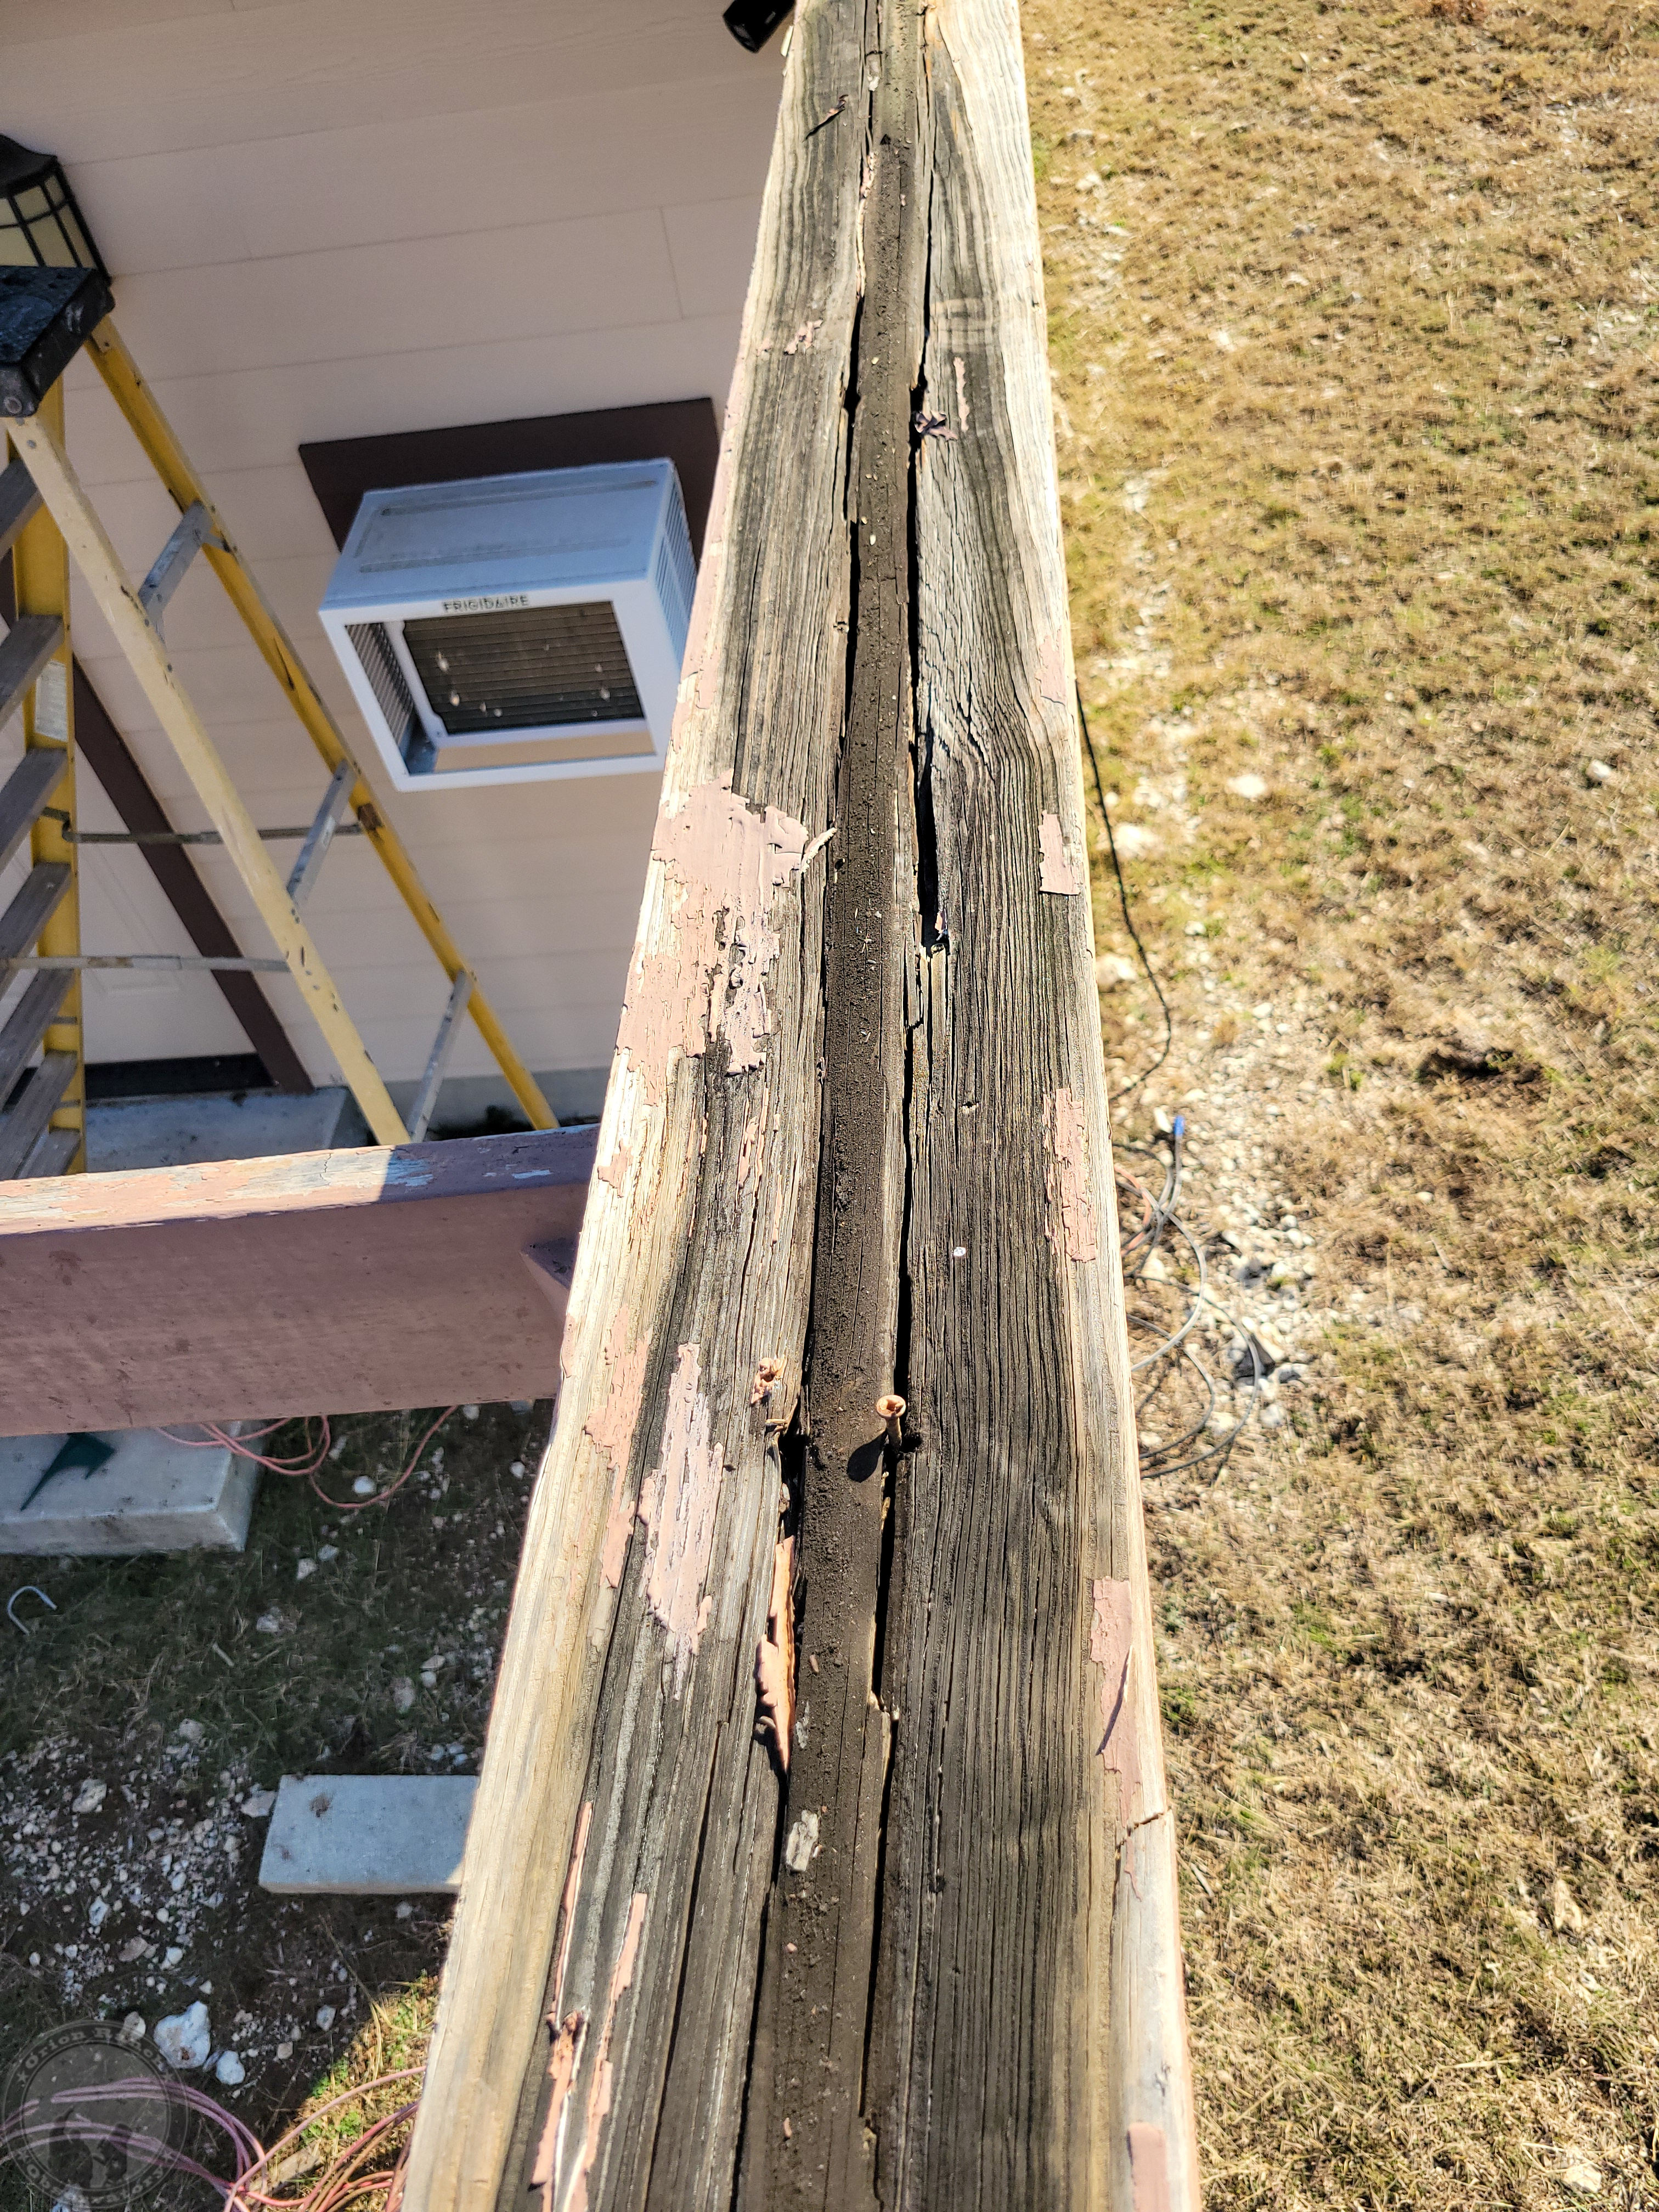
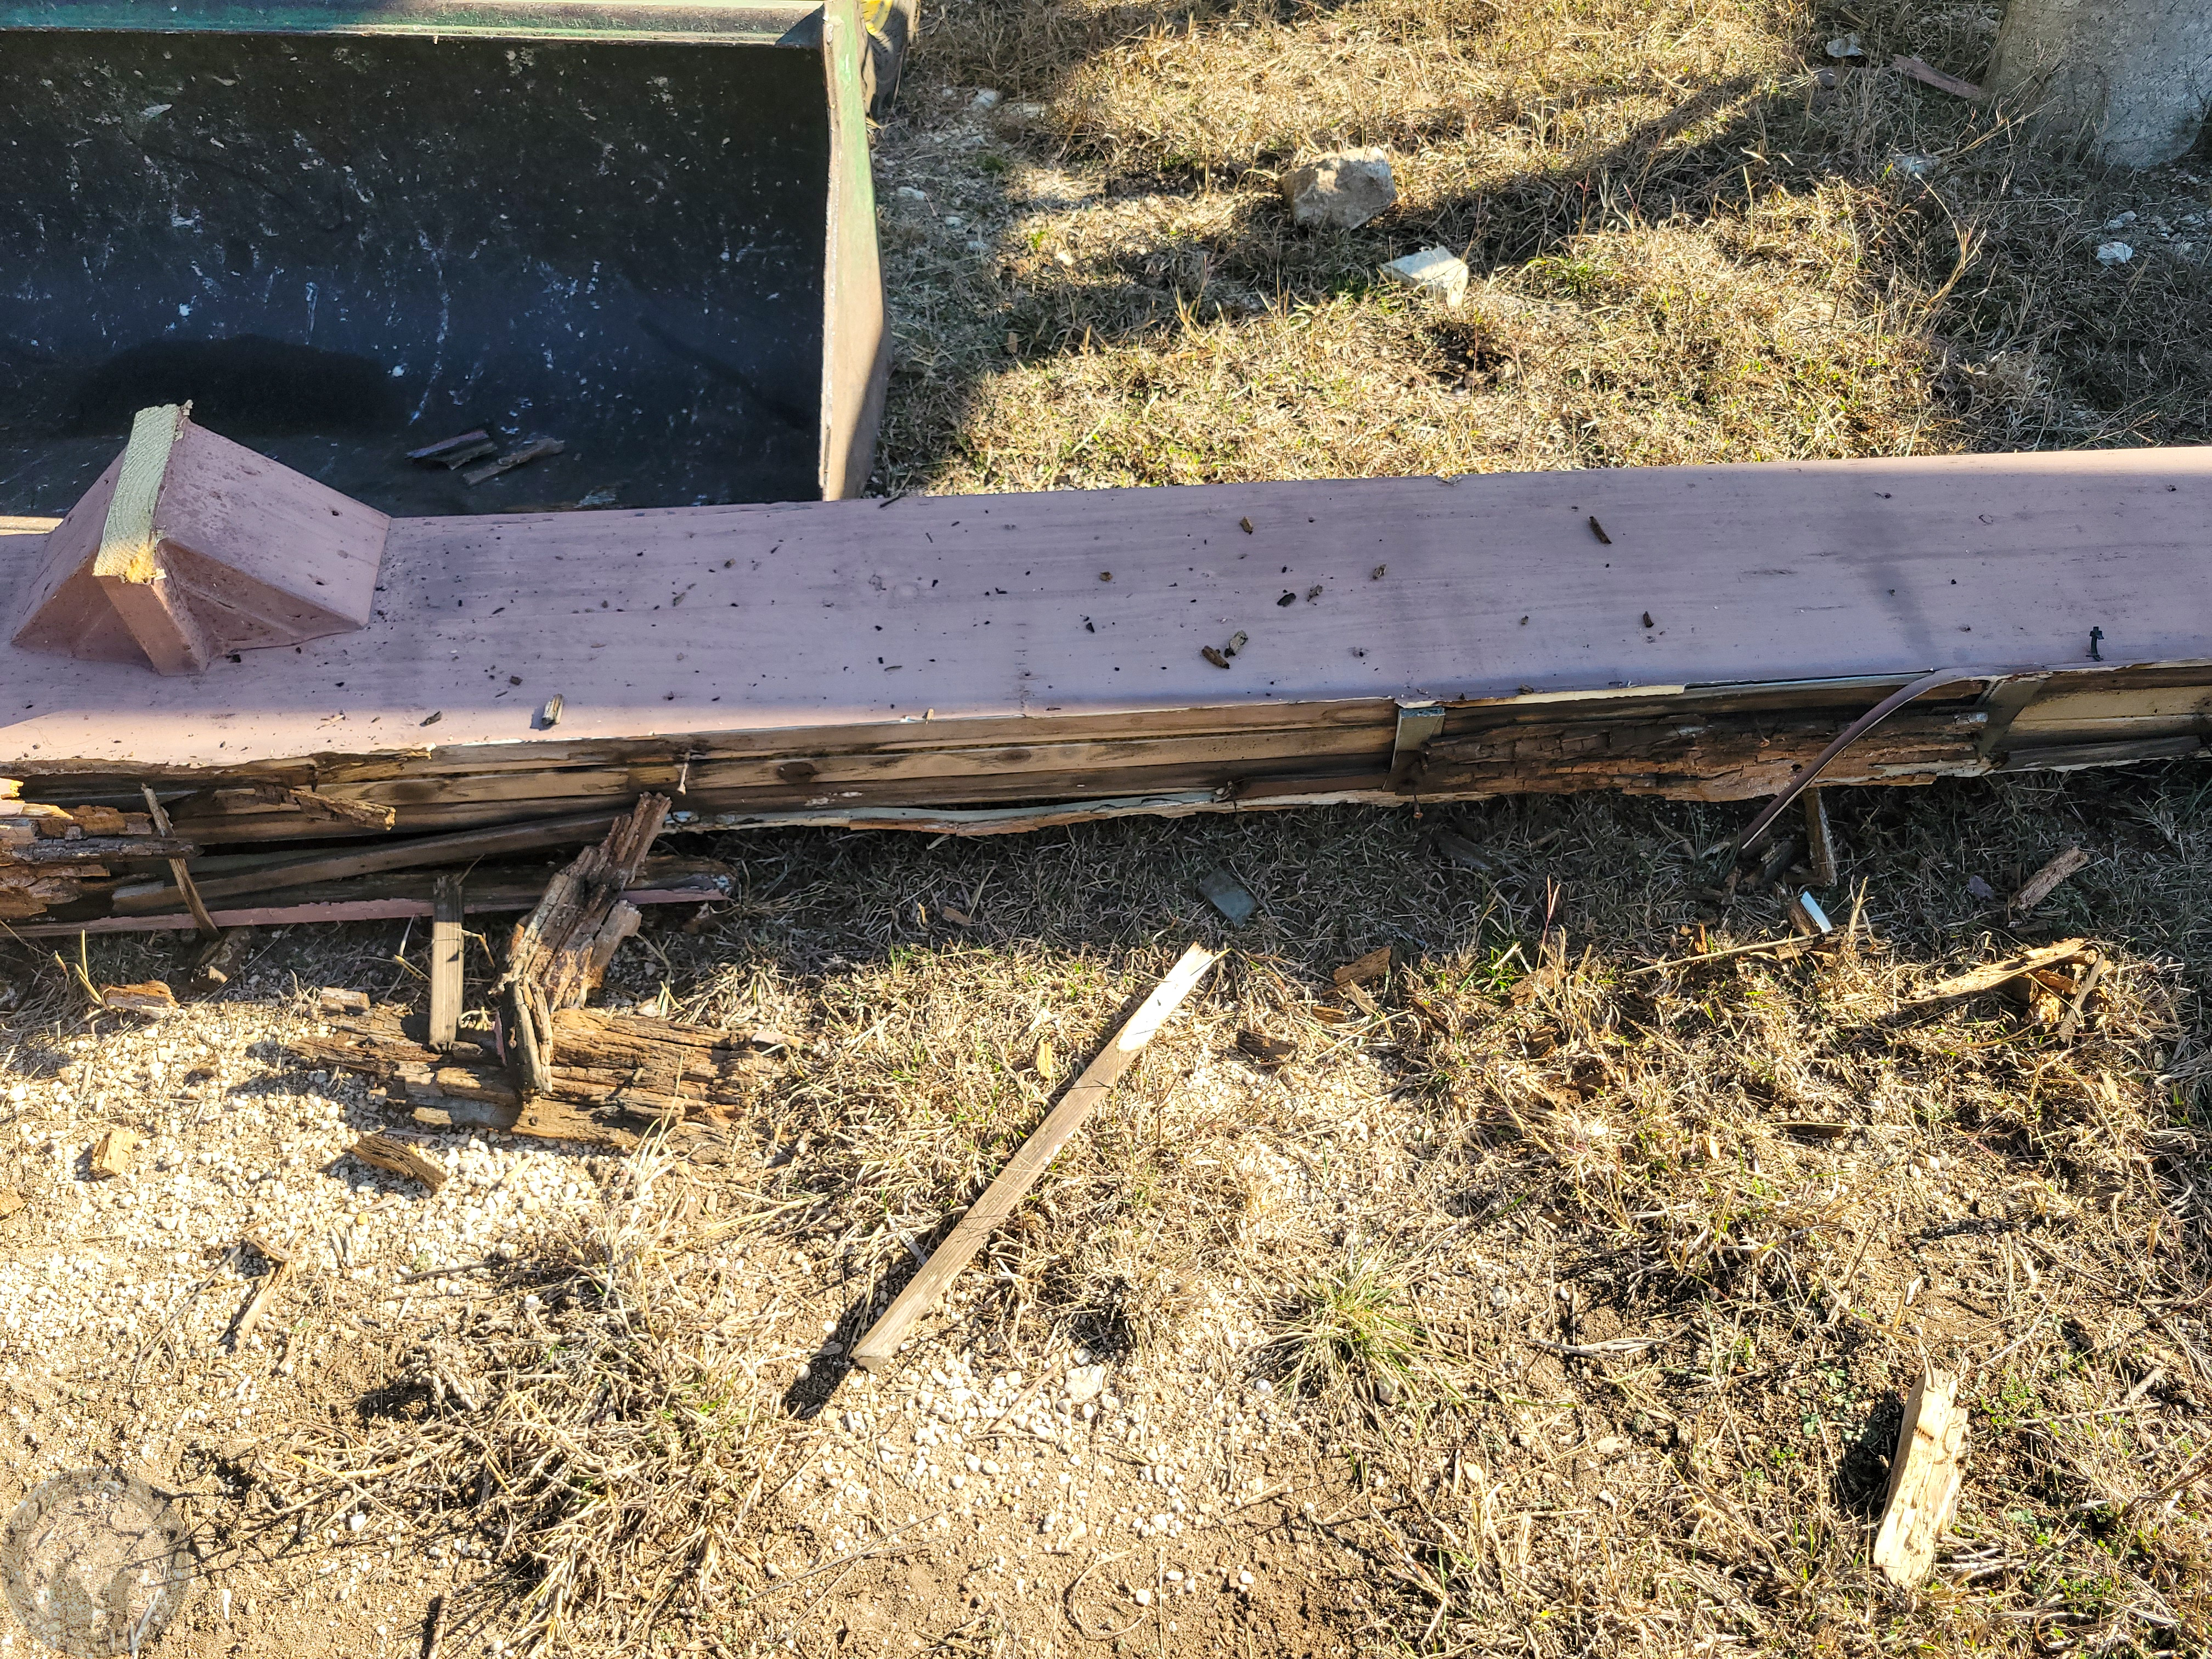
The top of the east rail looked ok, but the west rail where all the noise came from was in pretty bad shape.

There were spots where the top cap had rotted through.

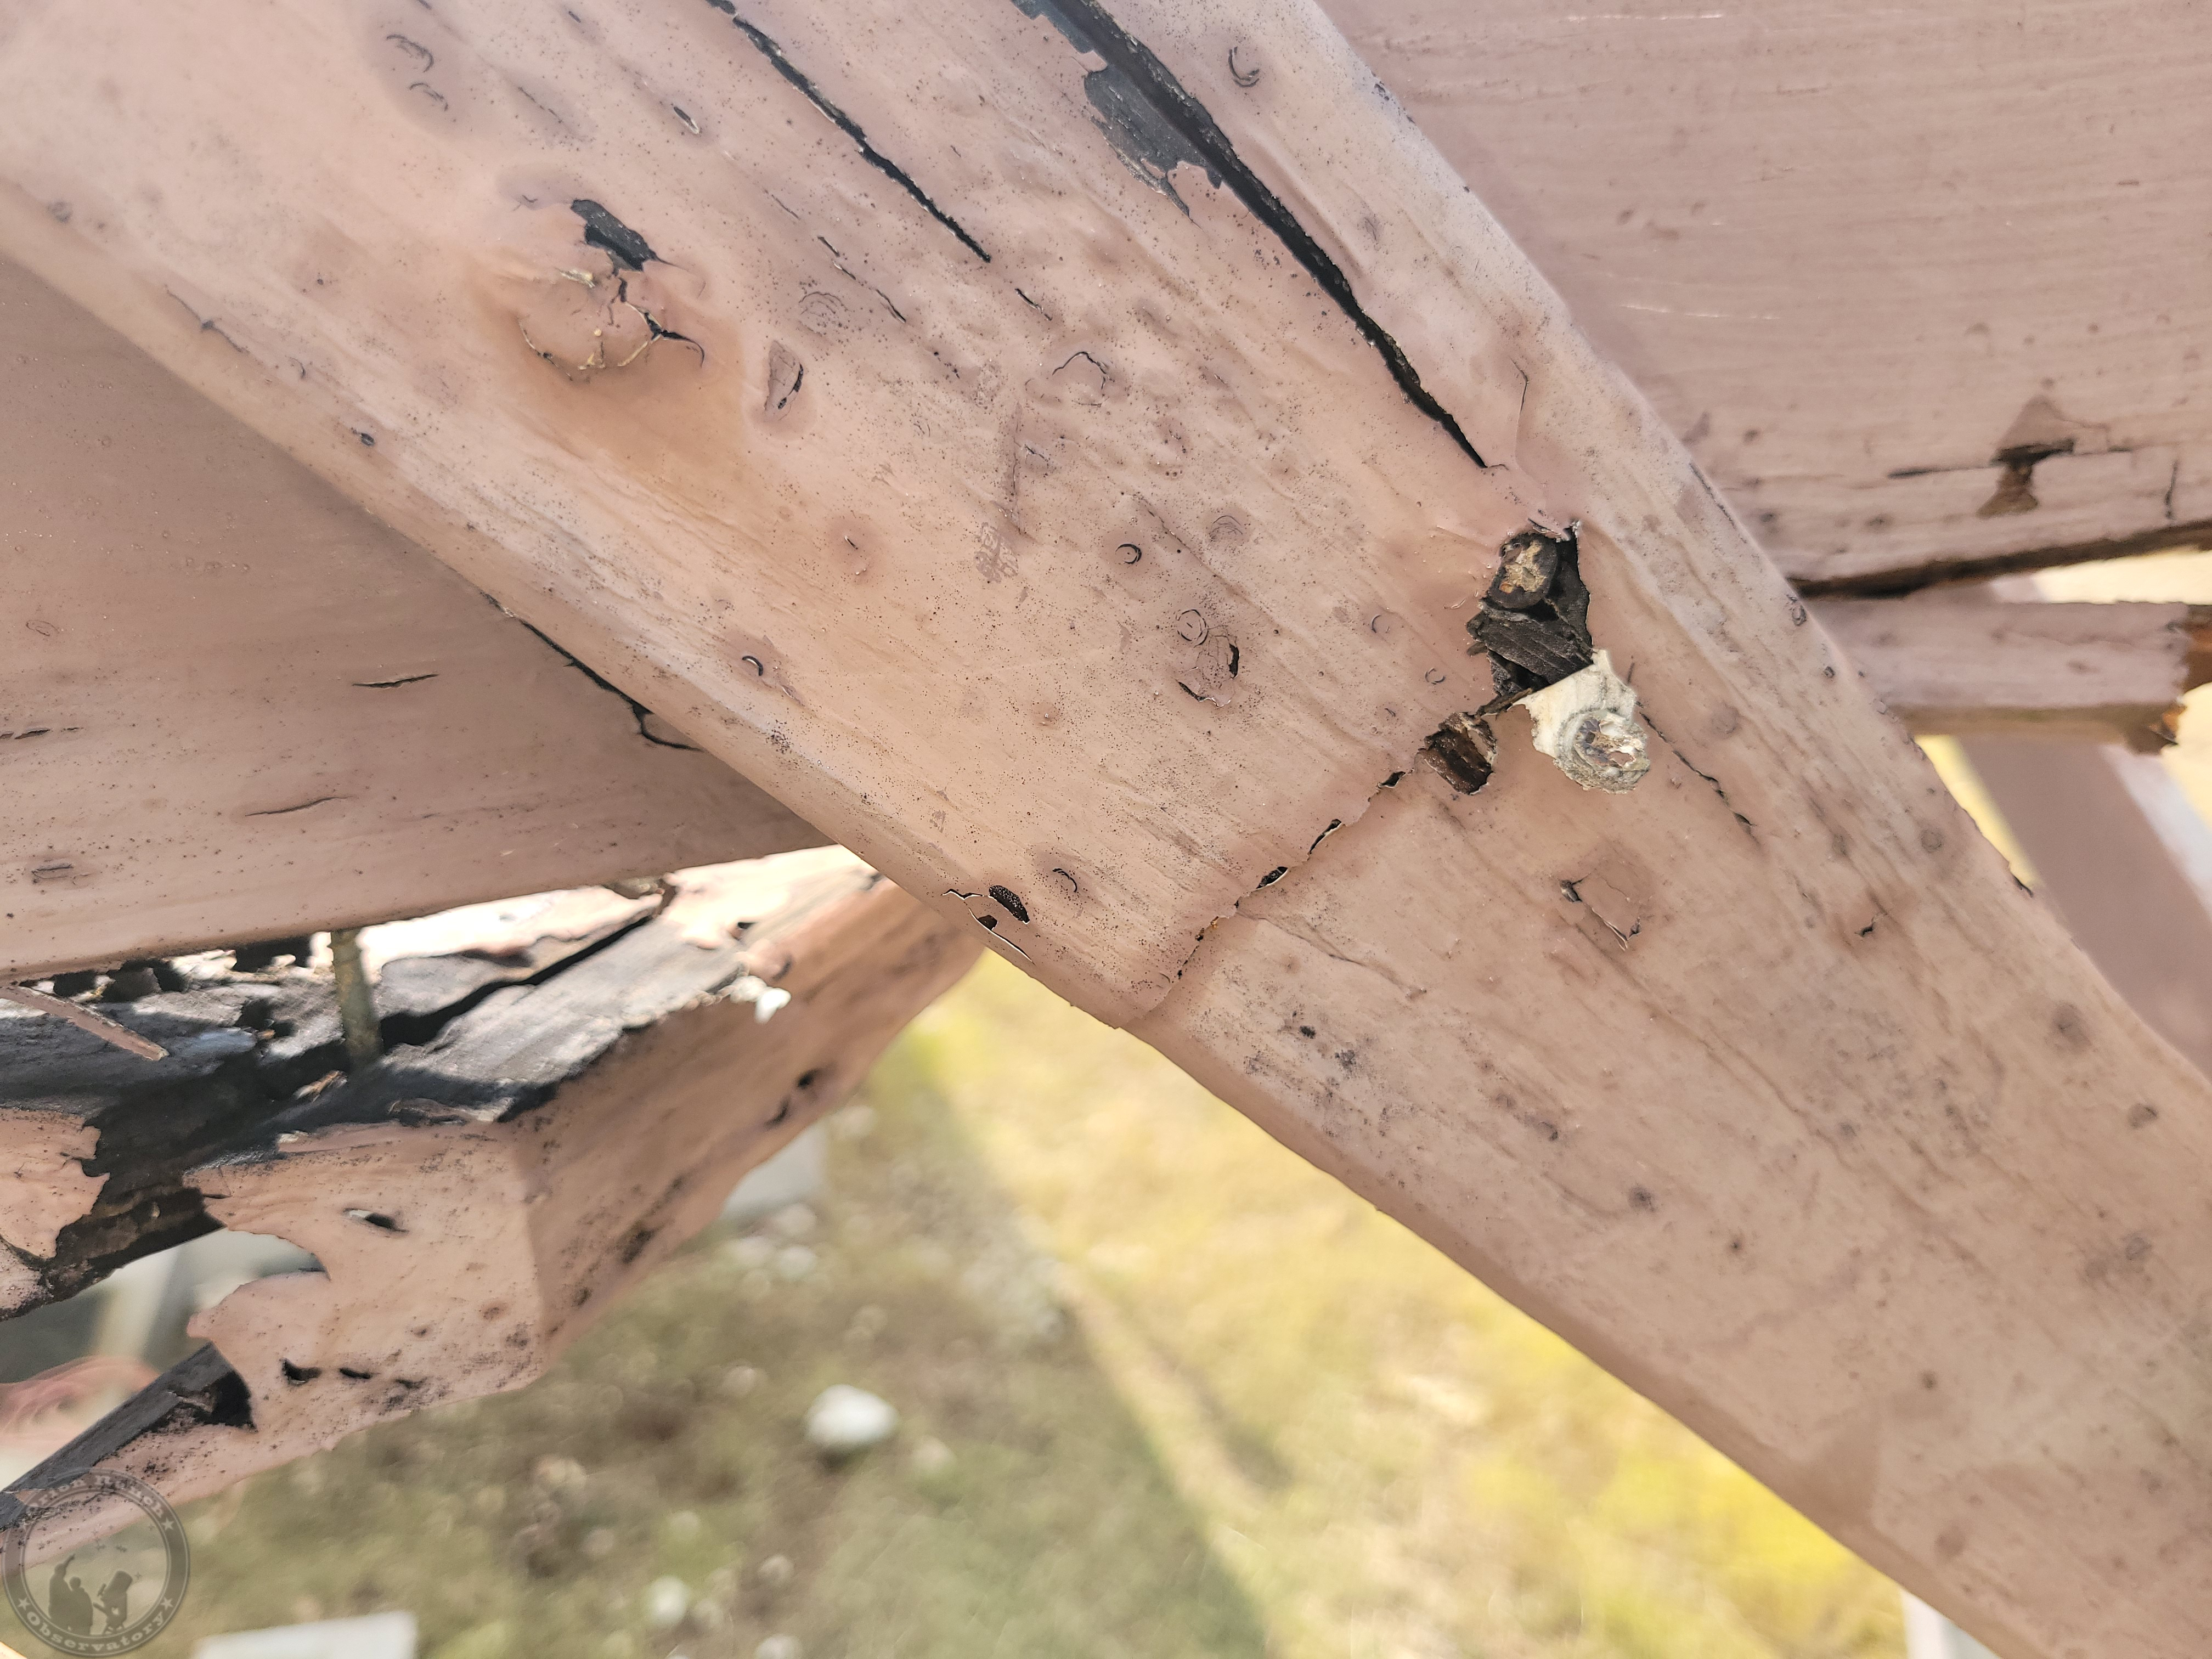
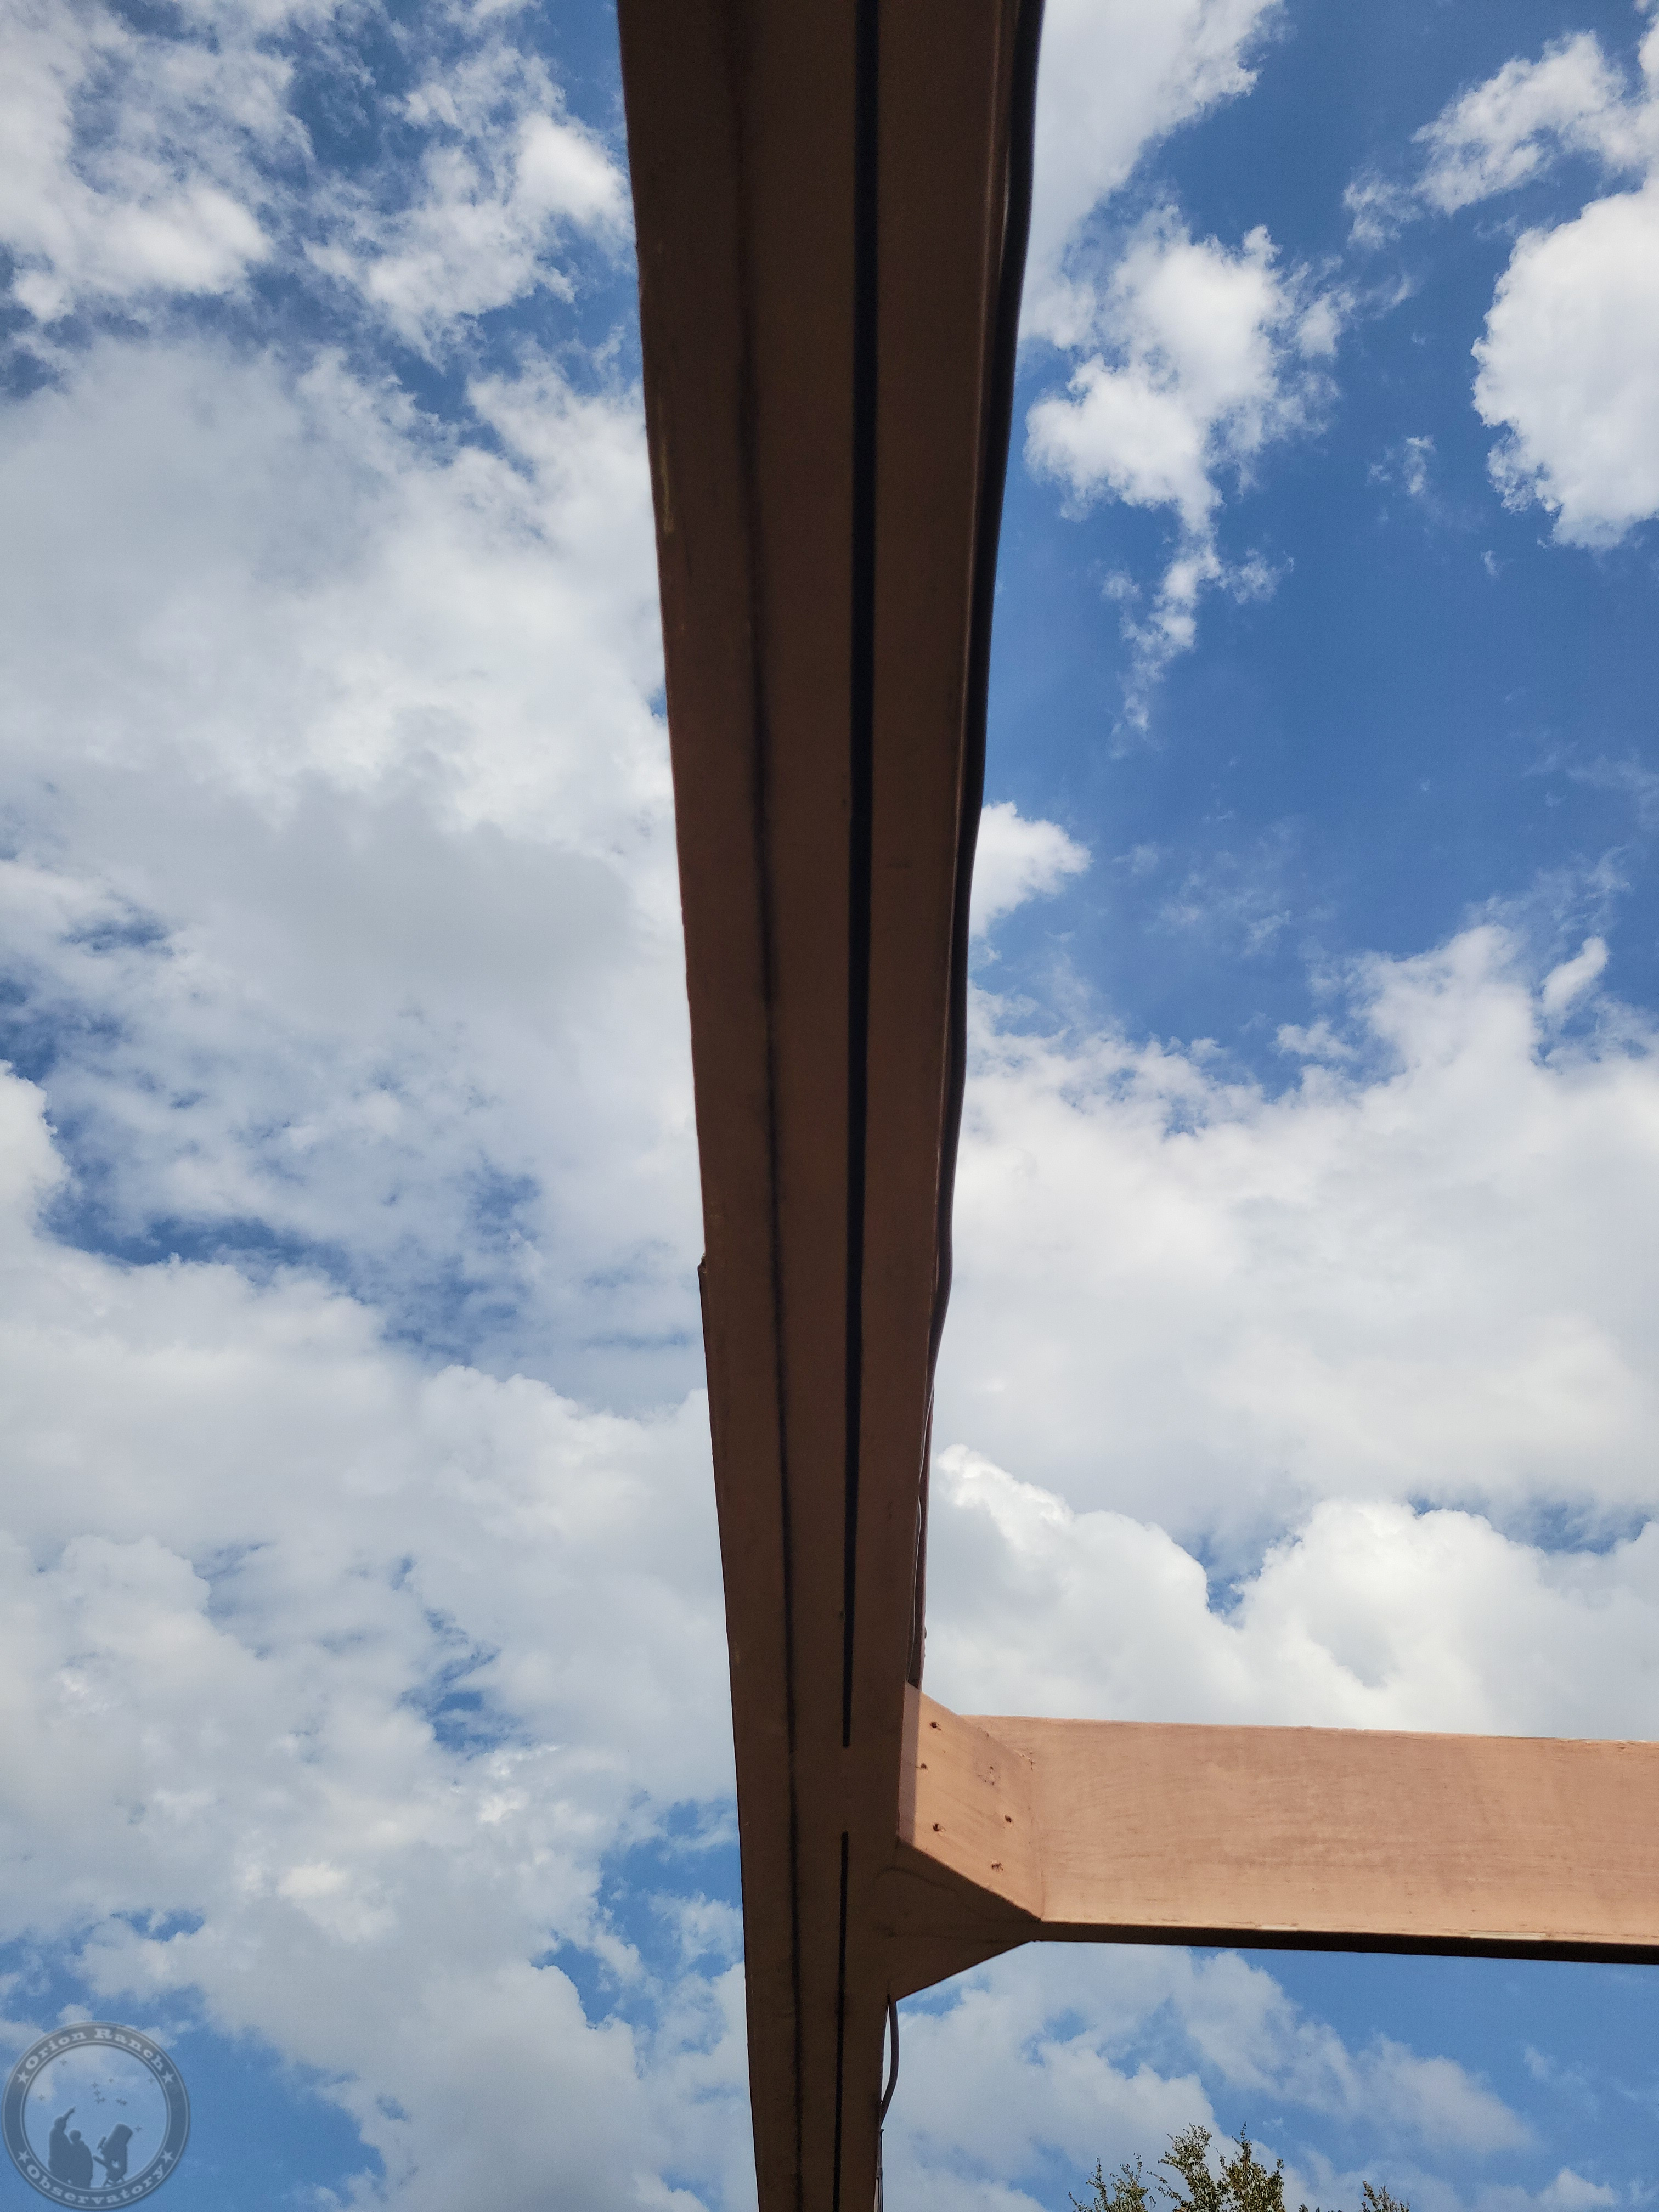
And the underside of my laminated triple 2×12 beam looked like it was separating.

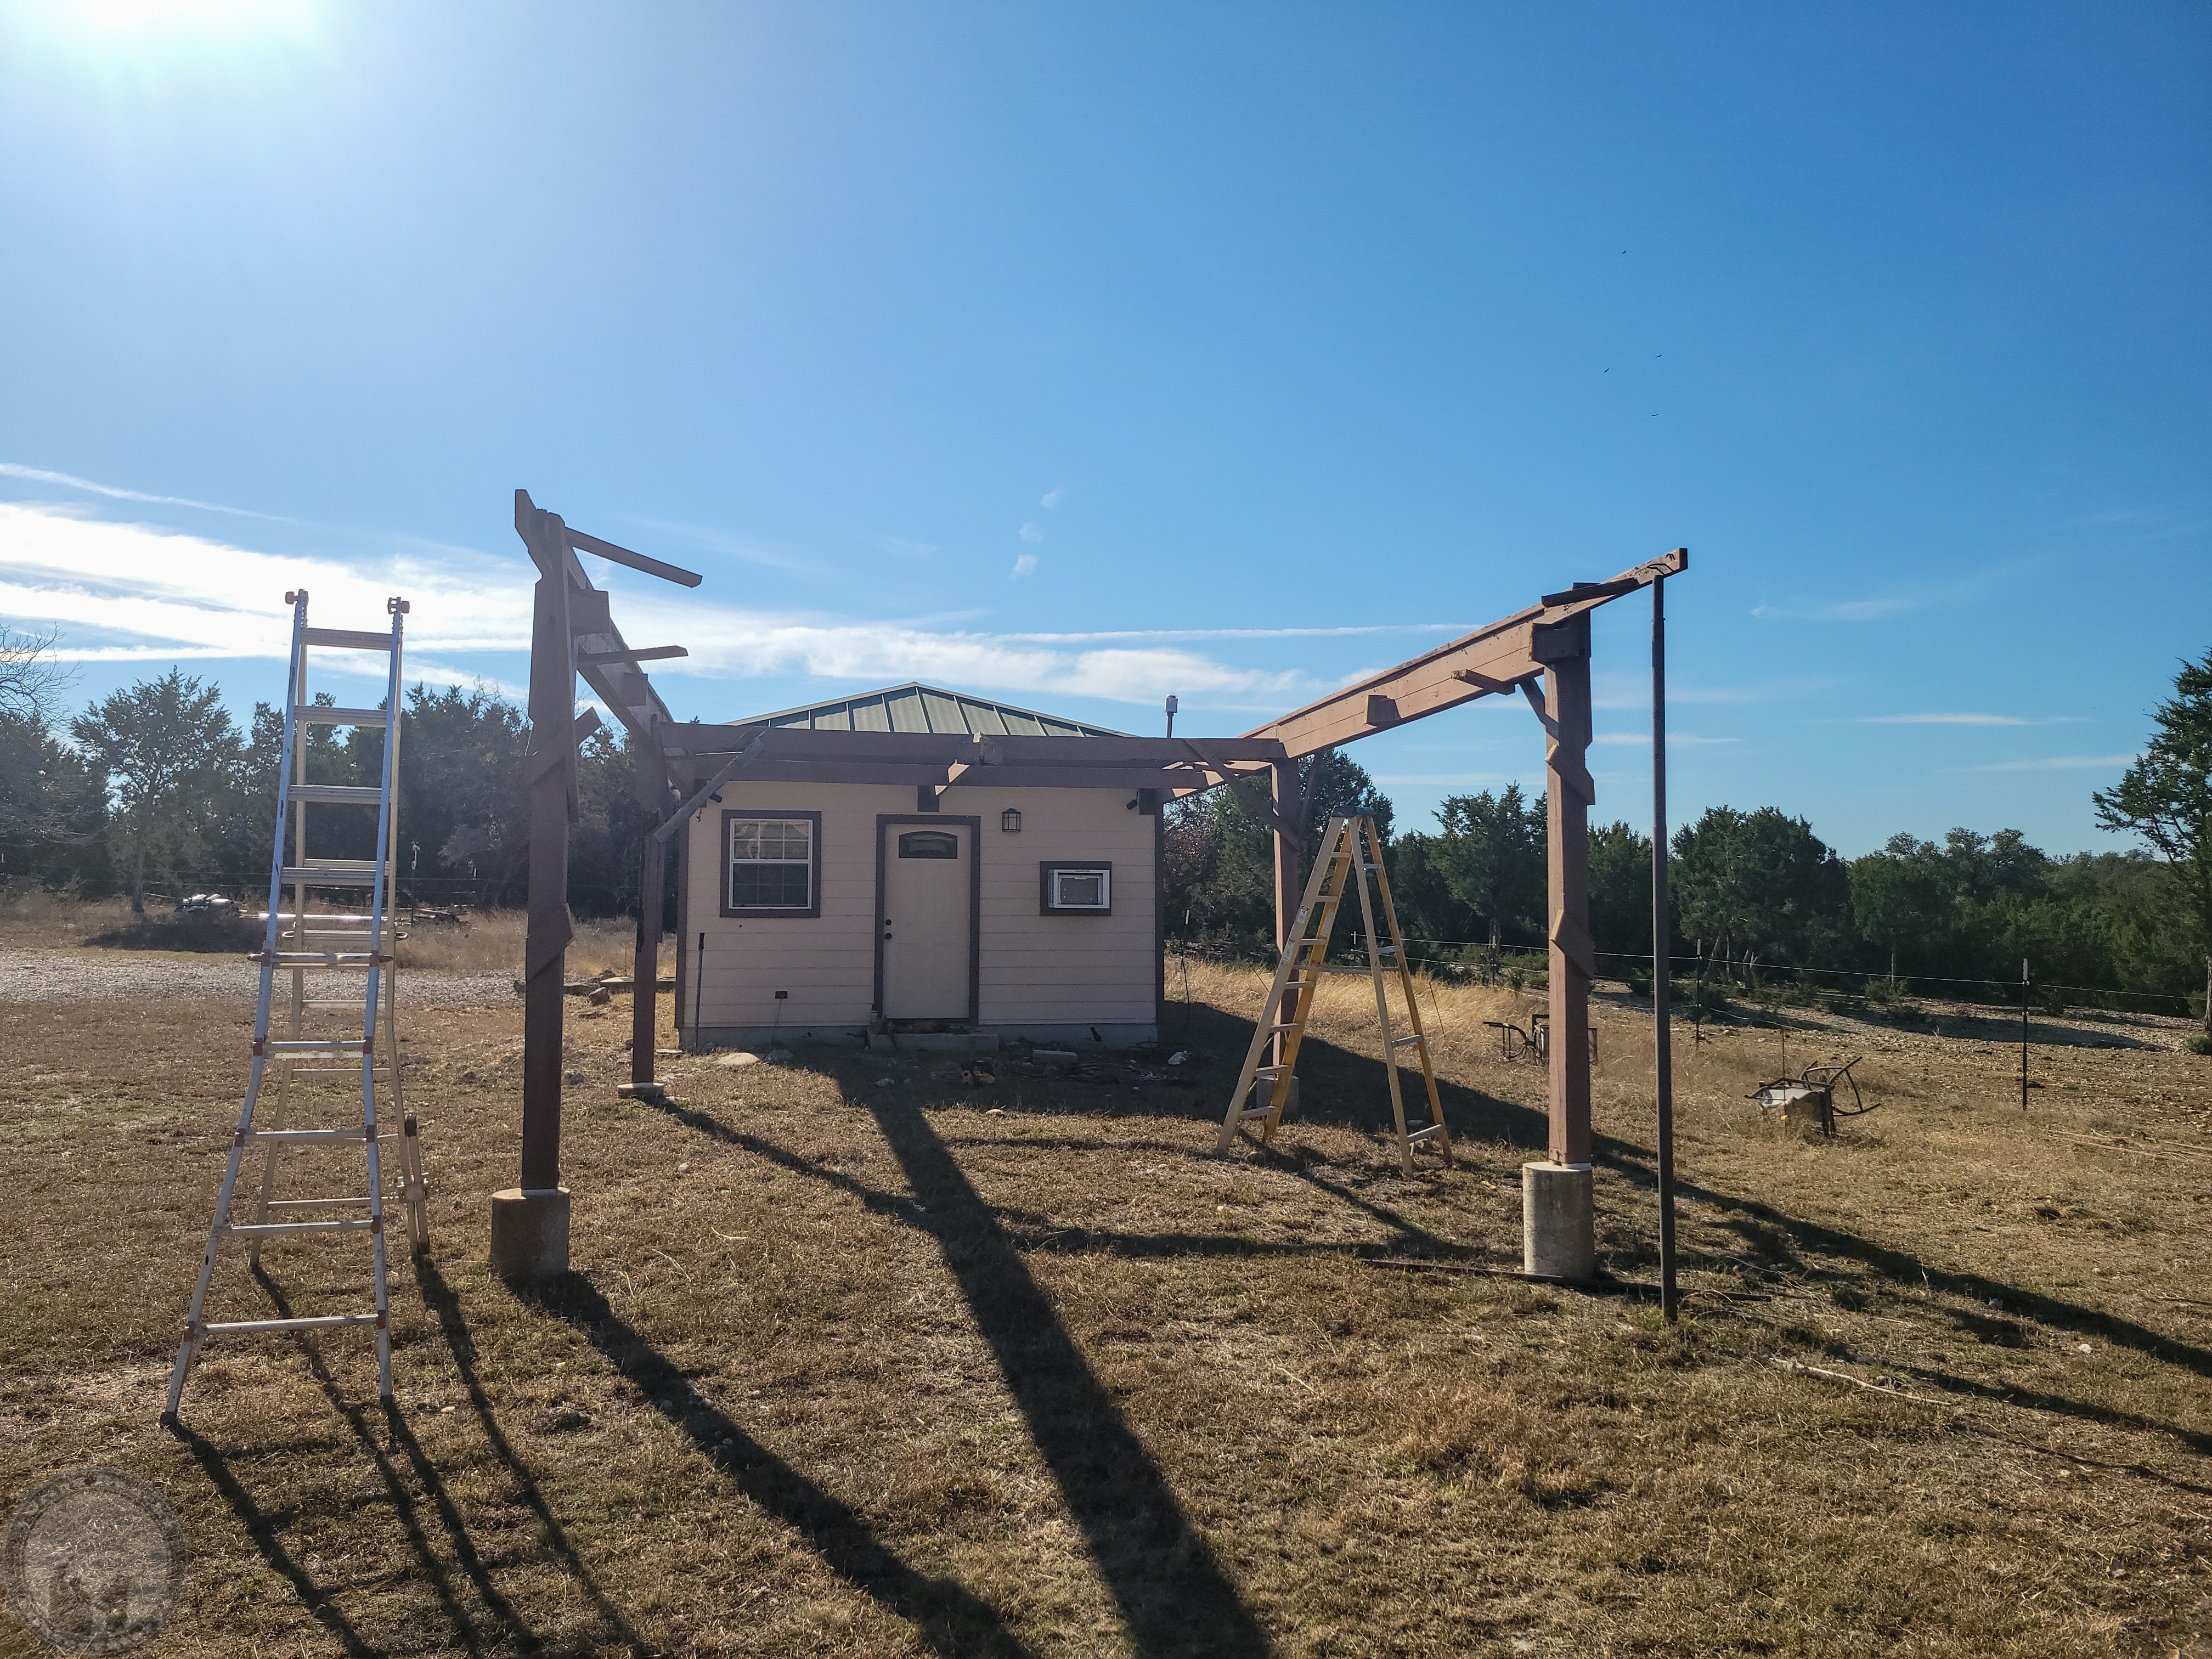
At any rate, it doesn’t look like I’m going to be reopening again for a while!  I’m going to try to finish my redesign and order the H-beams to redo all of this in steel, while I still have the strength to be able to handle a project like this!  If I can get the design done and get the materials ordered in time, I might be able to take off Thanksgiving week to attempt the rebuild.  Of course nothing ever goes as fast as I hope, and I don’t have the stamina I used to to boot, so finishing it all in one week may be a stretch.  I figured I’d start this thread to track the progress of the rebuild and share the results.

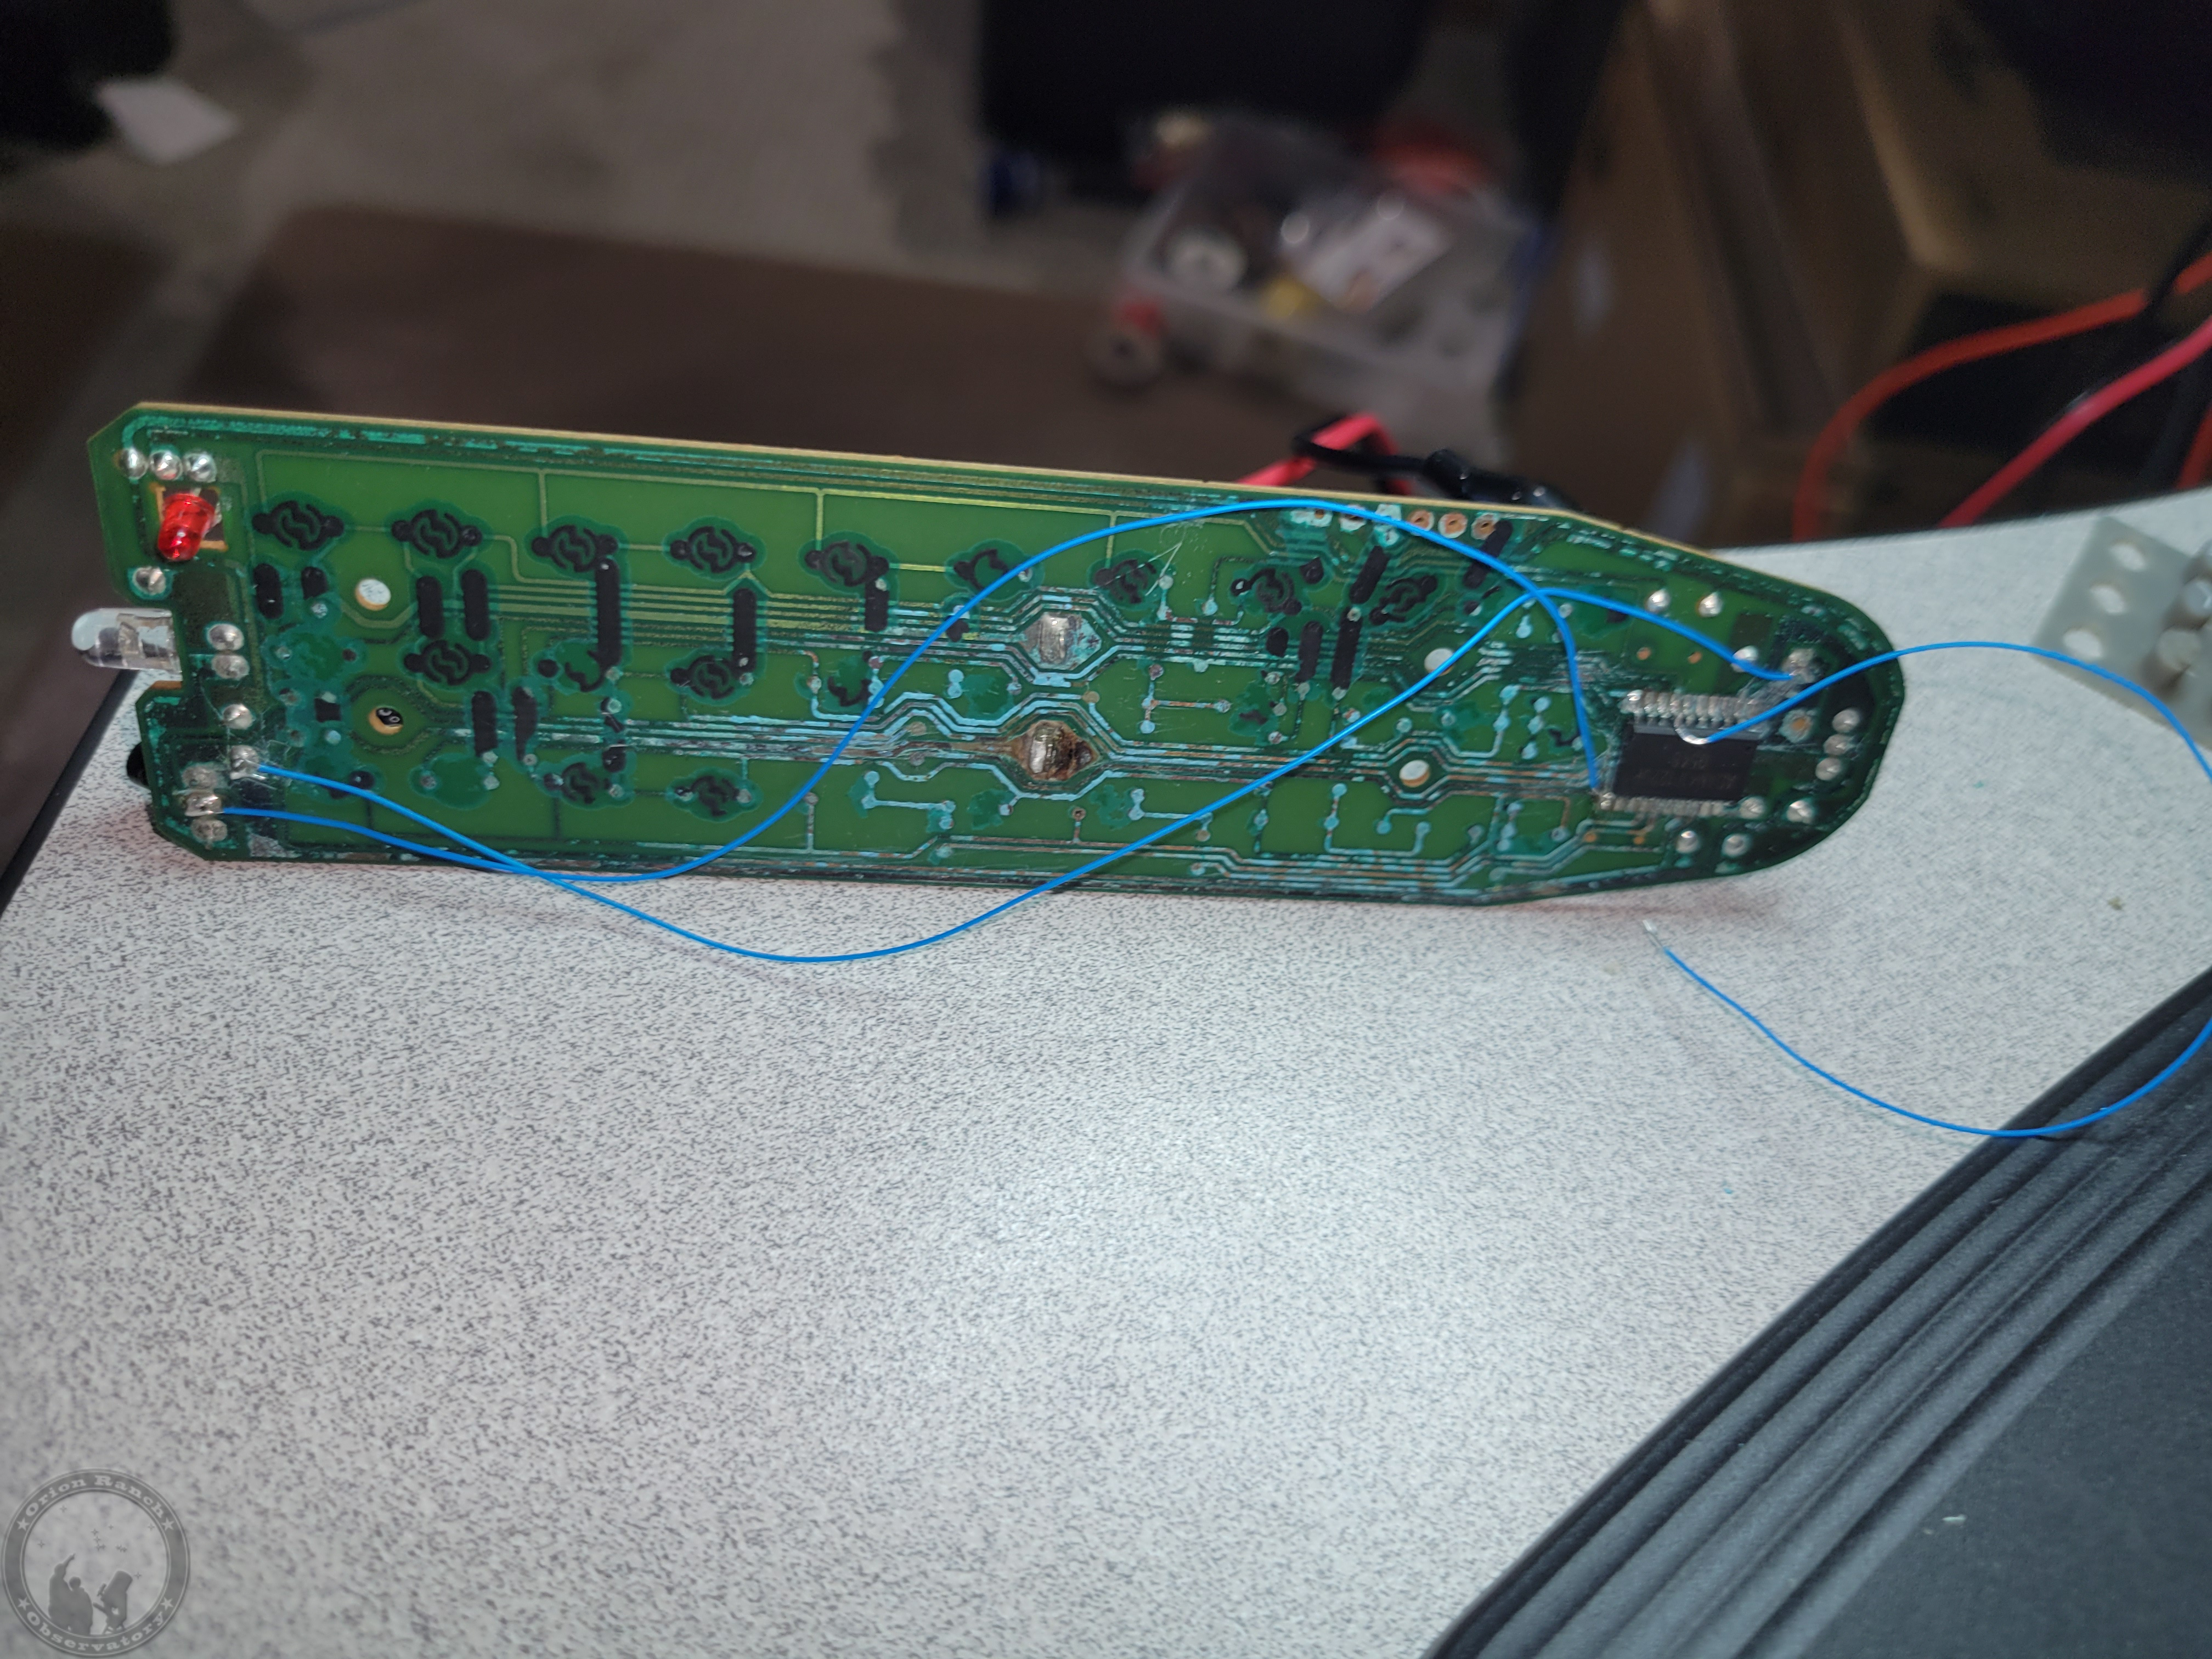
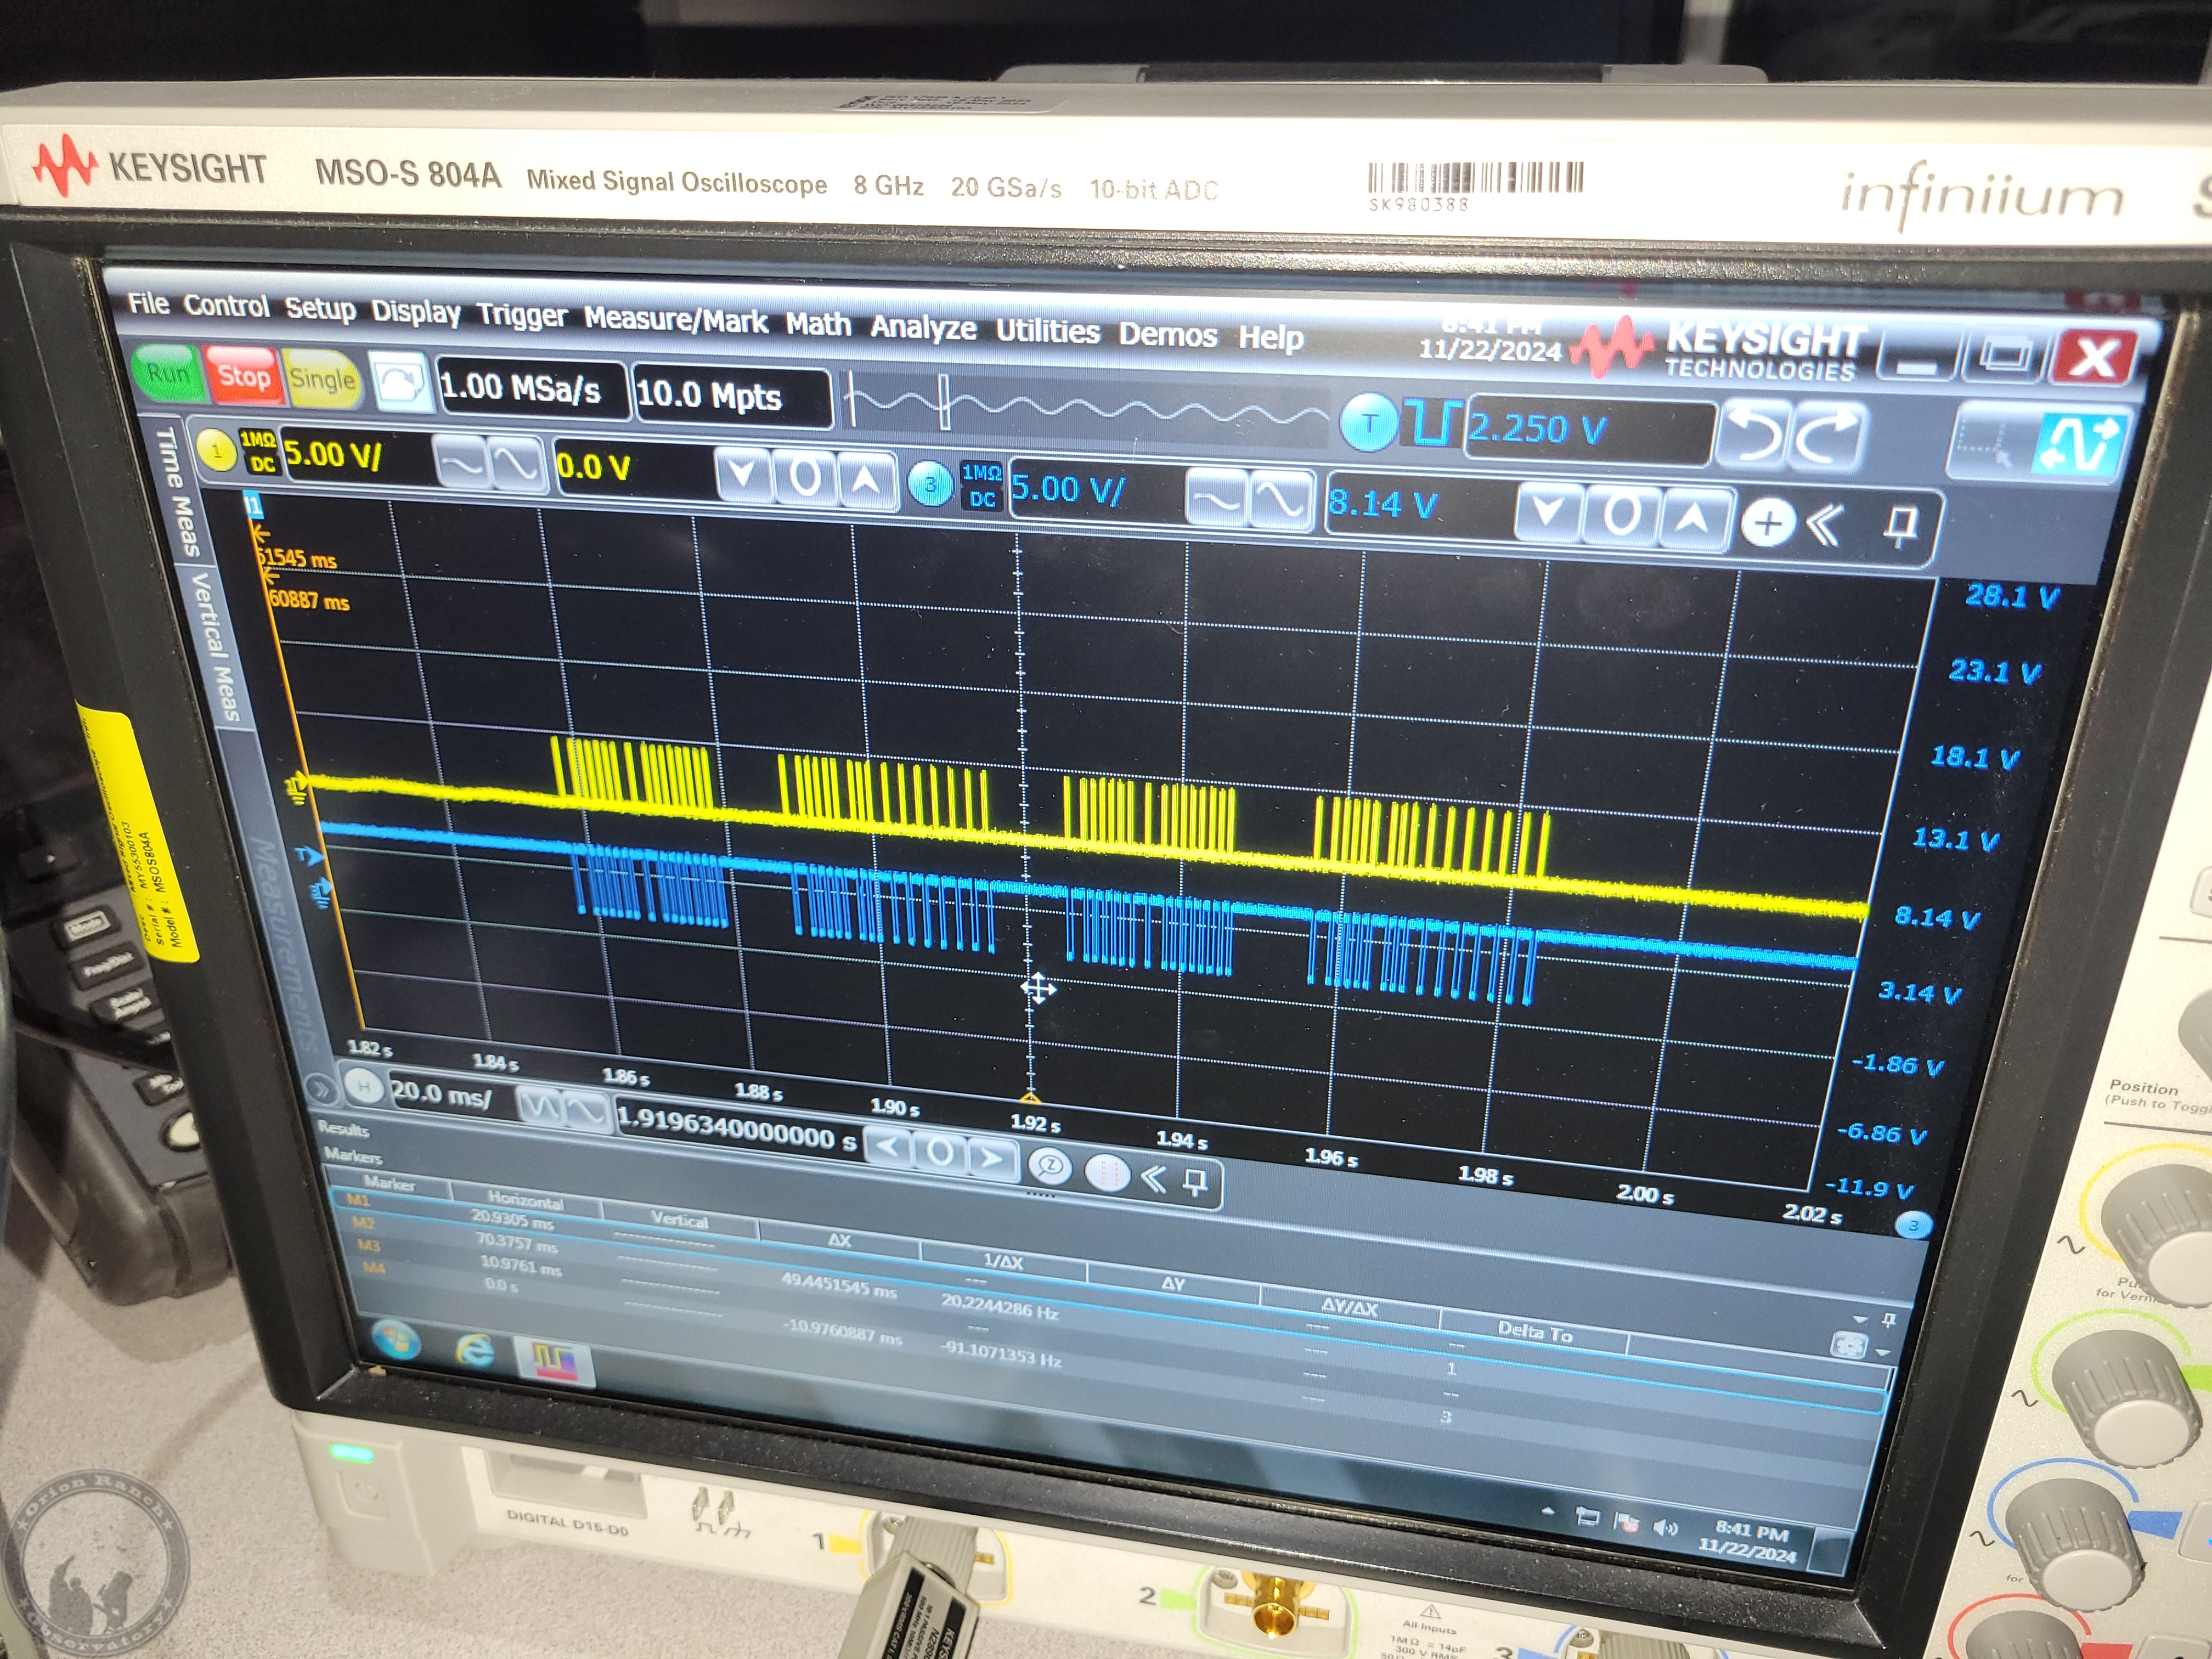
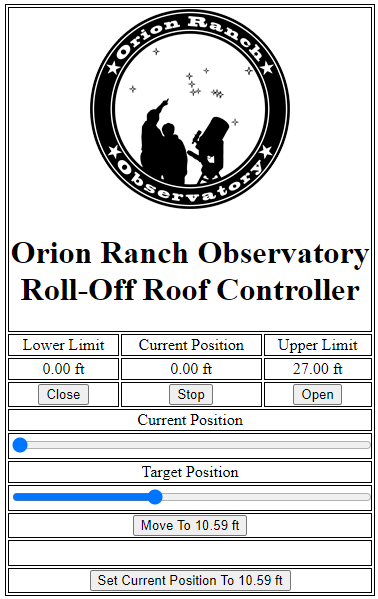
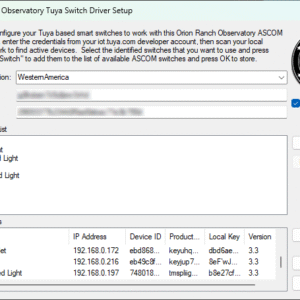
The sad thing is that I was almost to the point of finally fully automating my observatory!  I just finished my ASCOM driver to control Tuya SmartLife smart switches, and with my new ESP32 based web controller for my roll-off, was planning to write an ASCOM driver to support that as well.  So of course my luck says it’s time to shut me down with some other problem!  As I mentioned in the OnStep rebuild video, if I ever win the lottery, it’s time to head for the hills or find a church and start praying, ‘cuz the world is a comin’ to an end!

November 1st, 2025

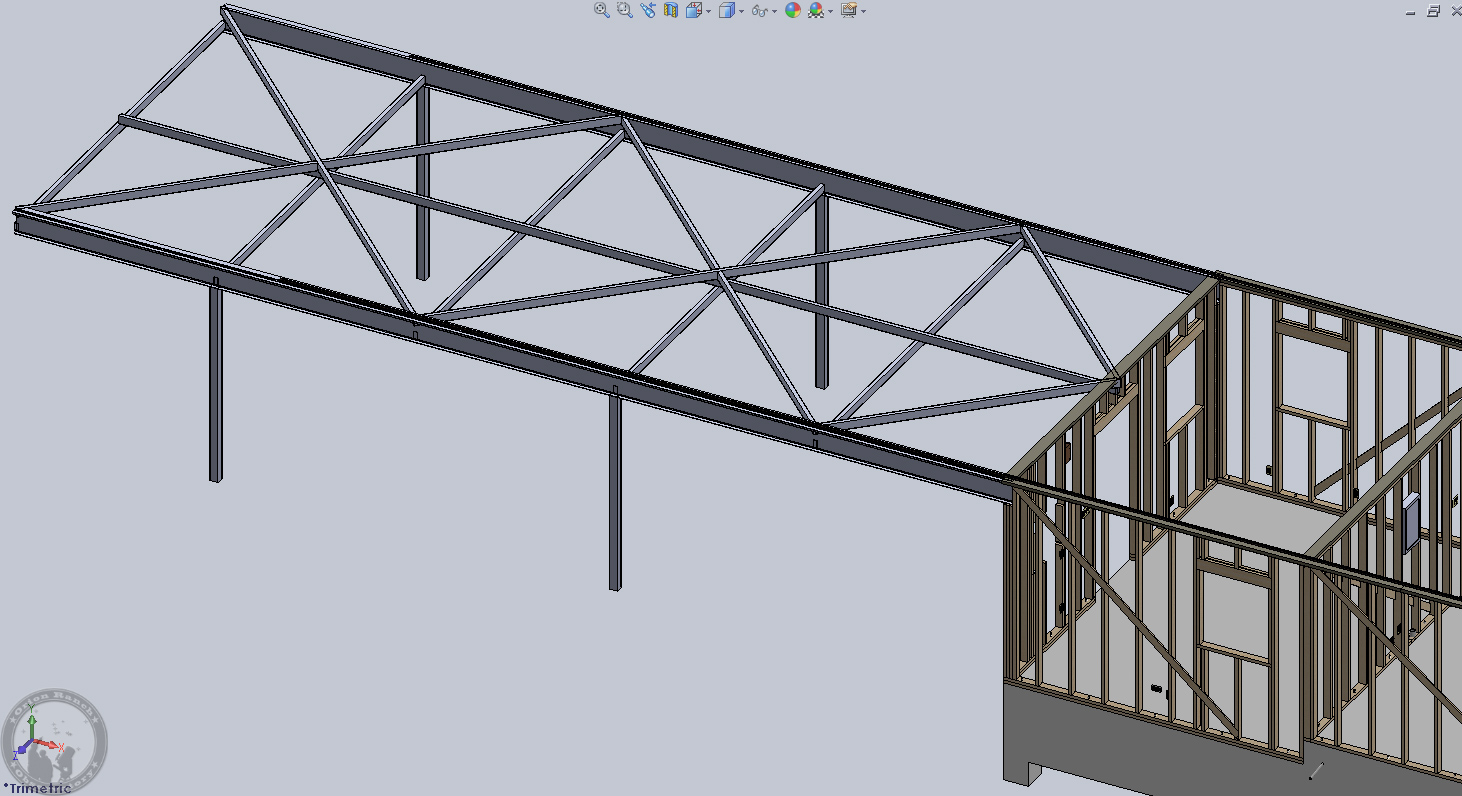
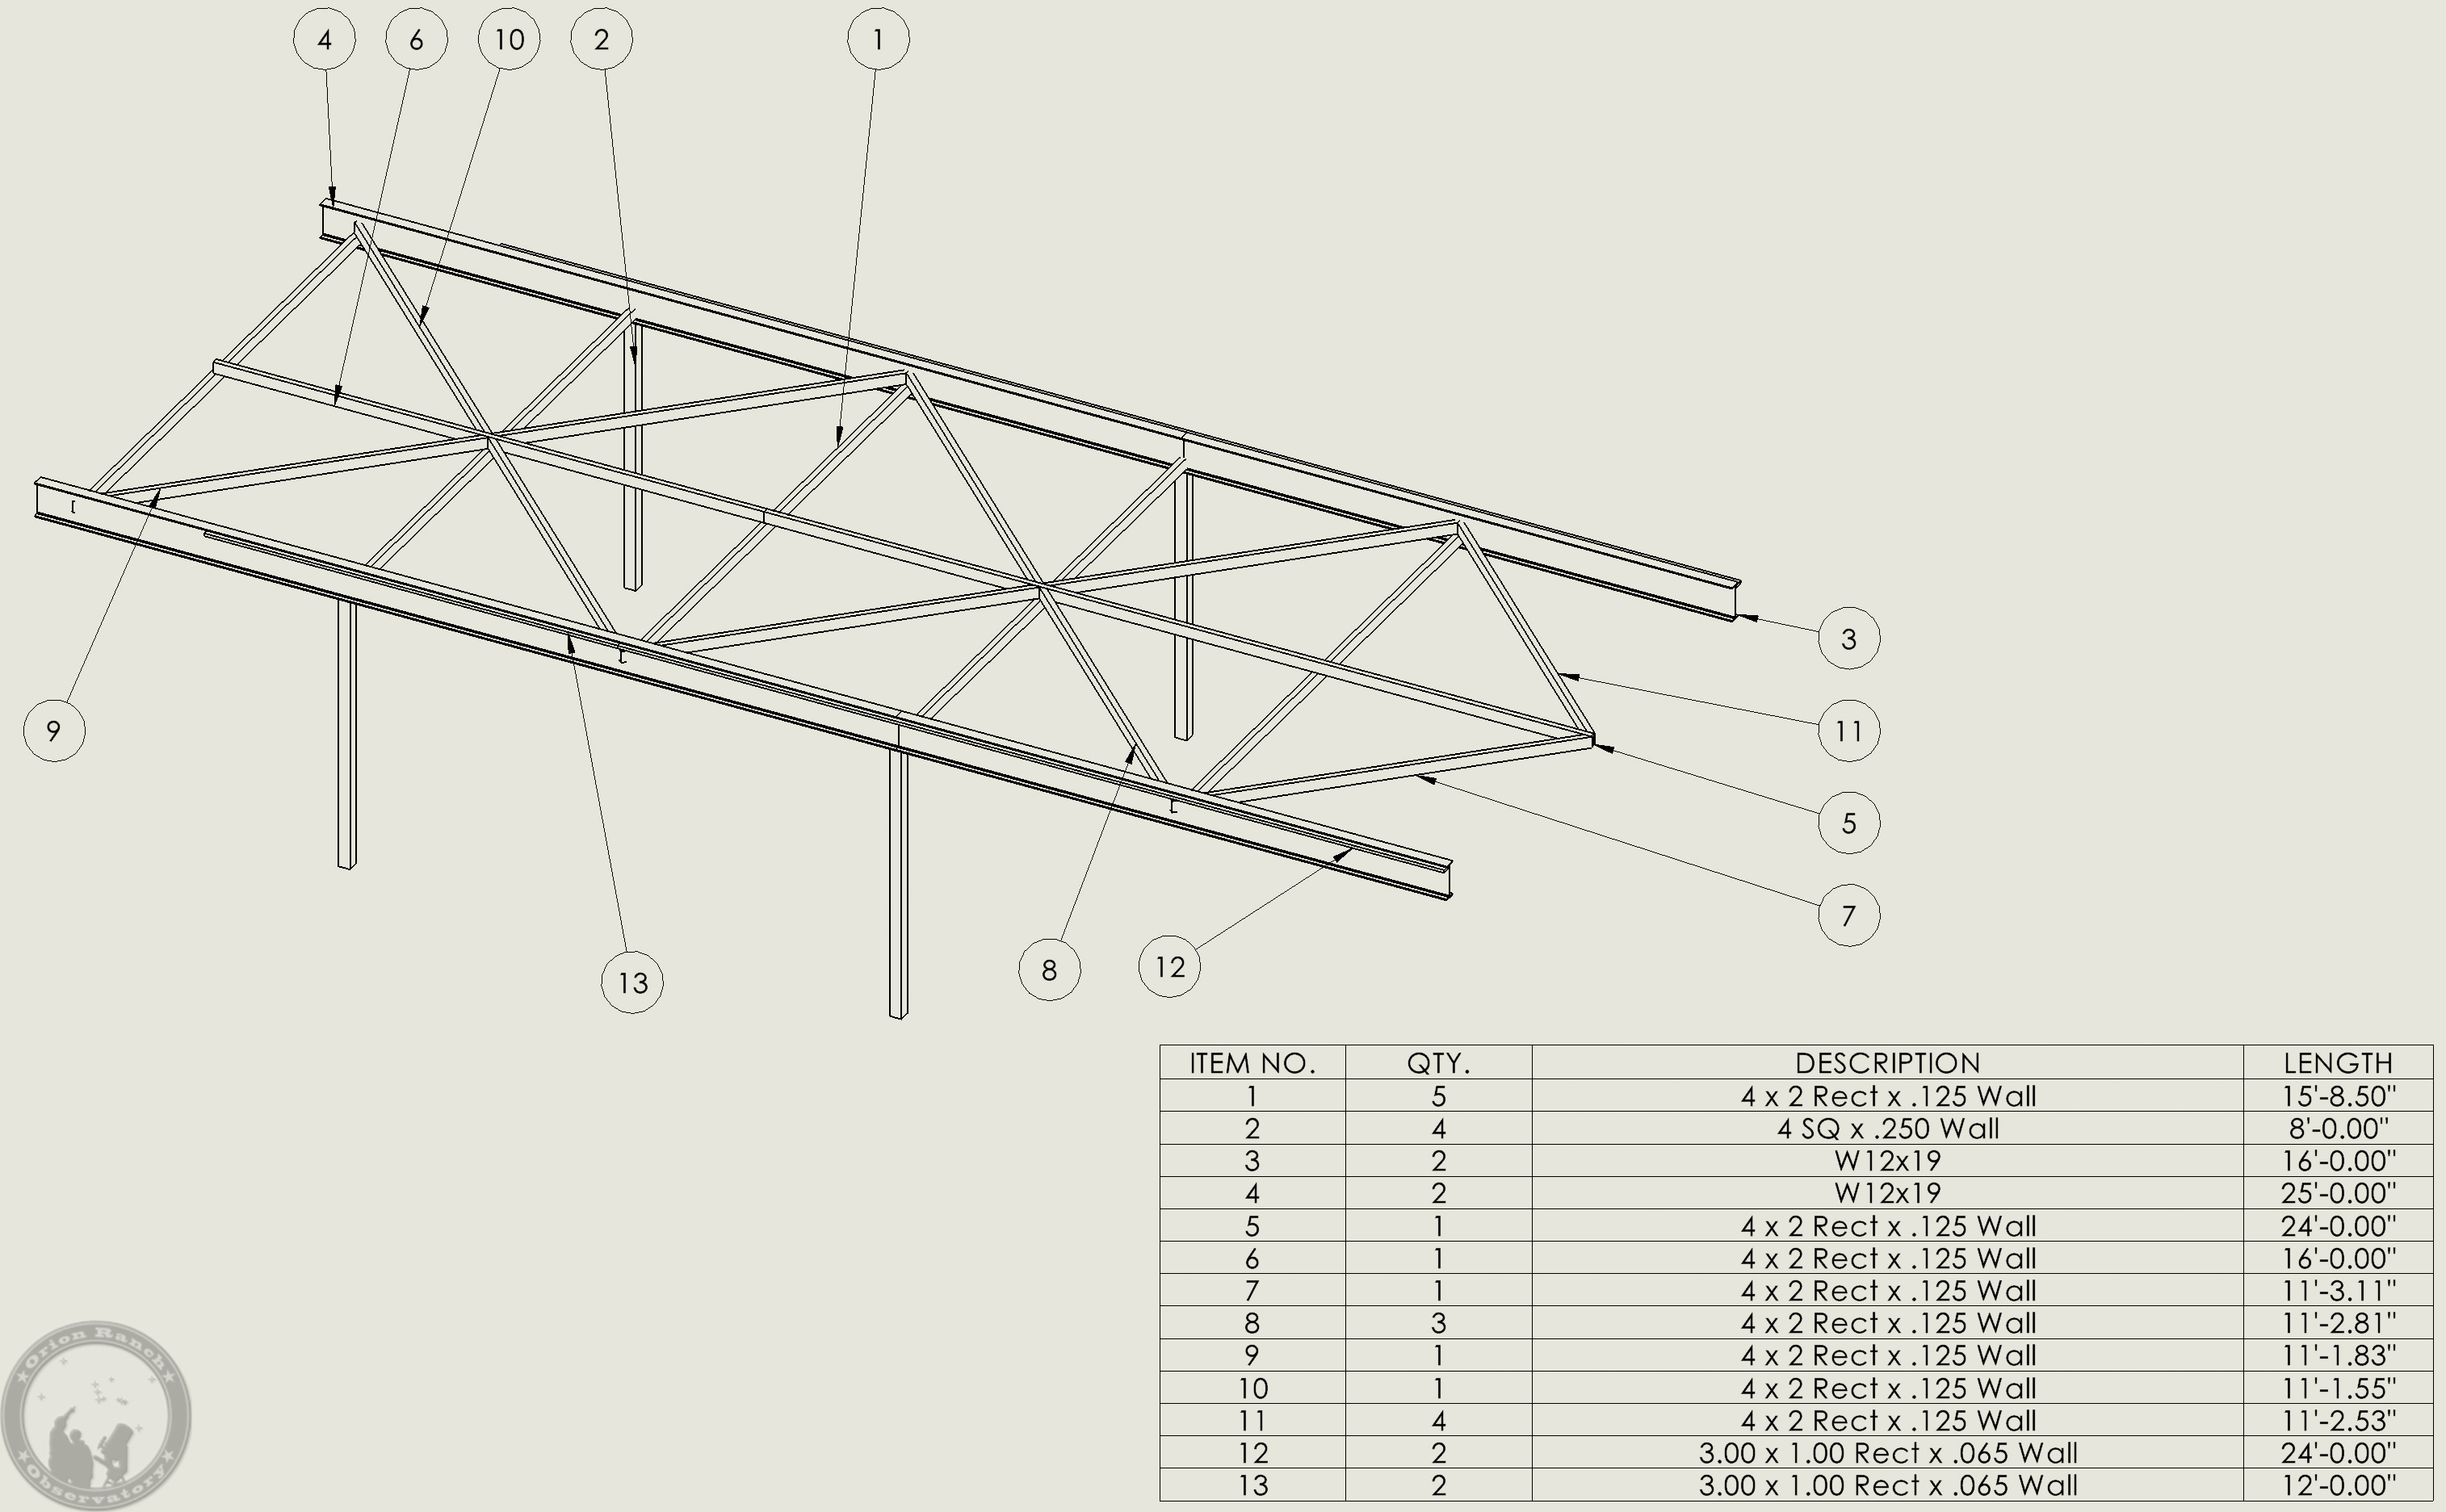
Here’s my initial plan for replacing the wood rails with steel.  This will depend on whether I can get 40′ H-beams delivered and onsite vs. having to use 20′ beams.  If I have to go with 20’s, then it will be 4′ shorter.  I don’t really need the extra overhang, but it would be nice to have the option of moving the roof completely off if I ever needed to service the wood in the observatory itself.  The bracing may be overkill, but this should minimize any chance of twisting, etc. on the beams.  I haven’t decided on bracing for the posts.

December 19th, 2025

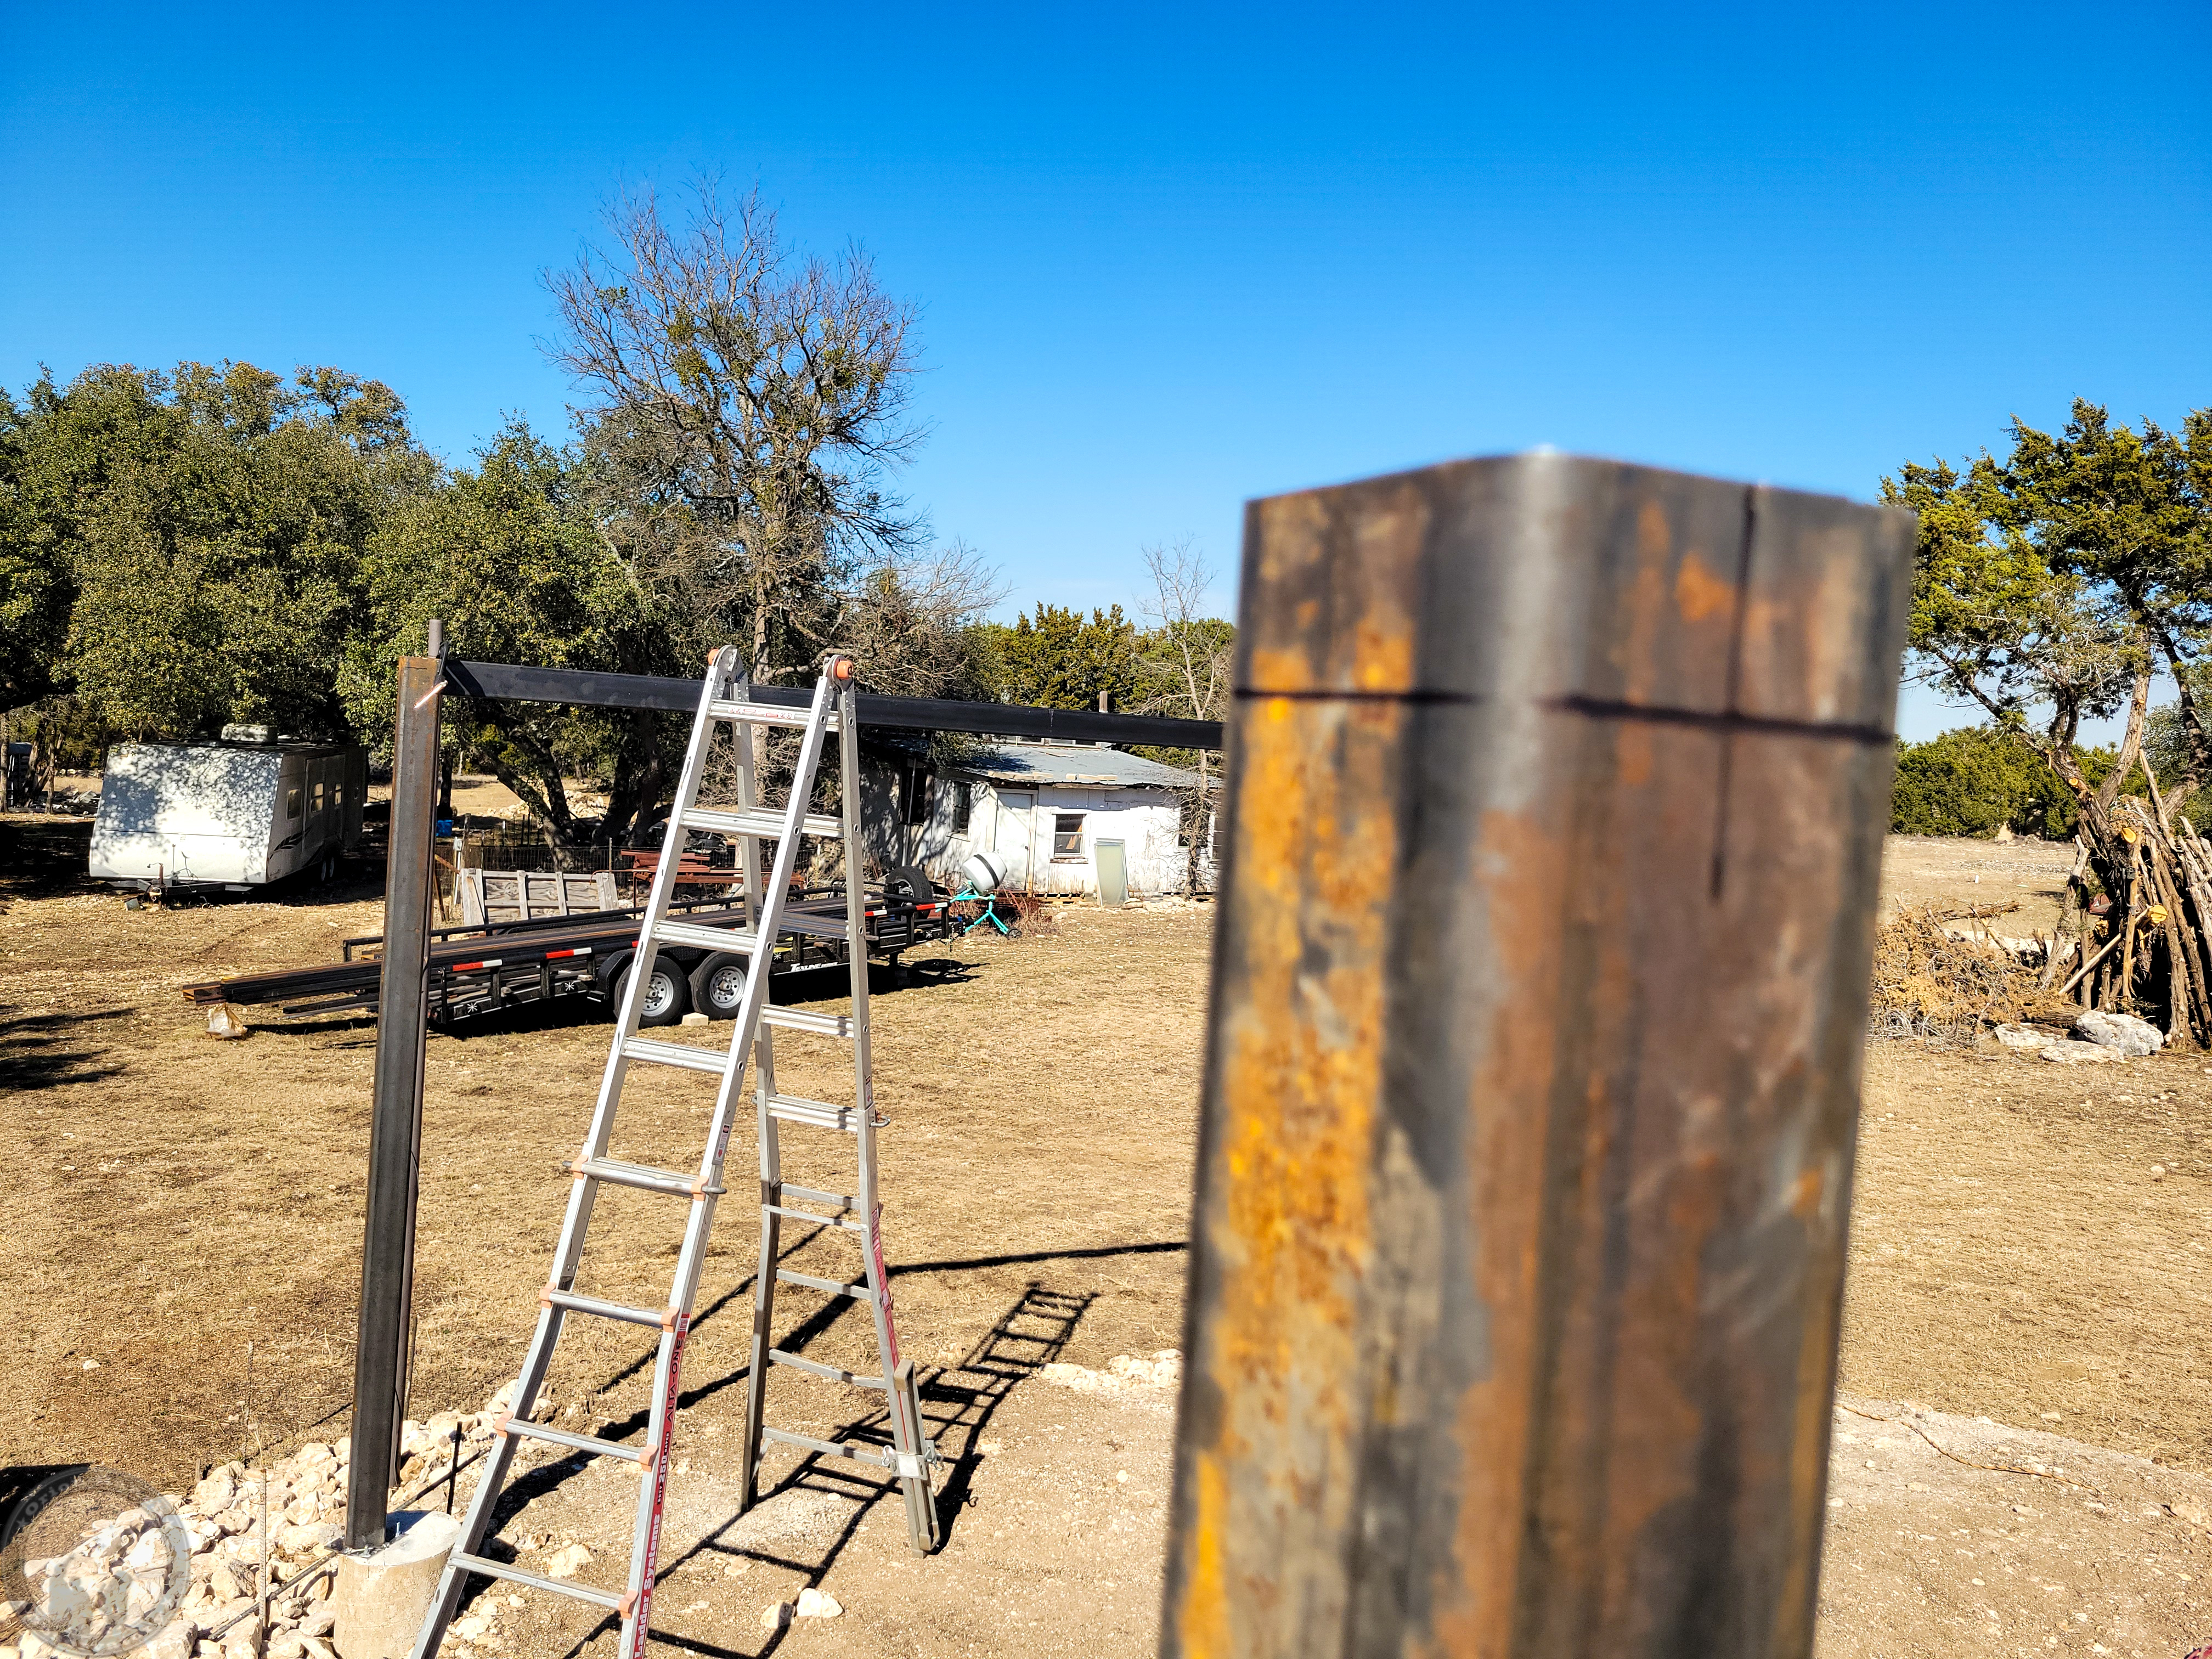
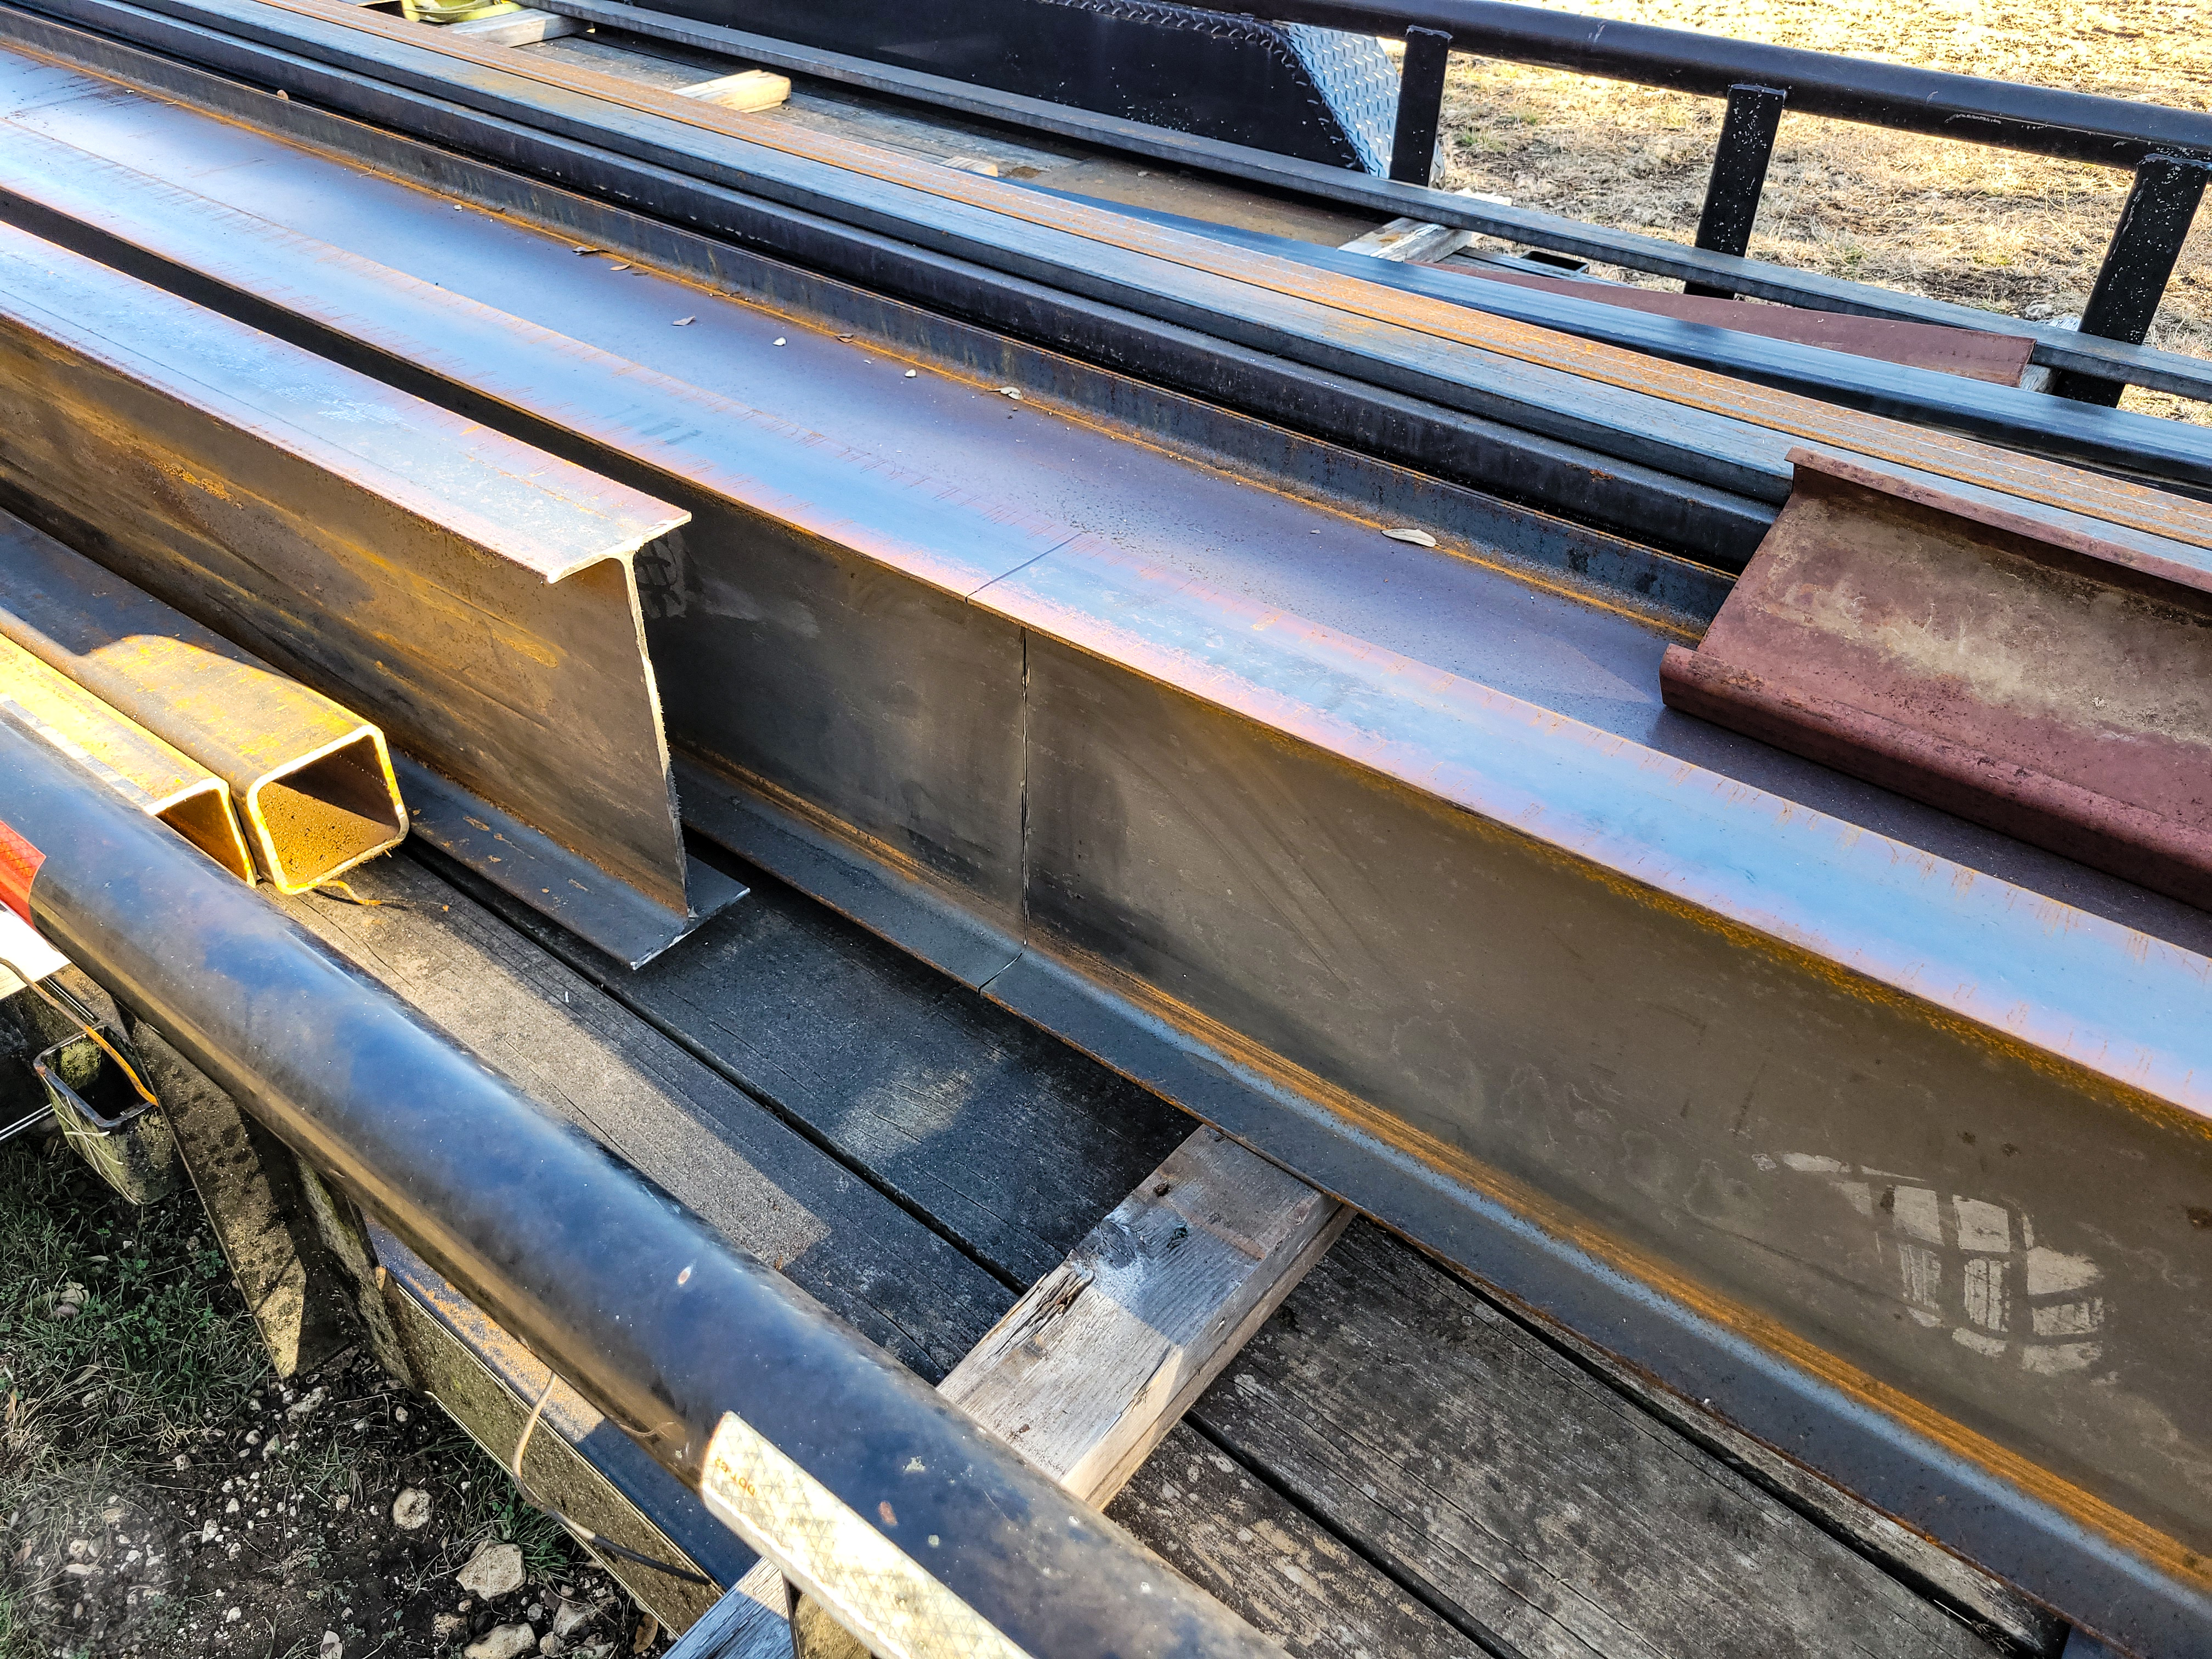
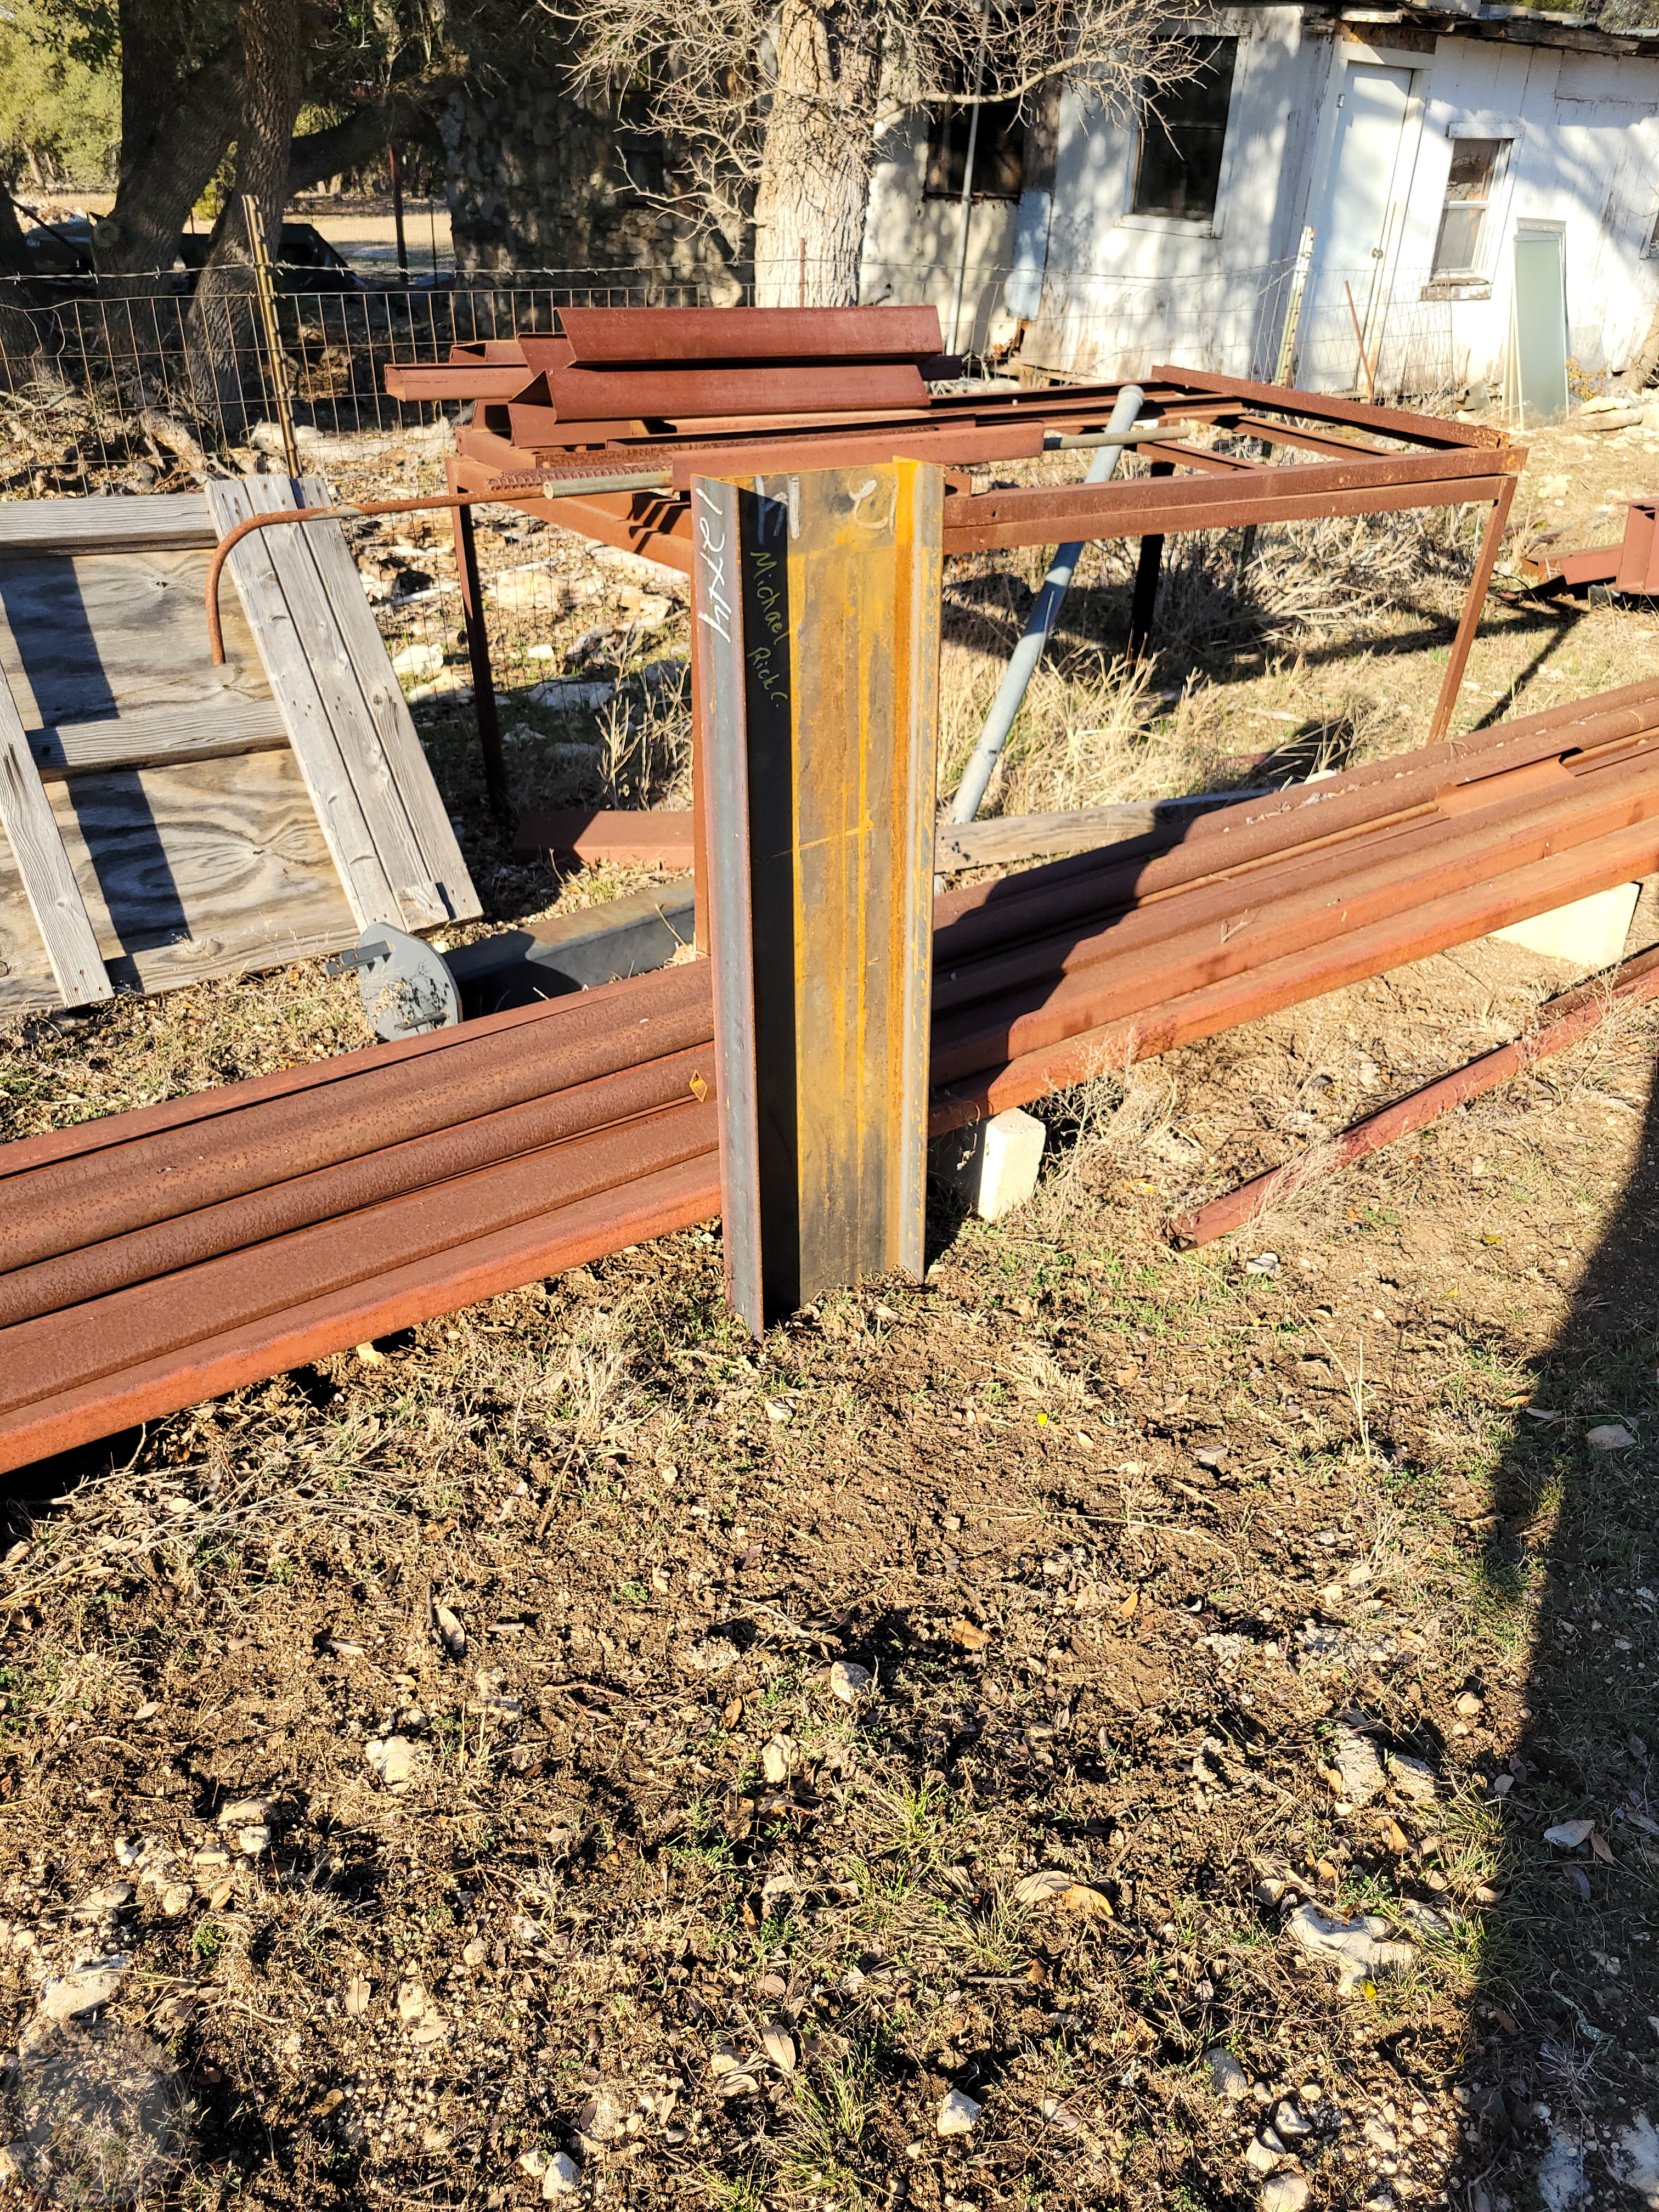
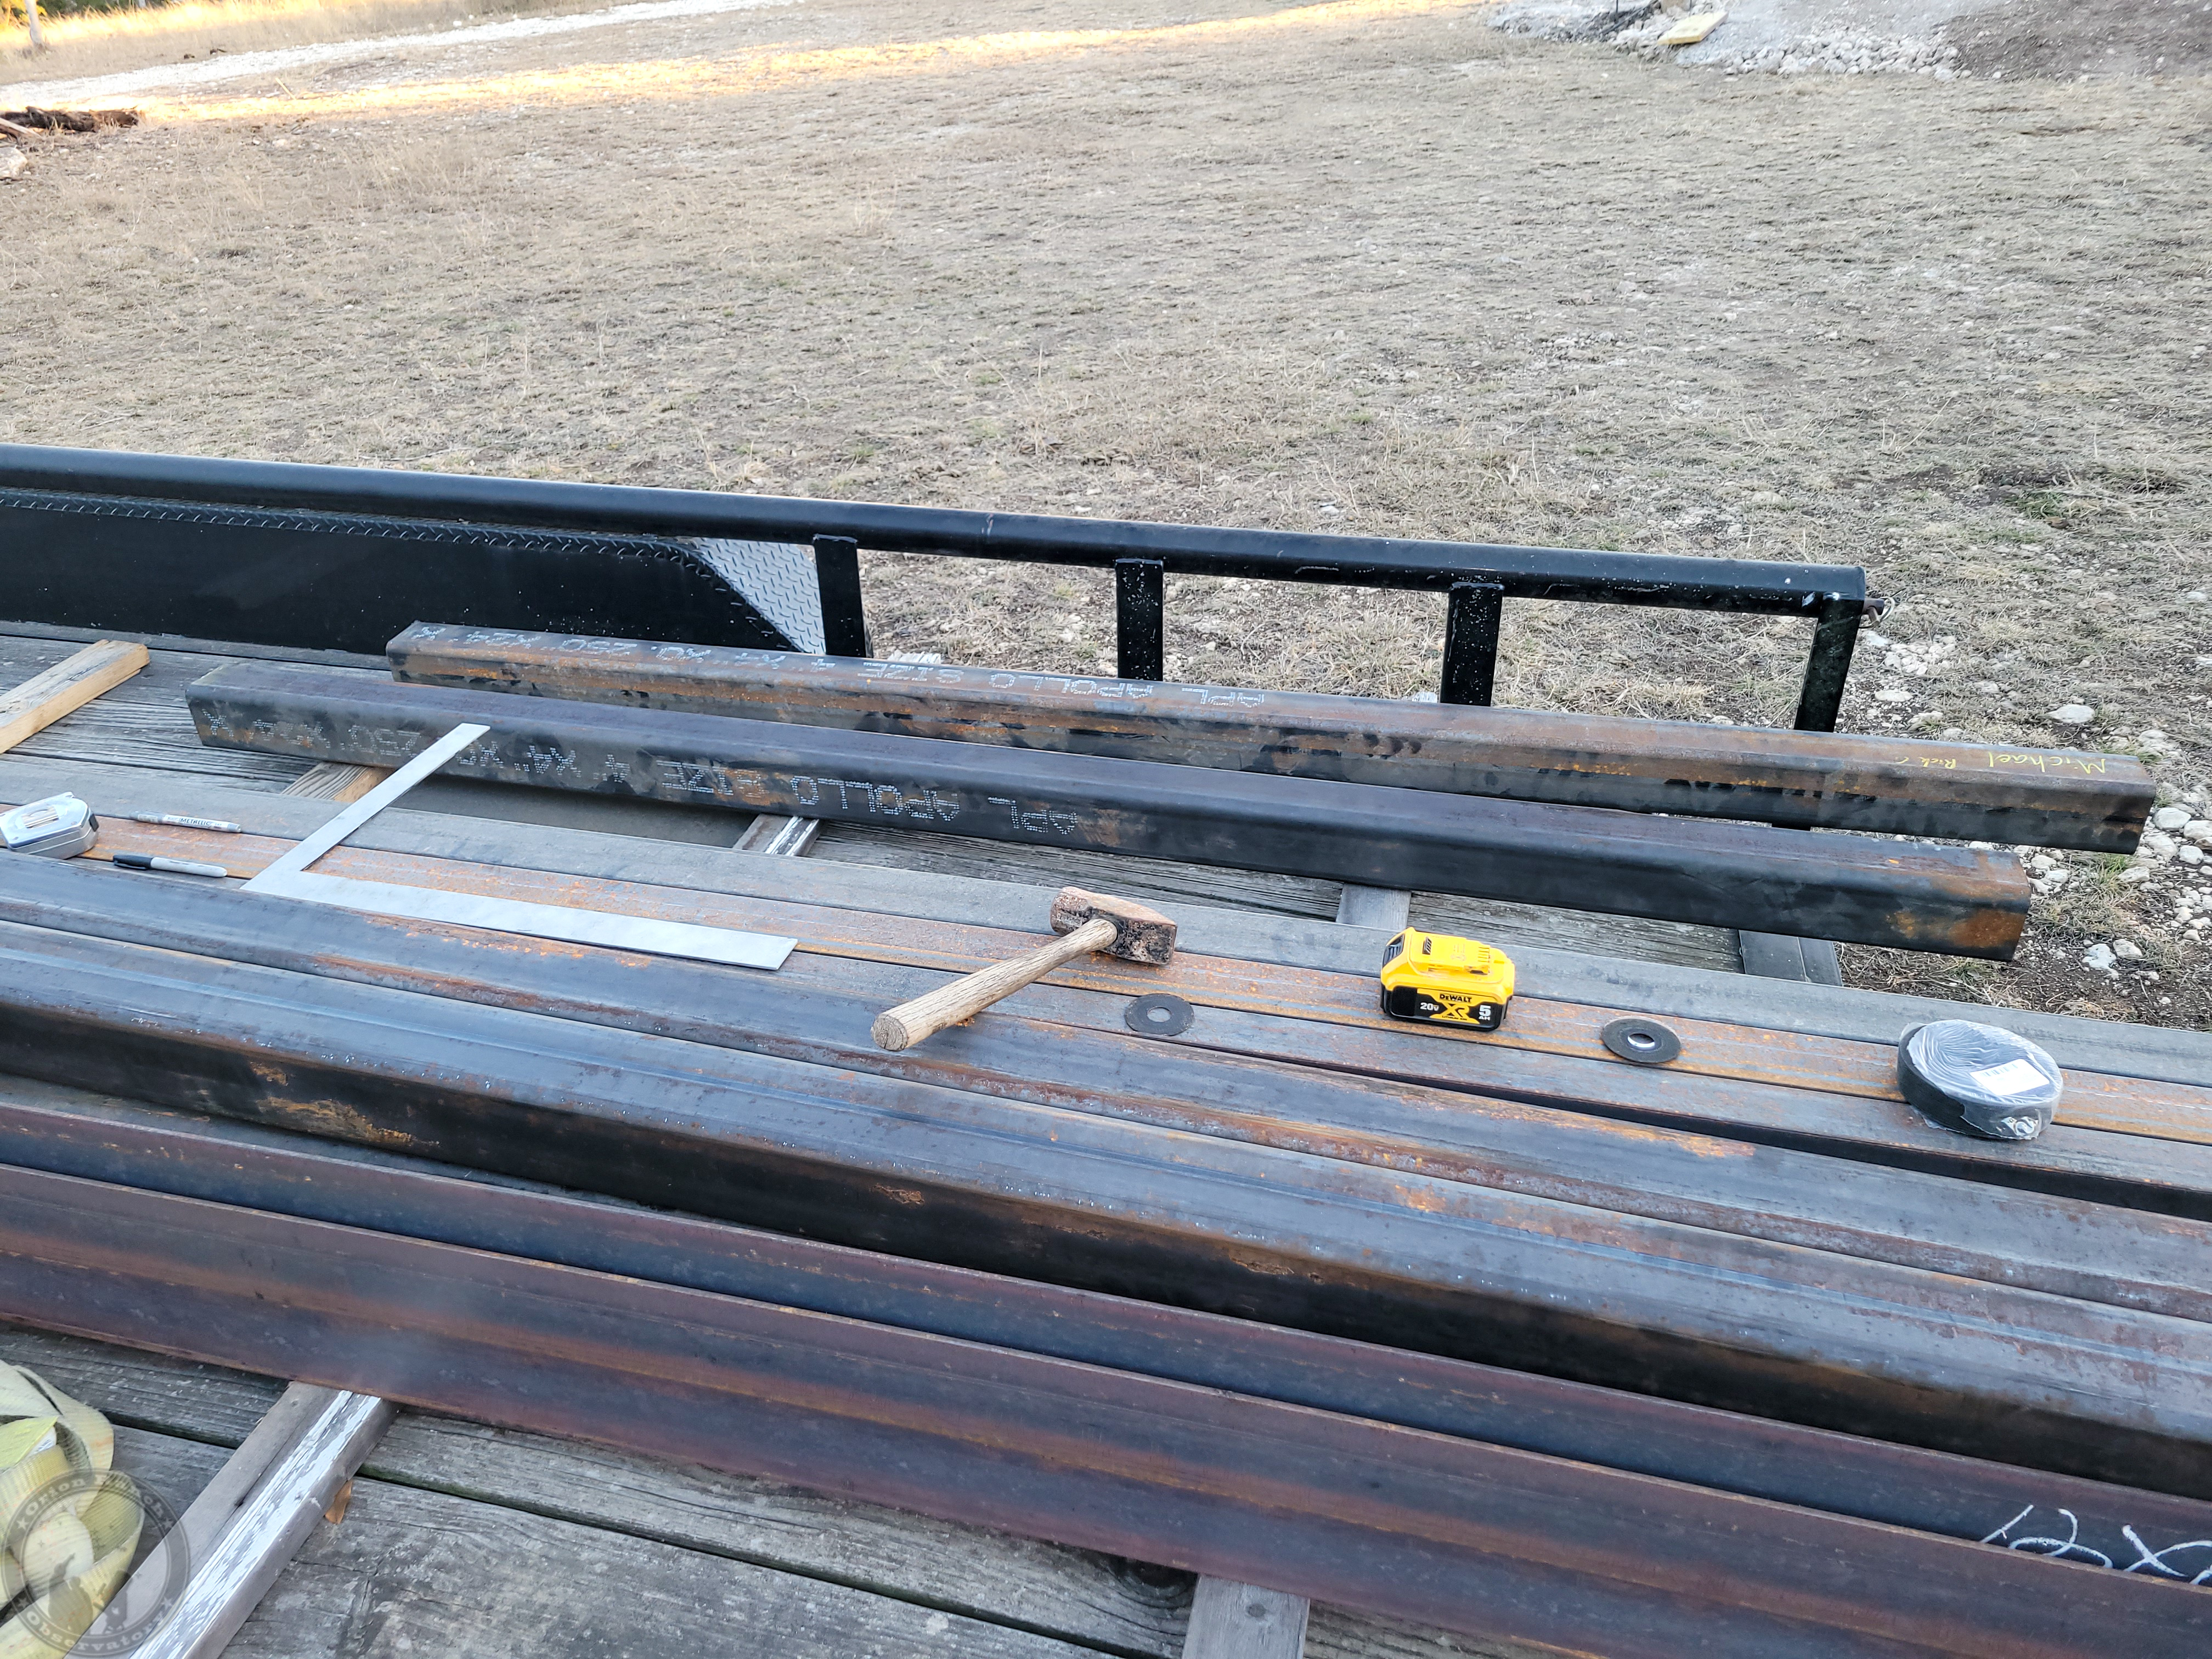
Ok, so the steel is on order and I’m planning to start demolishing the existing rail system tomorrow.

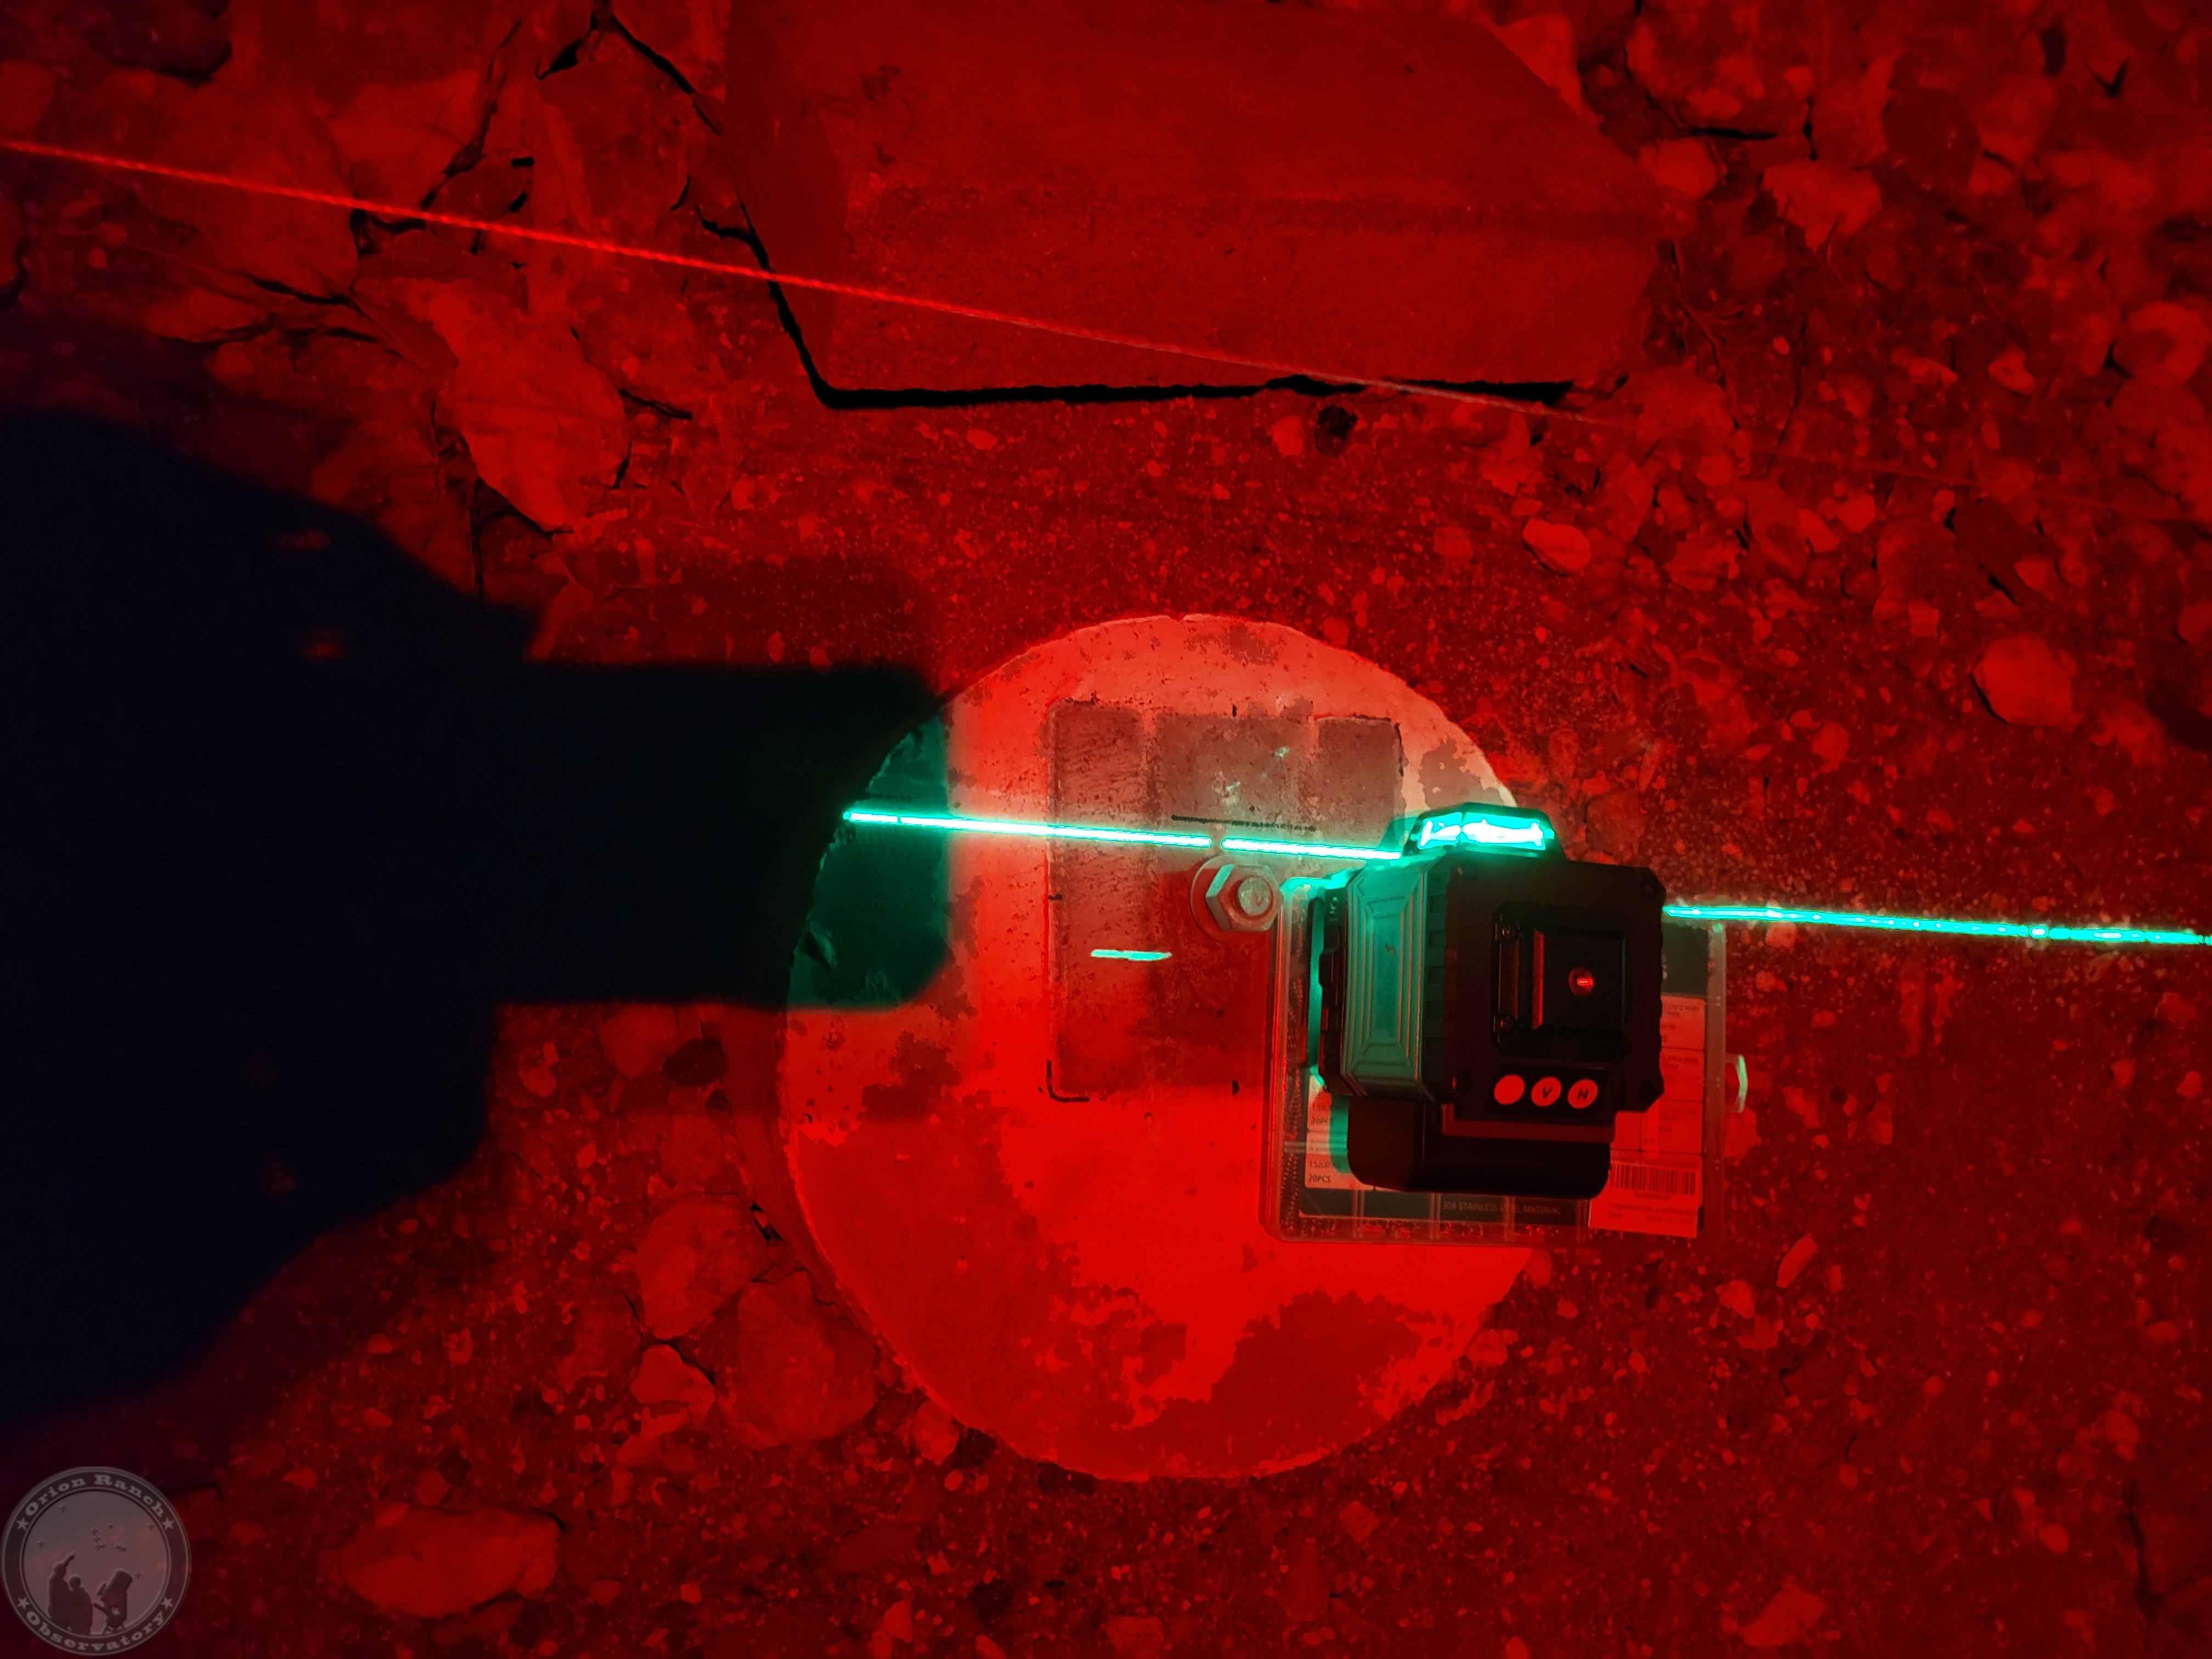
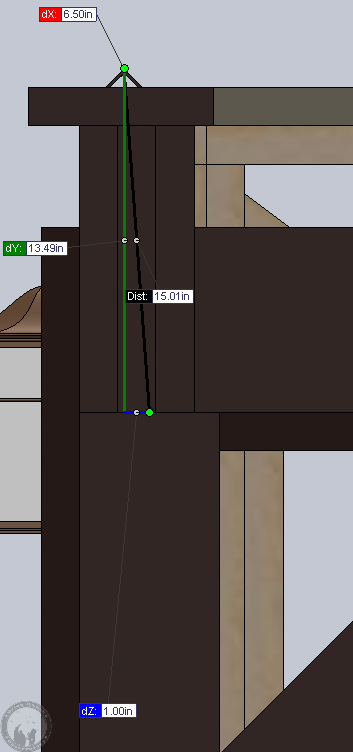
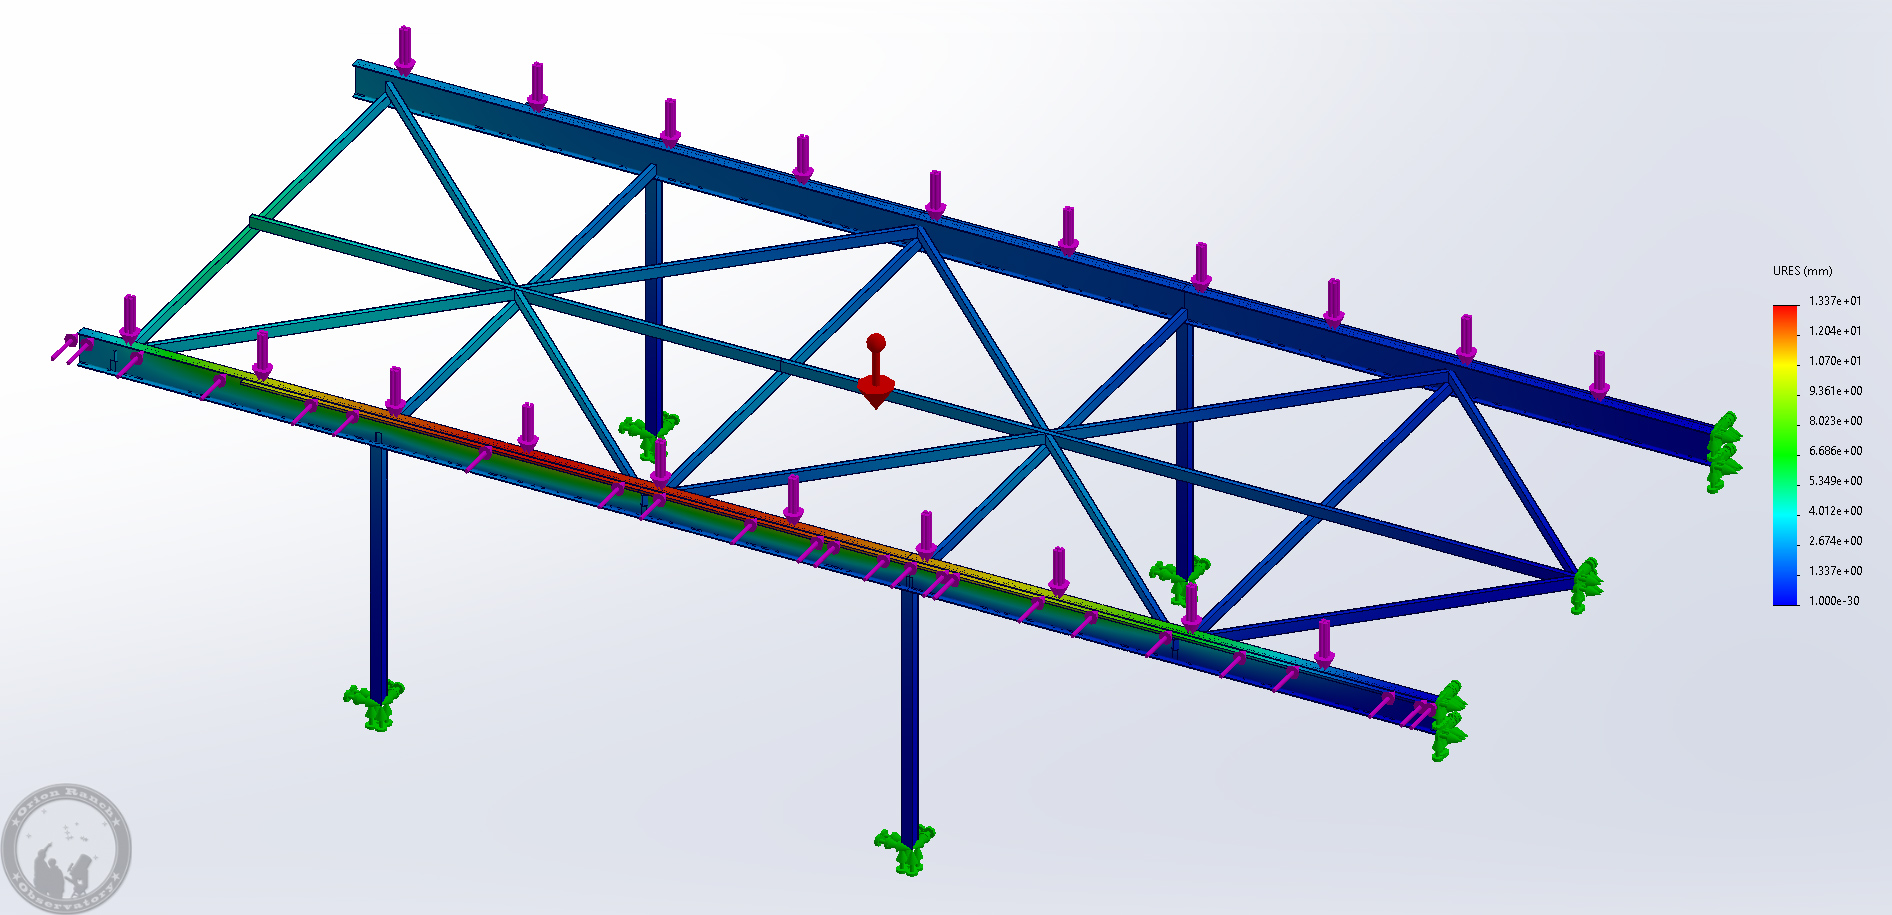
I’ve run some static load simulations to confirm how strong this will be under load.  The most sag under gravity is just the bracing cross members that will sag a mm or two under their own weight.  With the roof rolled completely off the observatory (observatory wall/rail repair mode) so that it’s out on the 9′ overhang I’m going to have, the H-beam will move about 1.5 mm.  Normally the roof will remain over the warm room and never go out on the overhang, so it’s really just because I was going to have to pay for the metal regardless, so why not use it?!!

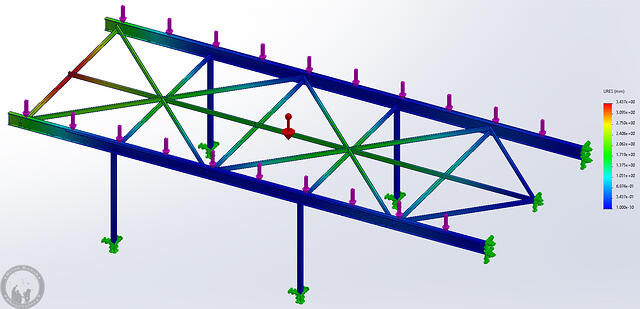
I did have to lower the diagonal cross braces to be on the centerline of the beam rather than up at the top, since I’d forgotten that the end cap of the roof hangs down past the top of the rail.  So I don’t have quite the amount of twist prevention that I would have had, but I don’t think it will be a problem.  I applied 10,000 lbs of force to the edge of the top flange and it only moved 33 mm (about 1.25″).  Applying a 100 MPH horizontal wind load on the entire roof gives about 3500 lbs of force, assuming the roof was really a flat surface.  I suspect the angle of the roof would convert much of that force to downward force instead of horizontal, but still, that’s showing a worst case of ~13 mm (half an inch).  Hopefully I’ll never have the roof open in 100 MPH winds, but if I were to do so, I don’t think the rails would be going anywhere!

Here’s the final plan.

December 23rd, 2025

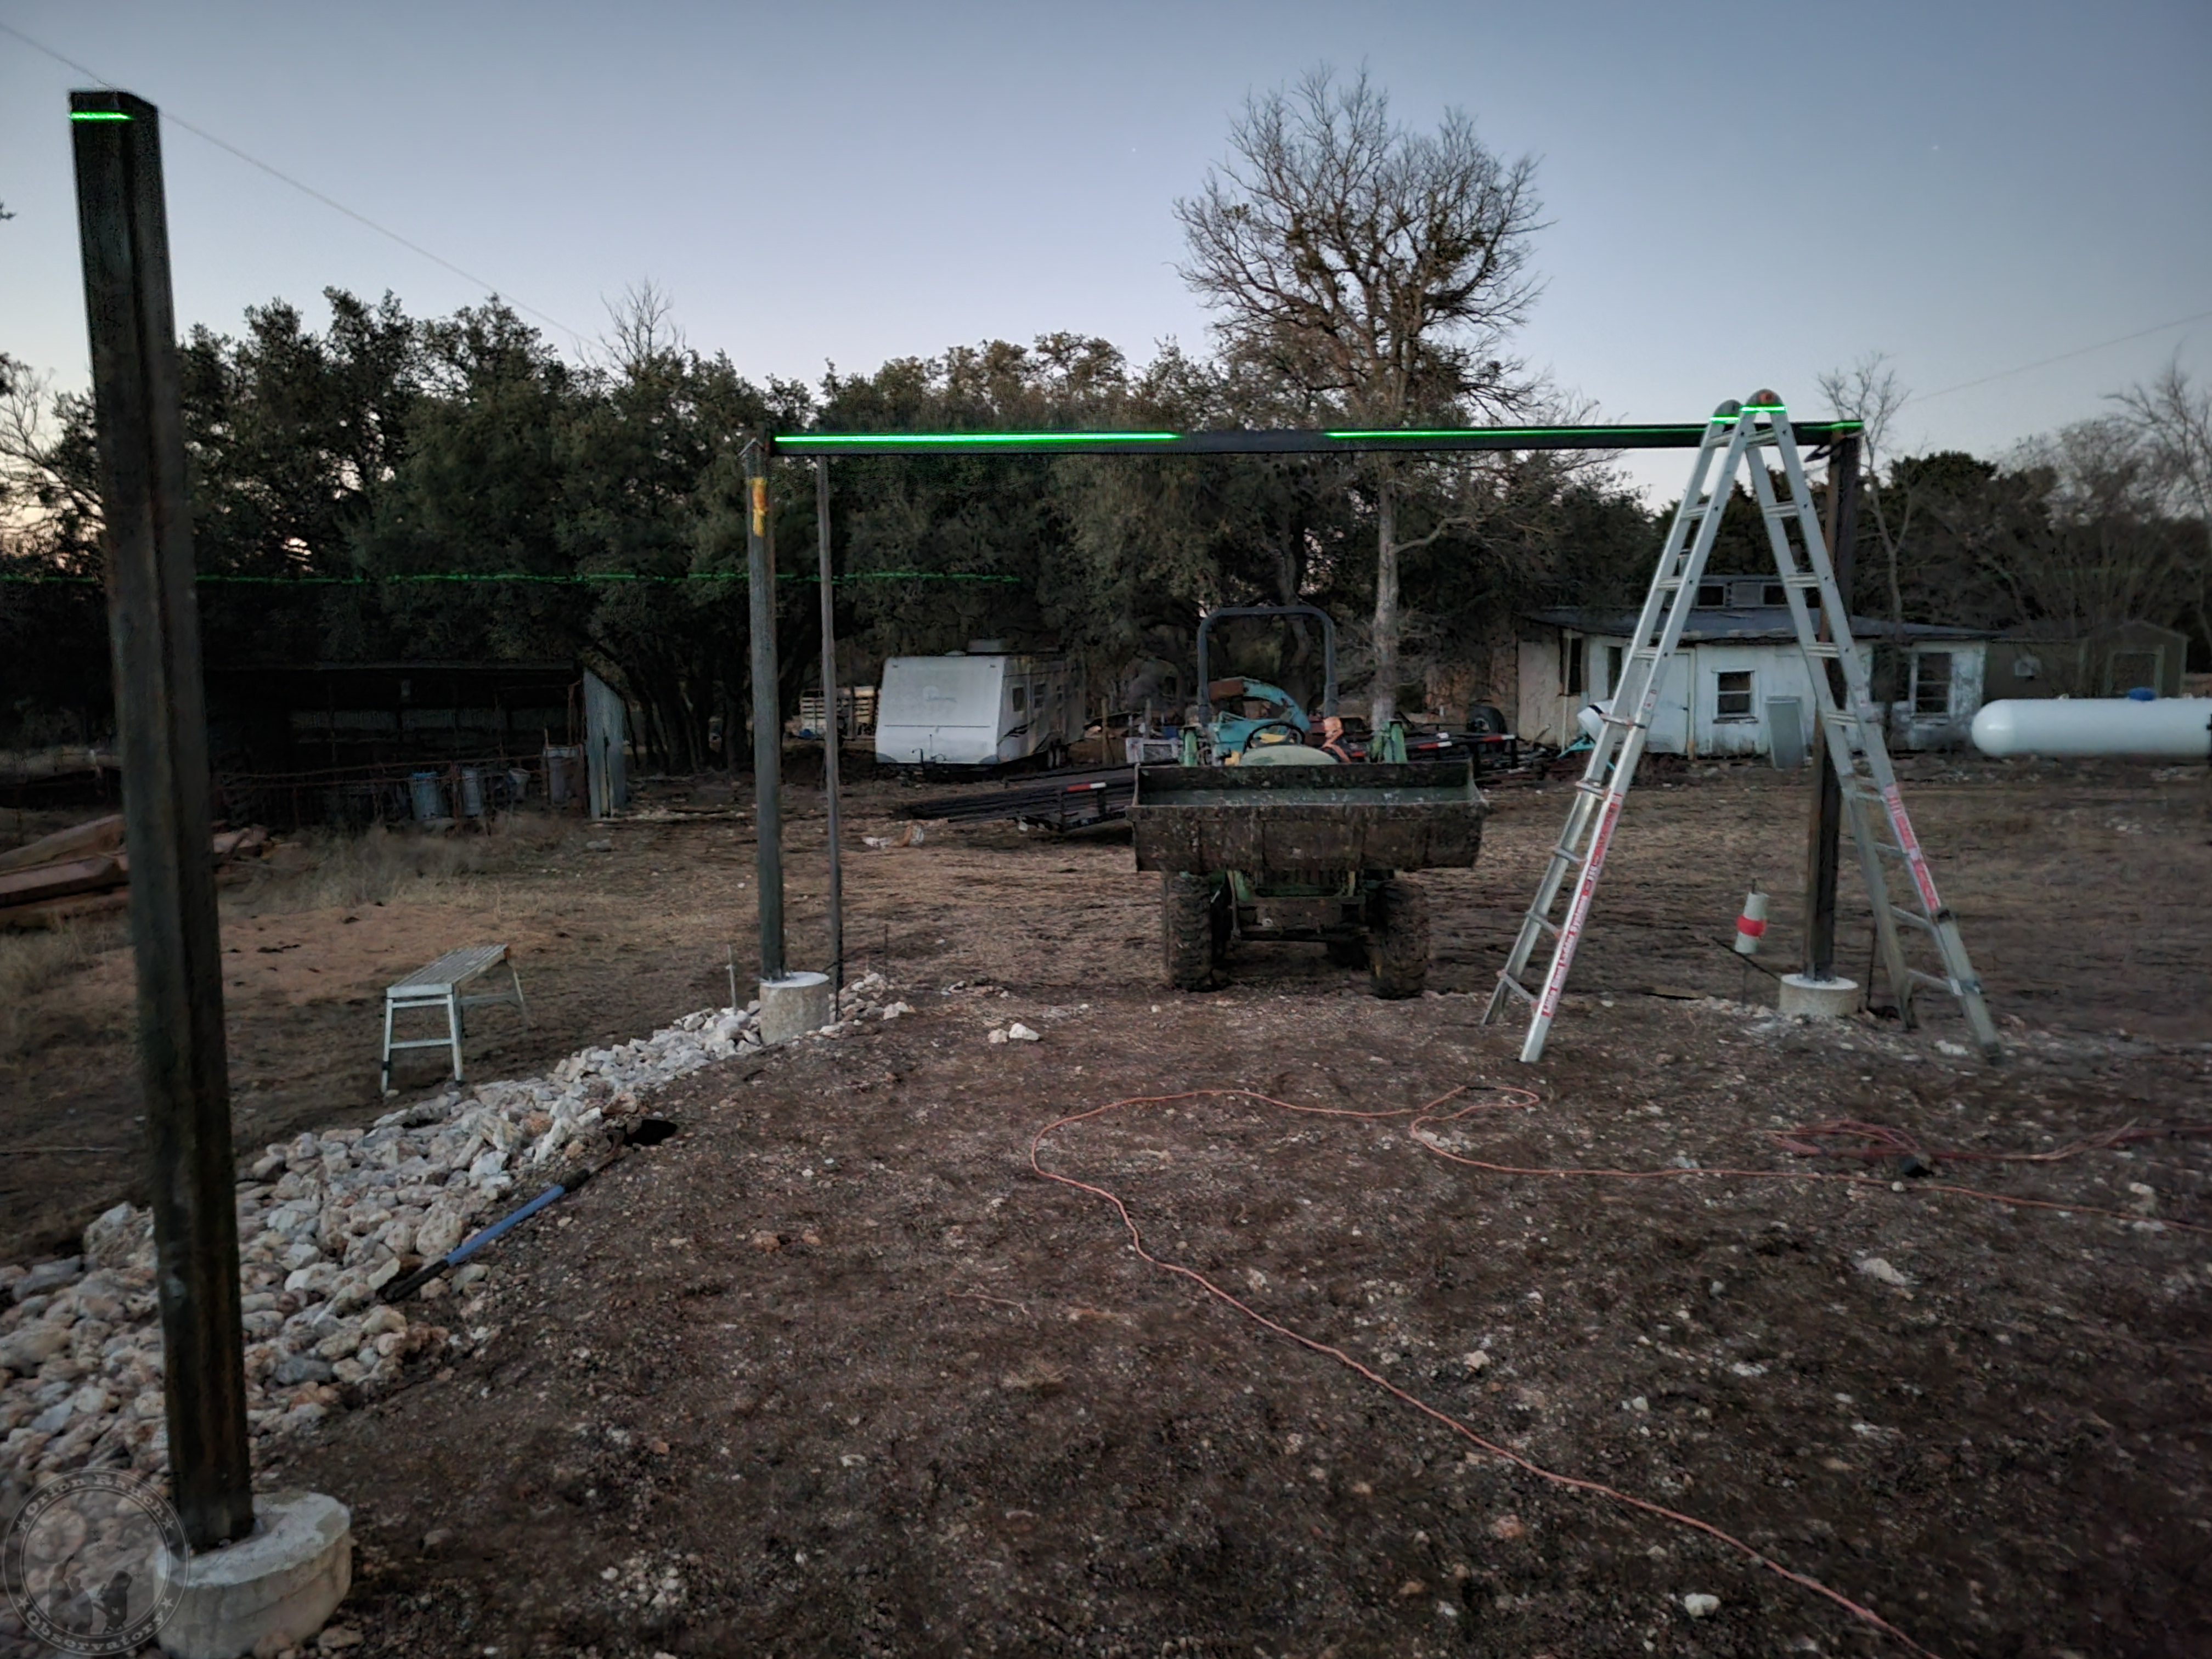
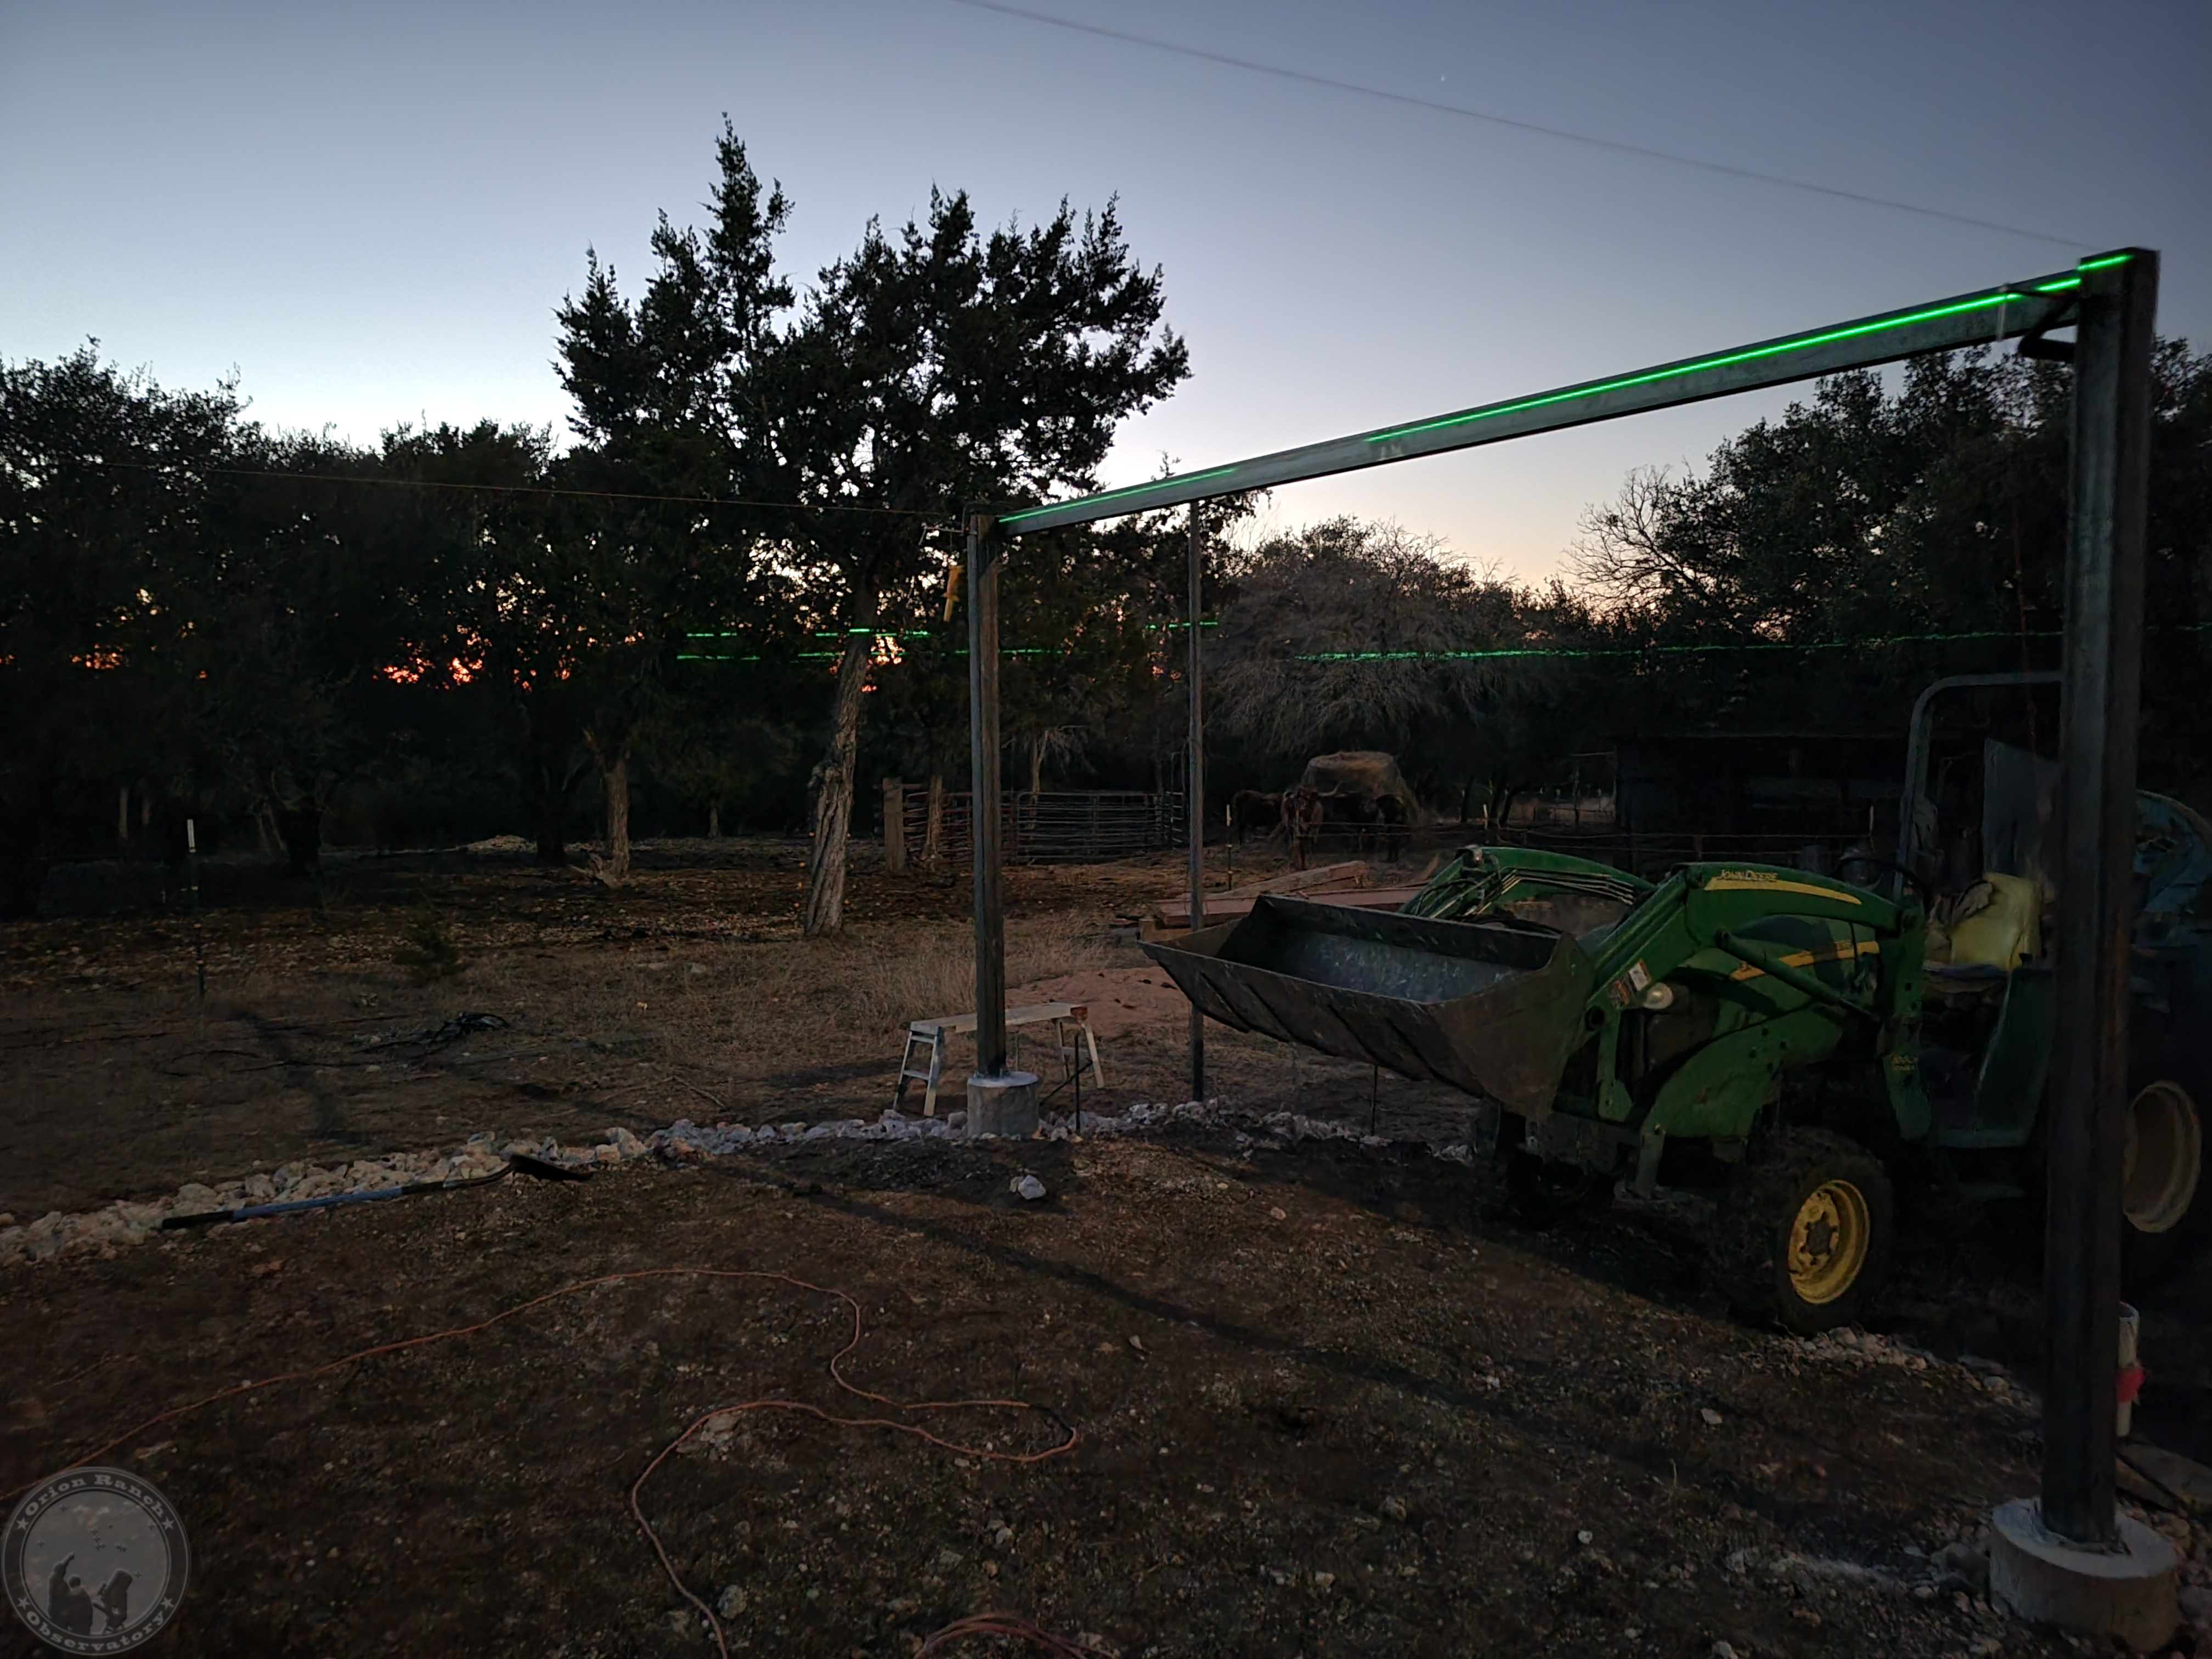
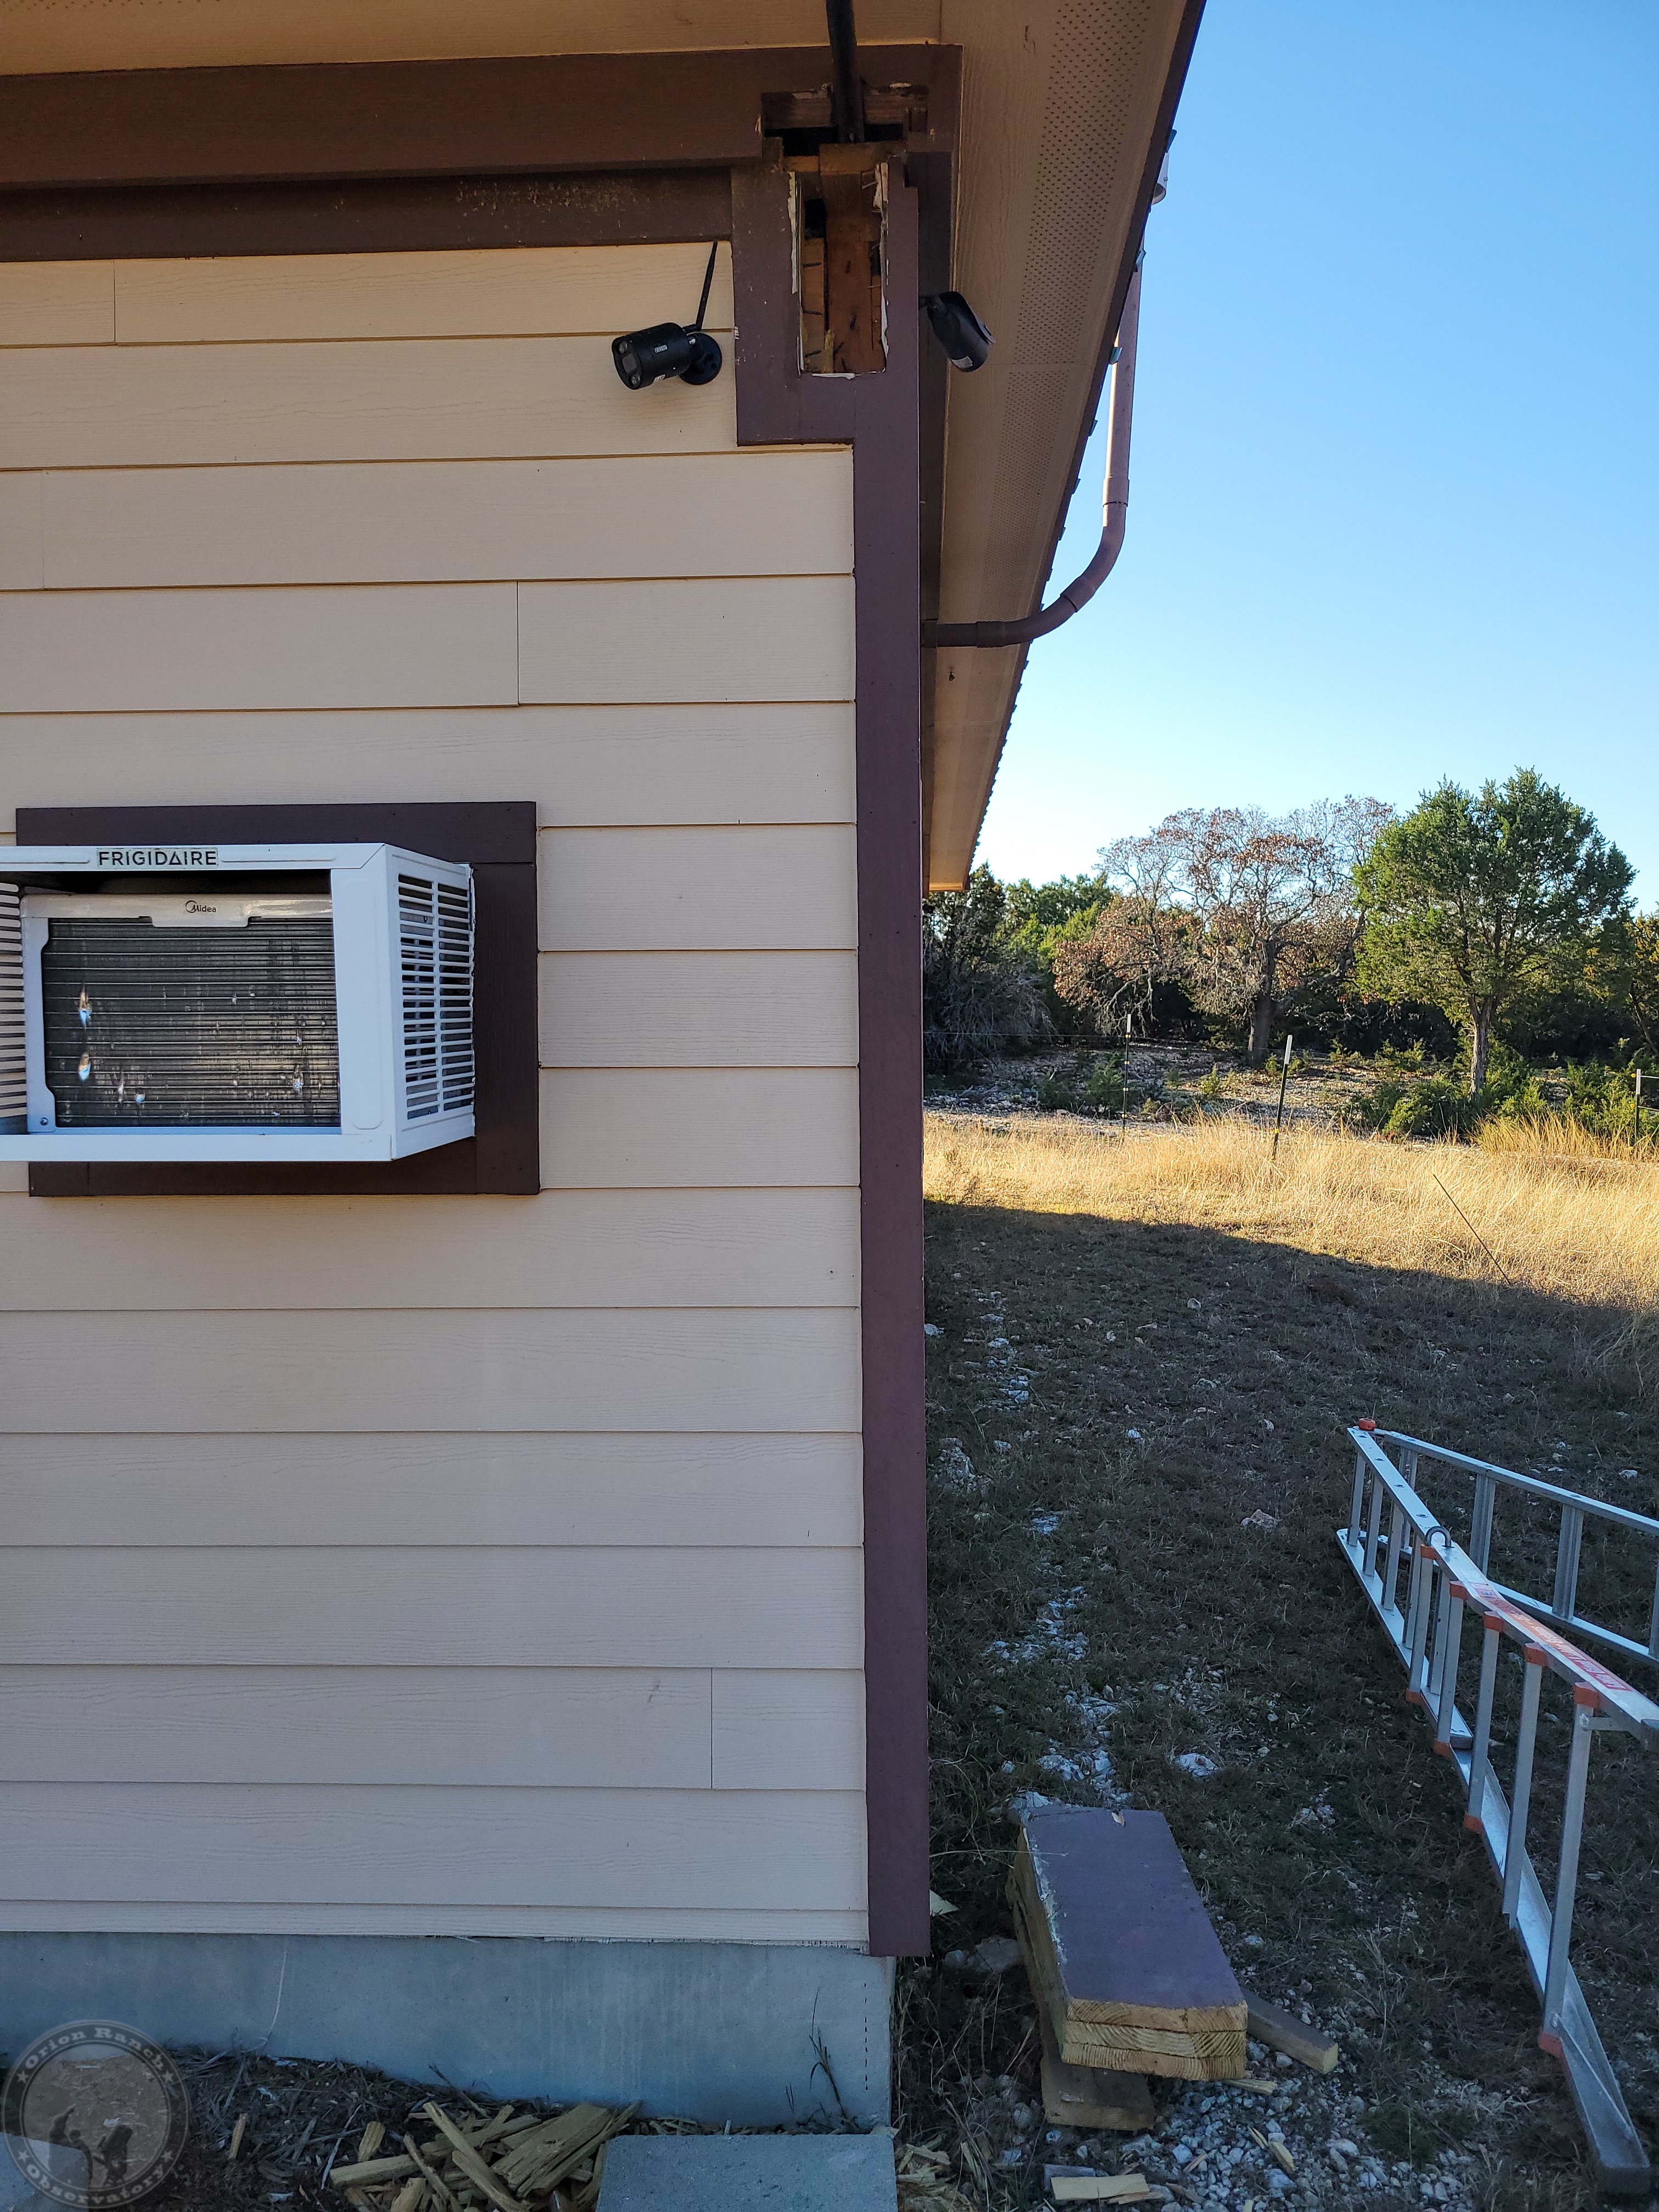
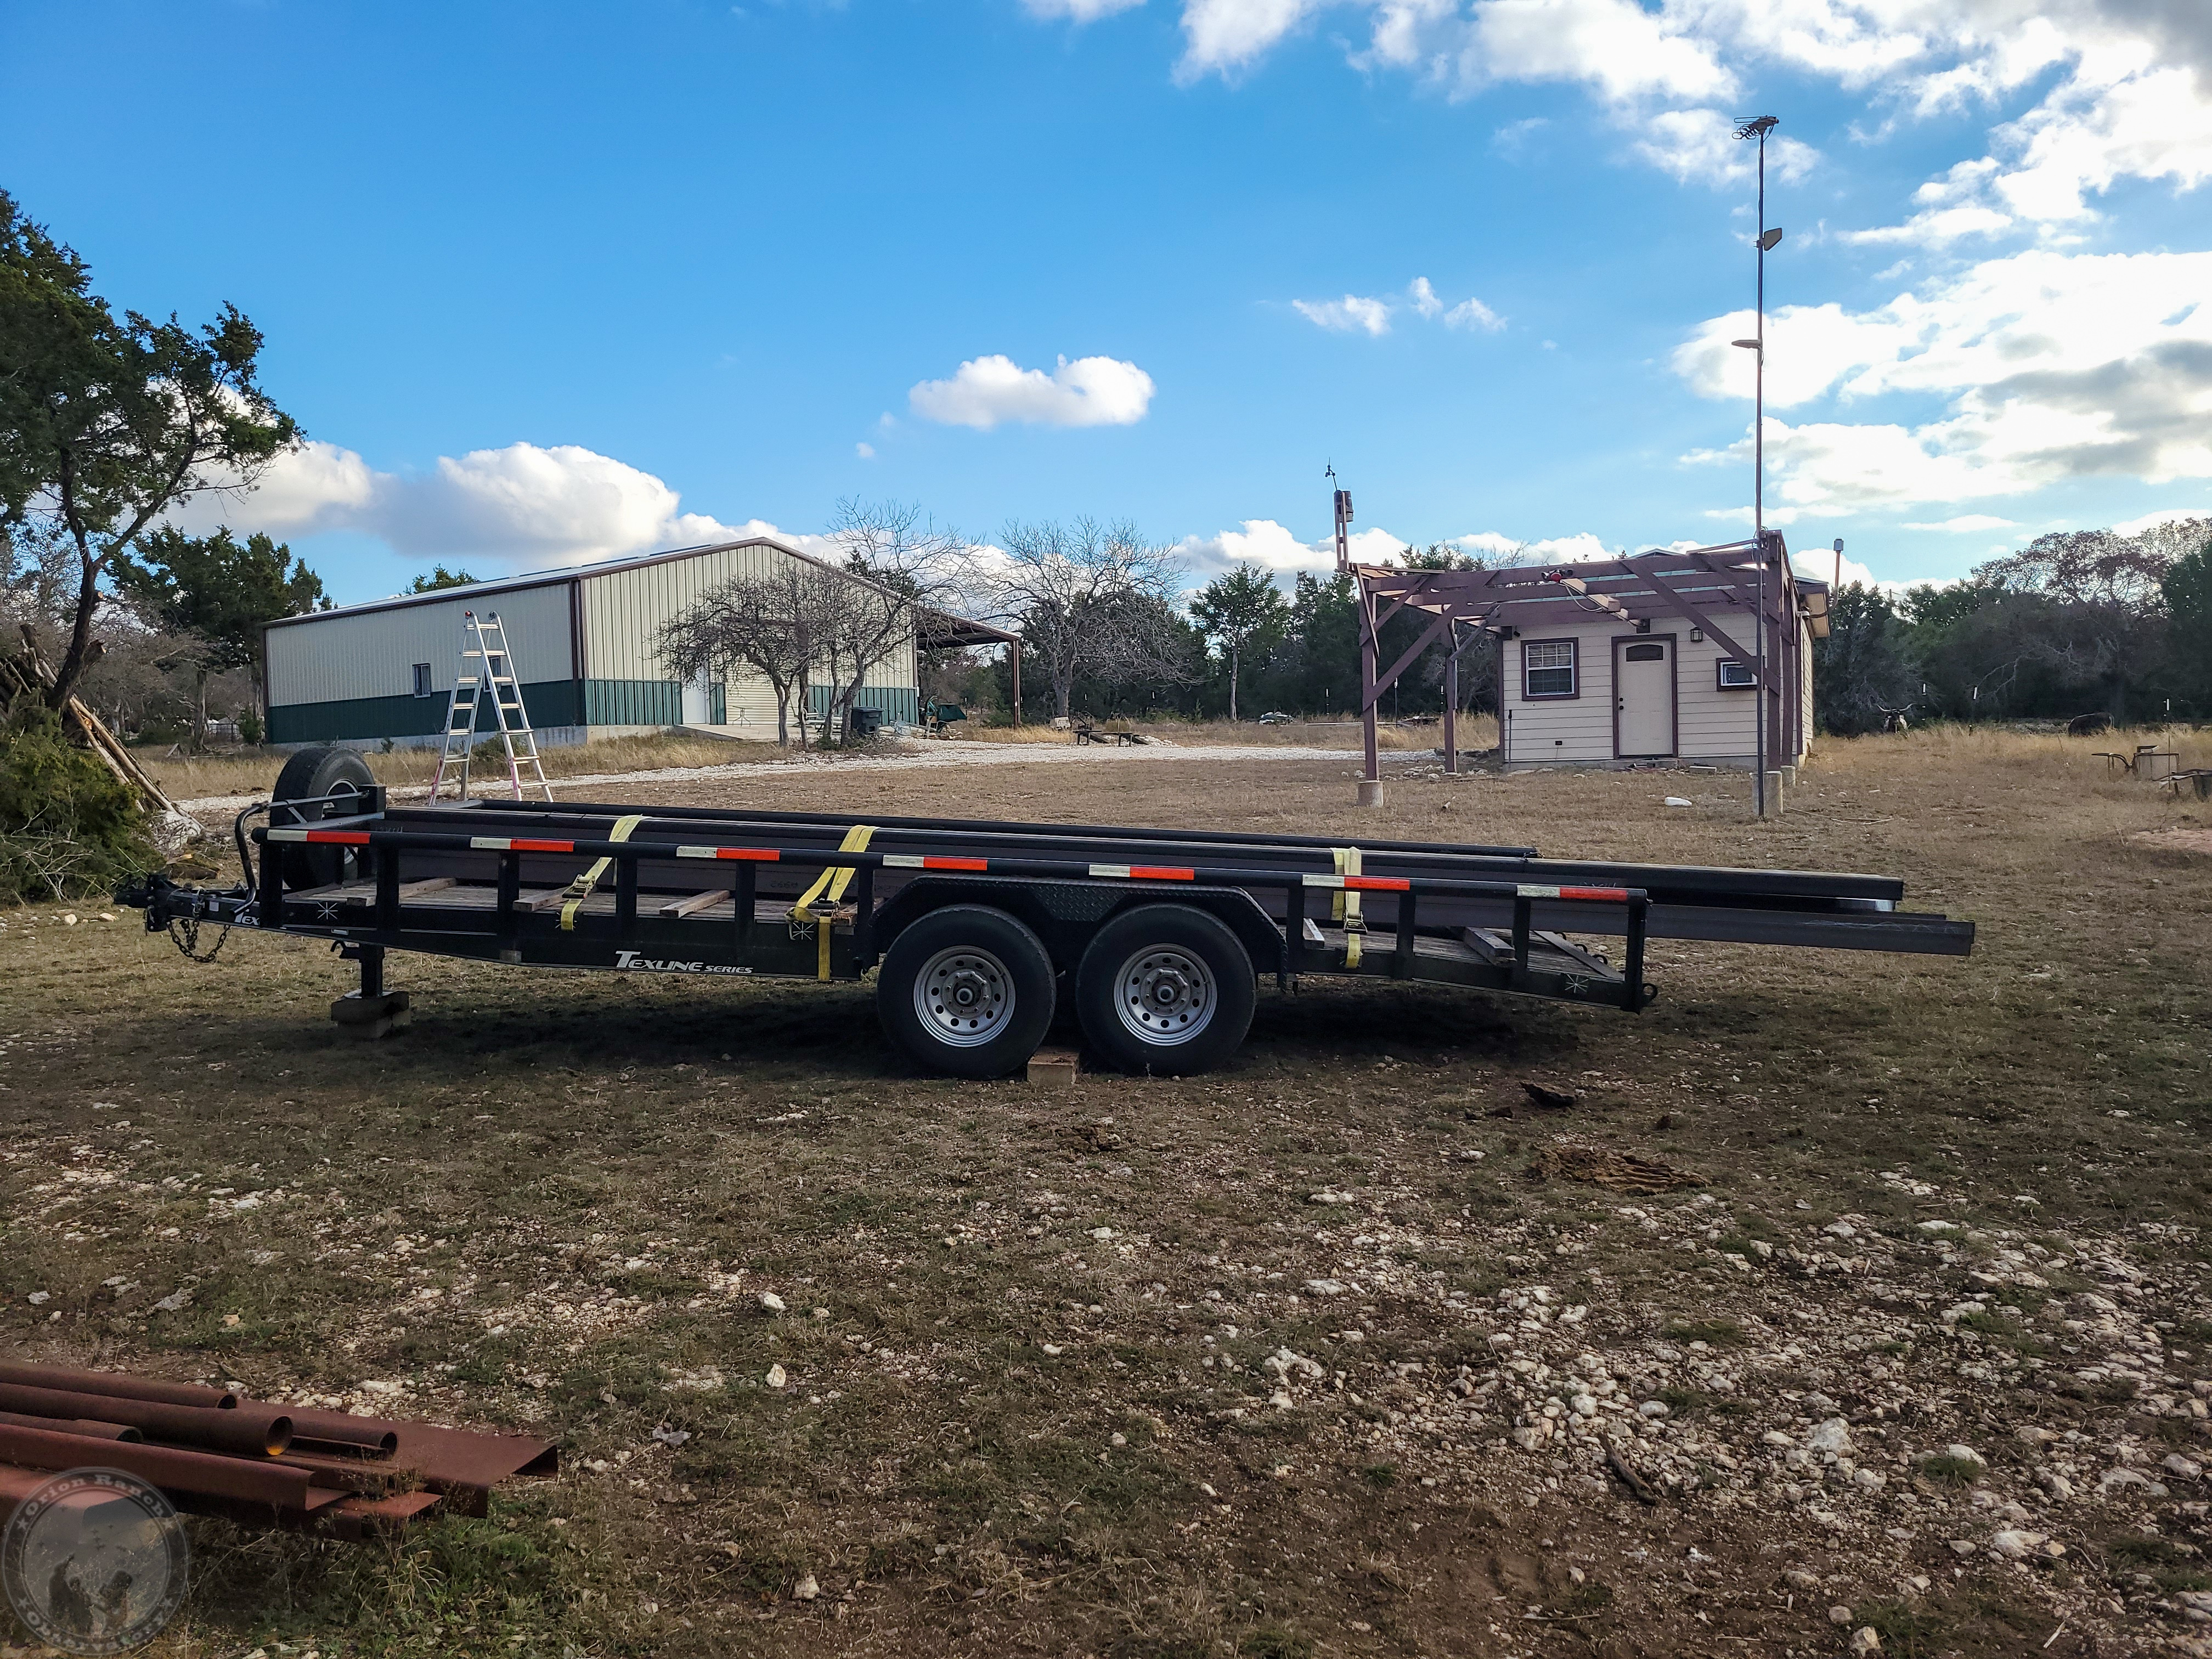
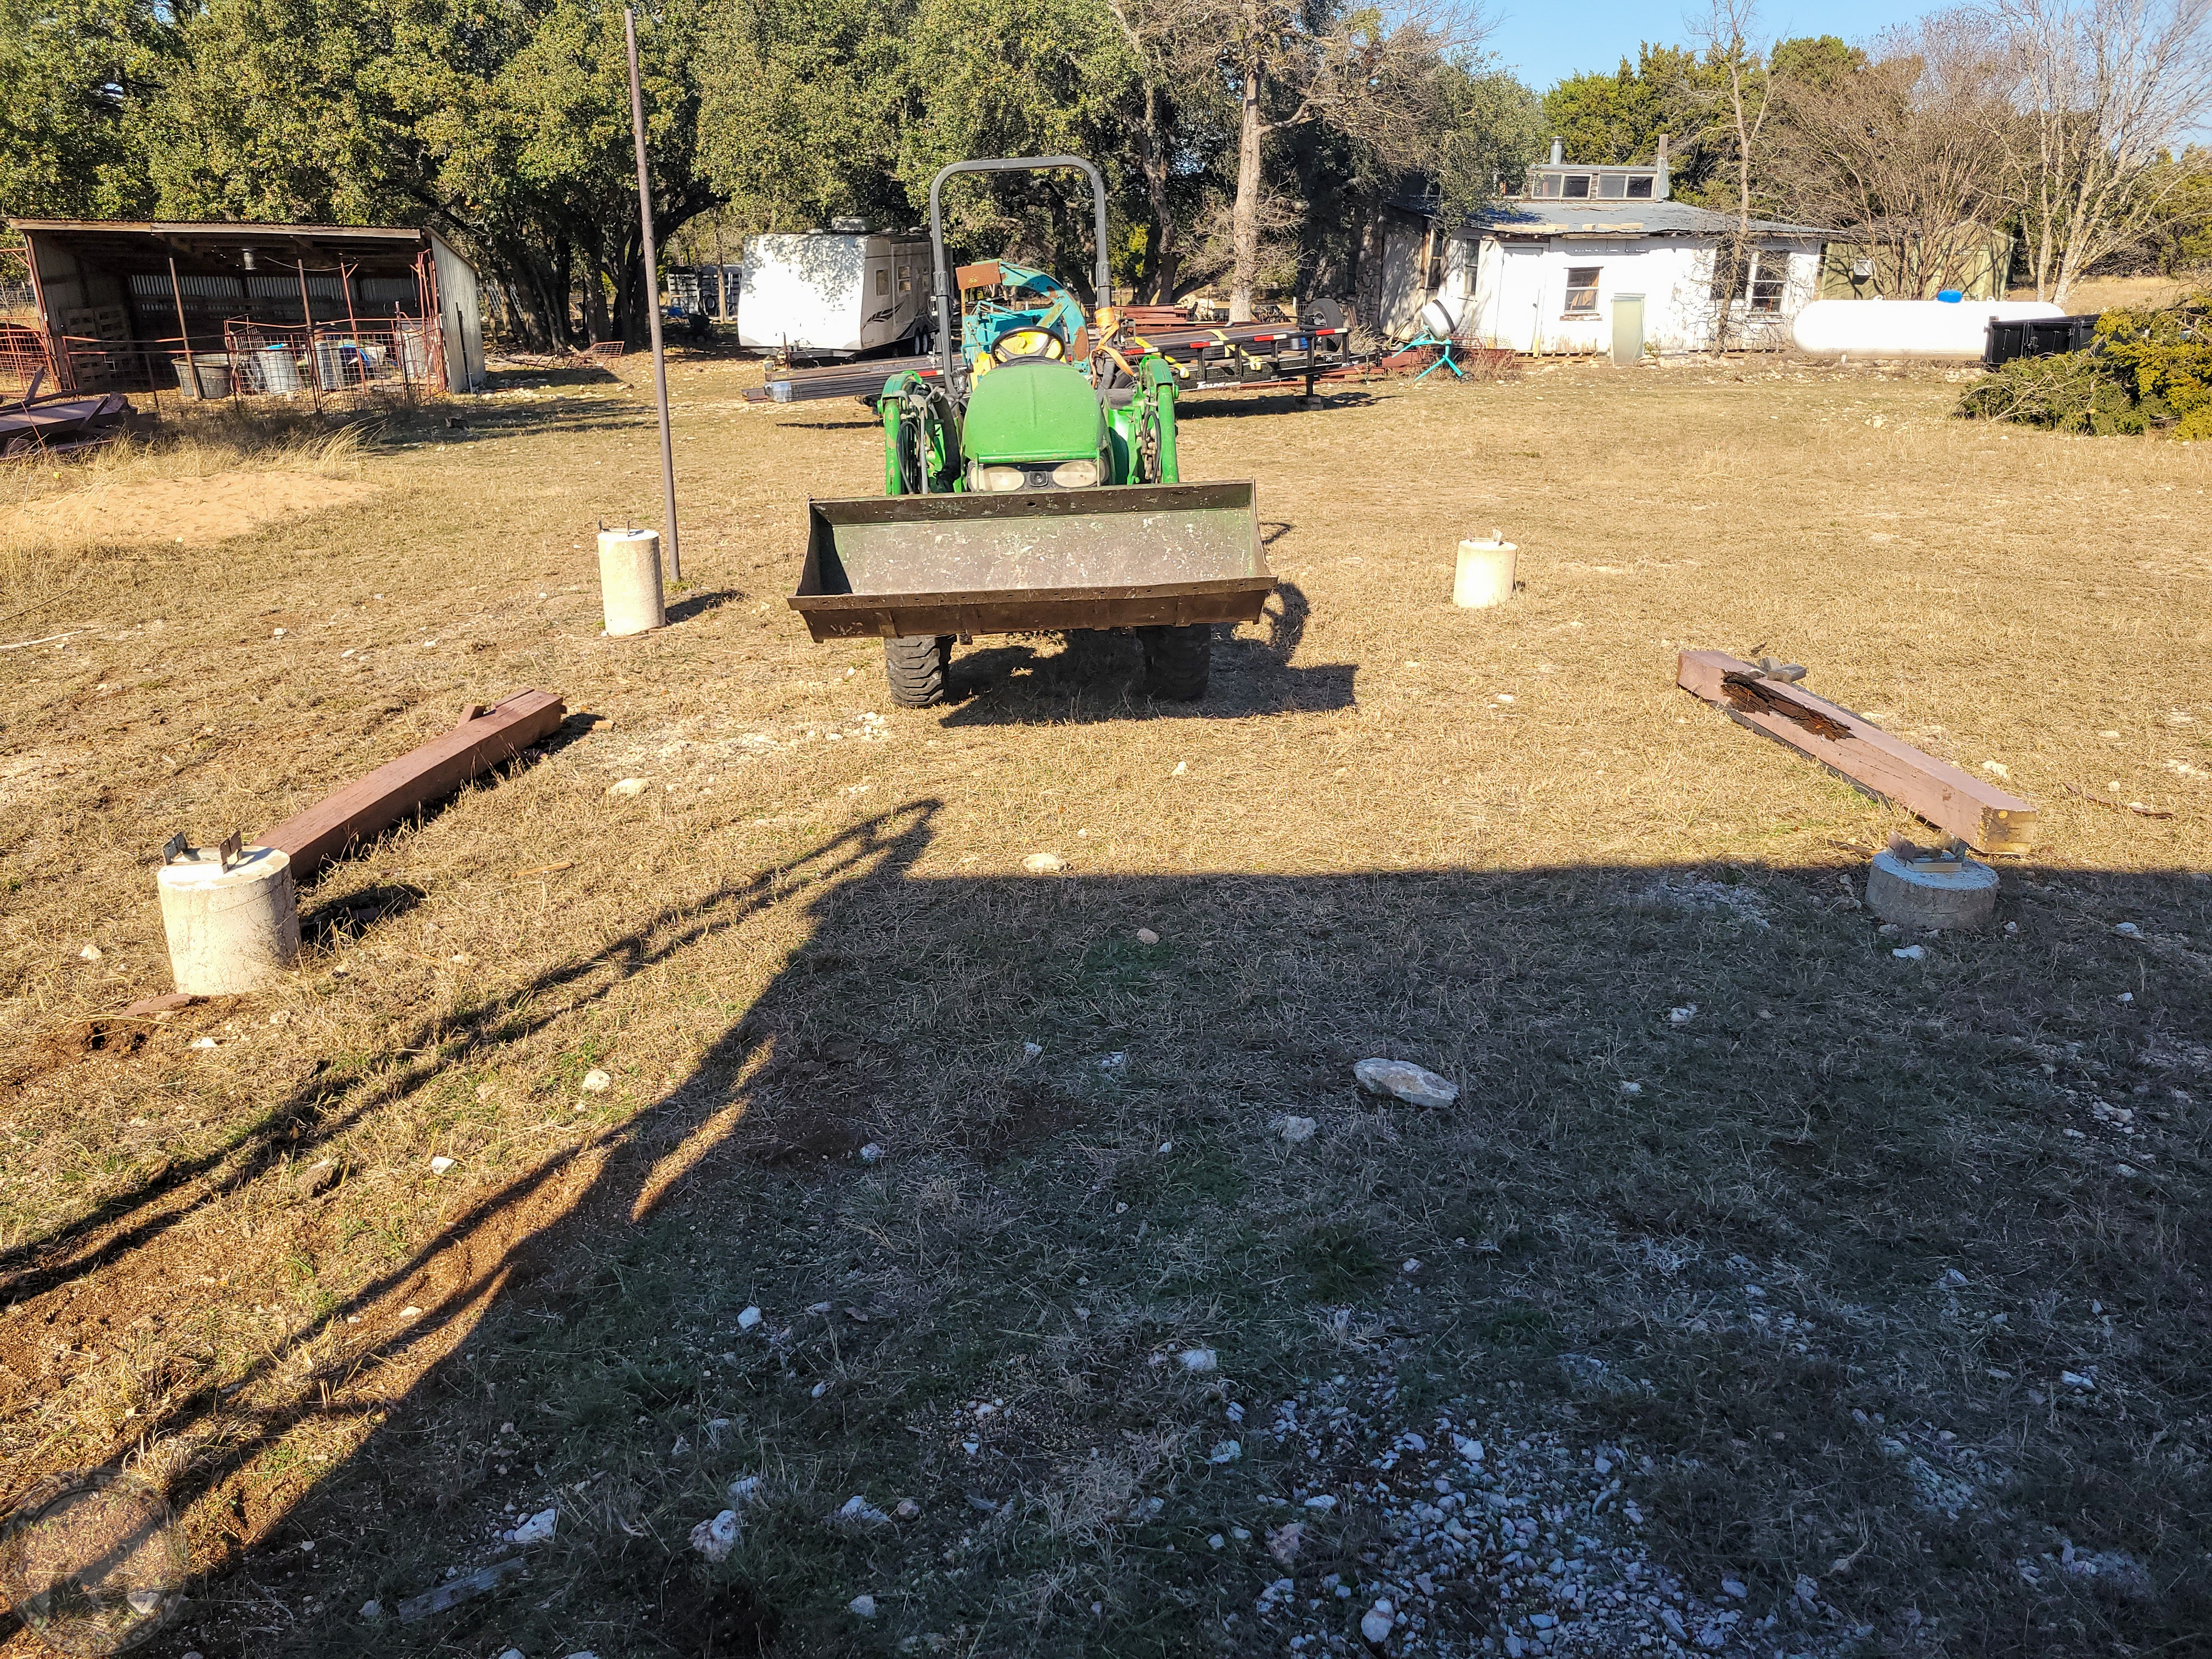
Well, now that I have a trailer load of steel, looks like I’m committed (or should be committed)!  So tomorrow I start demolition of the old rail system.  Had hoped to have that done or at least underway by now, but spent the time cleaning up the area and trimming some trees to have room to work and install some cameras for timelapse capture.

December 24th, 2025

Demolition Picture Time!

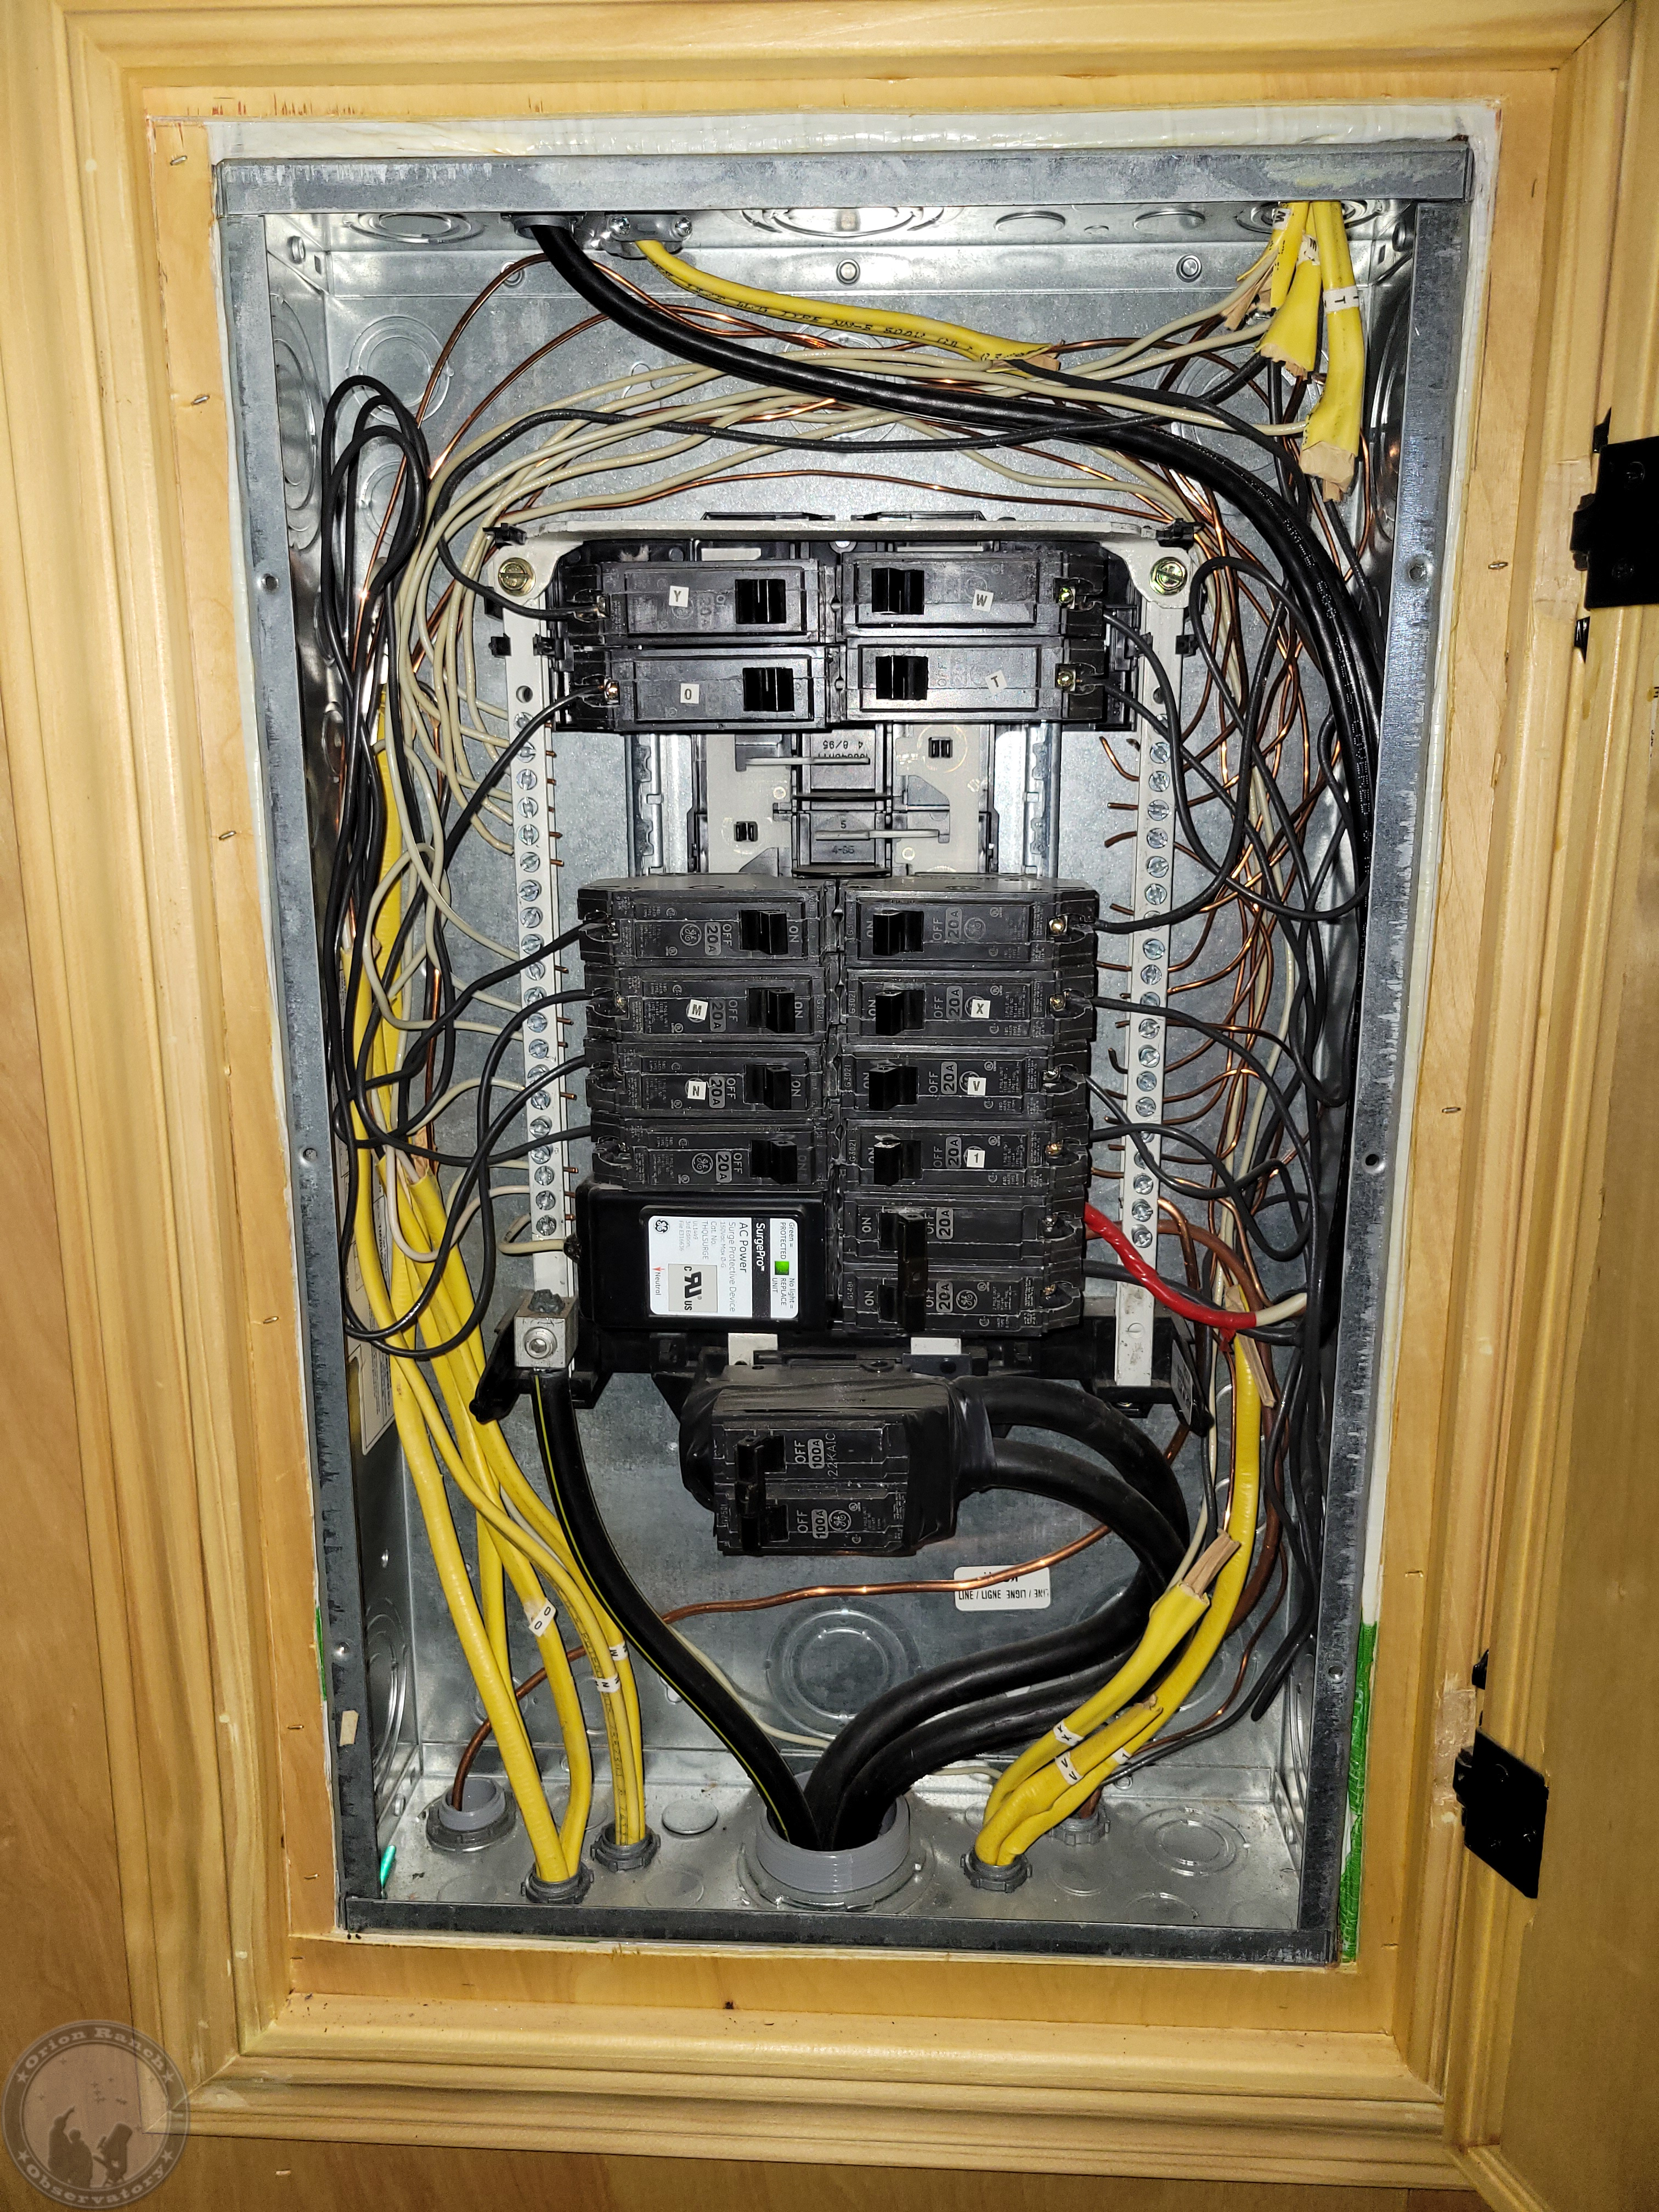
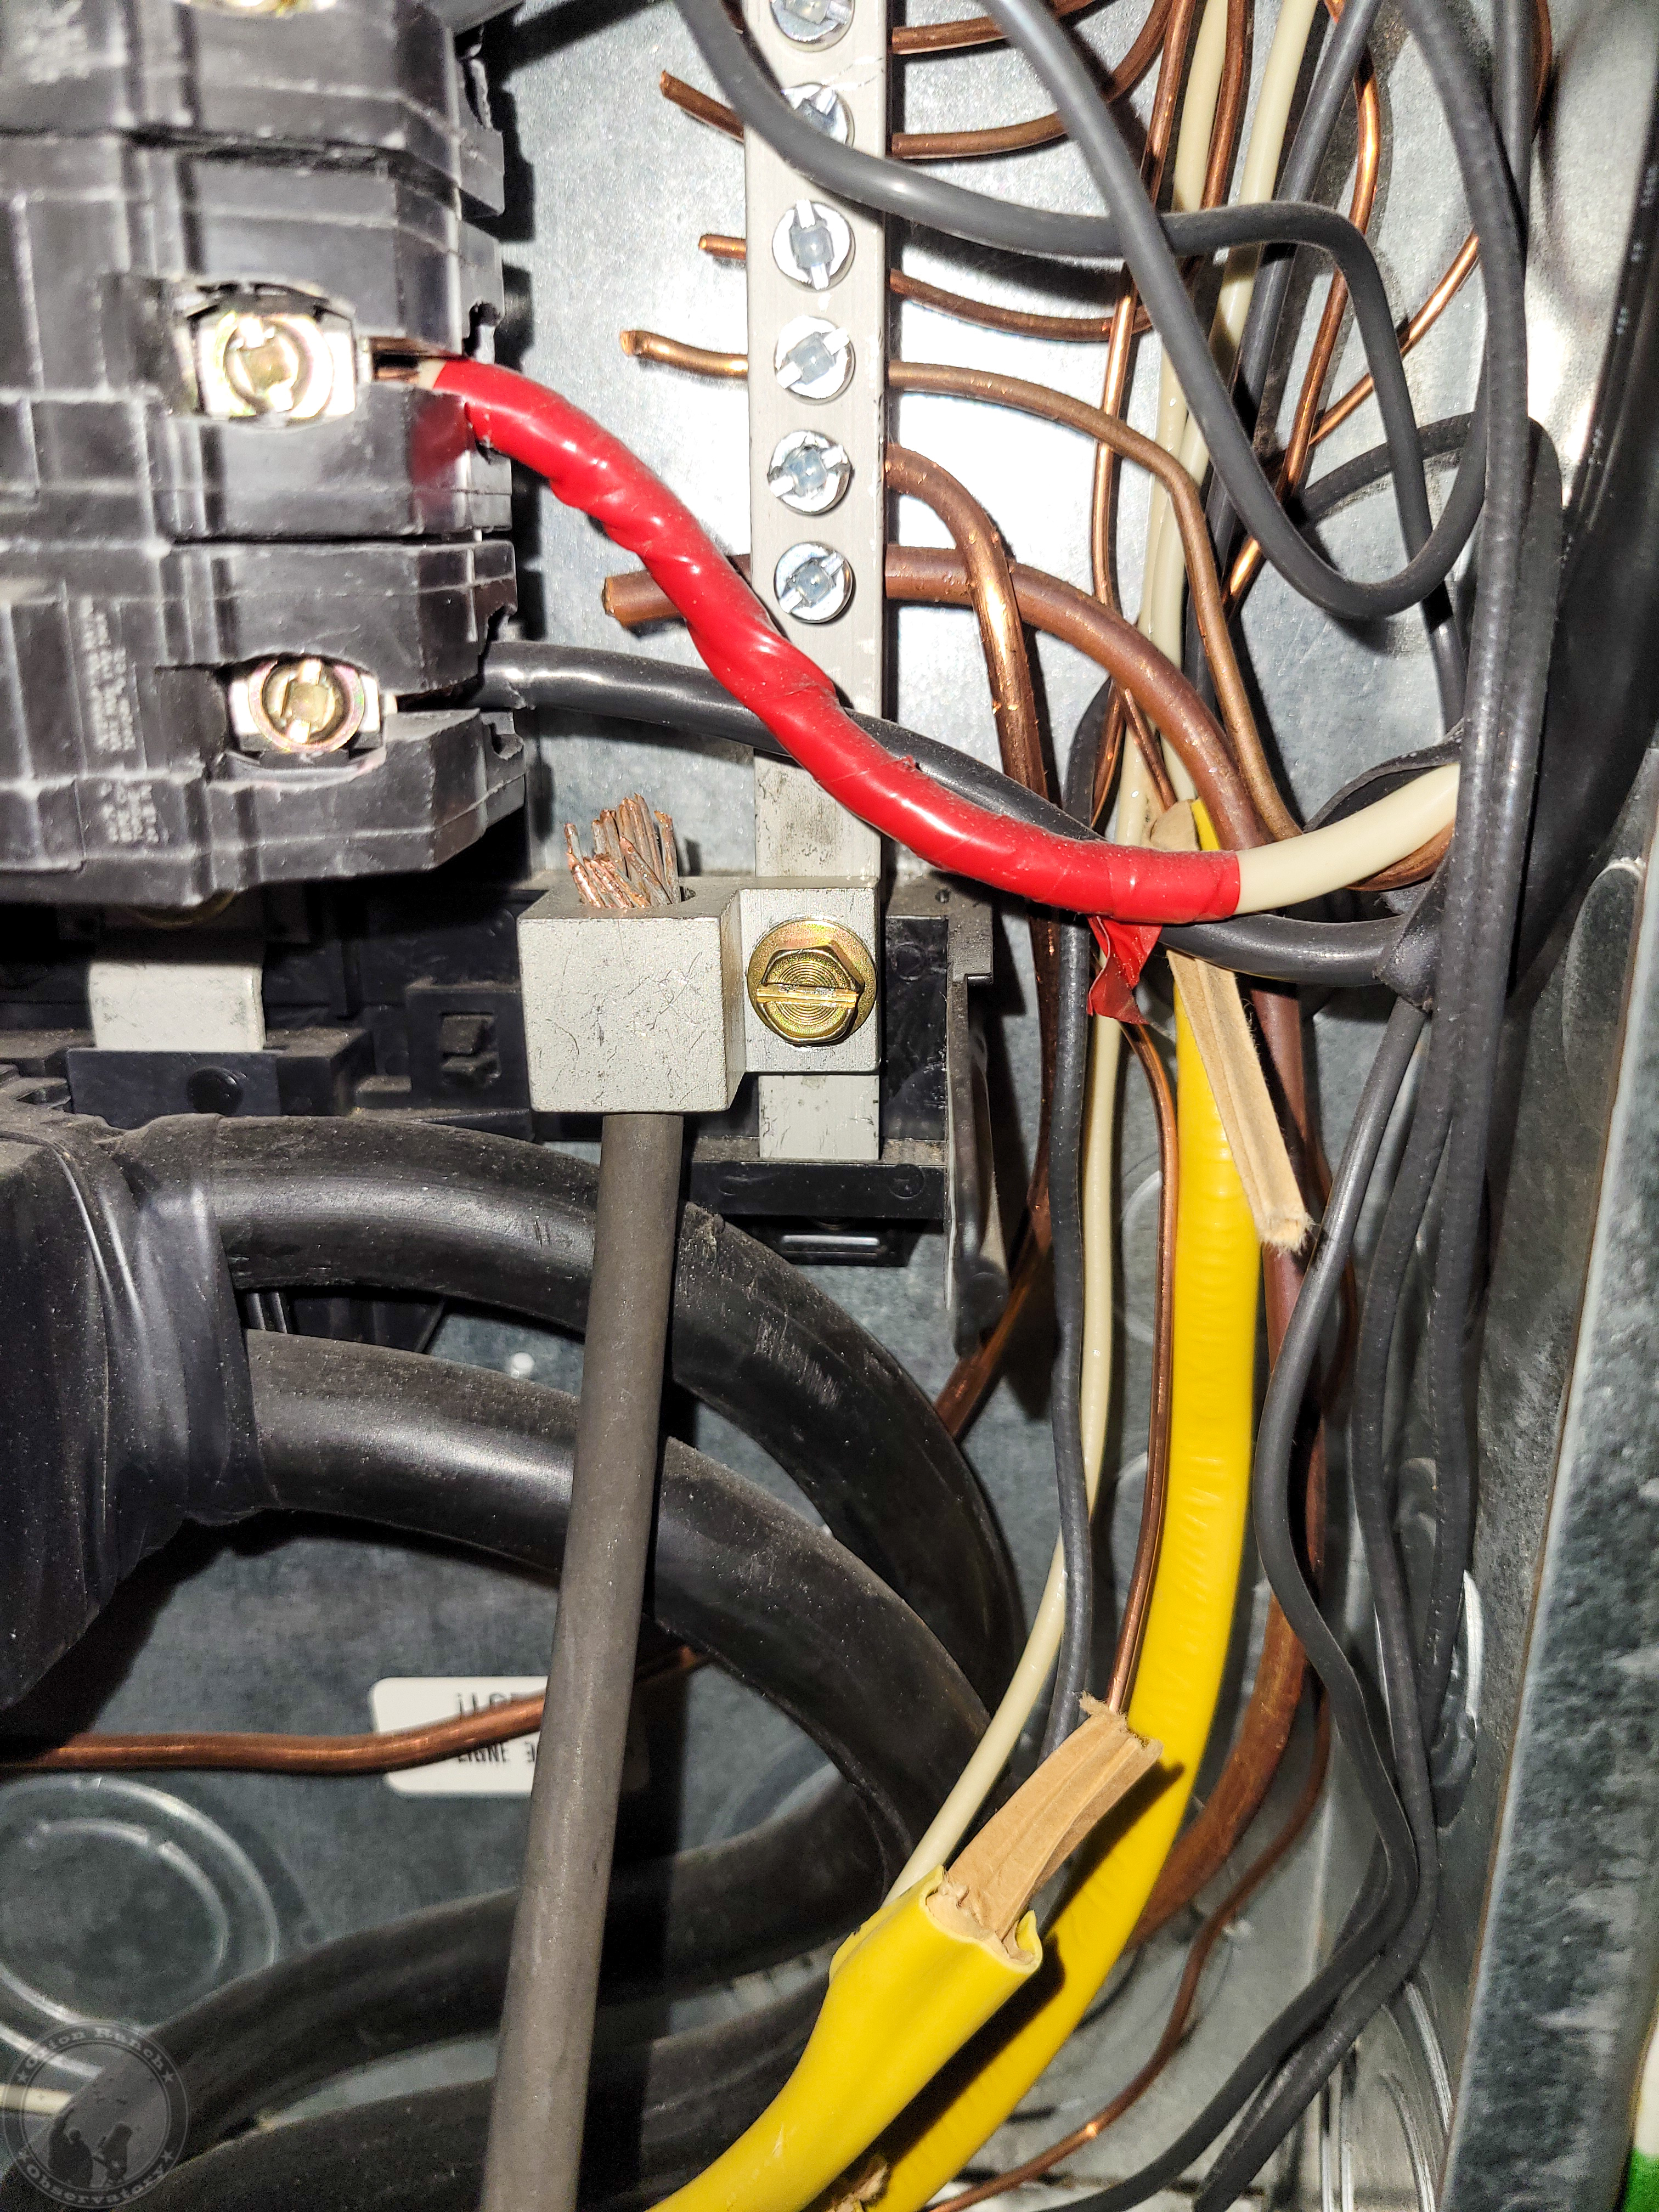
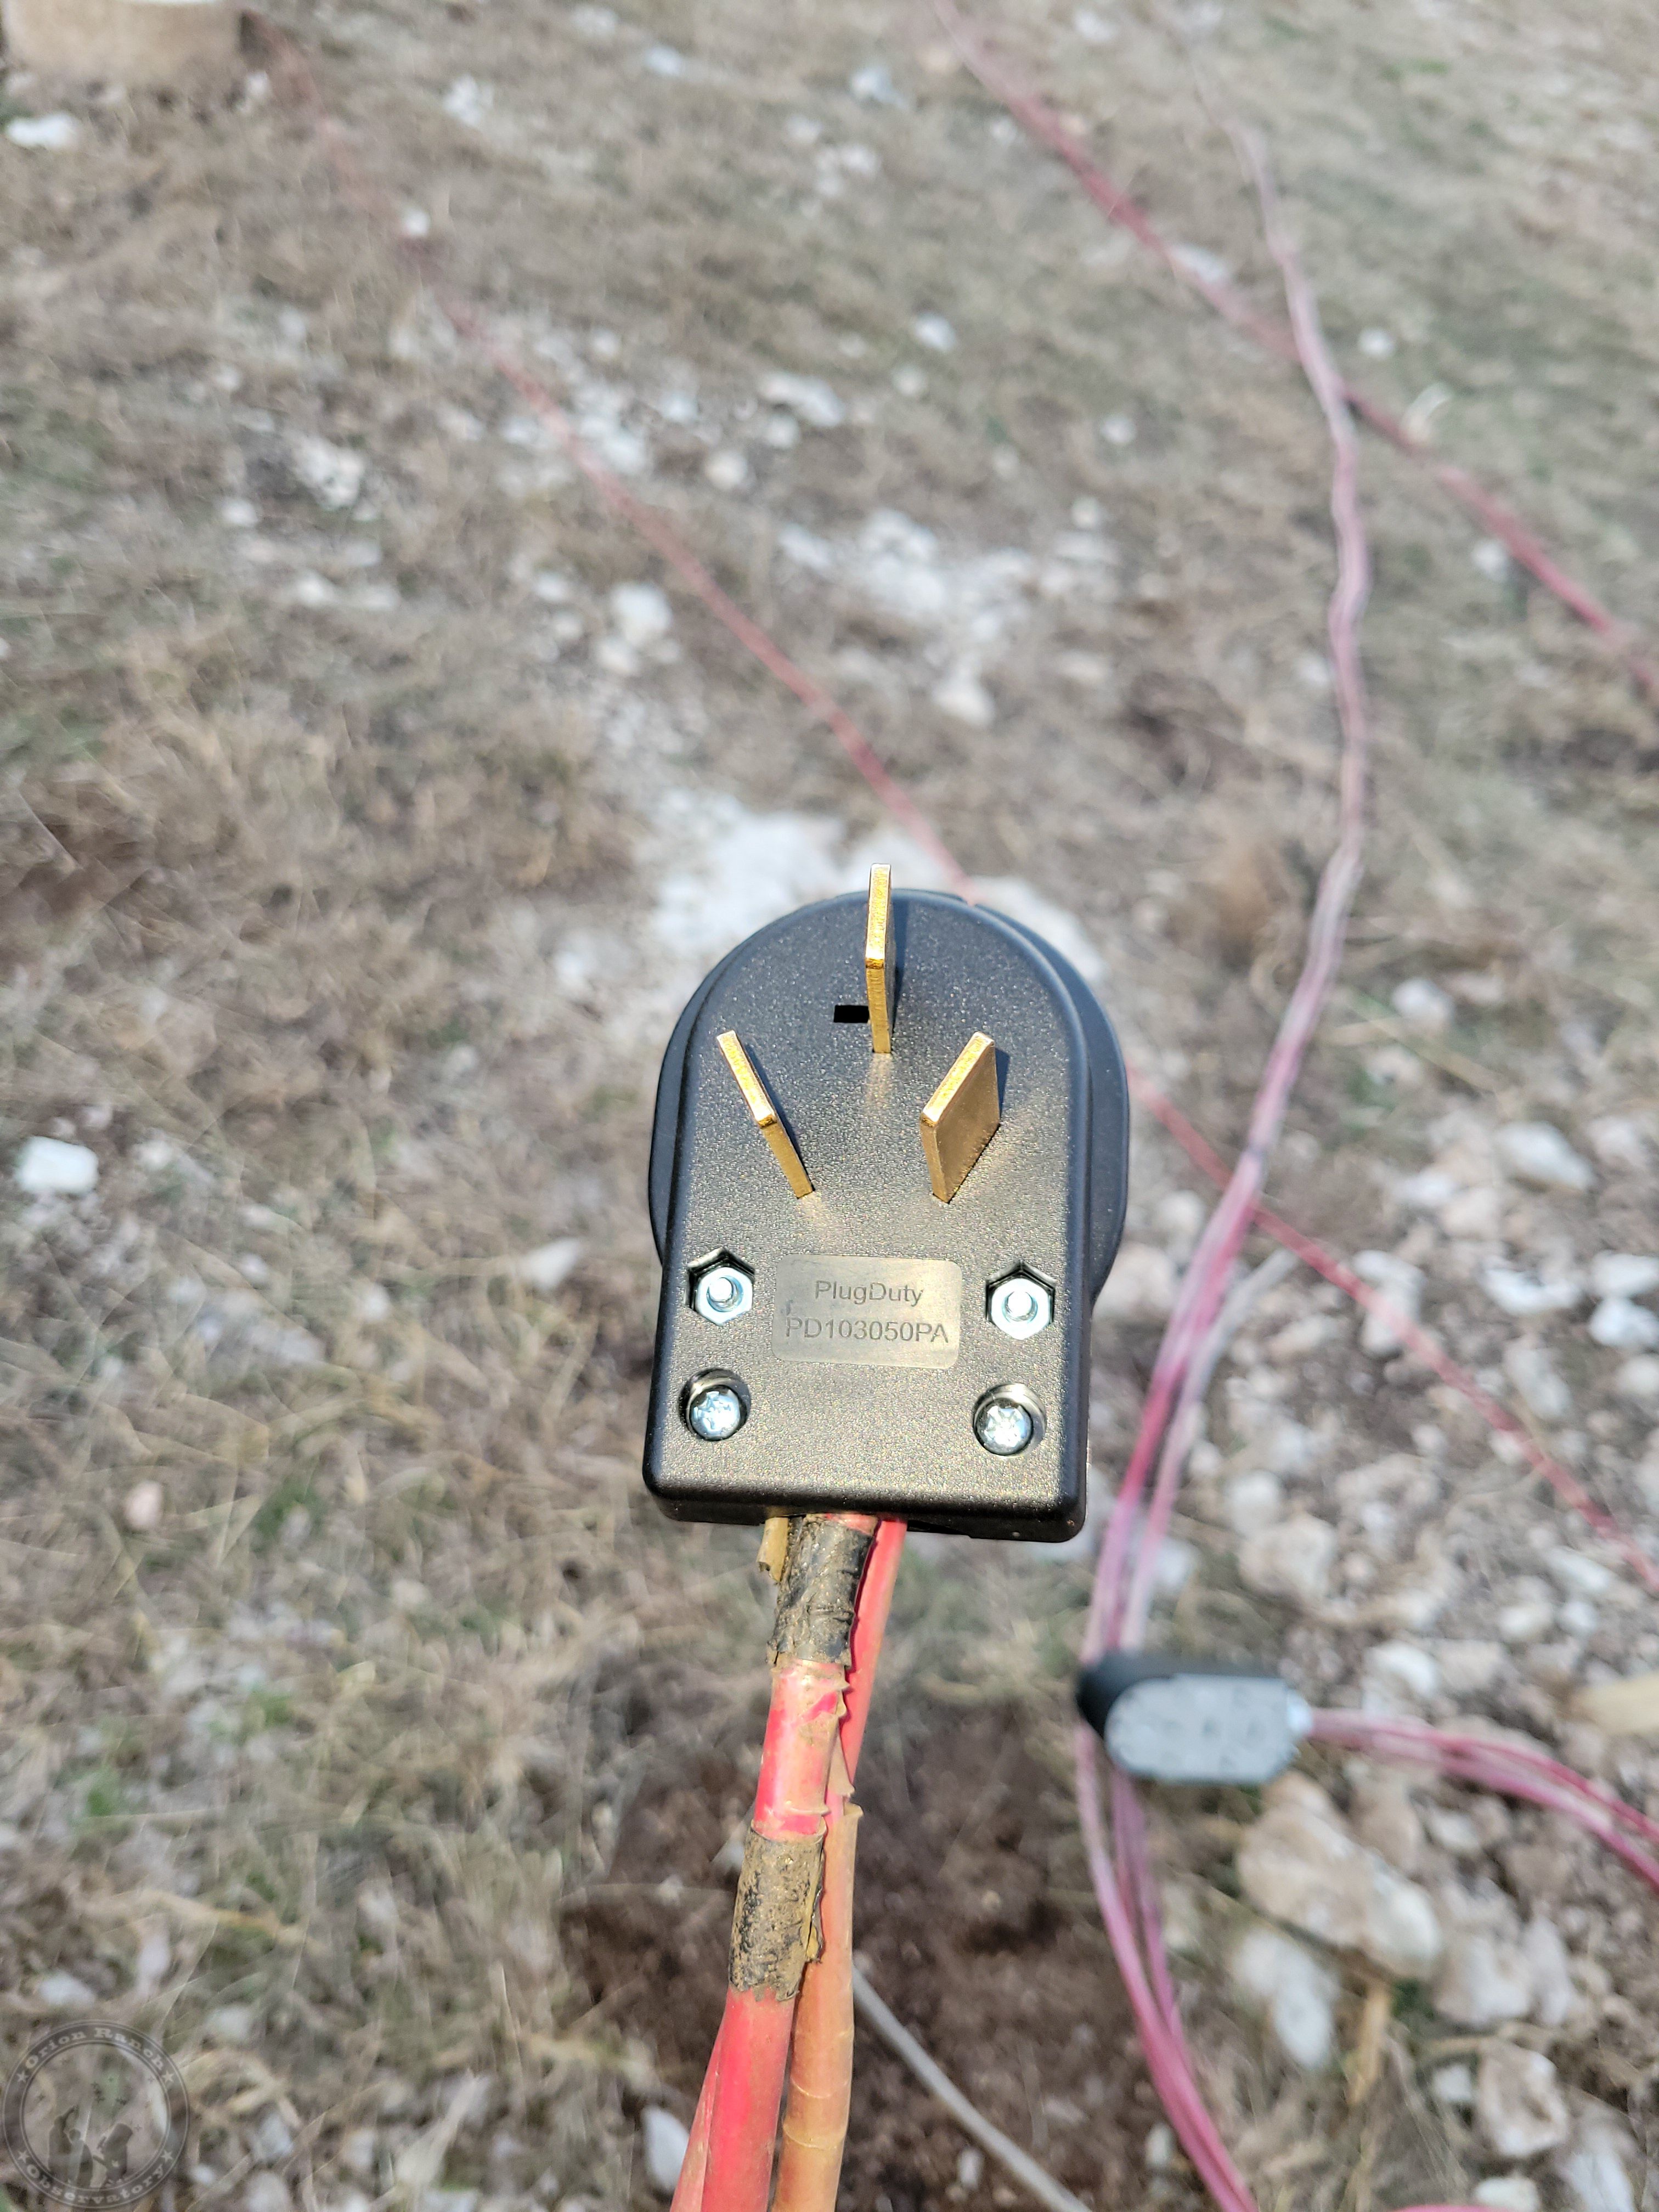
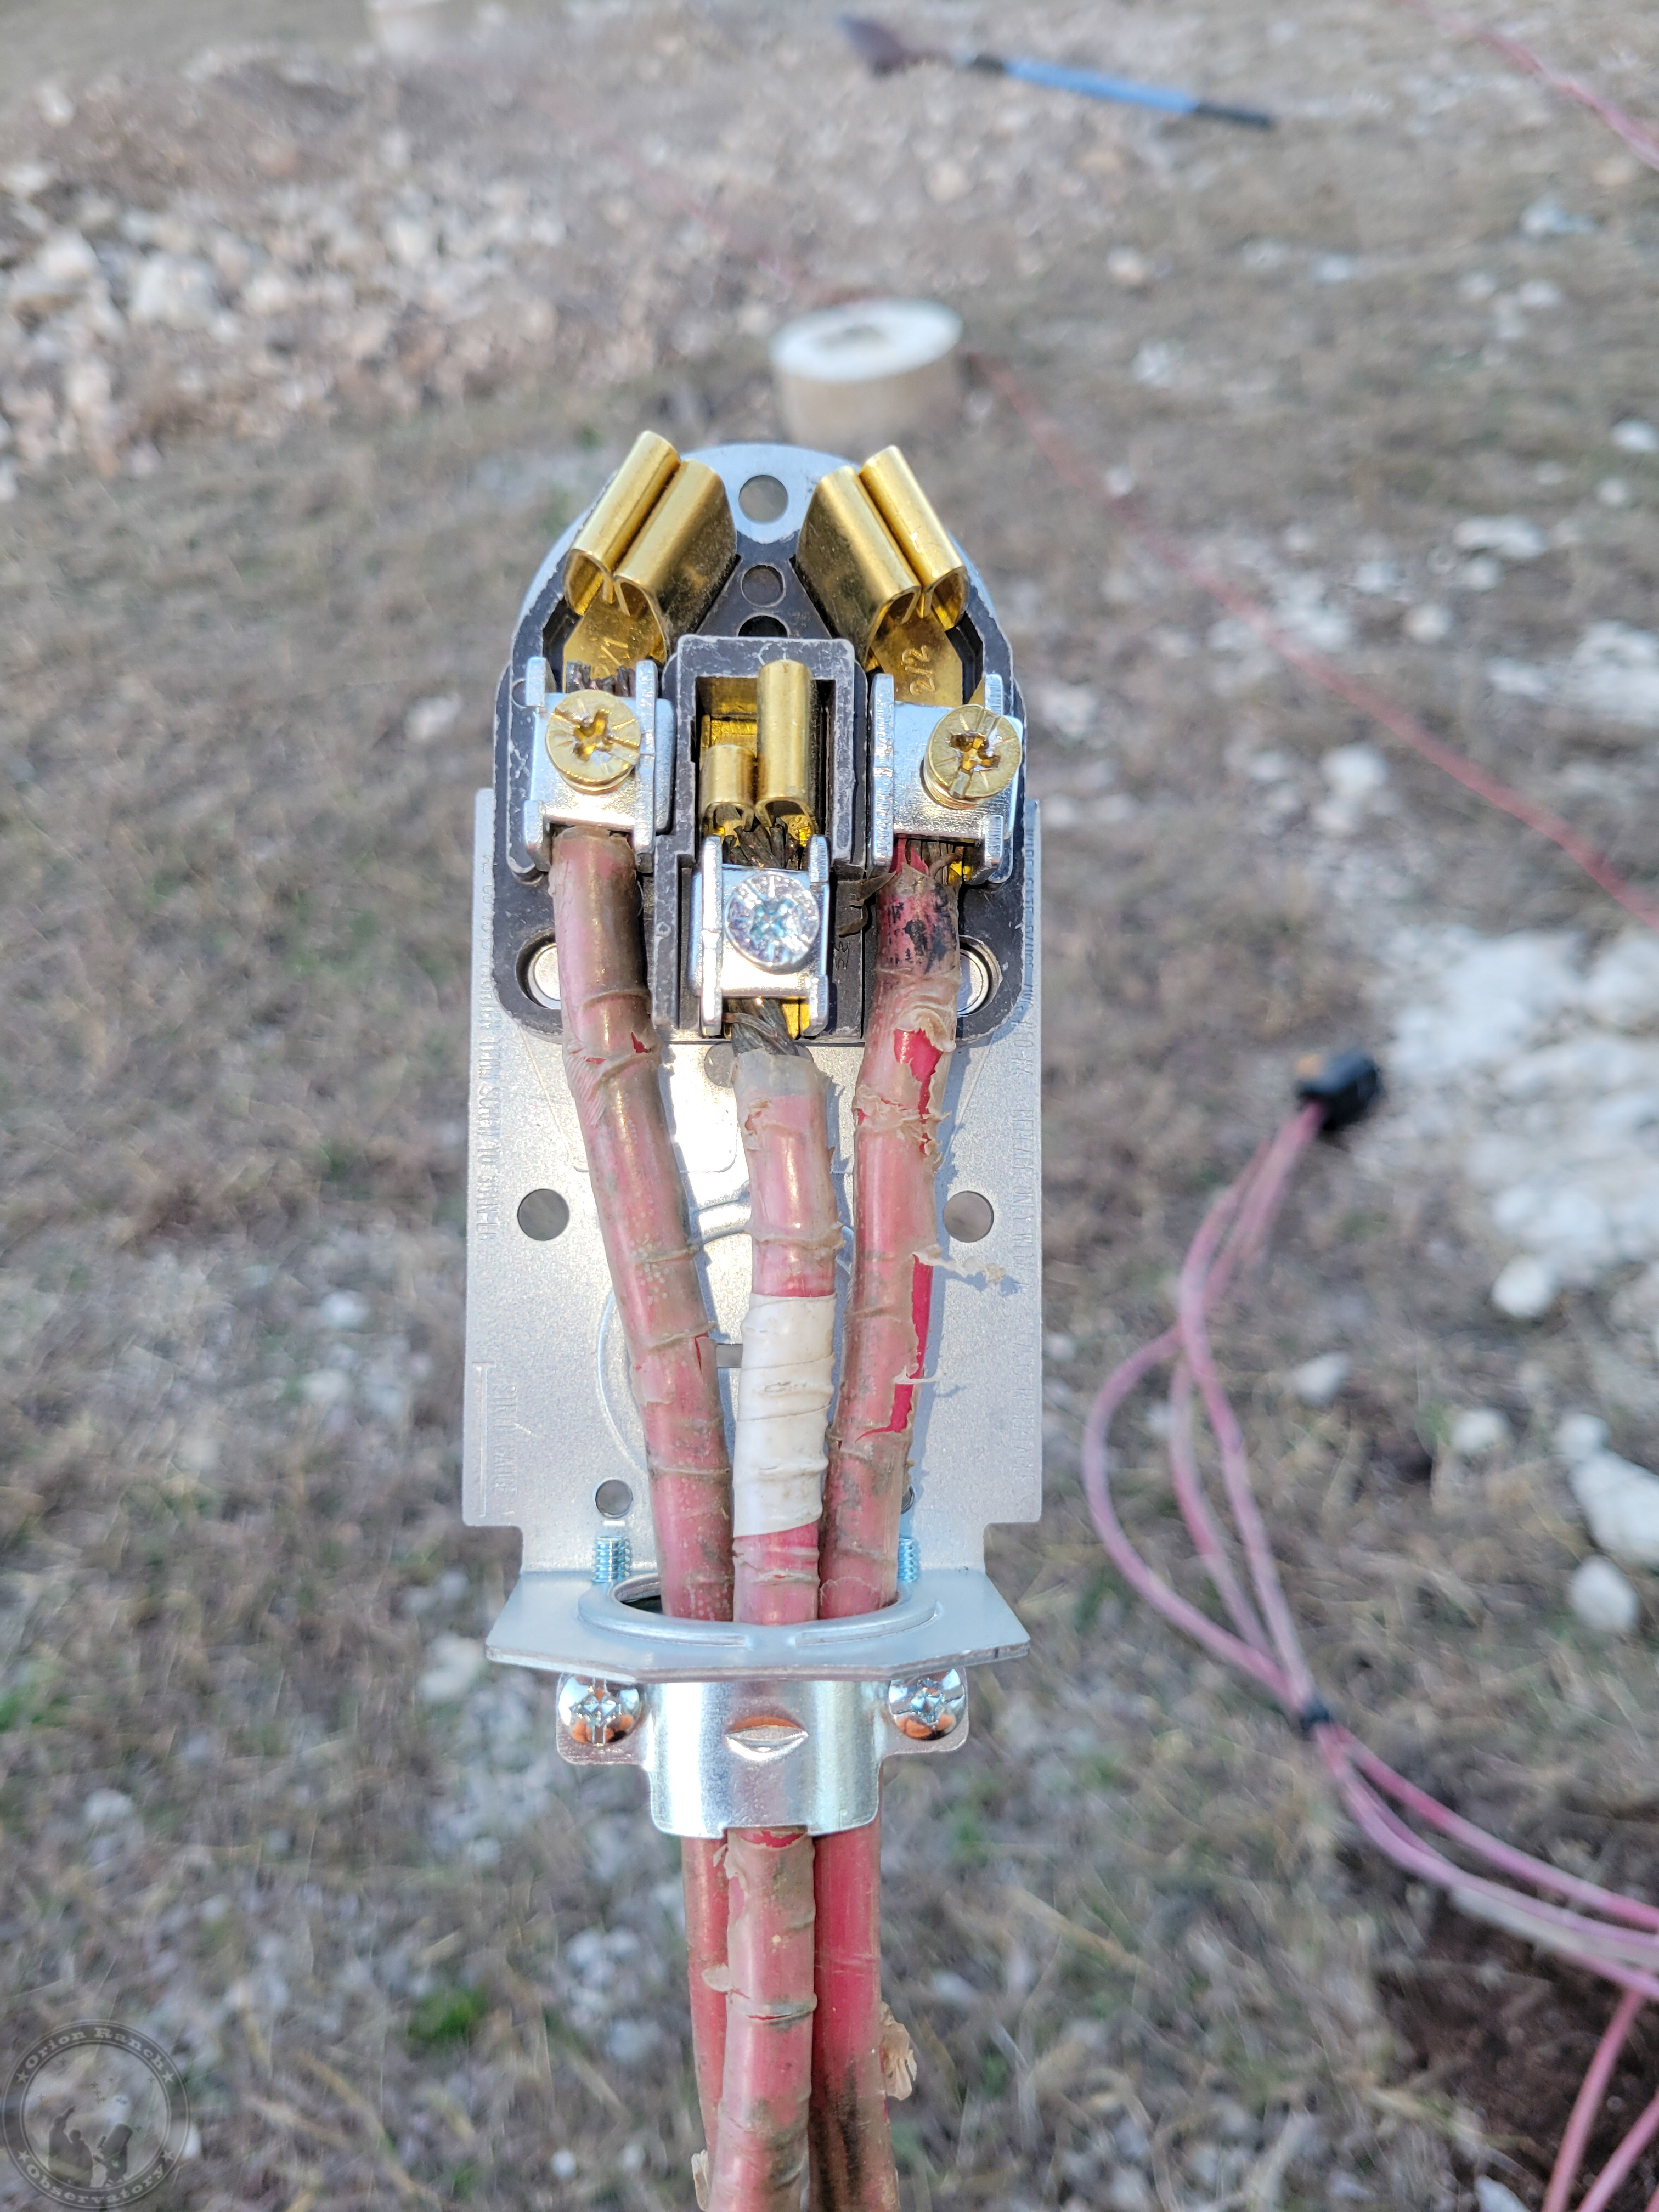
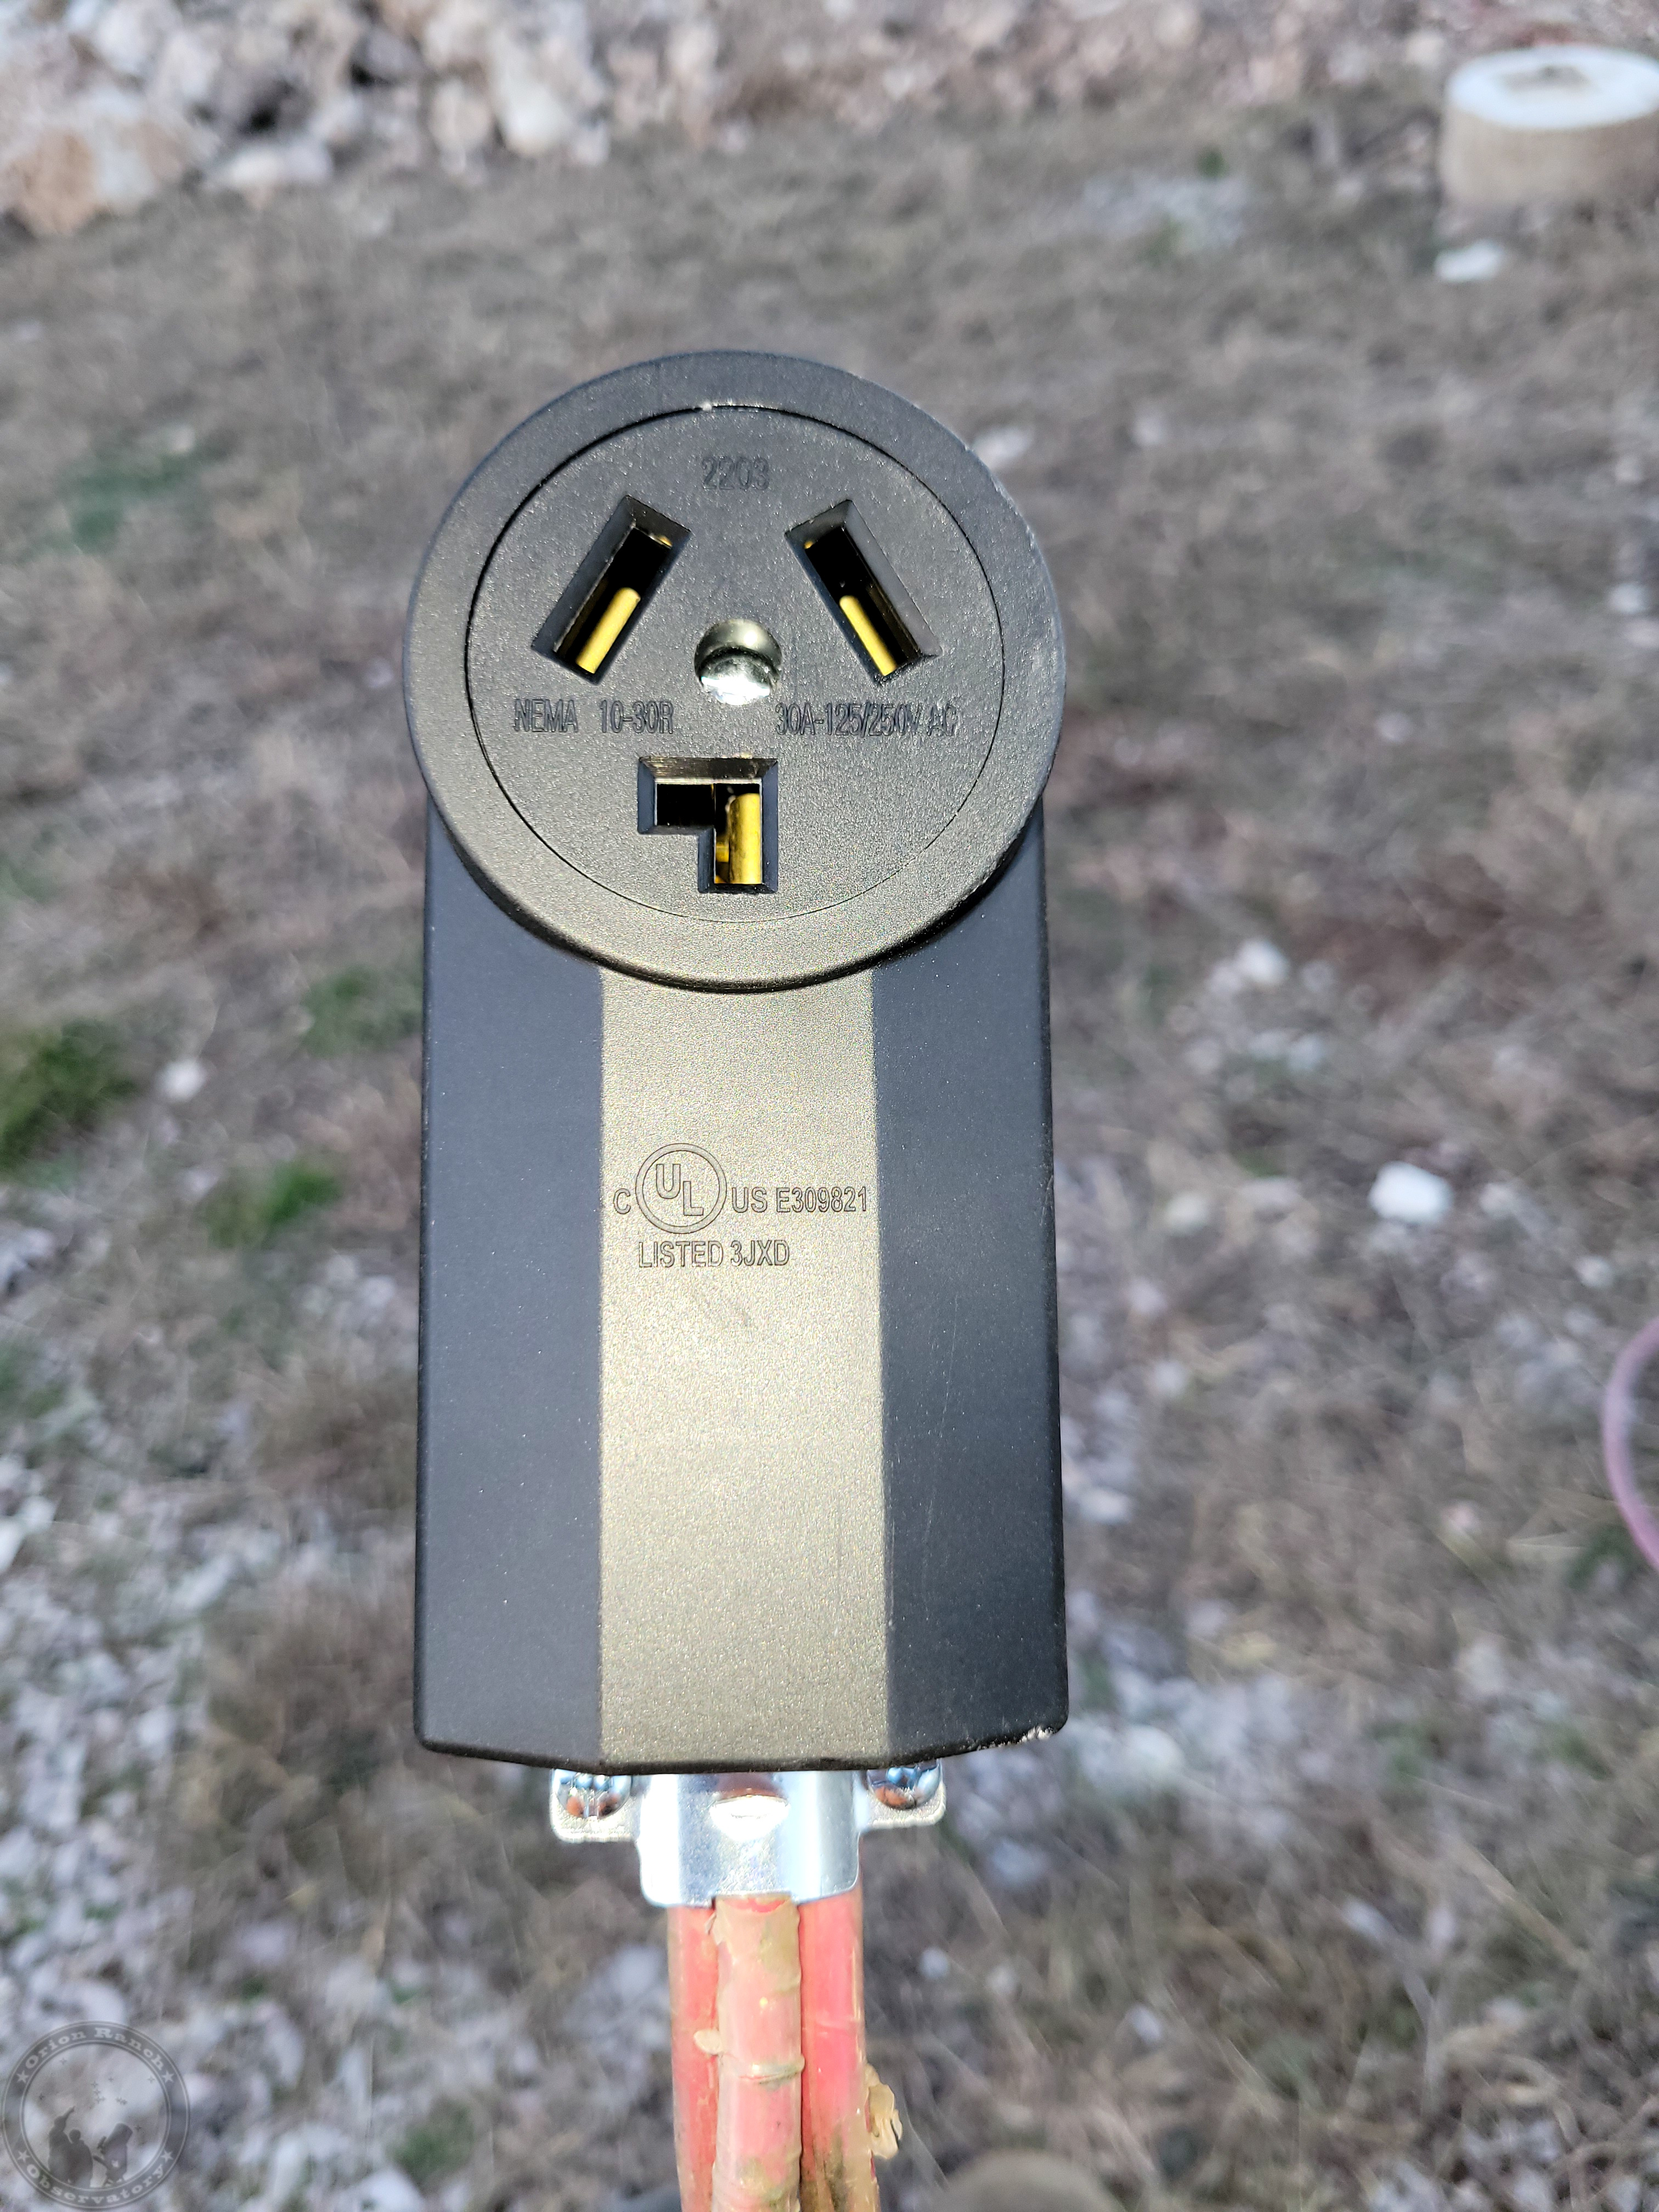
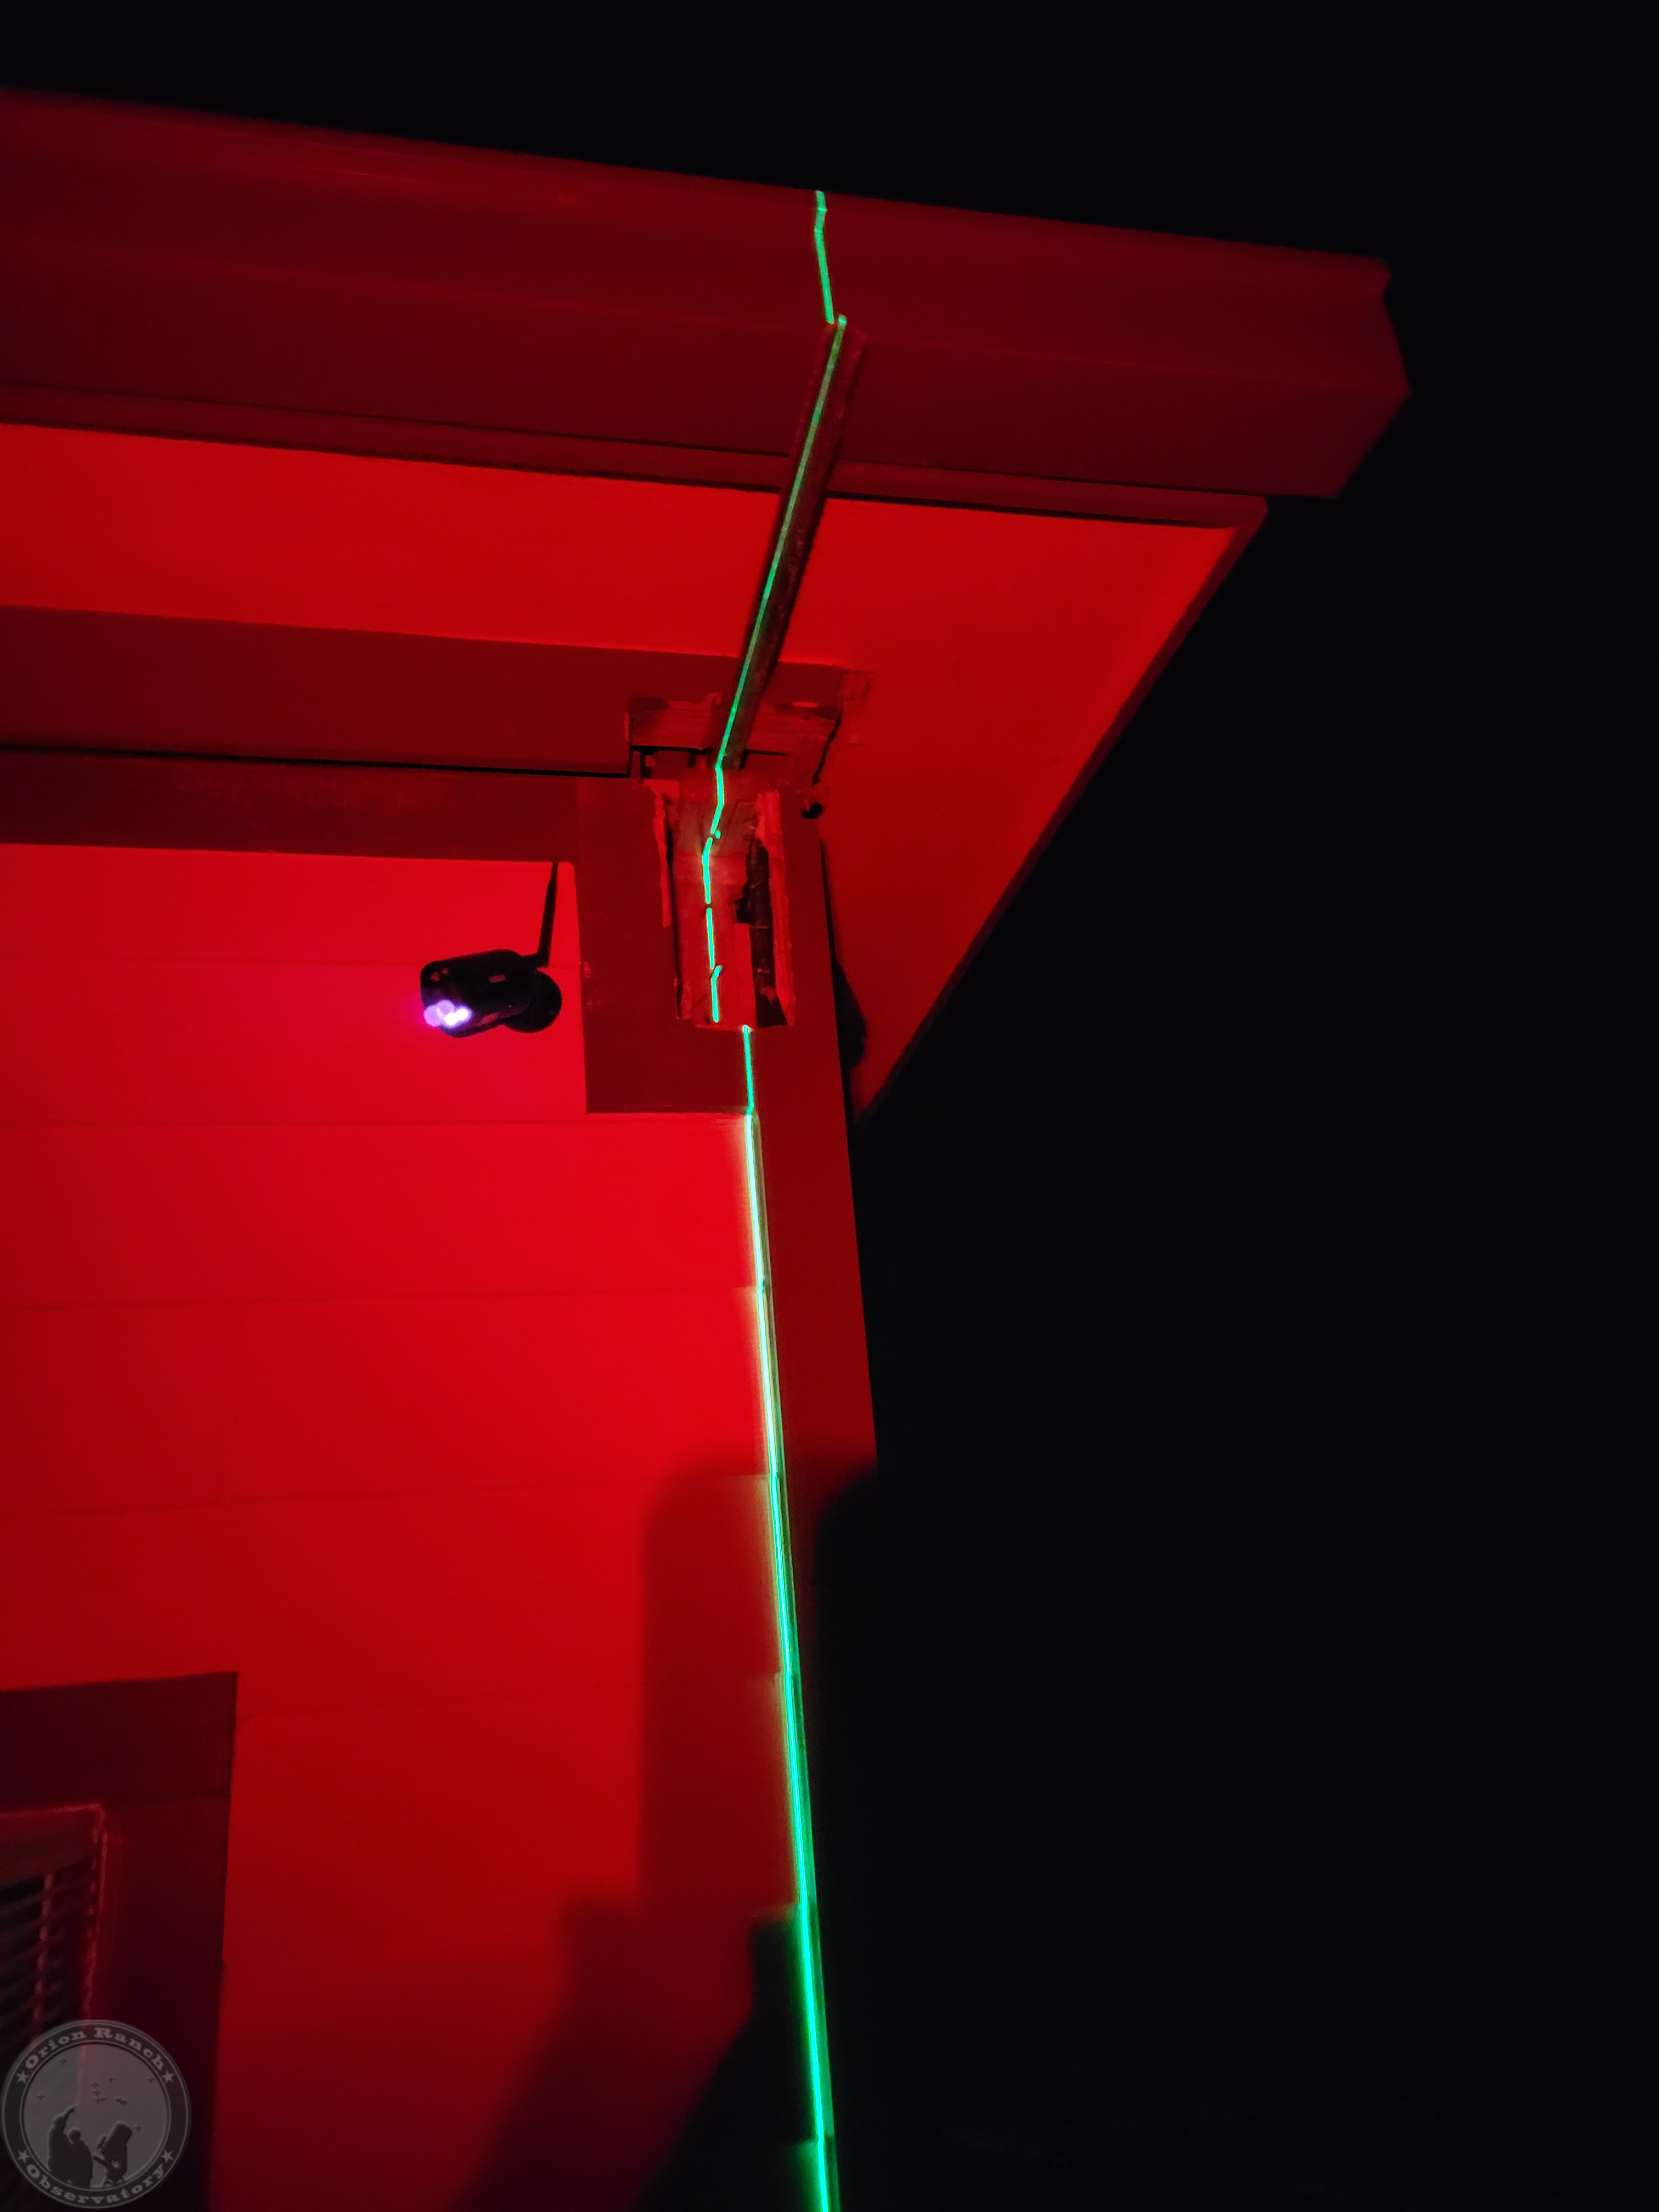
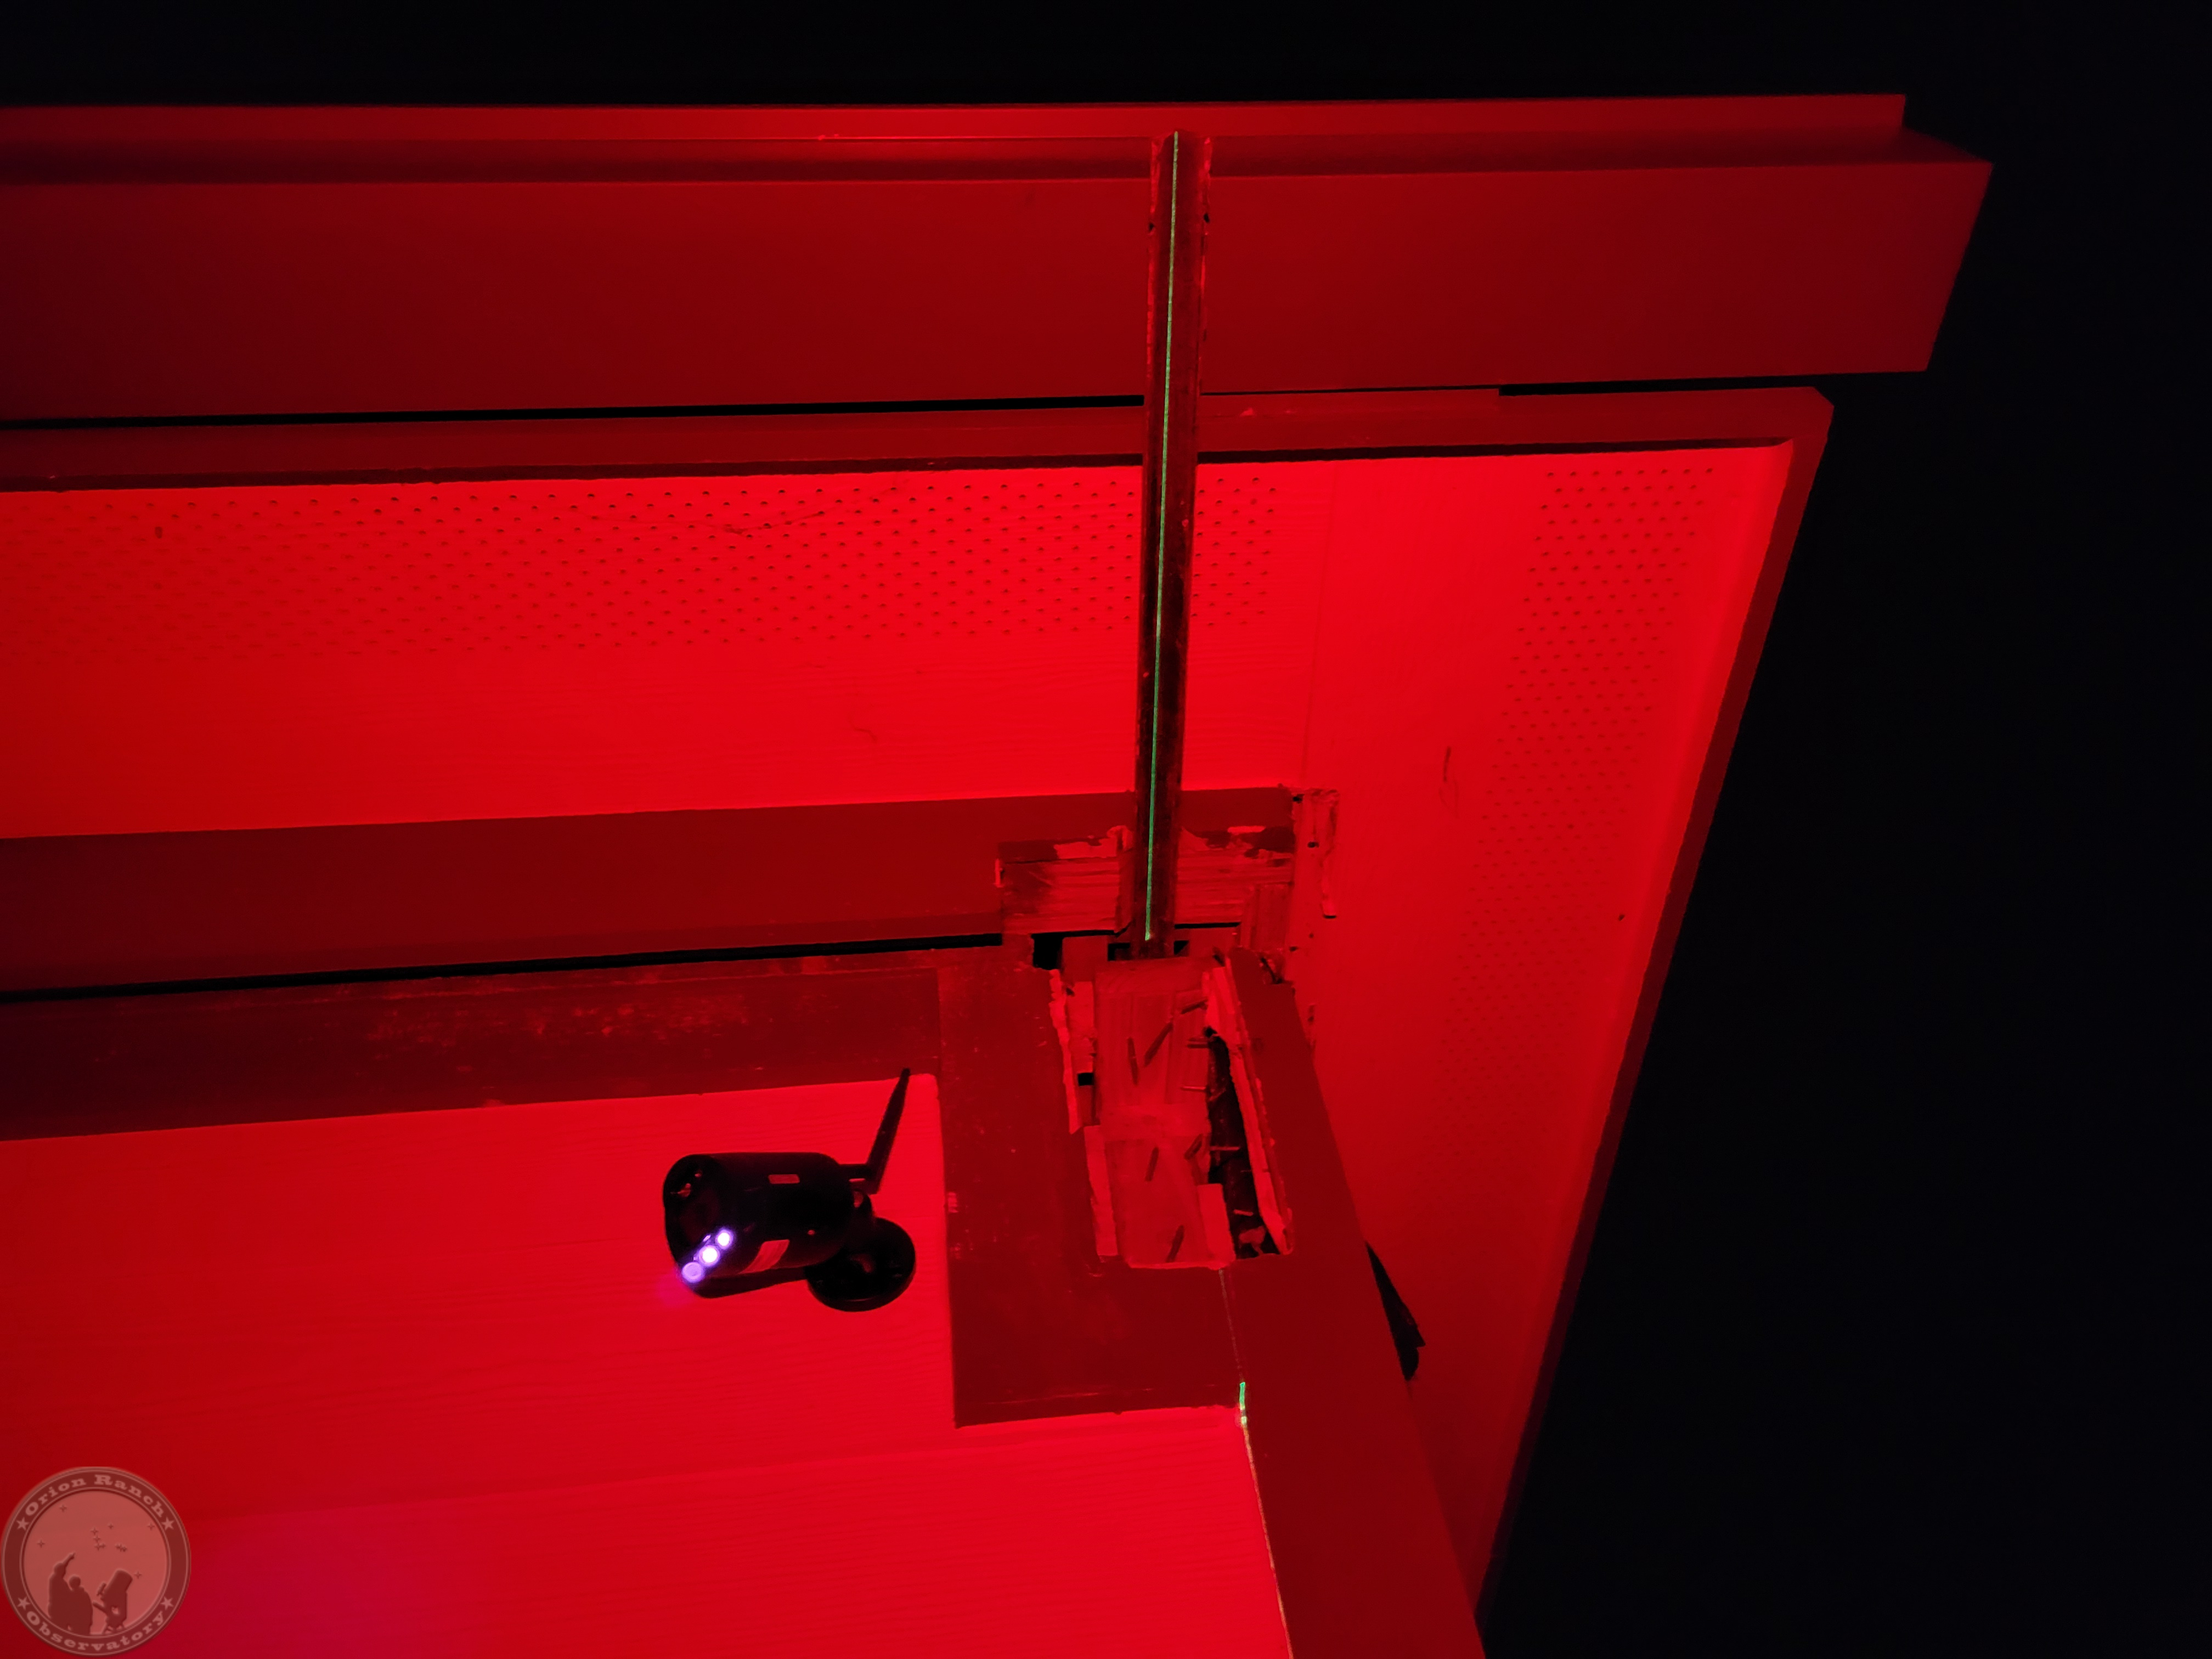
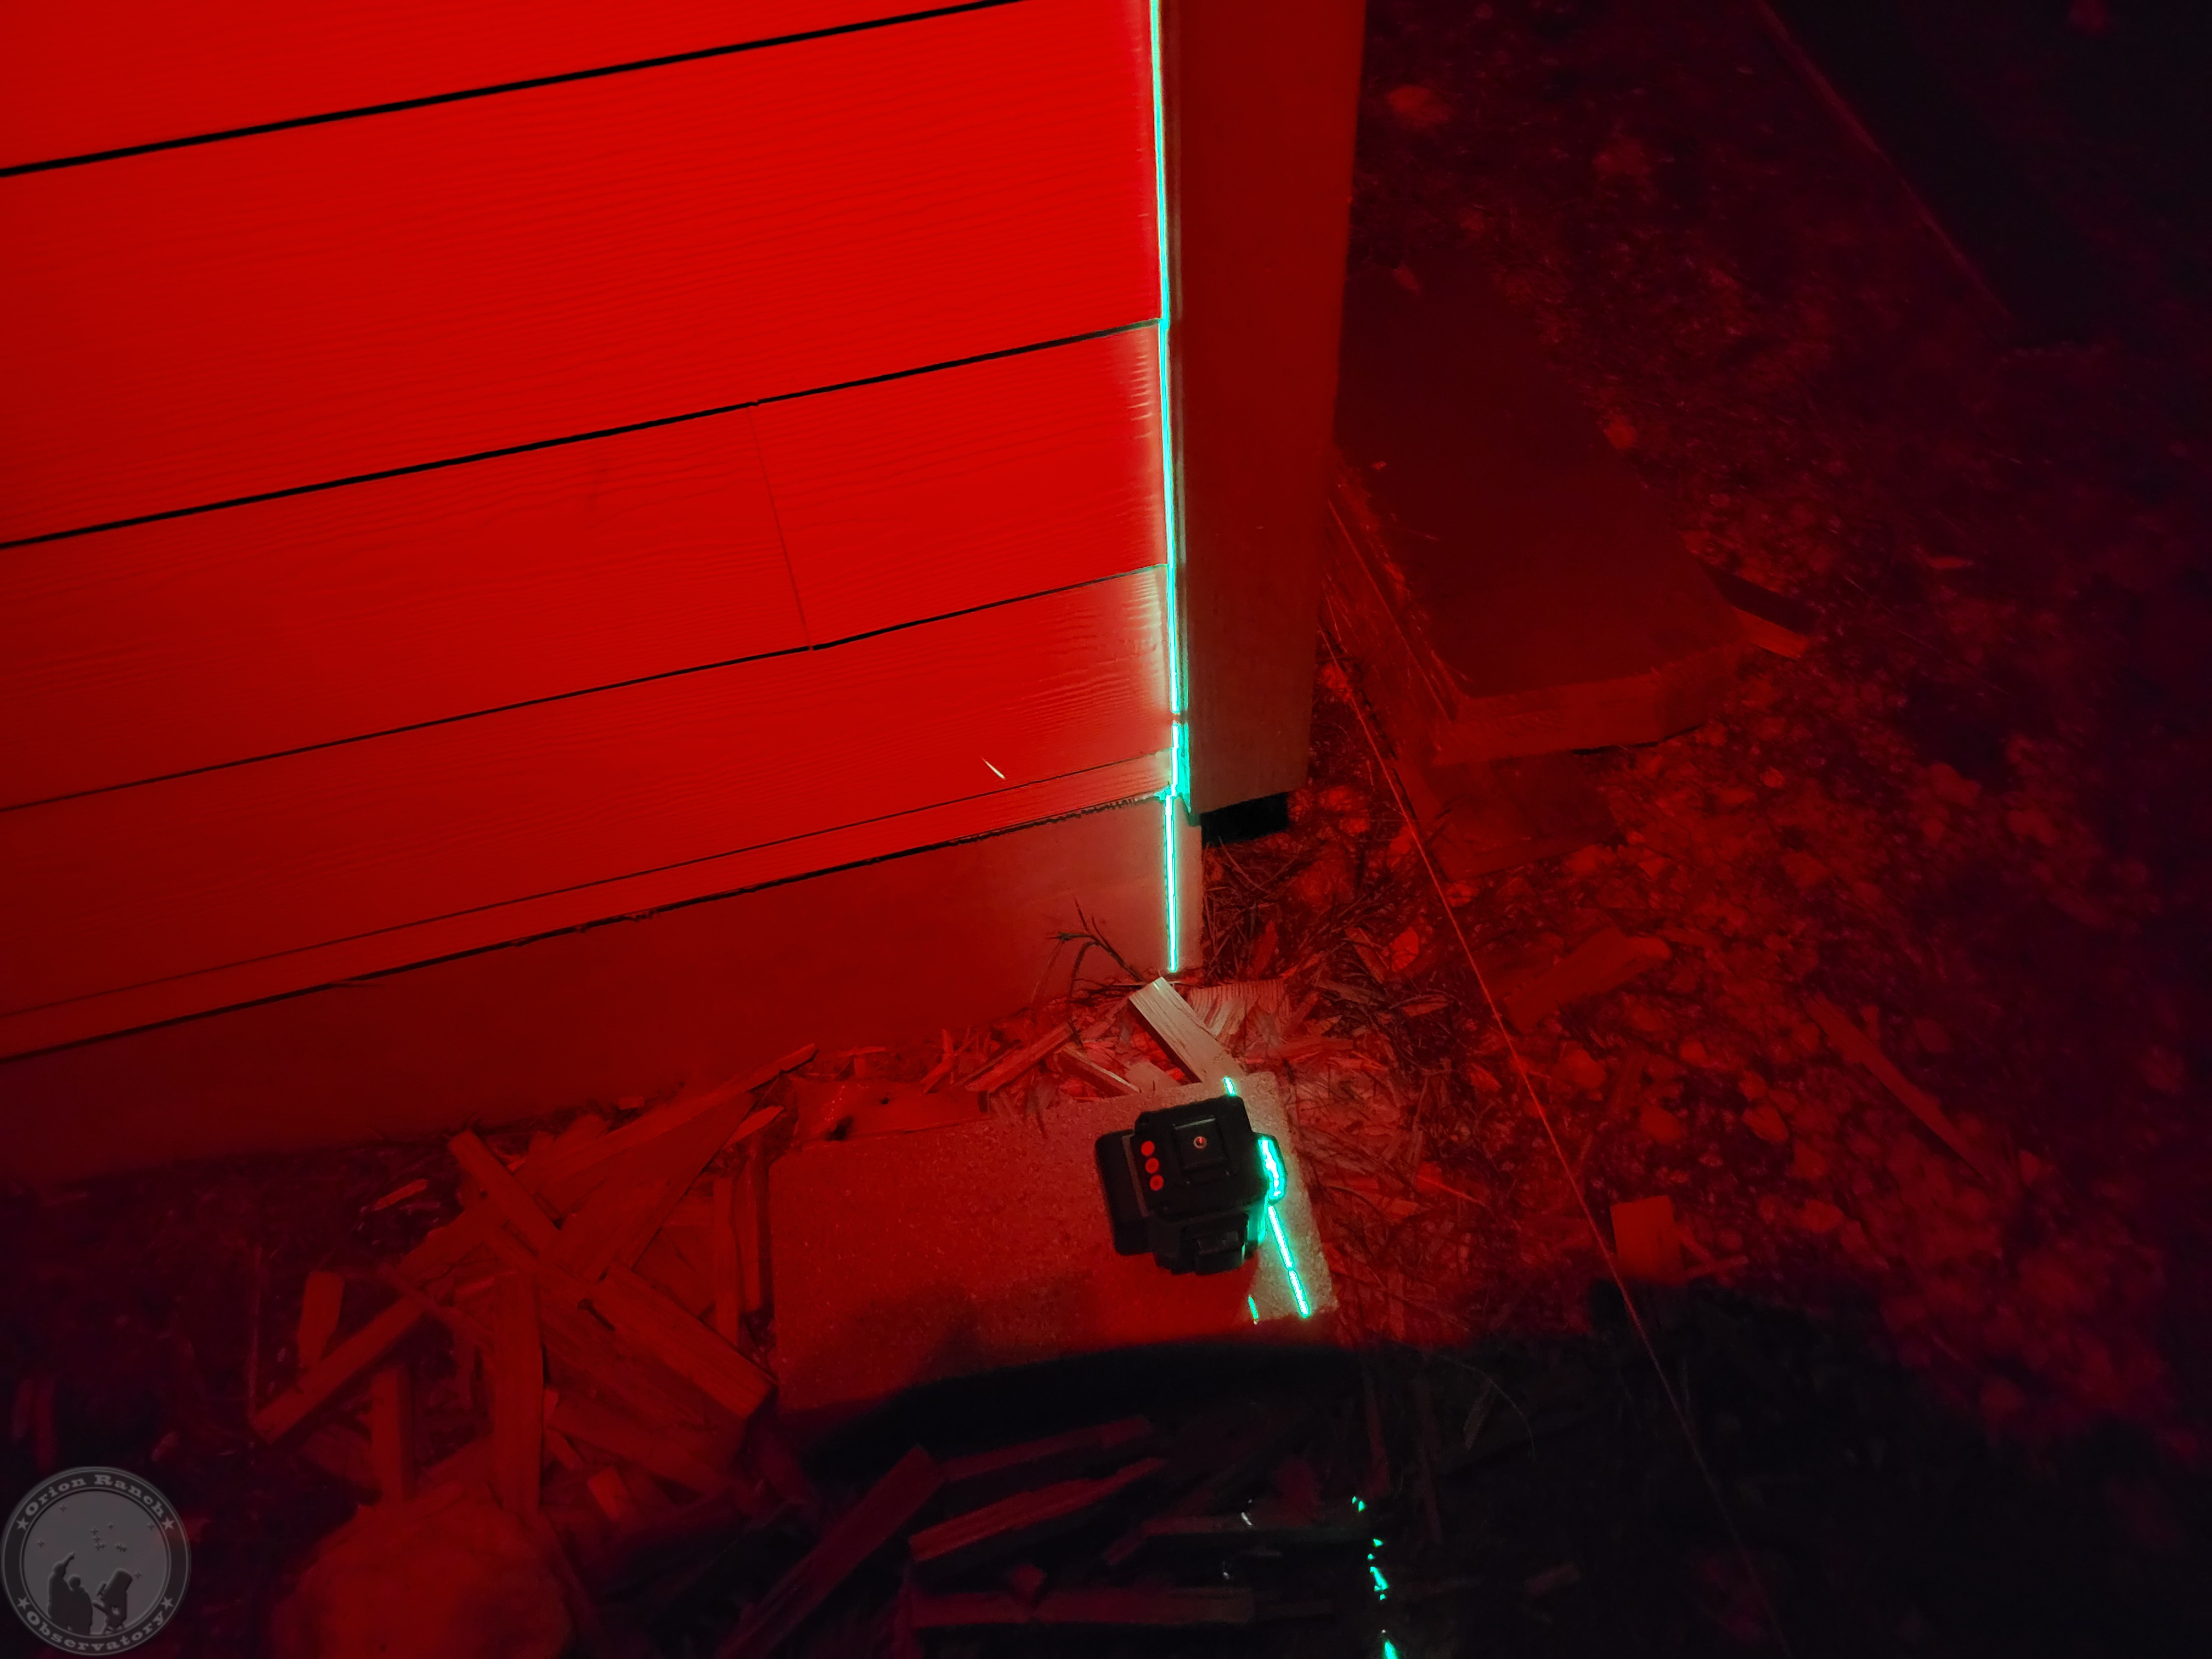
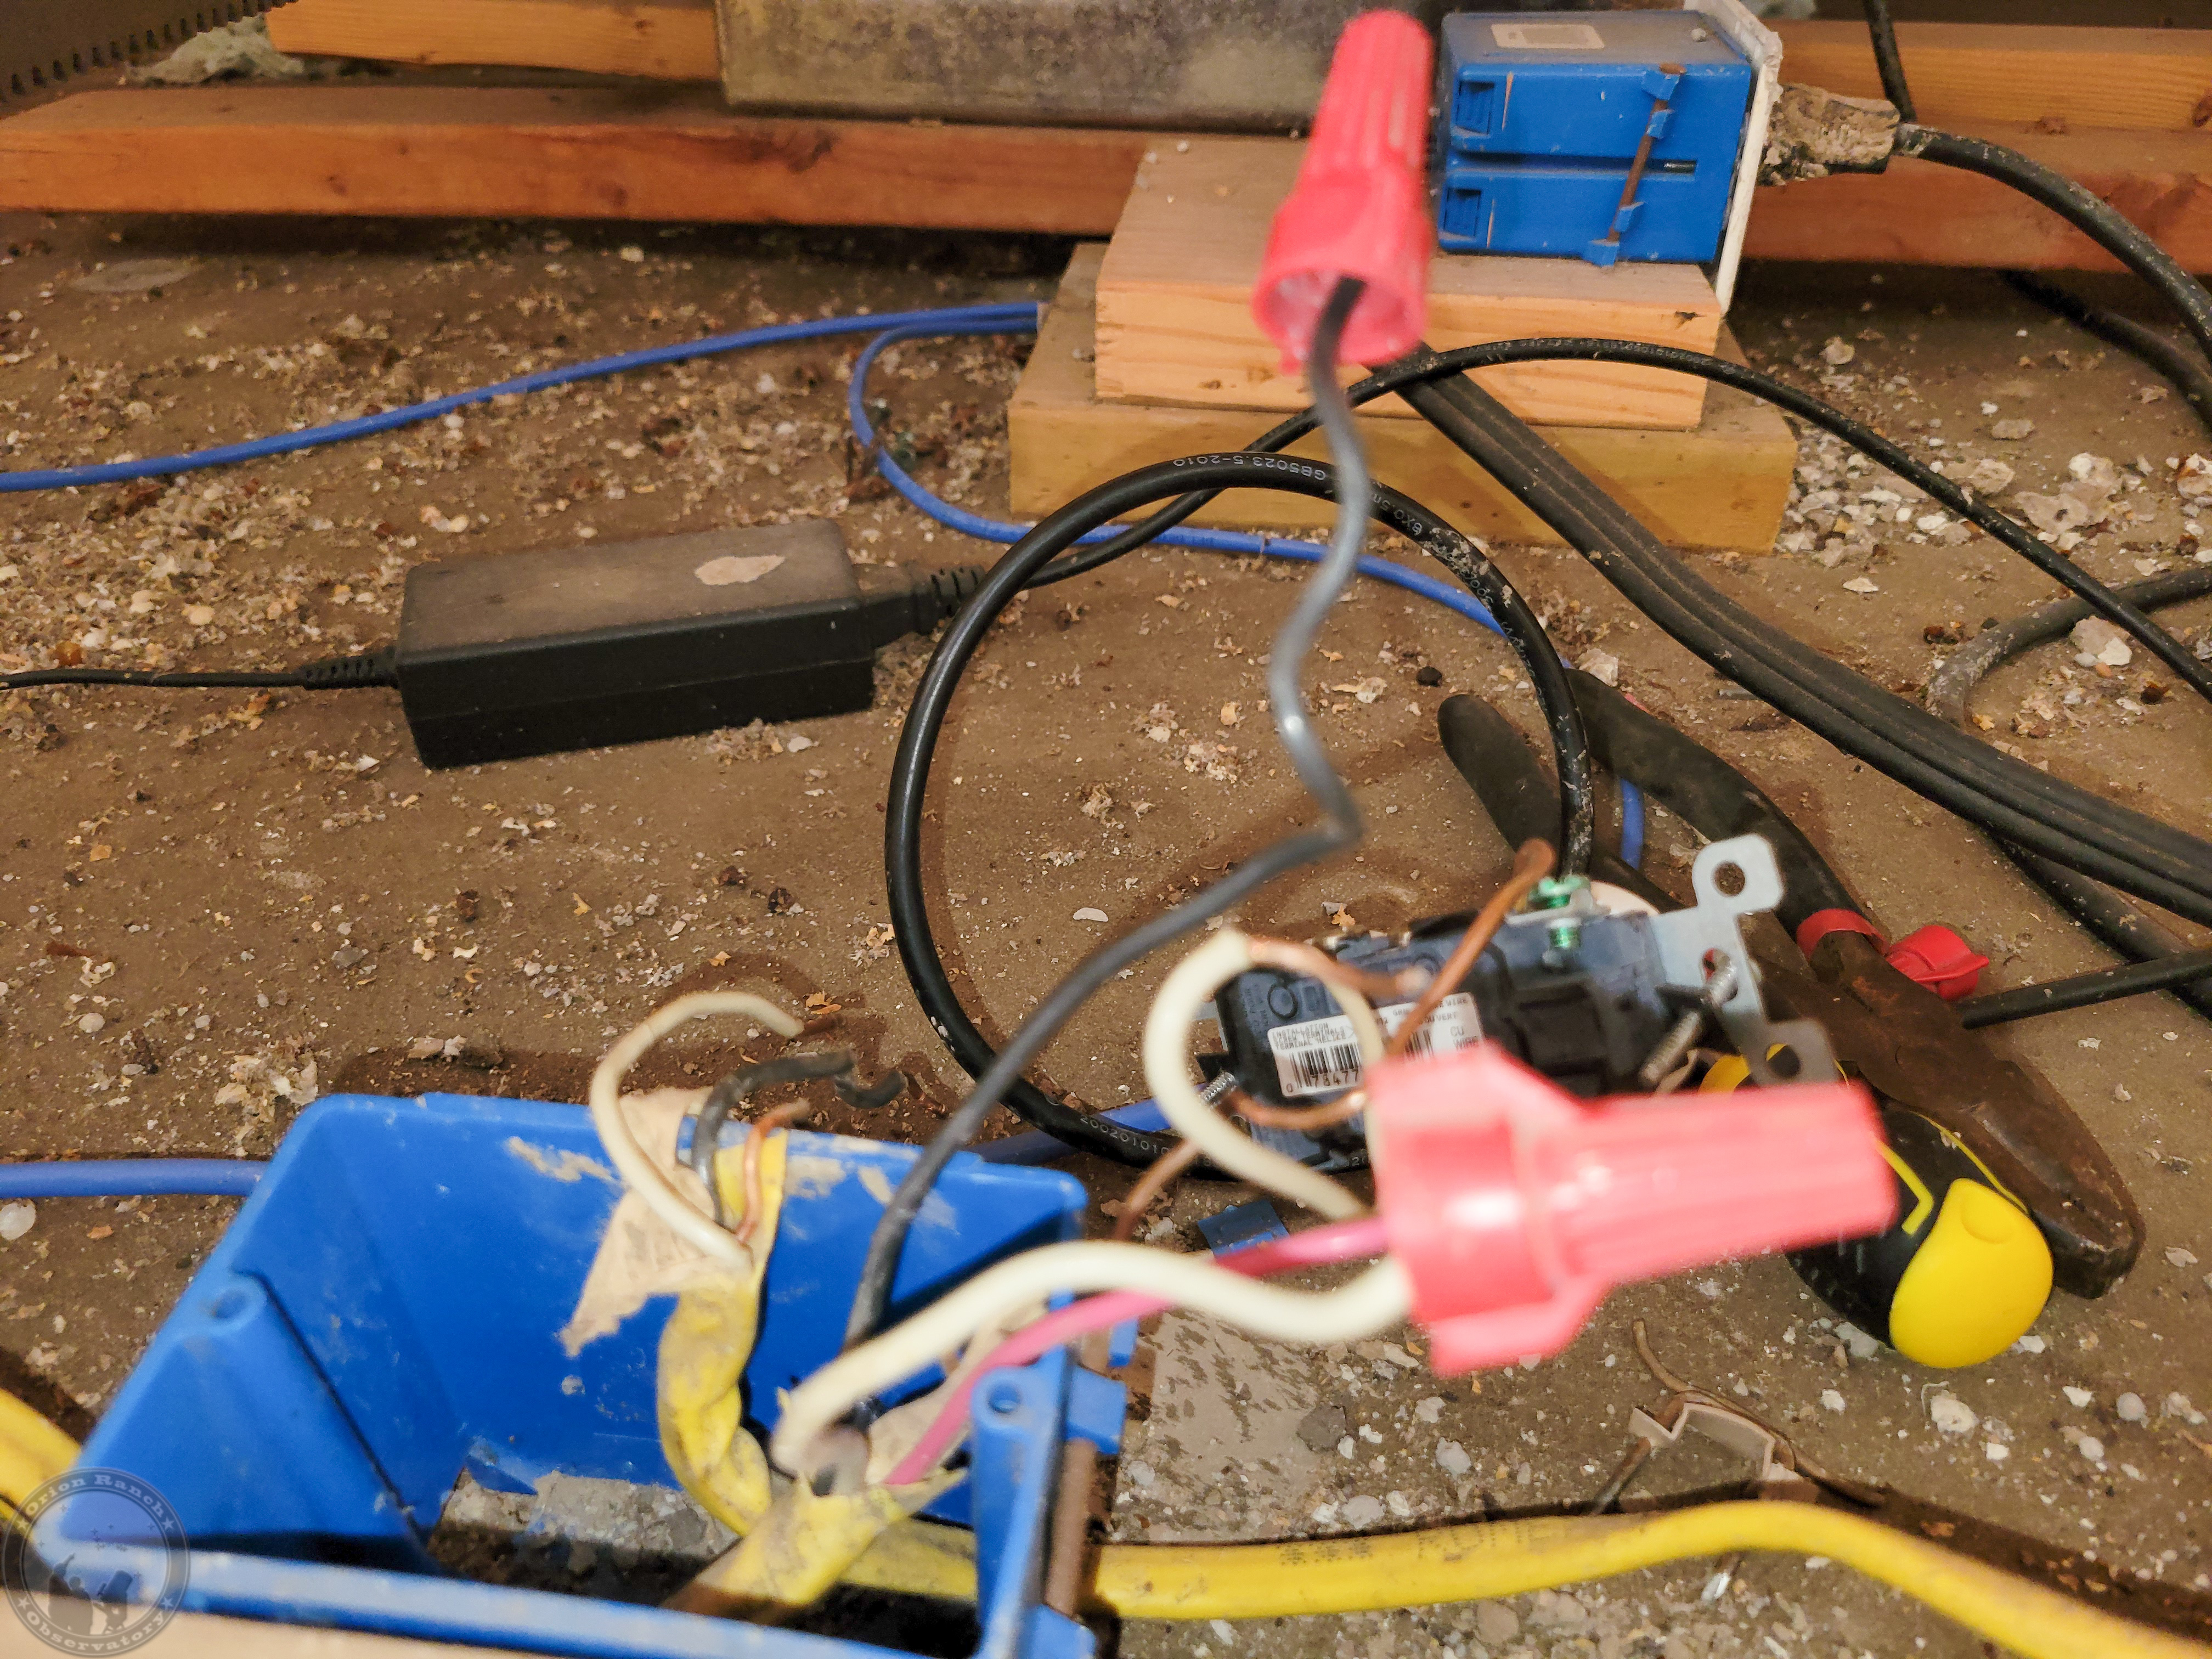
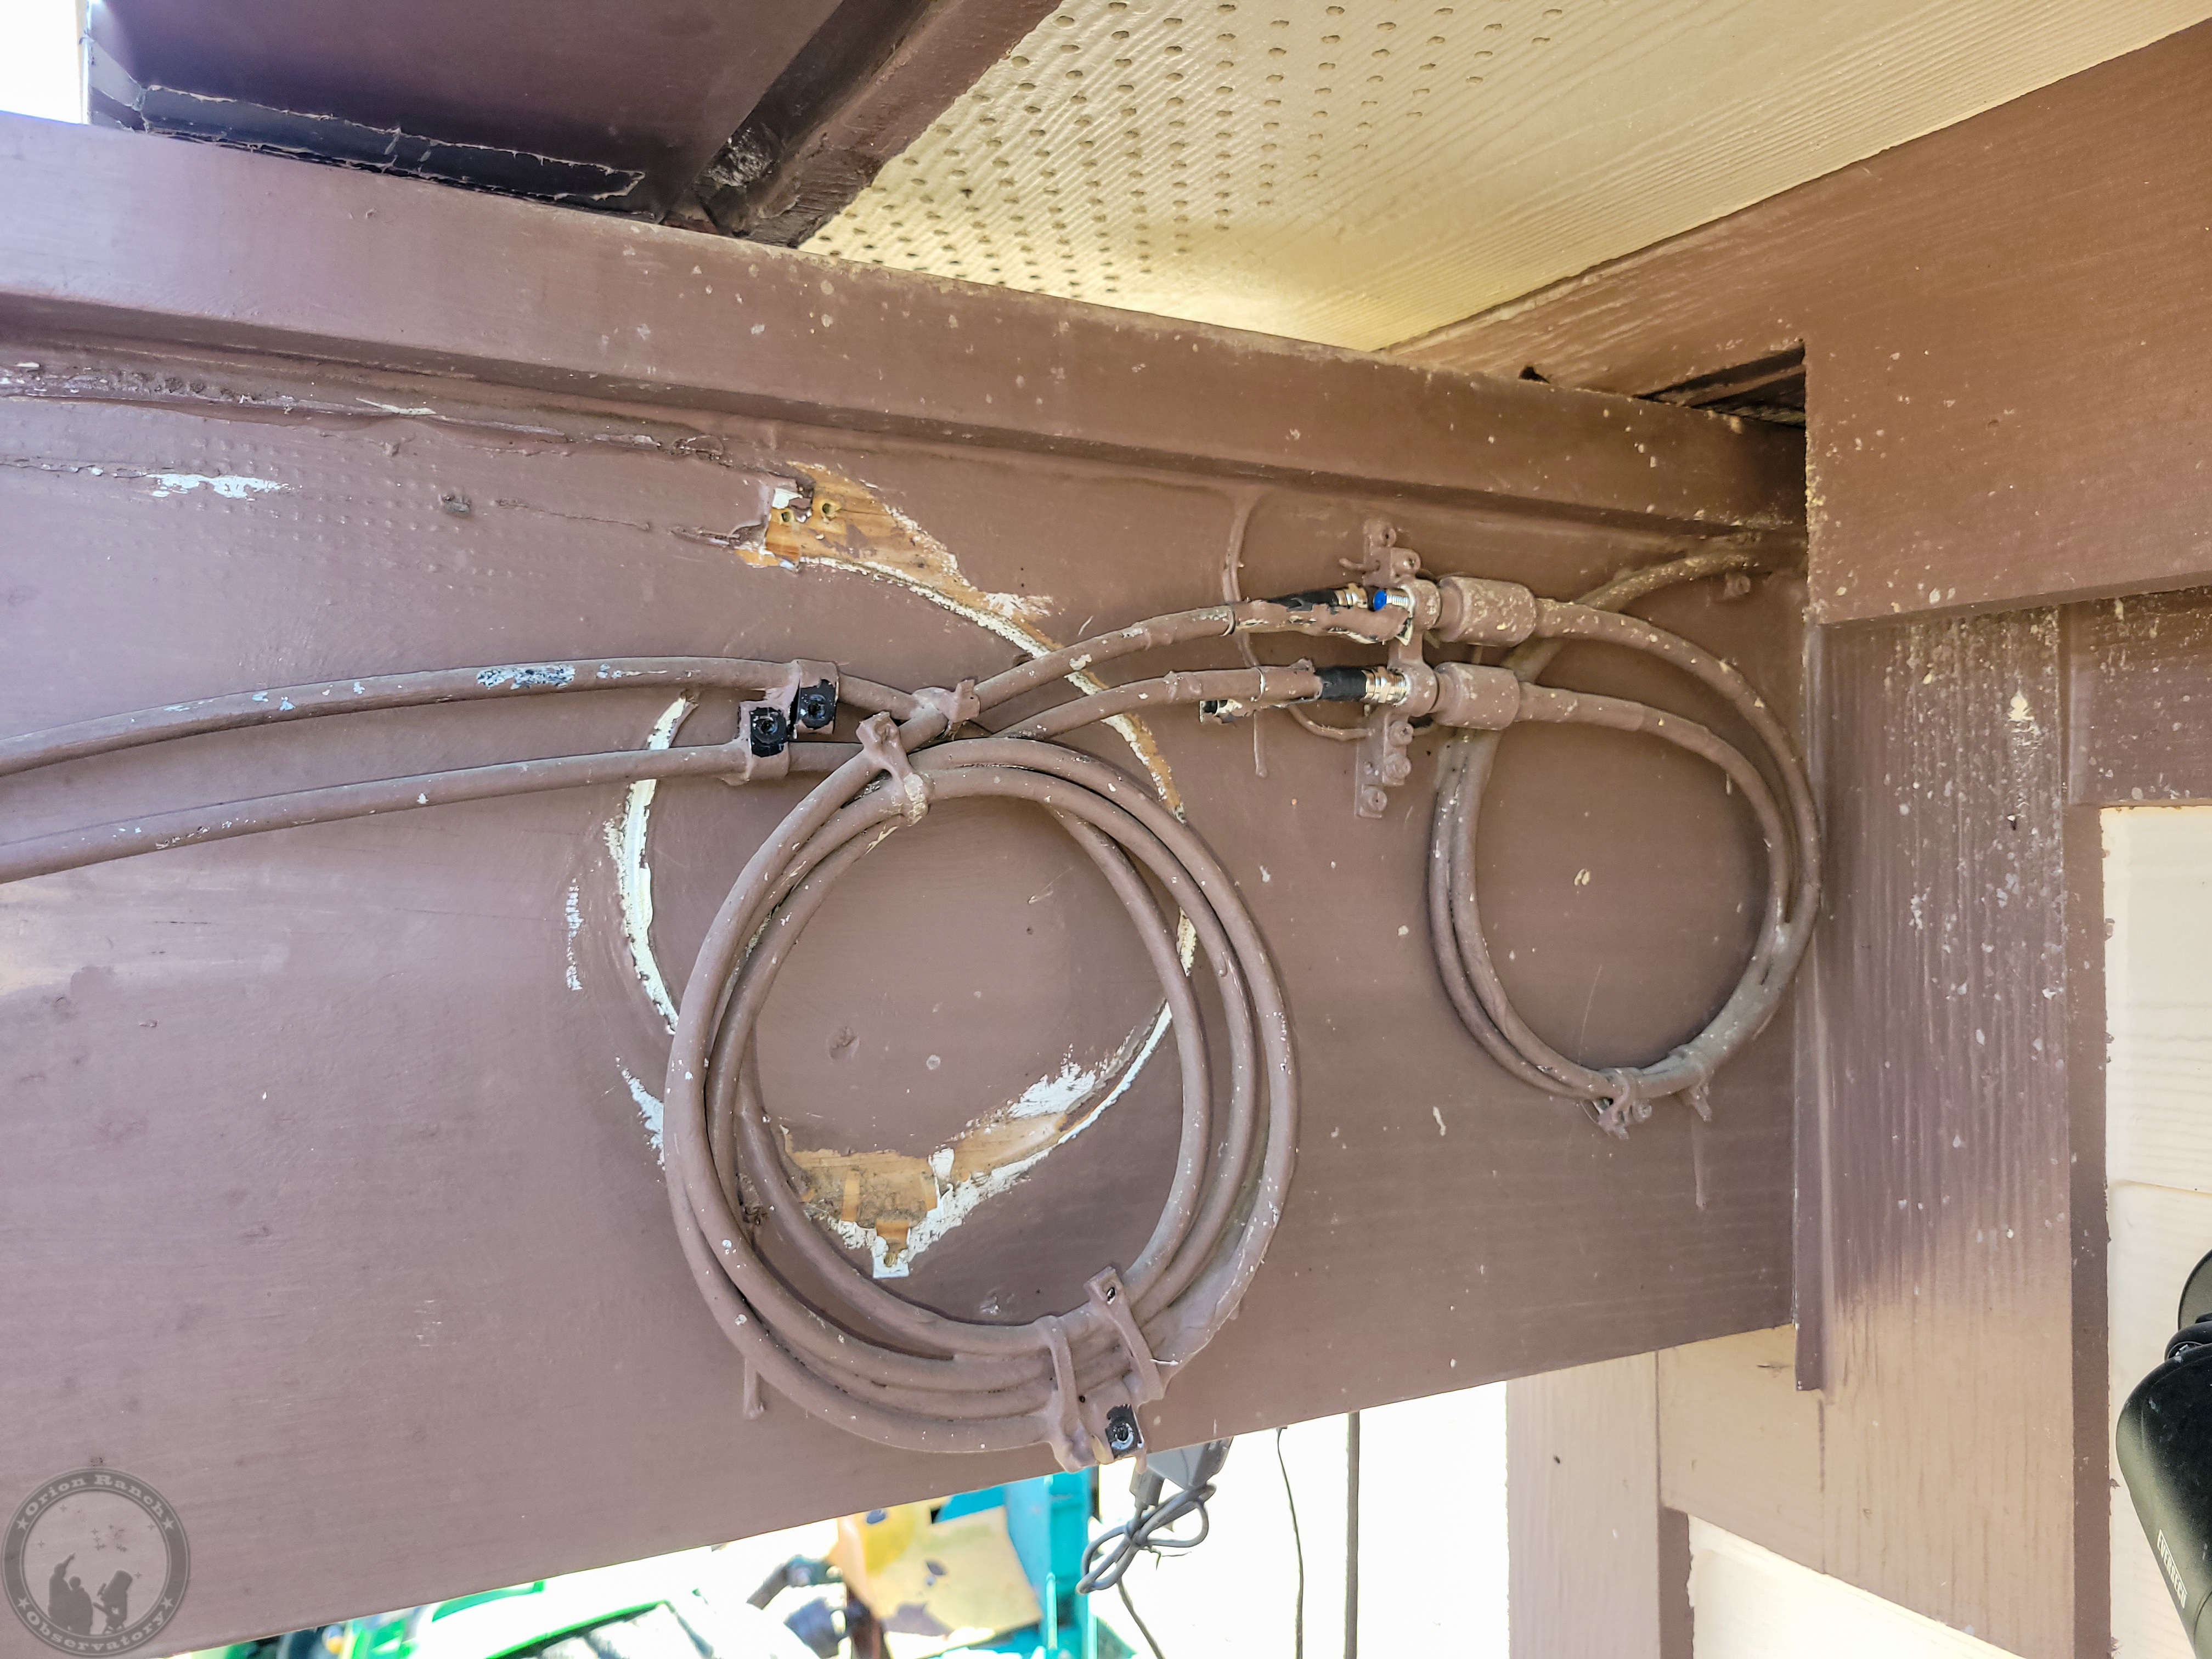
Started by removing the red strip light and lighting conduits from the center longitudinal brace.  That required opening the roof one last time to disconnect the wiring from the junction box above the warm room.

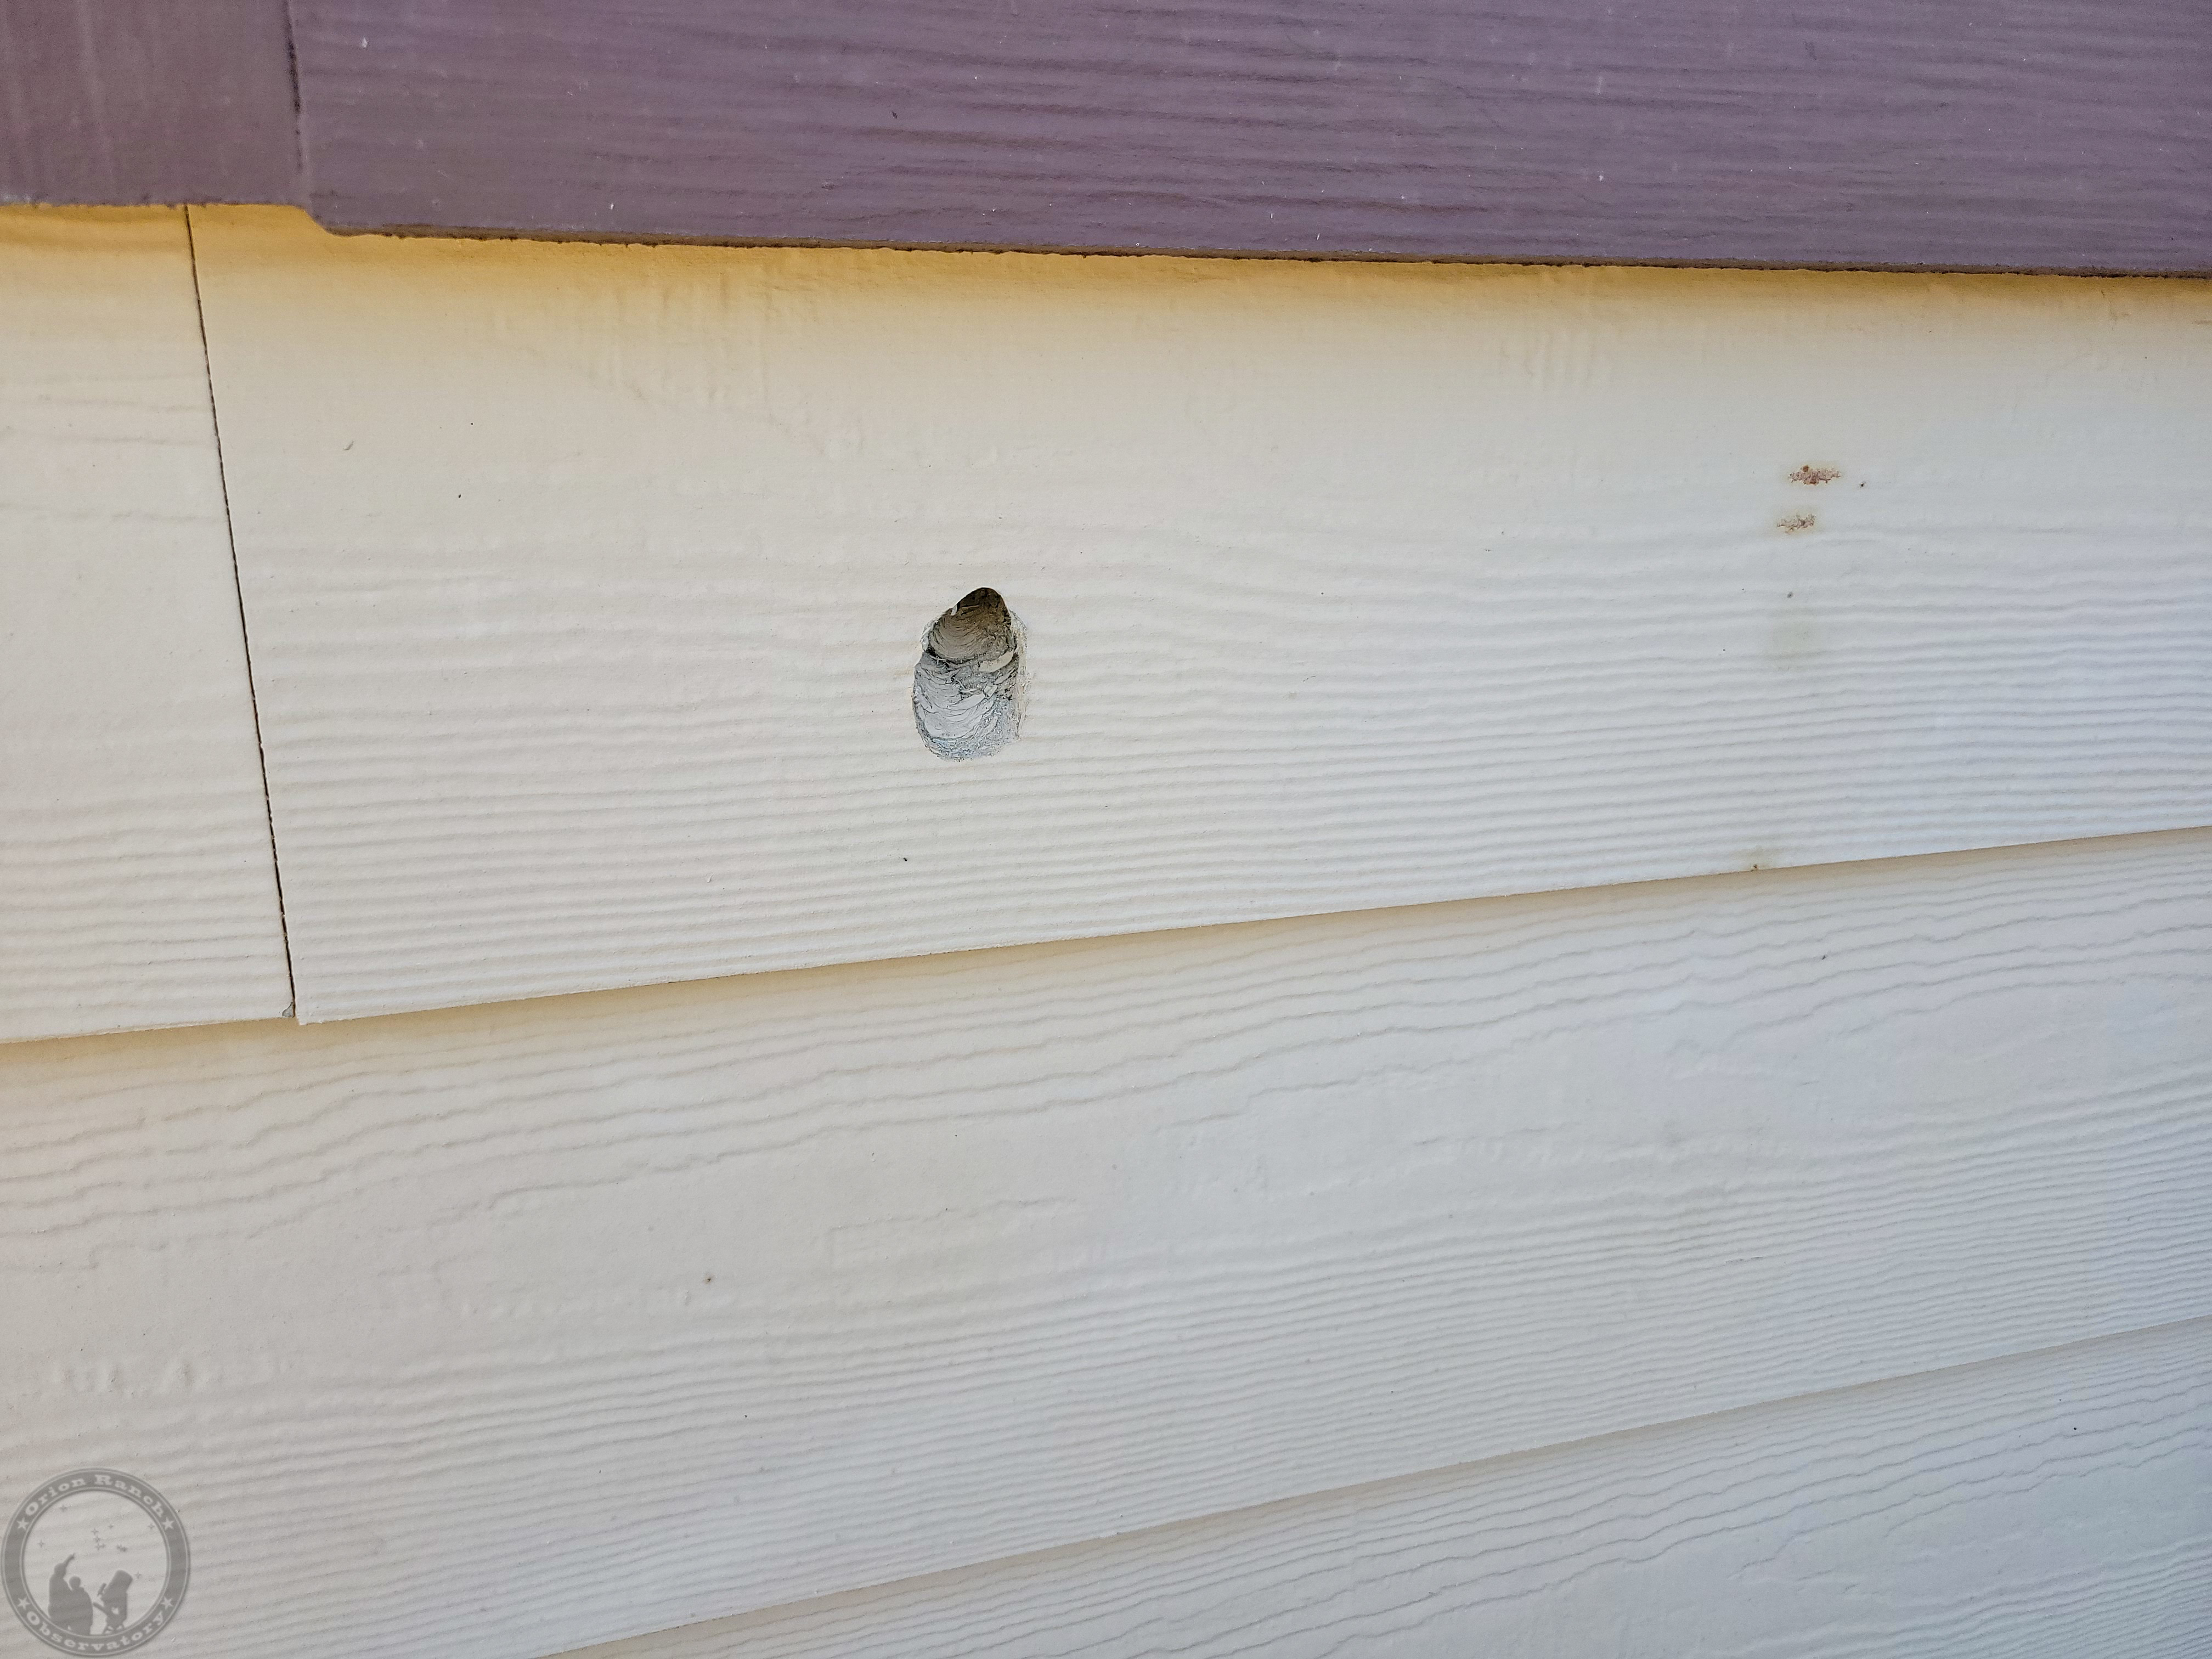
Look at all that wasp nest debris!  Ugh!  Going to have to get up there with a shop vac after I finish all of this.

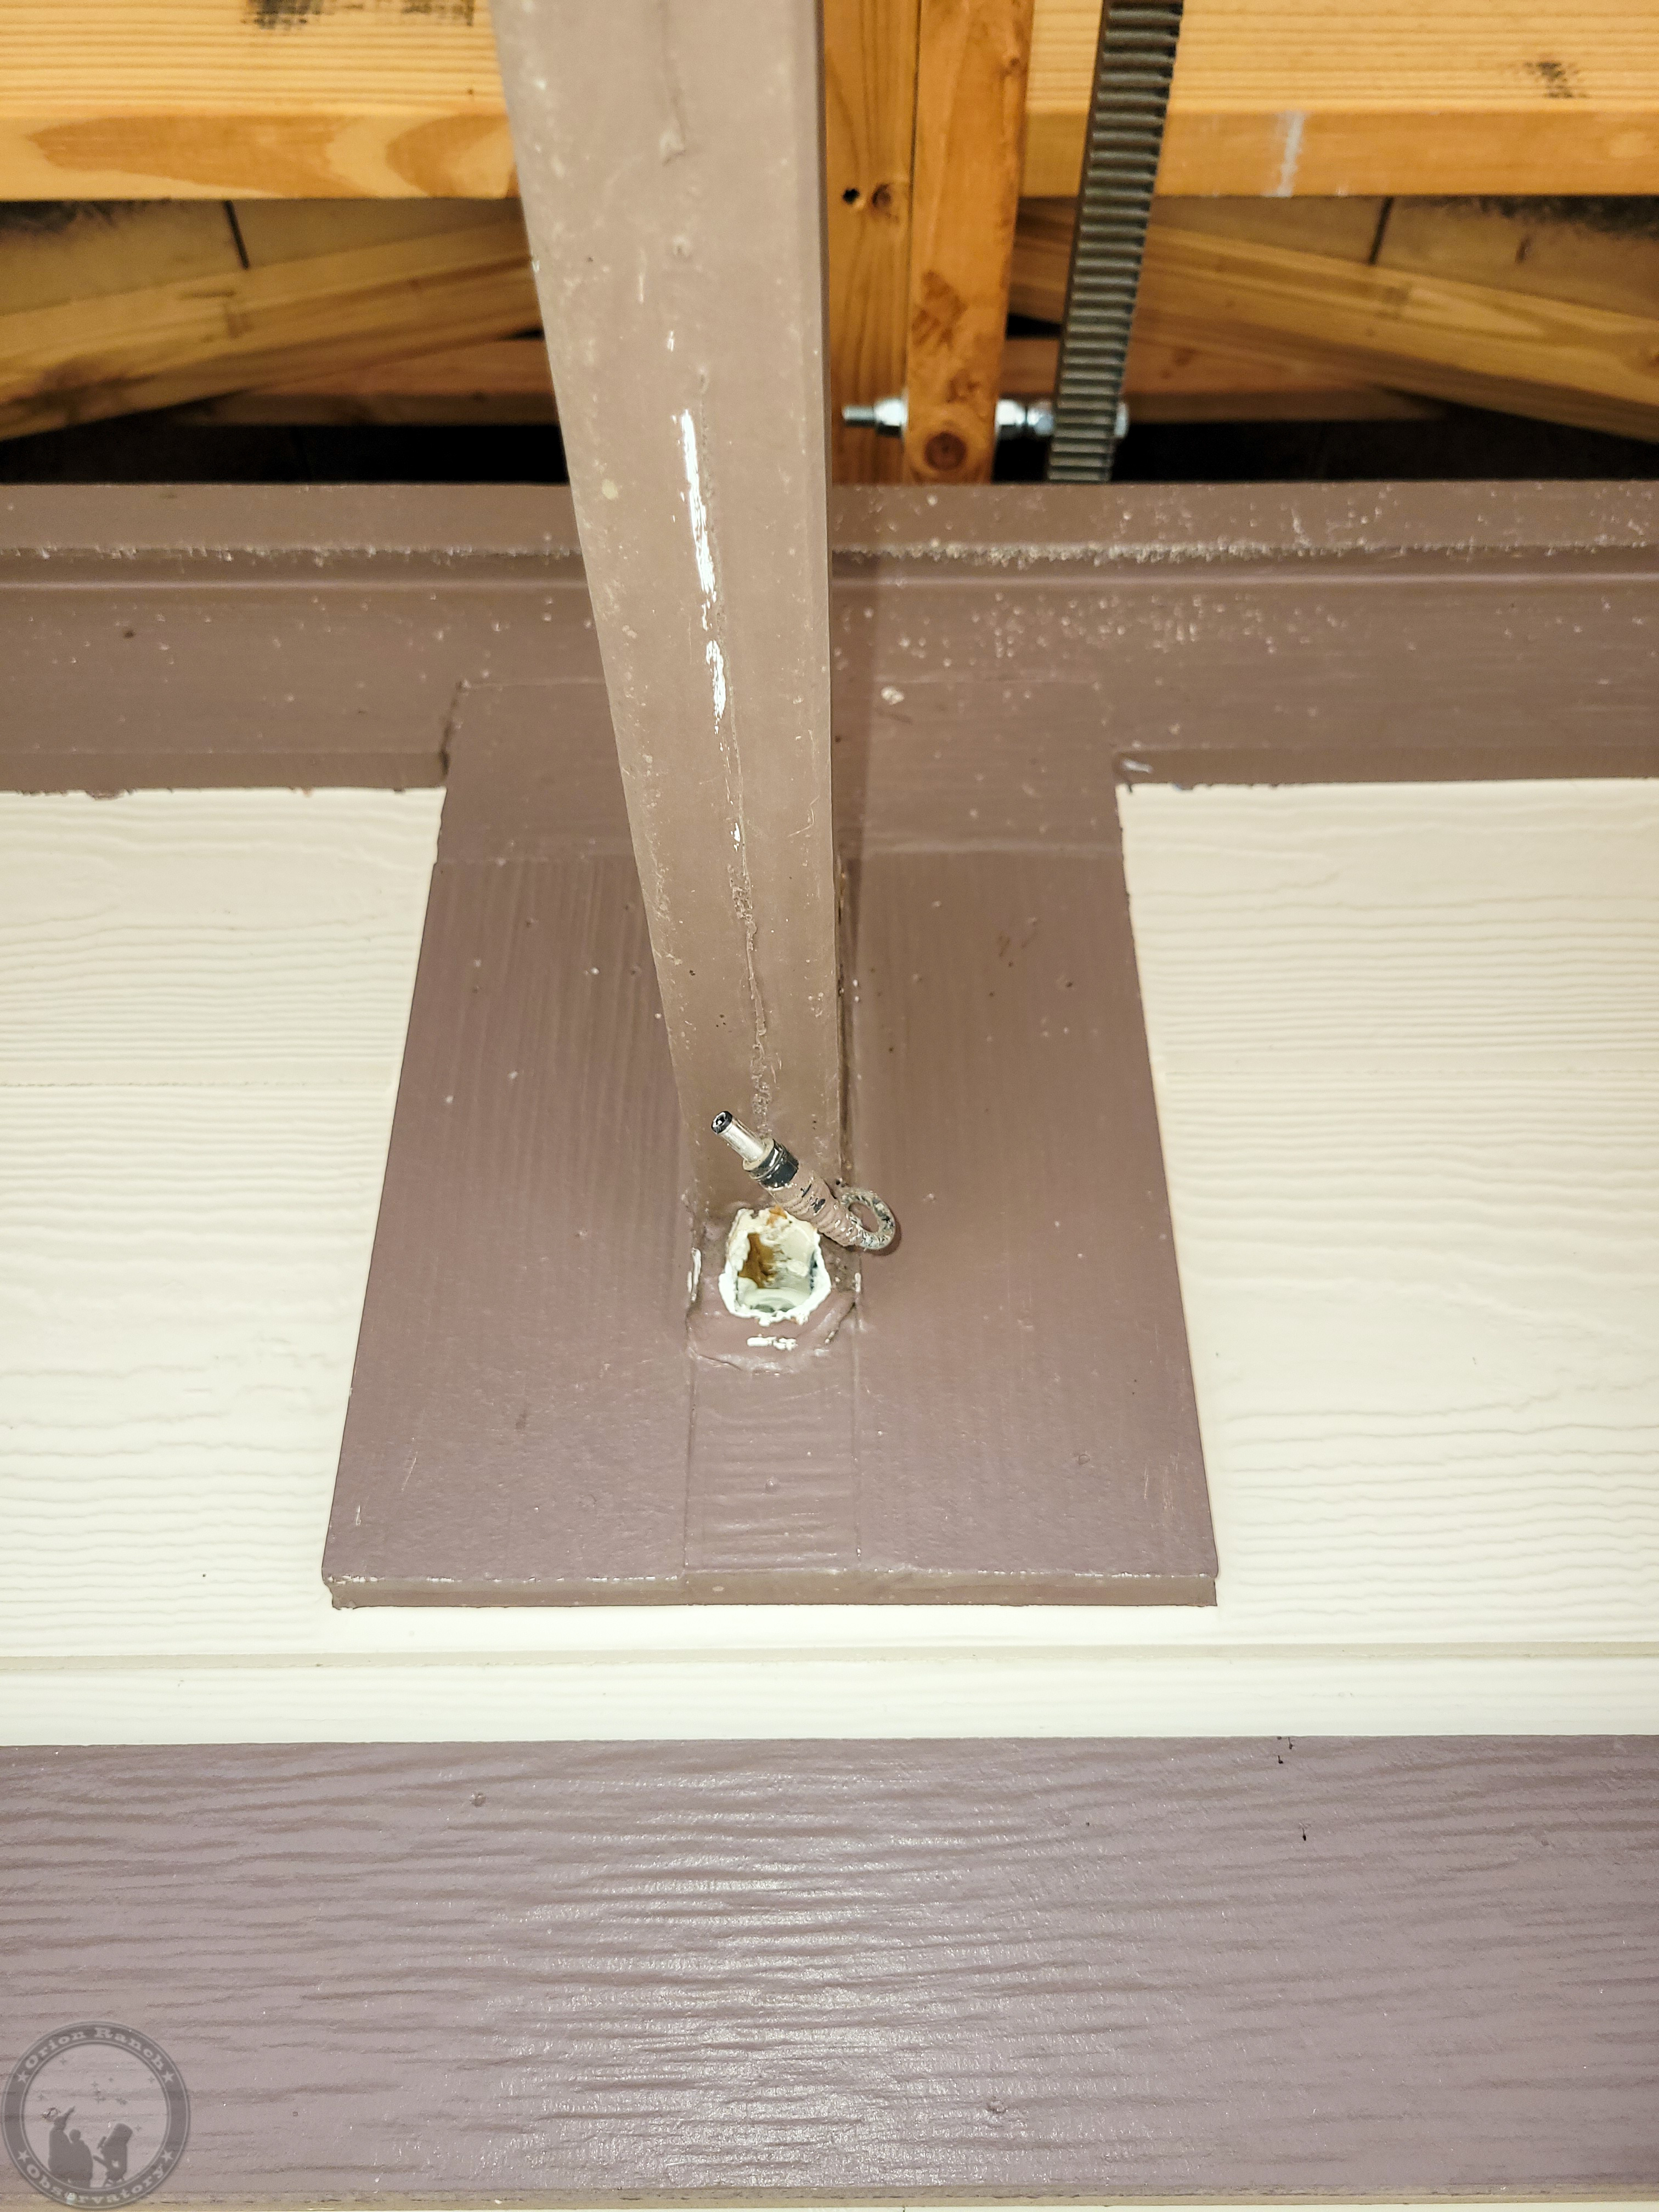
Here’s where I pulled the conduit out of the caulk.

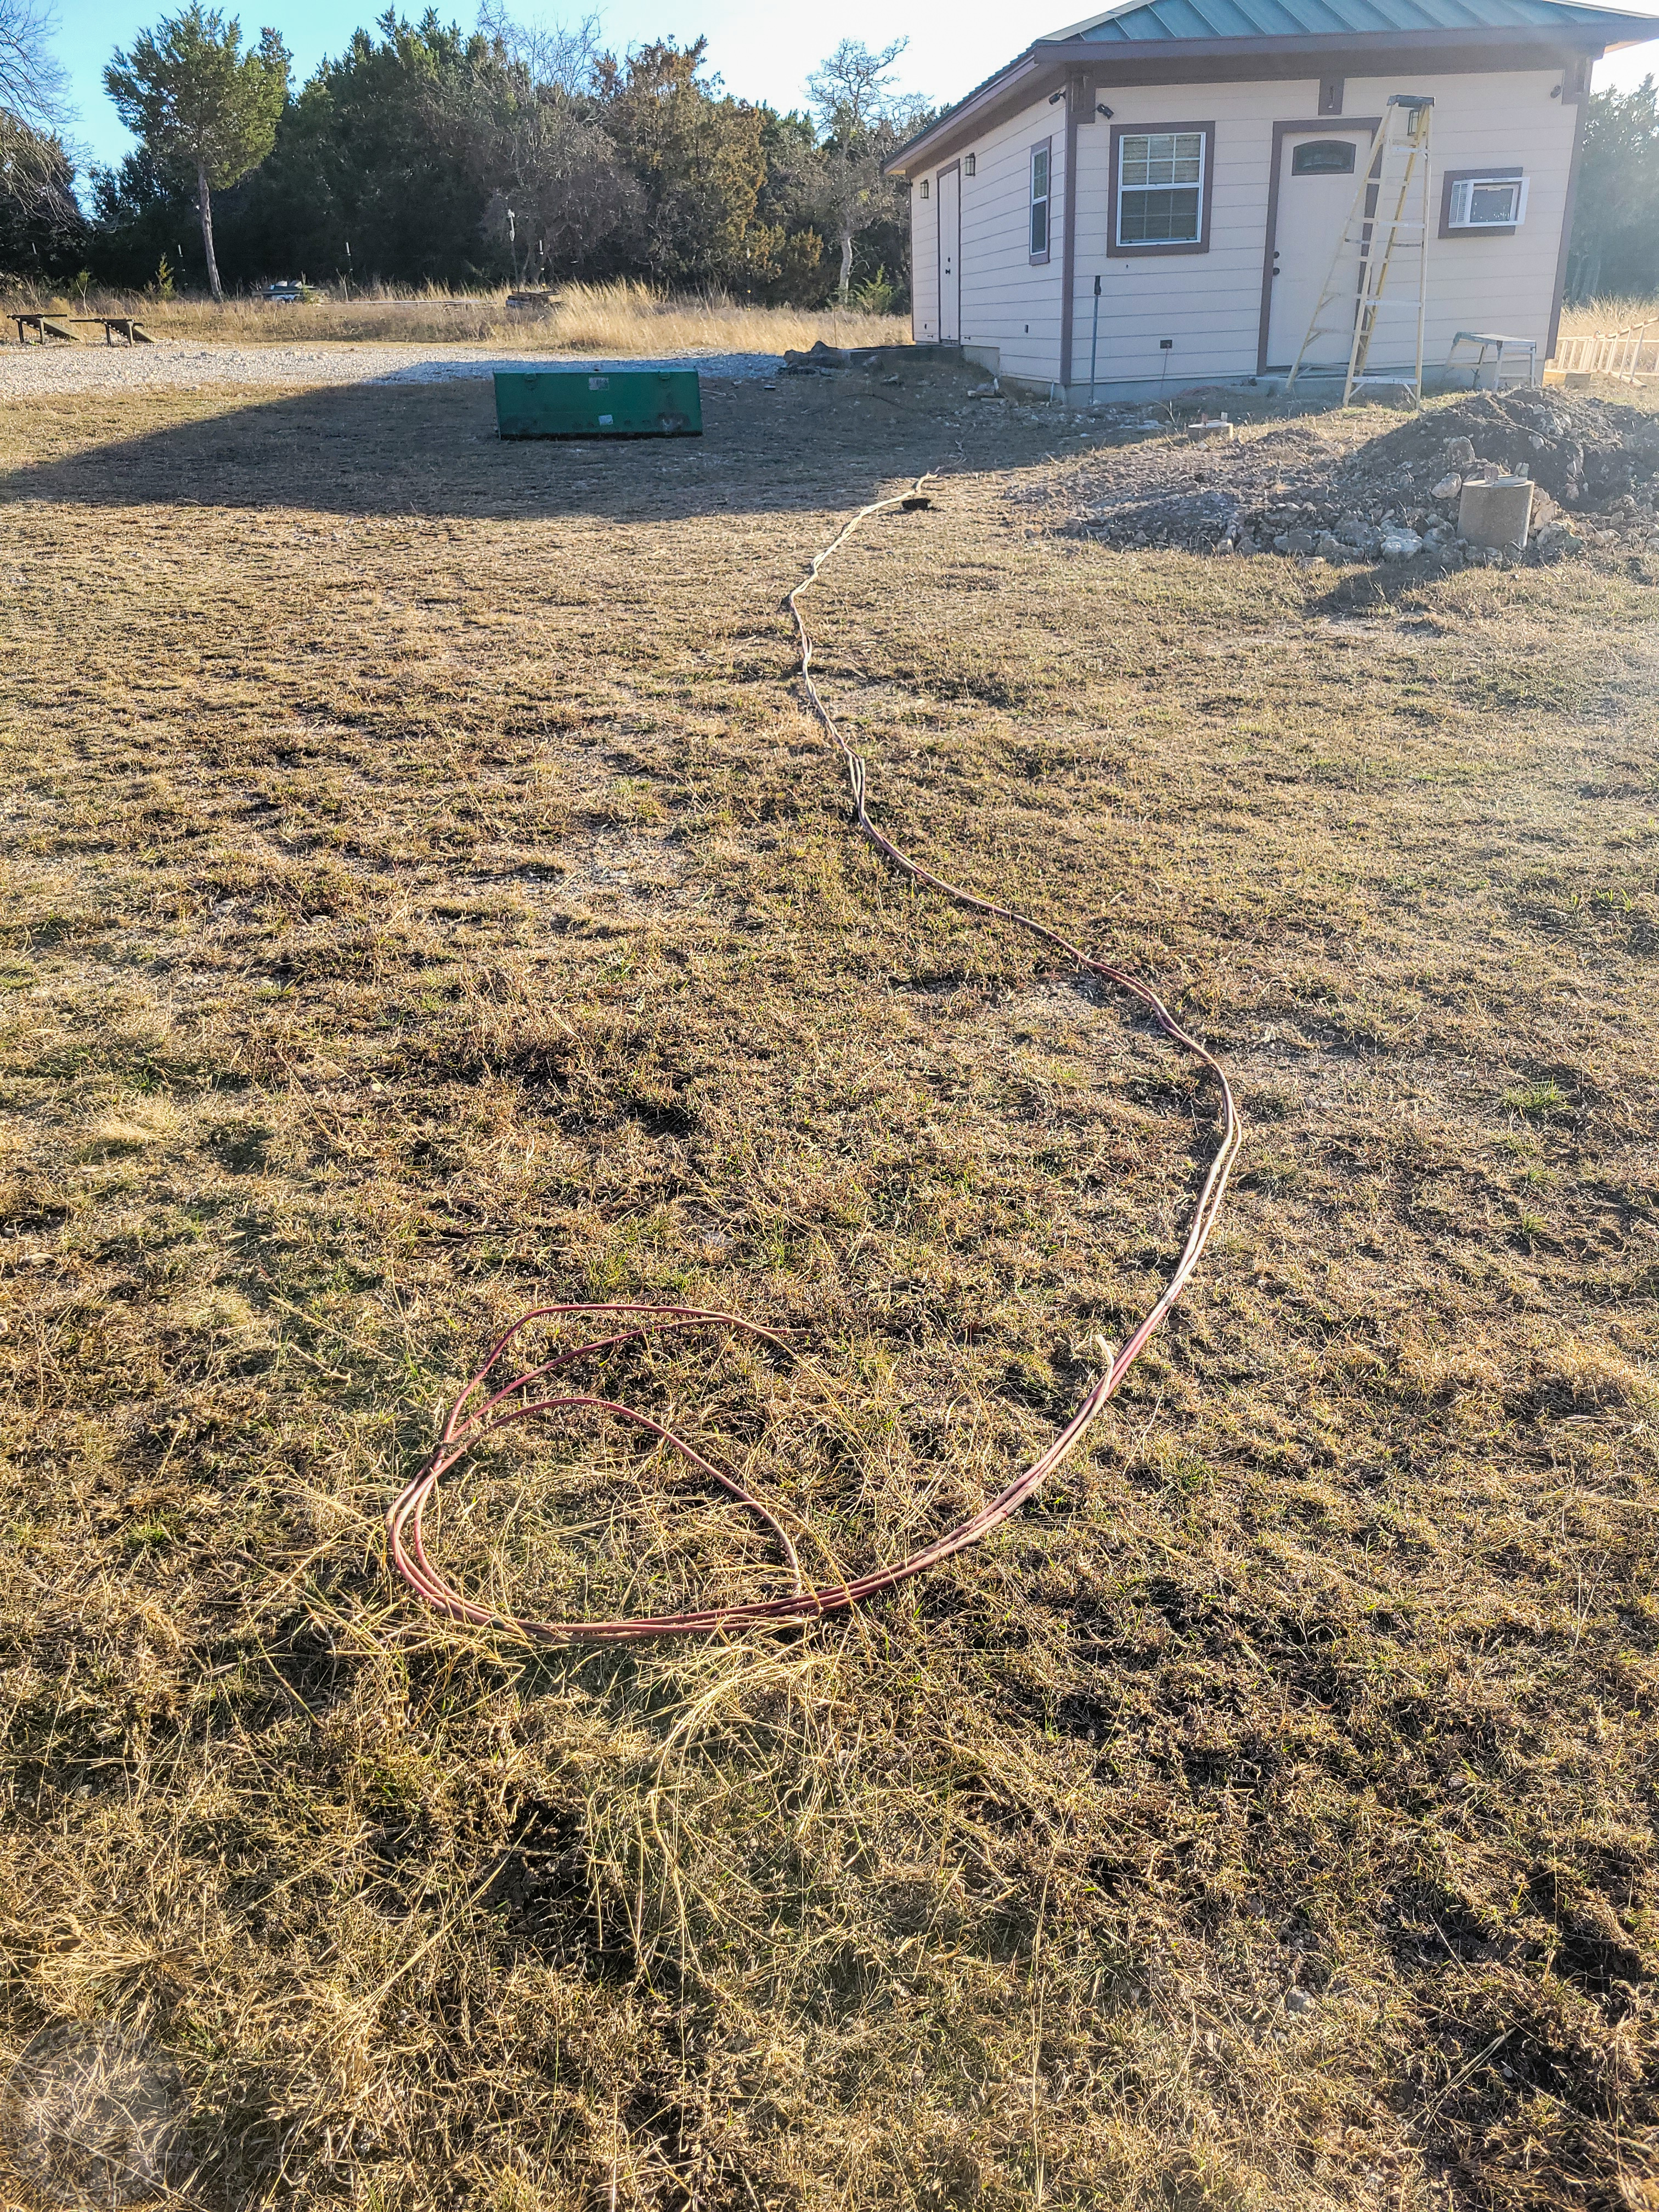
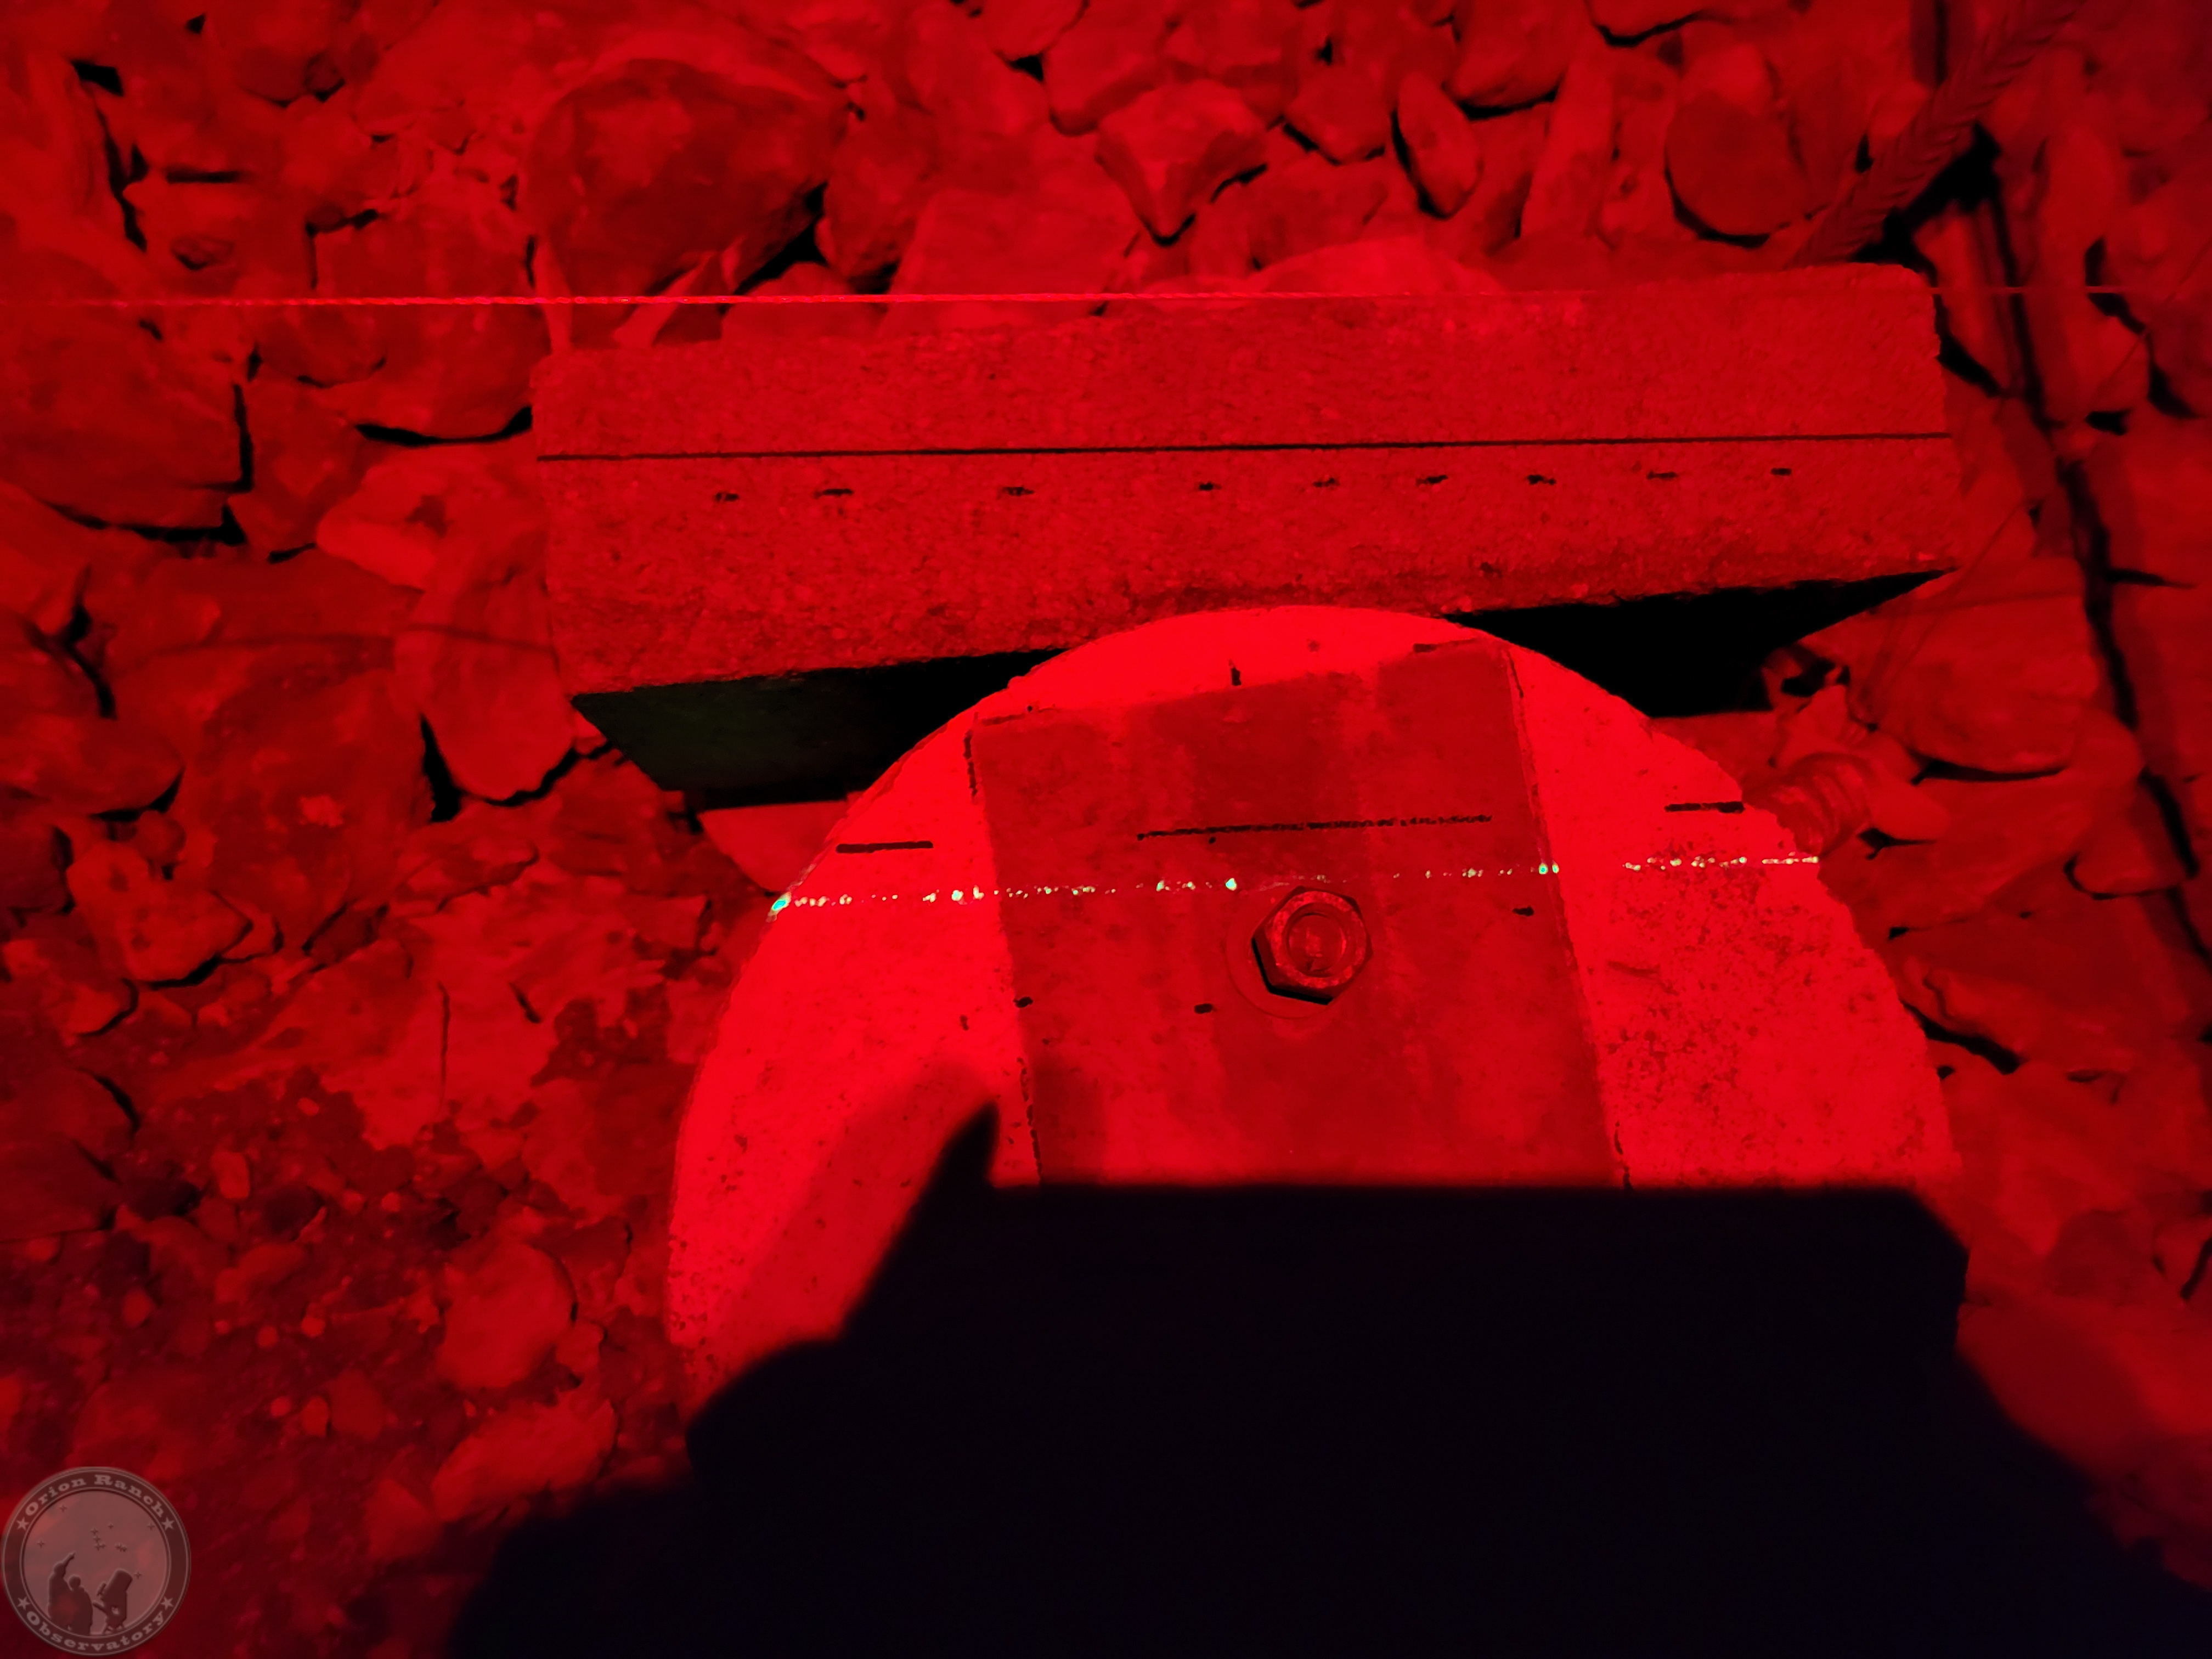
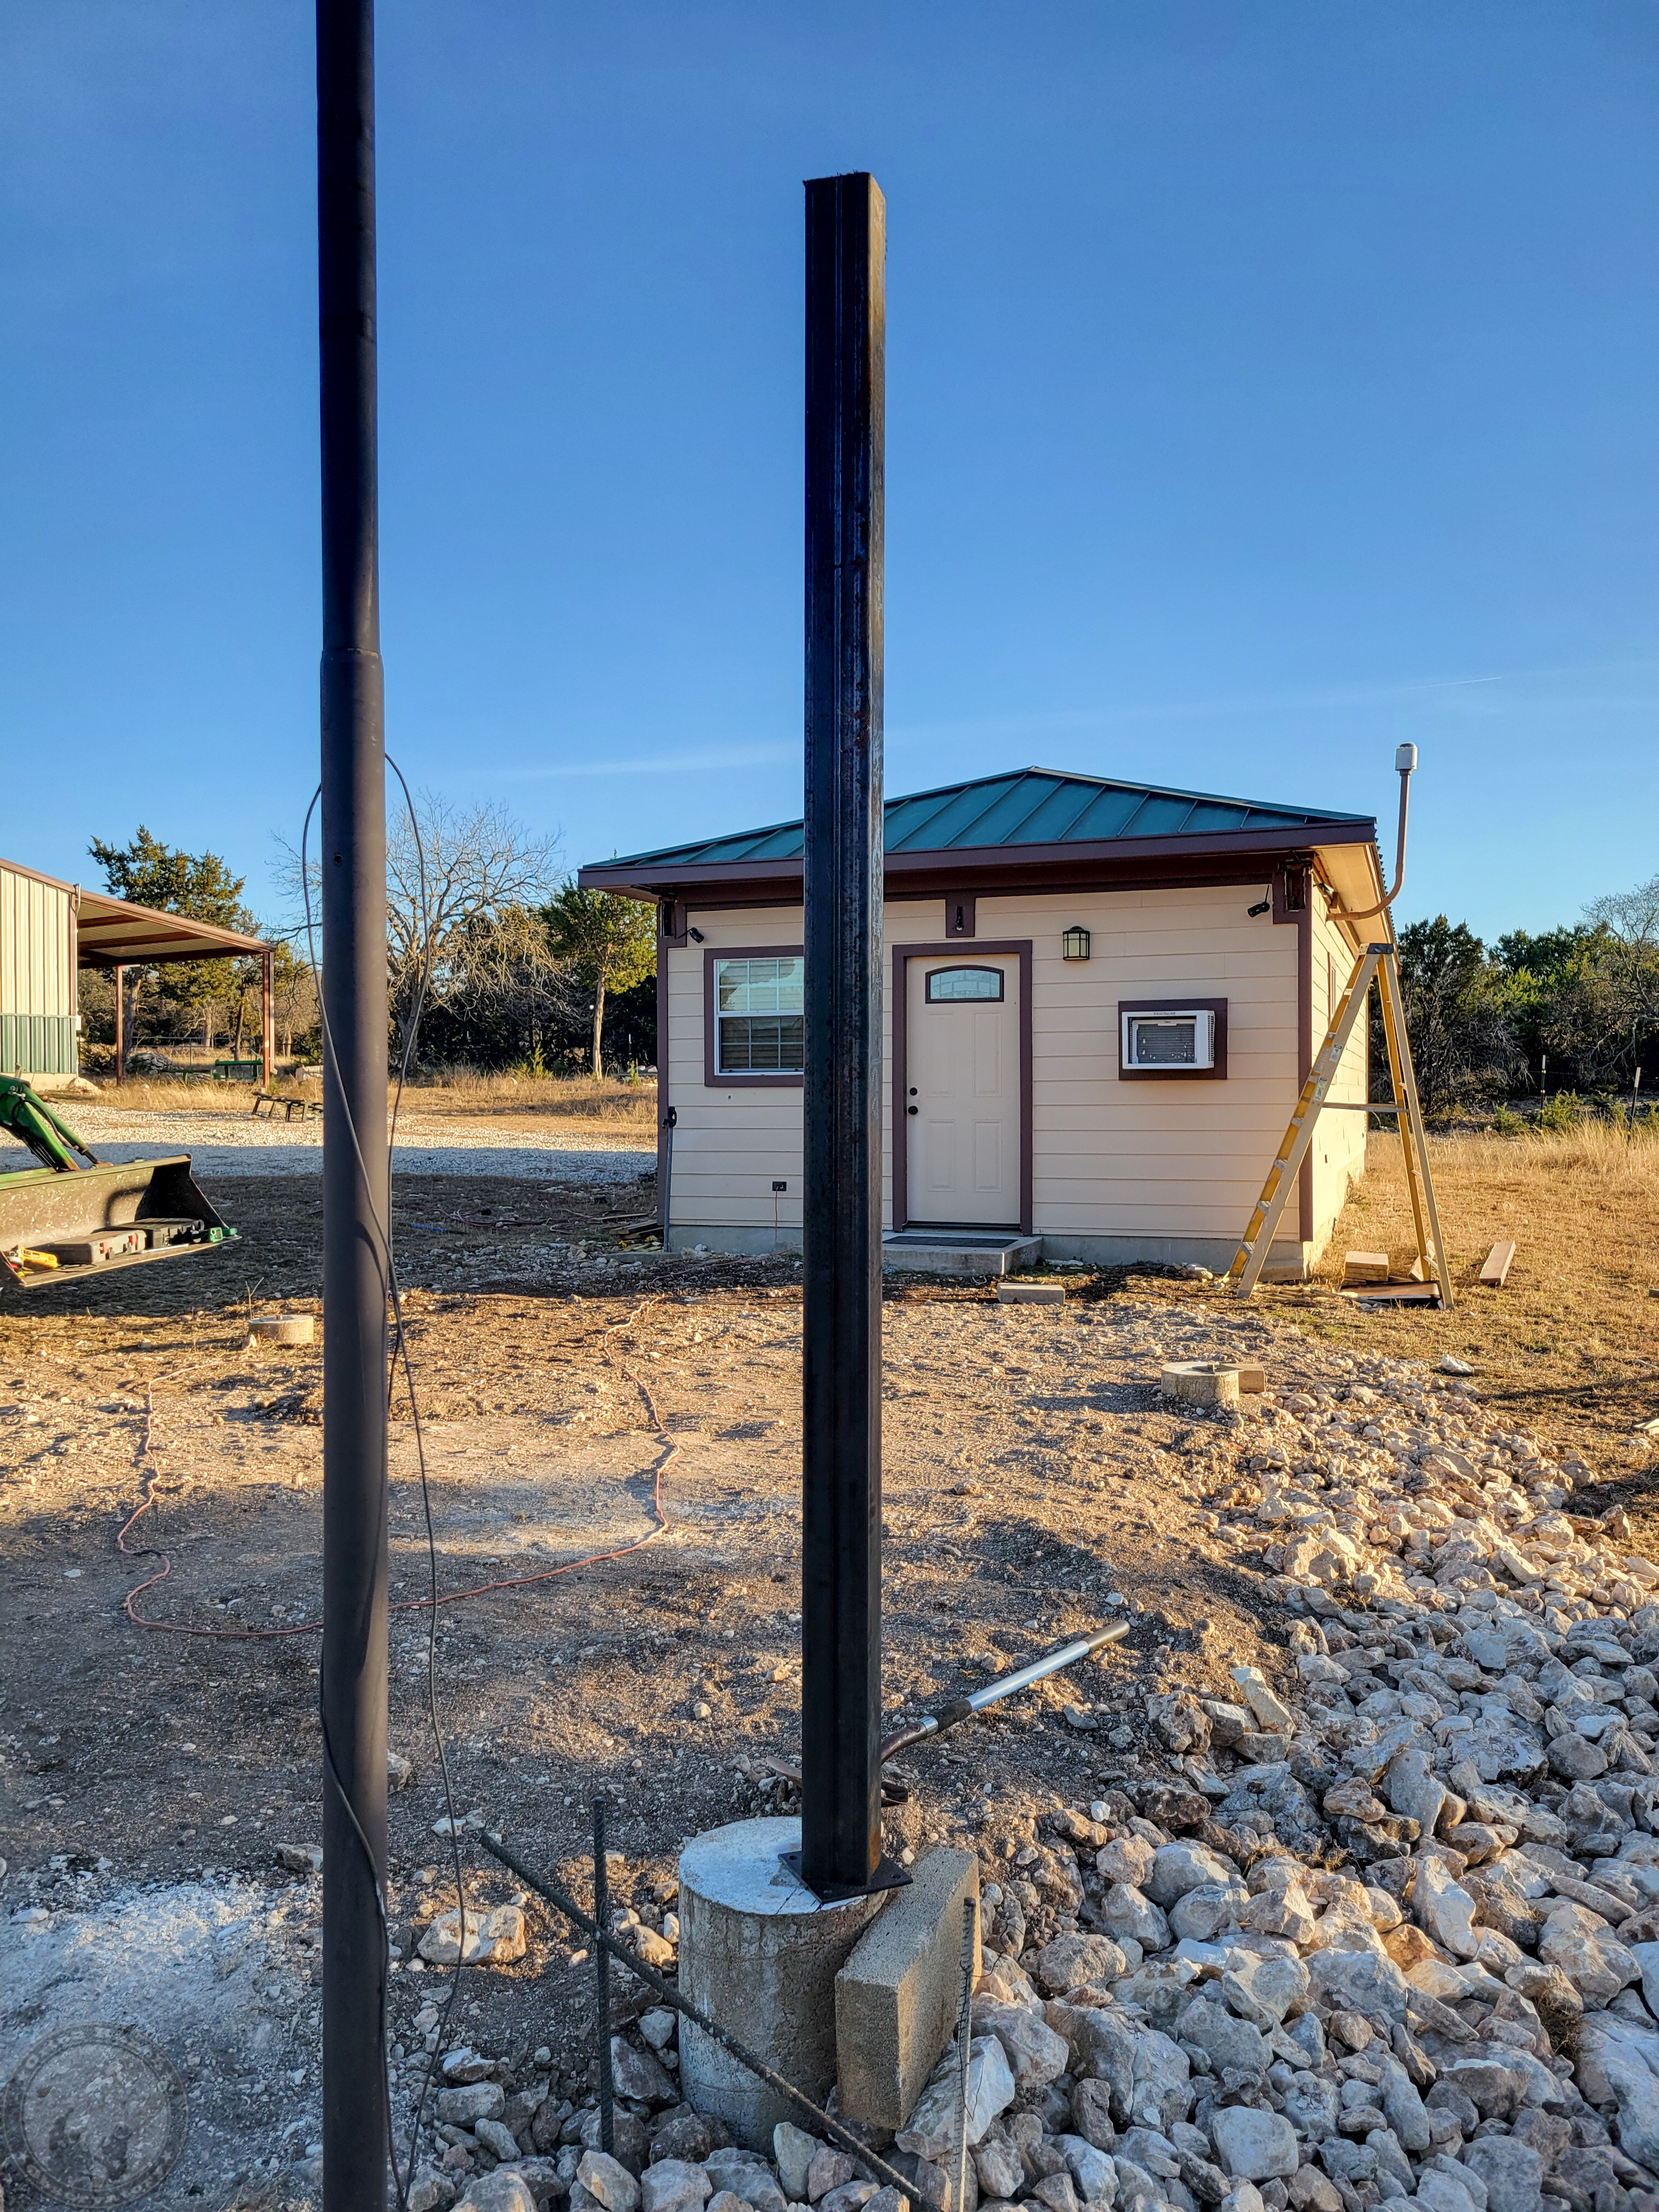
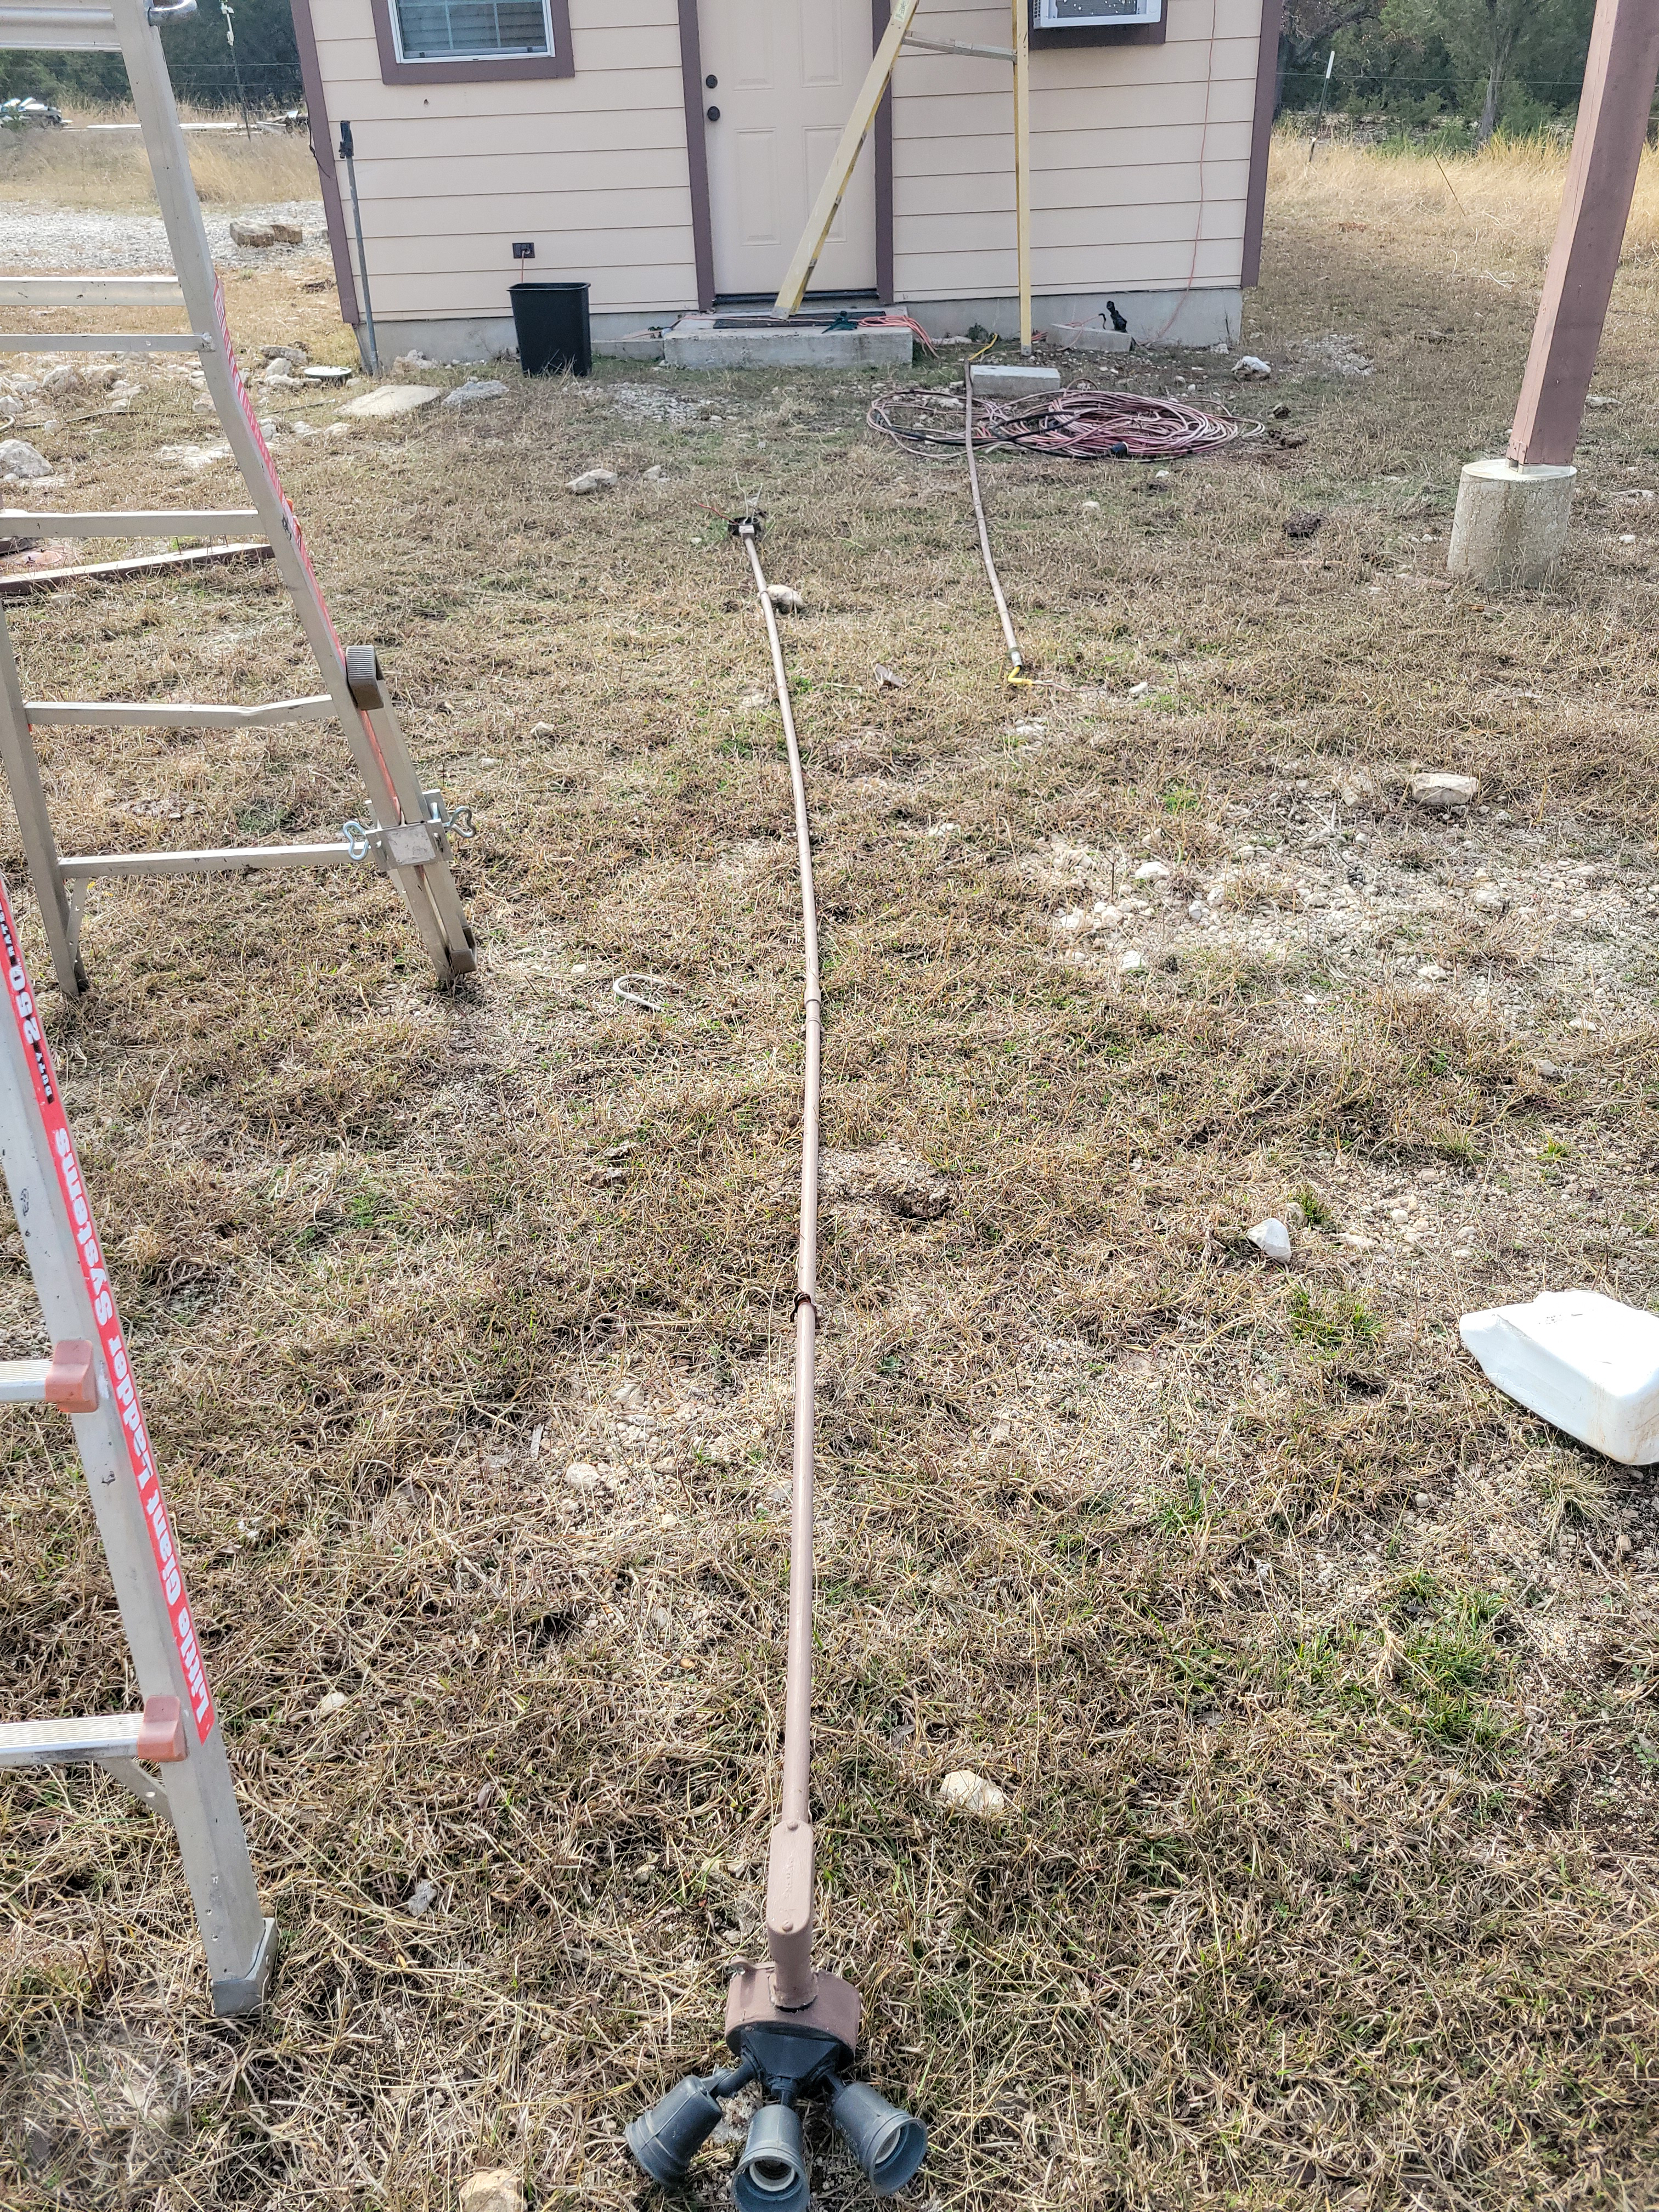
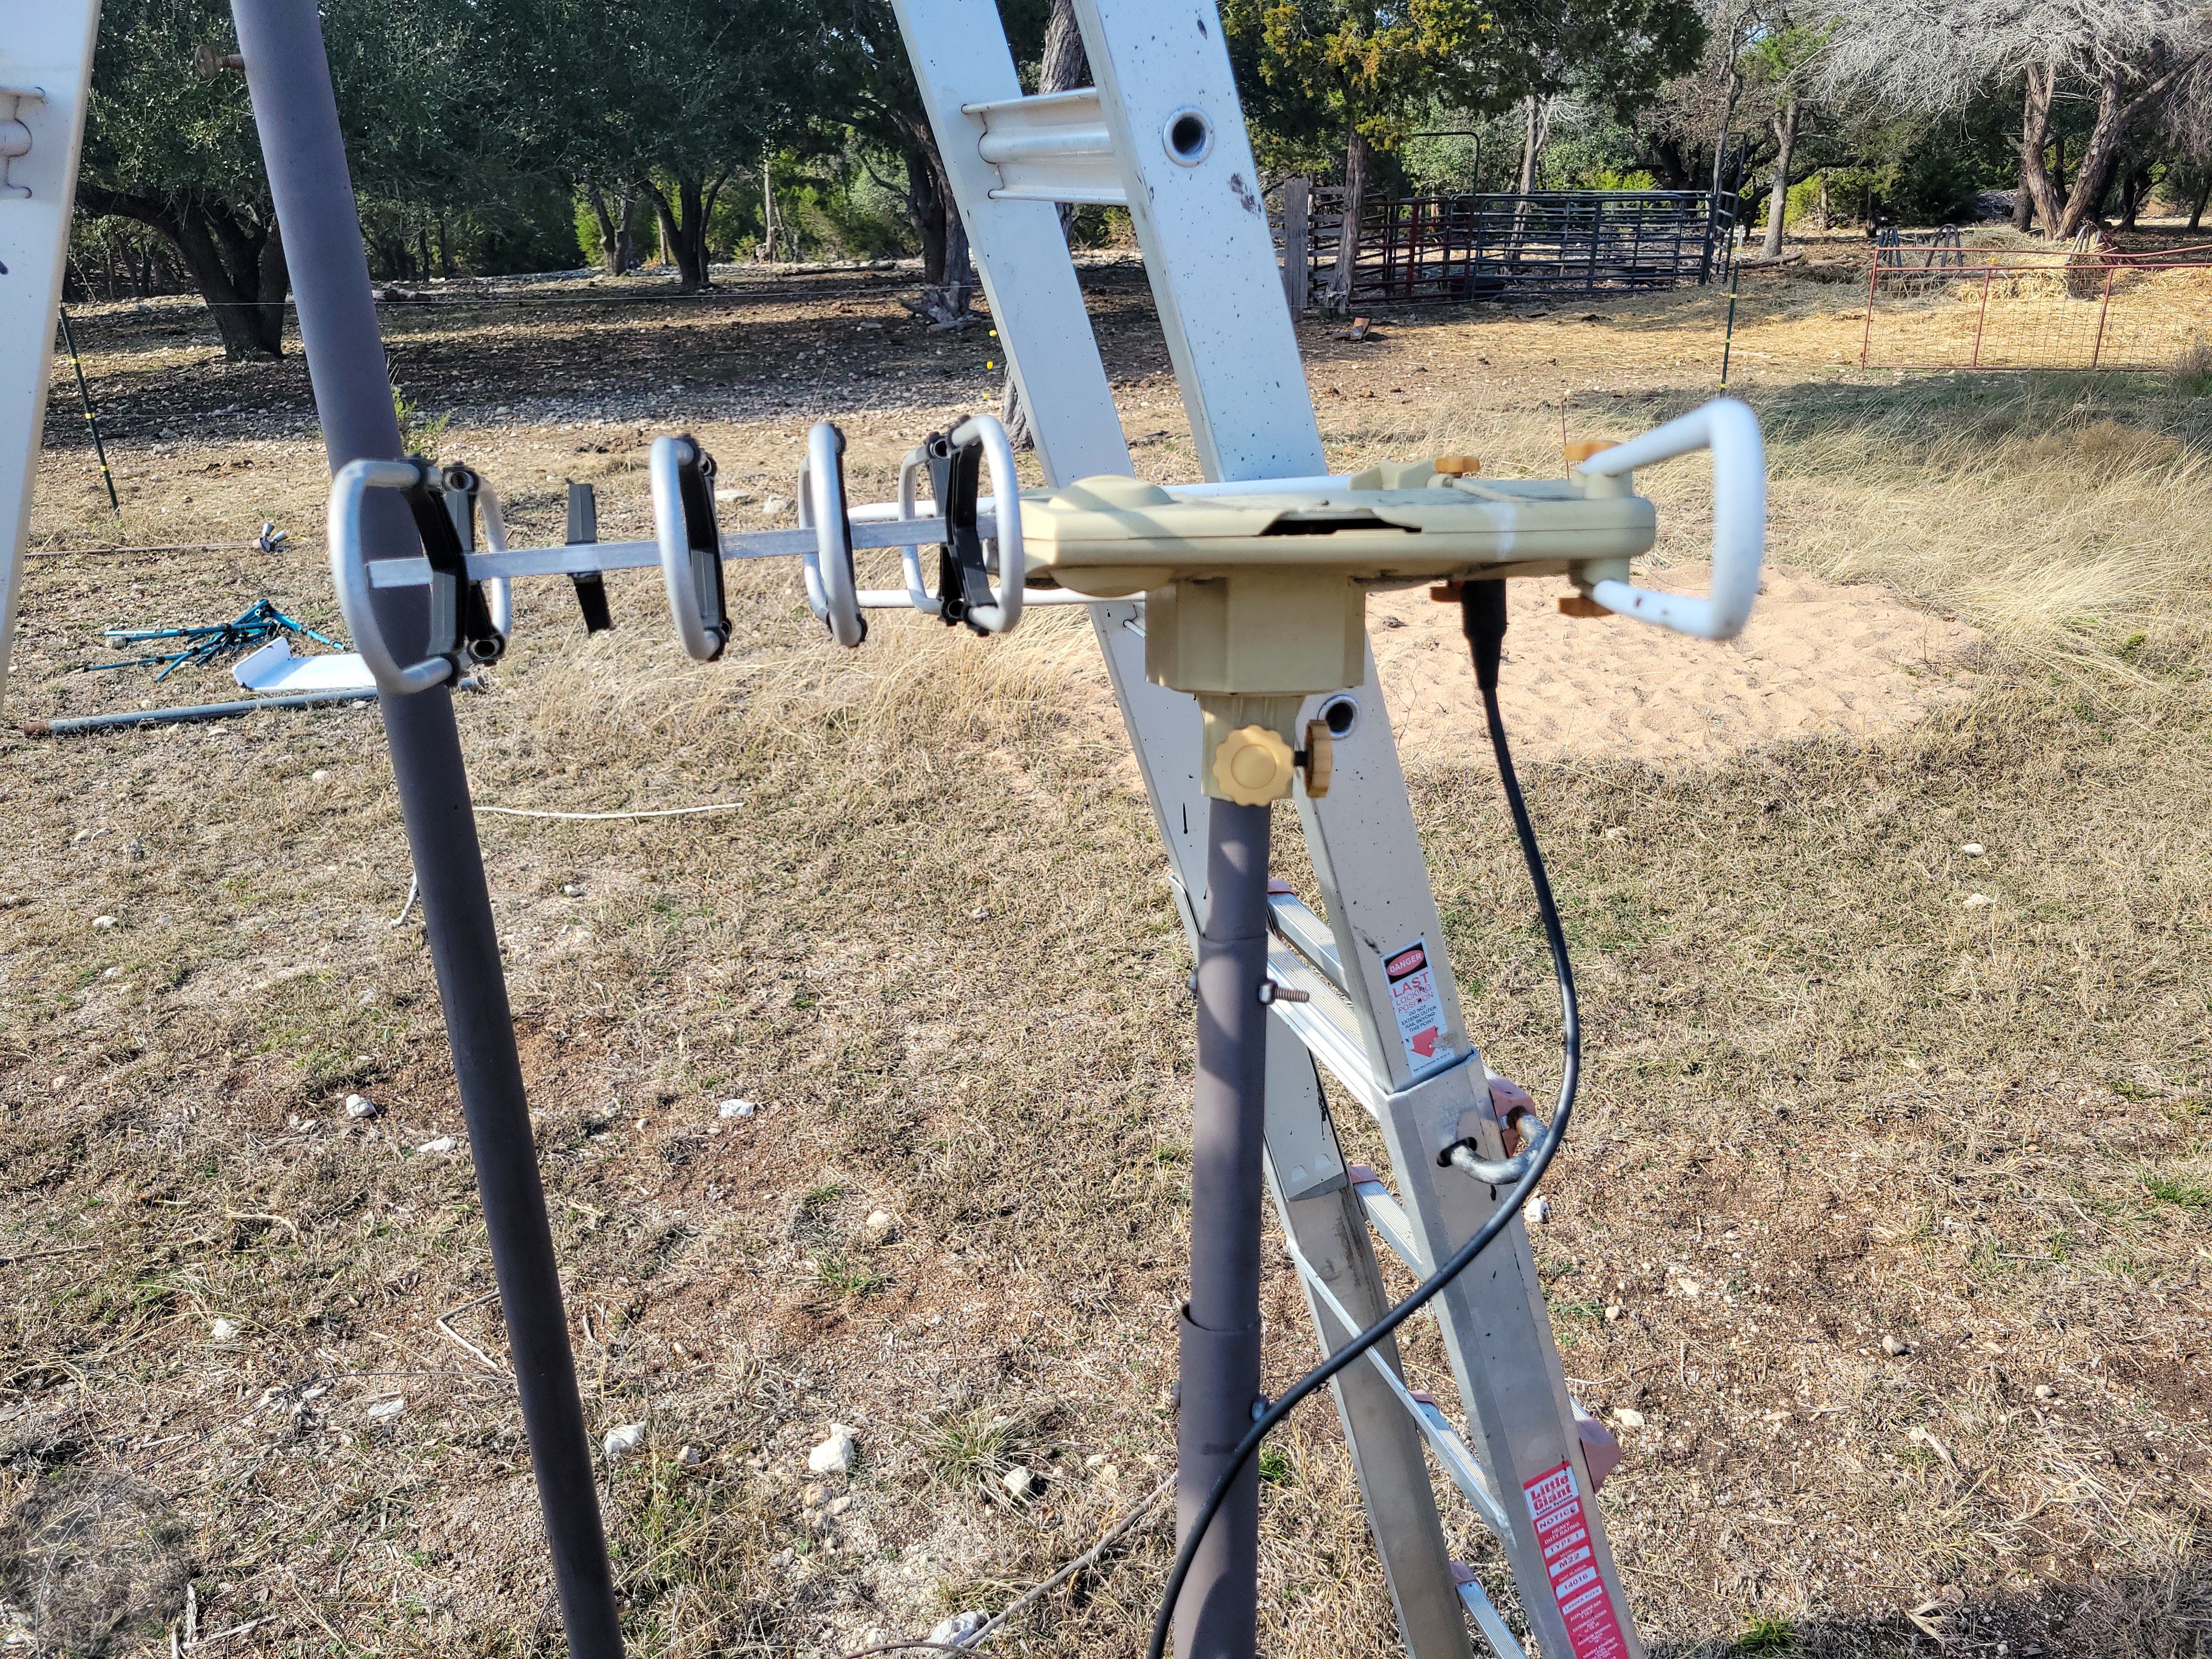
Next came pulling down the pole with all of the TV and cell phone booster antennas and removing all of the associated cables.  With the hail storms, etc. they are all rather worse for wear.  Not sure I’ll be putting any of this back up now that we have satellite internet, but it did make for a good lightning rod and north direction finder for my all-sky camera alignment!

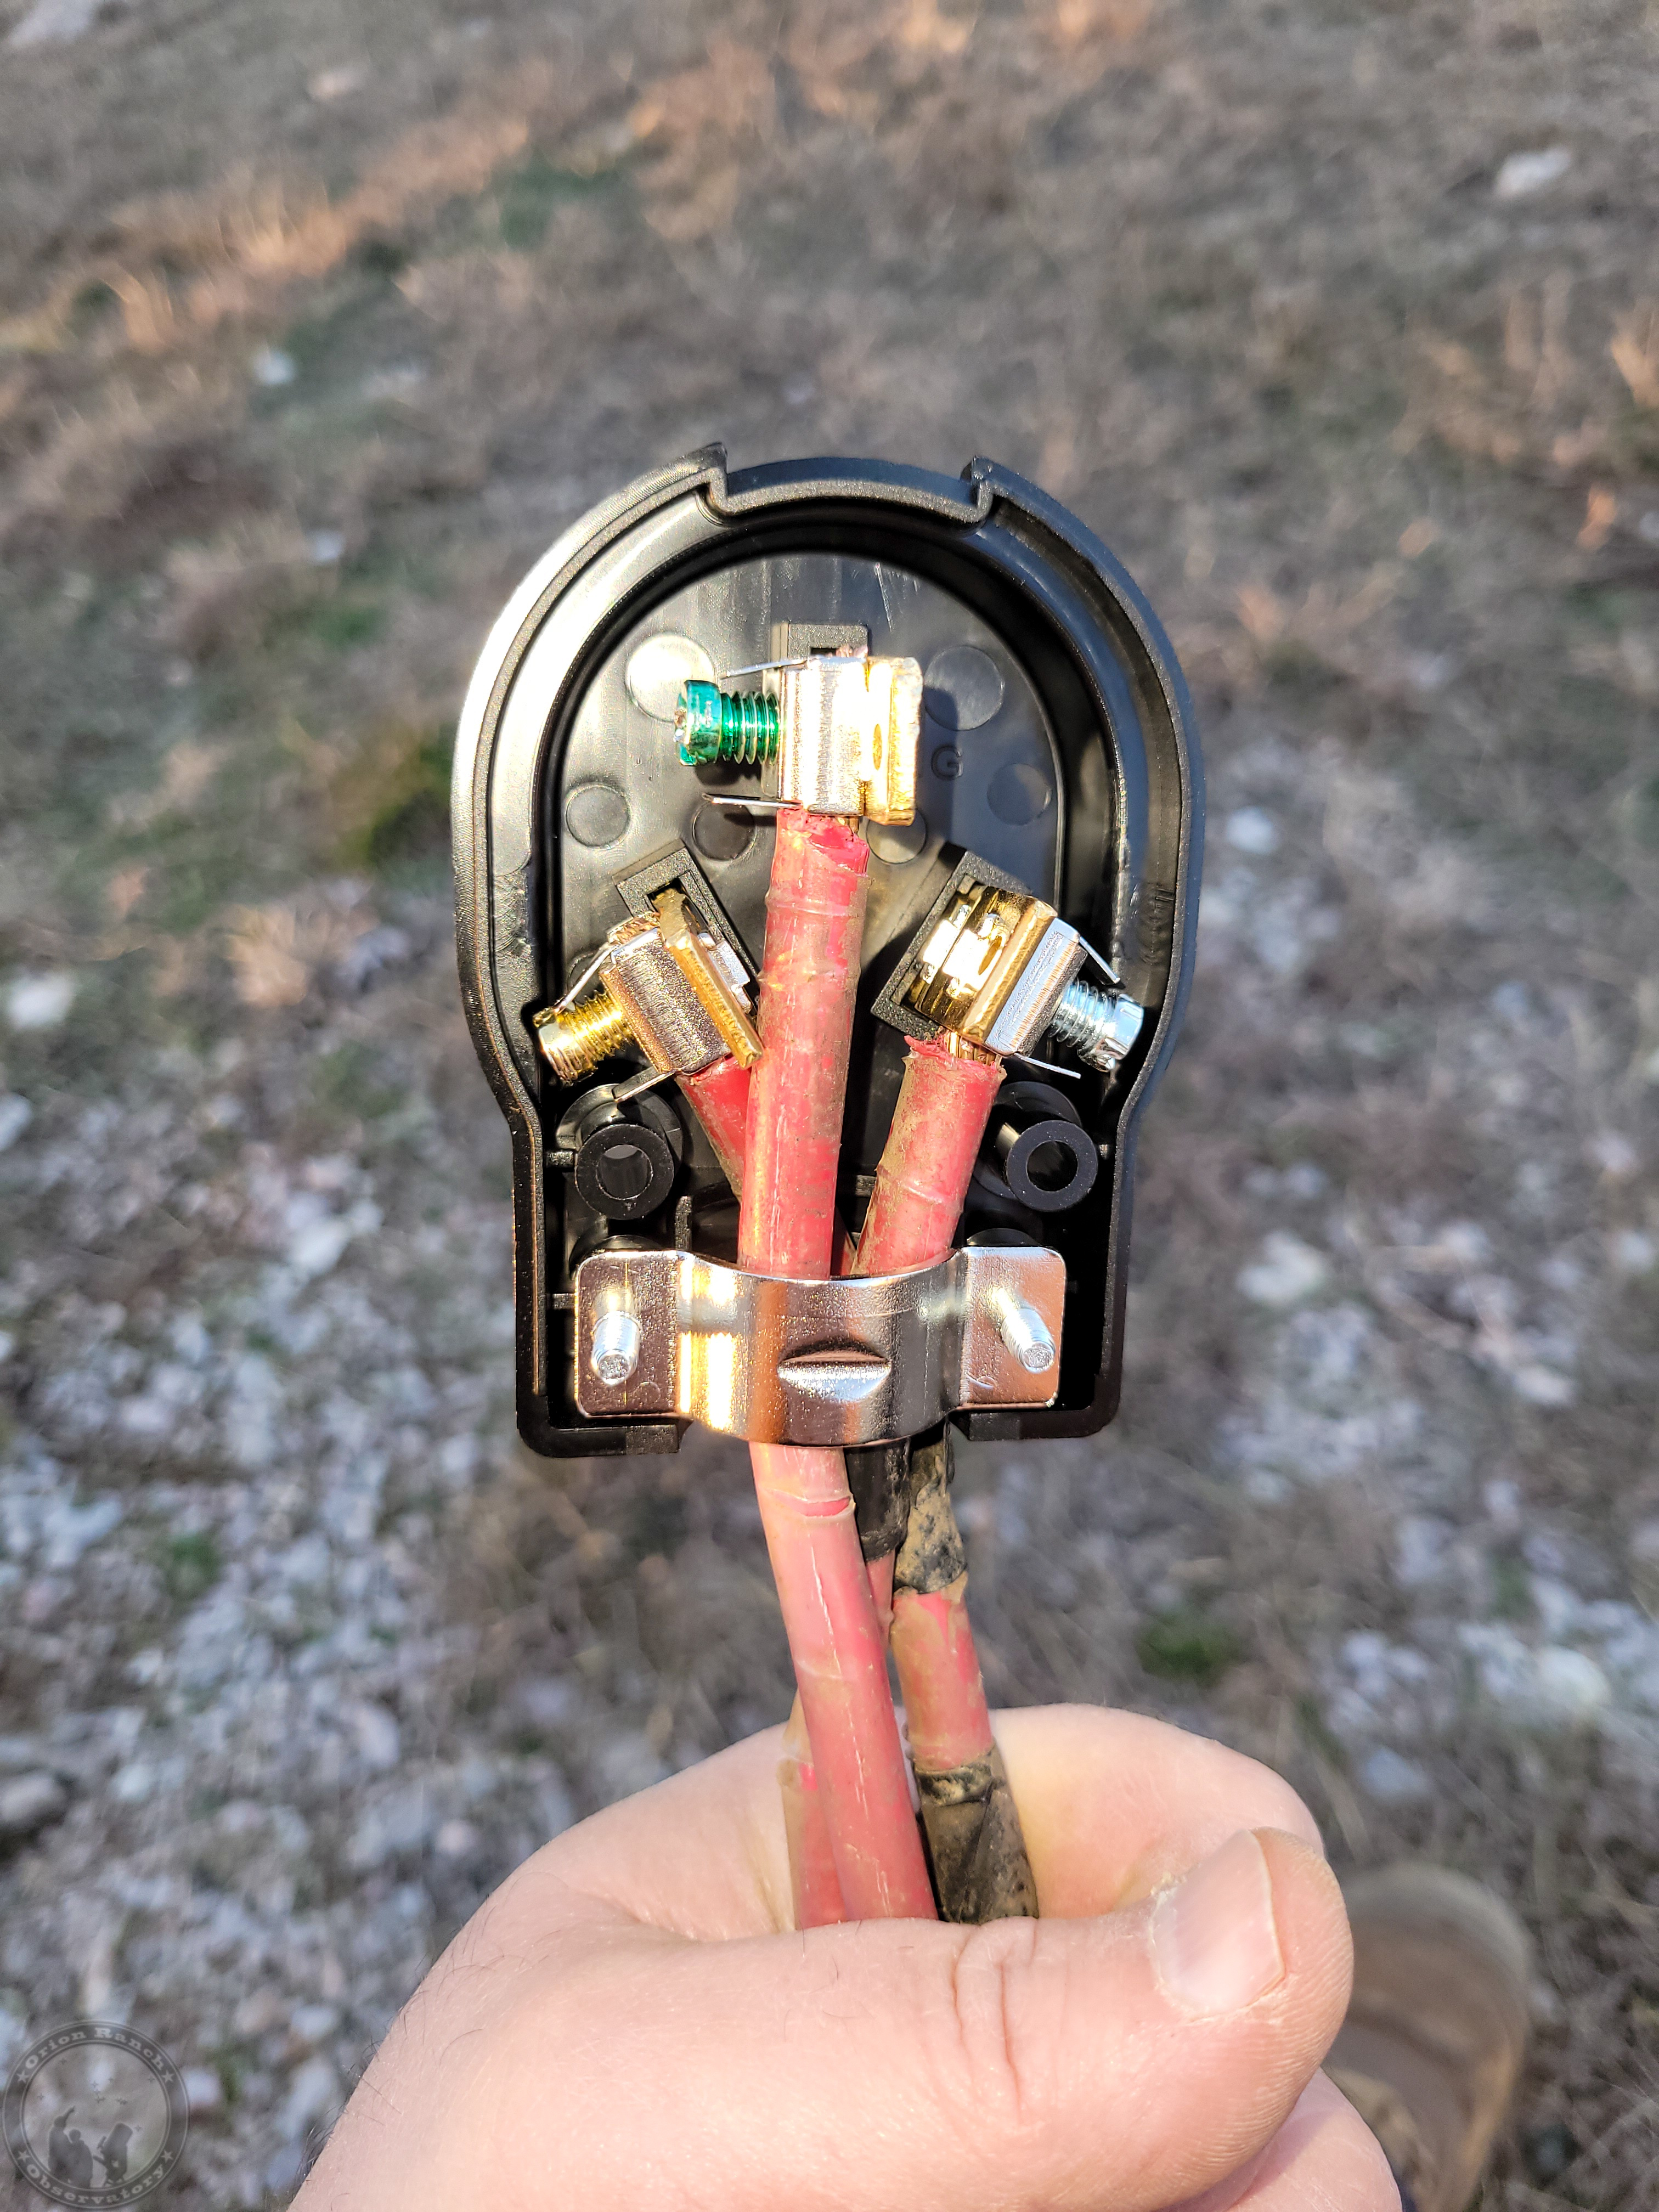
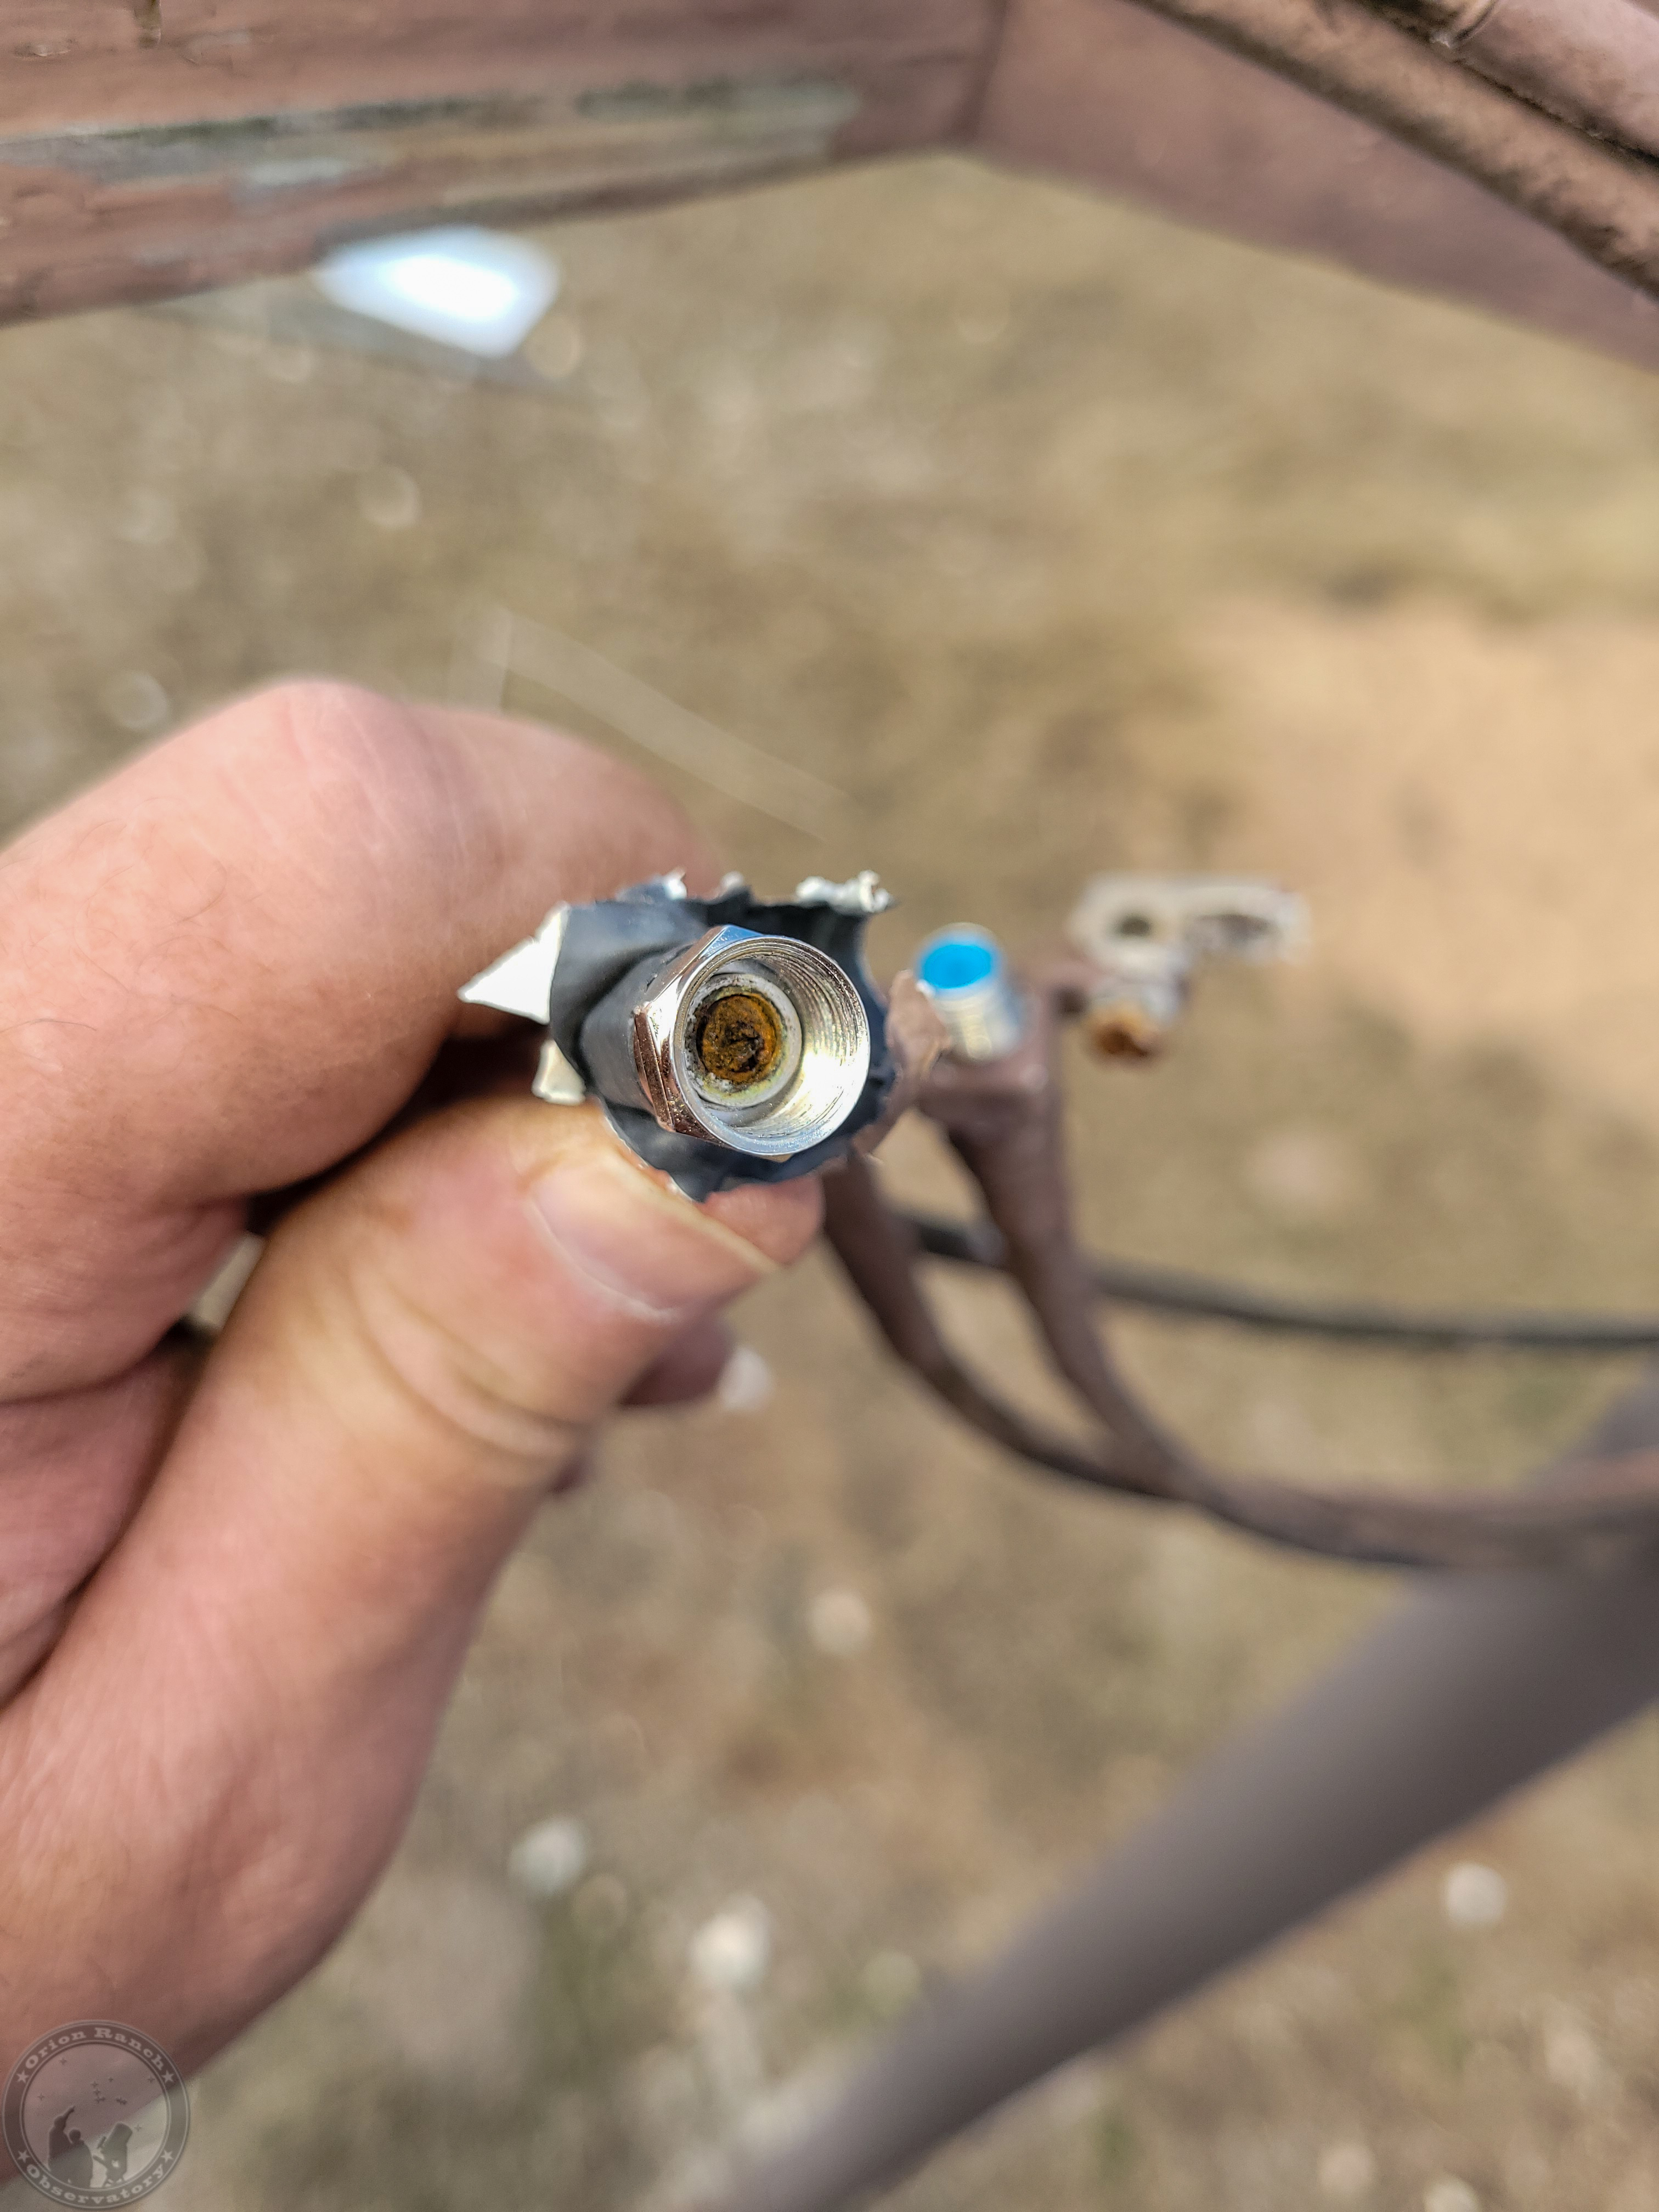
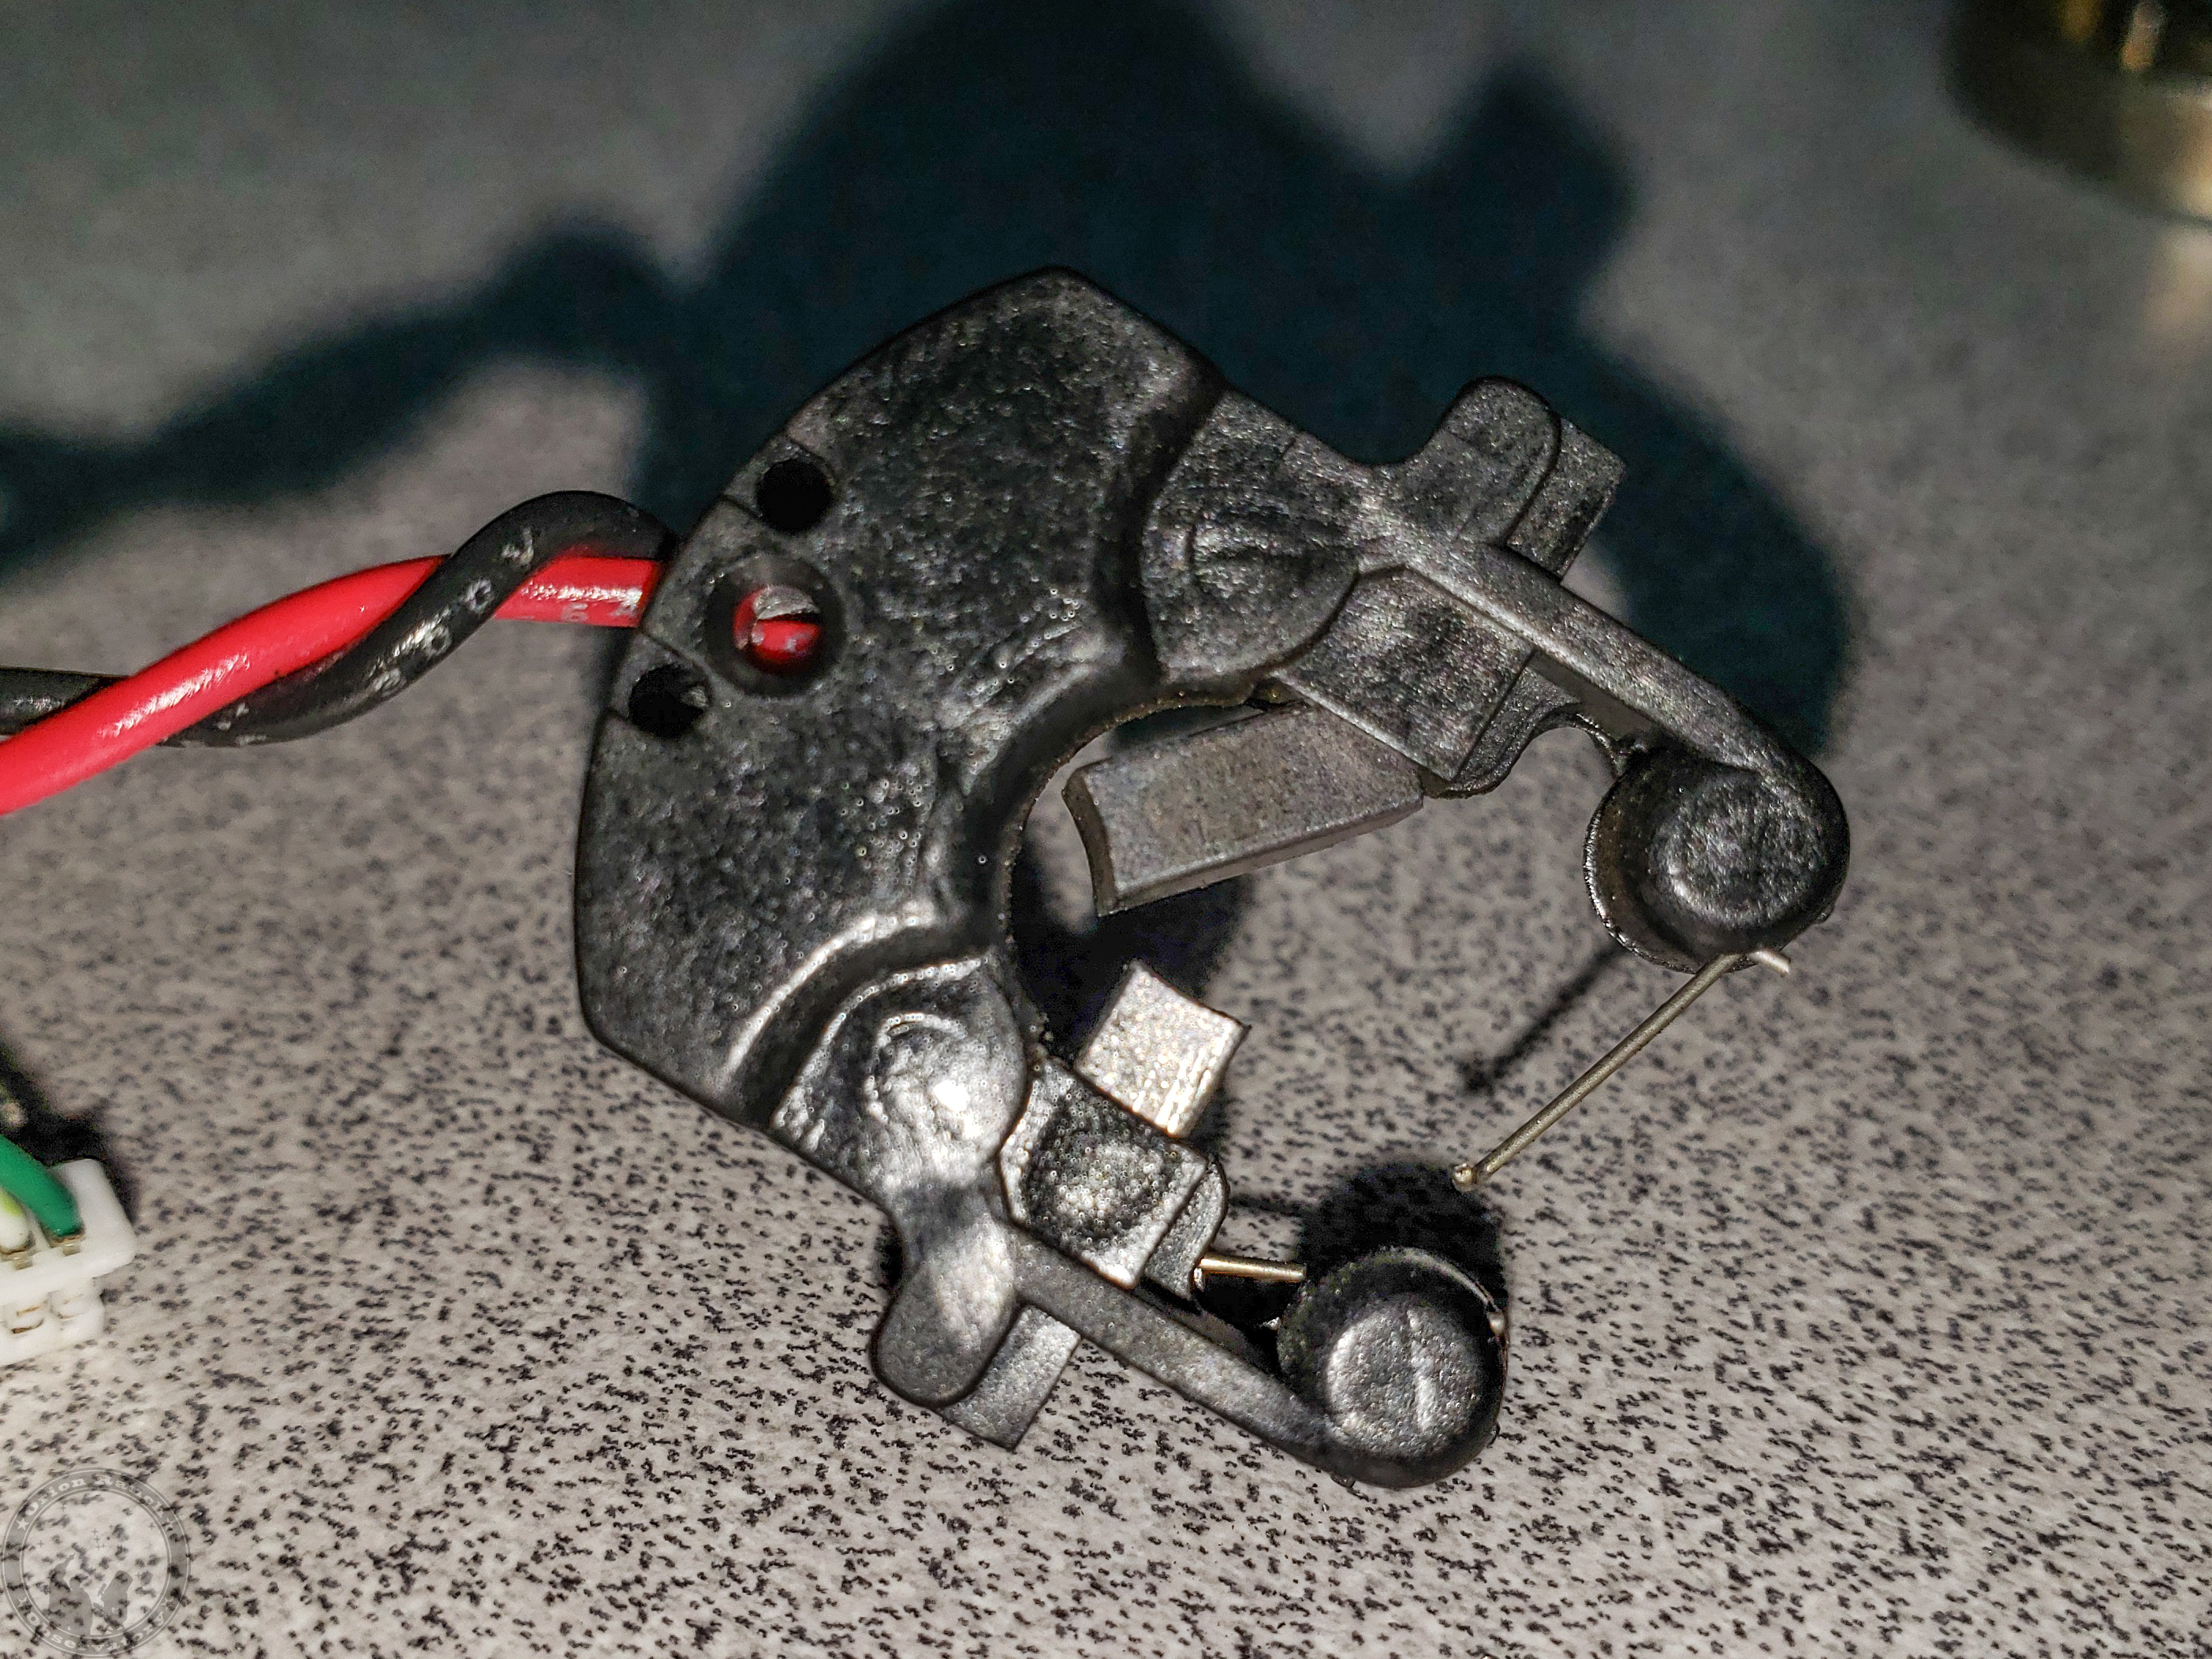
Speaking of lightning, the center pin of the TV antenna cable was burnt off at the grounding terminal.  I would expect lightning to primarily be carried on the shield, so it’s more likely it was the DC power supply that ran the amplifier in the antenna when all of that probably got shorted out with the busted housing and rain.

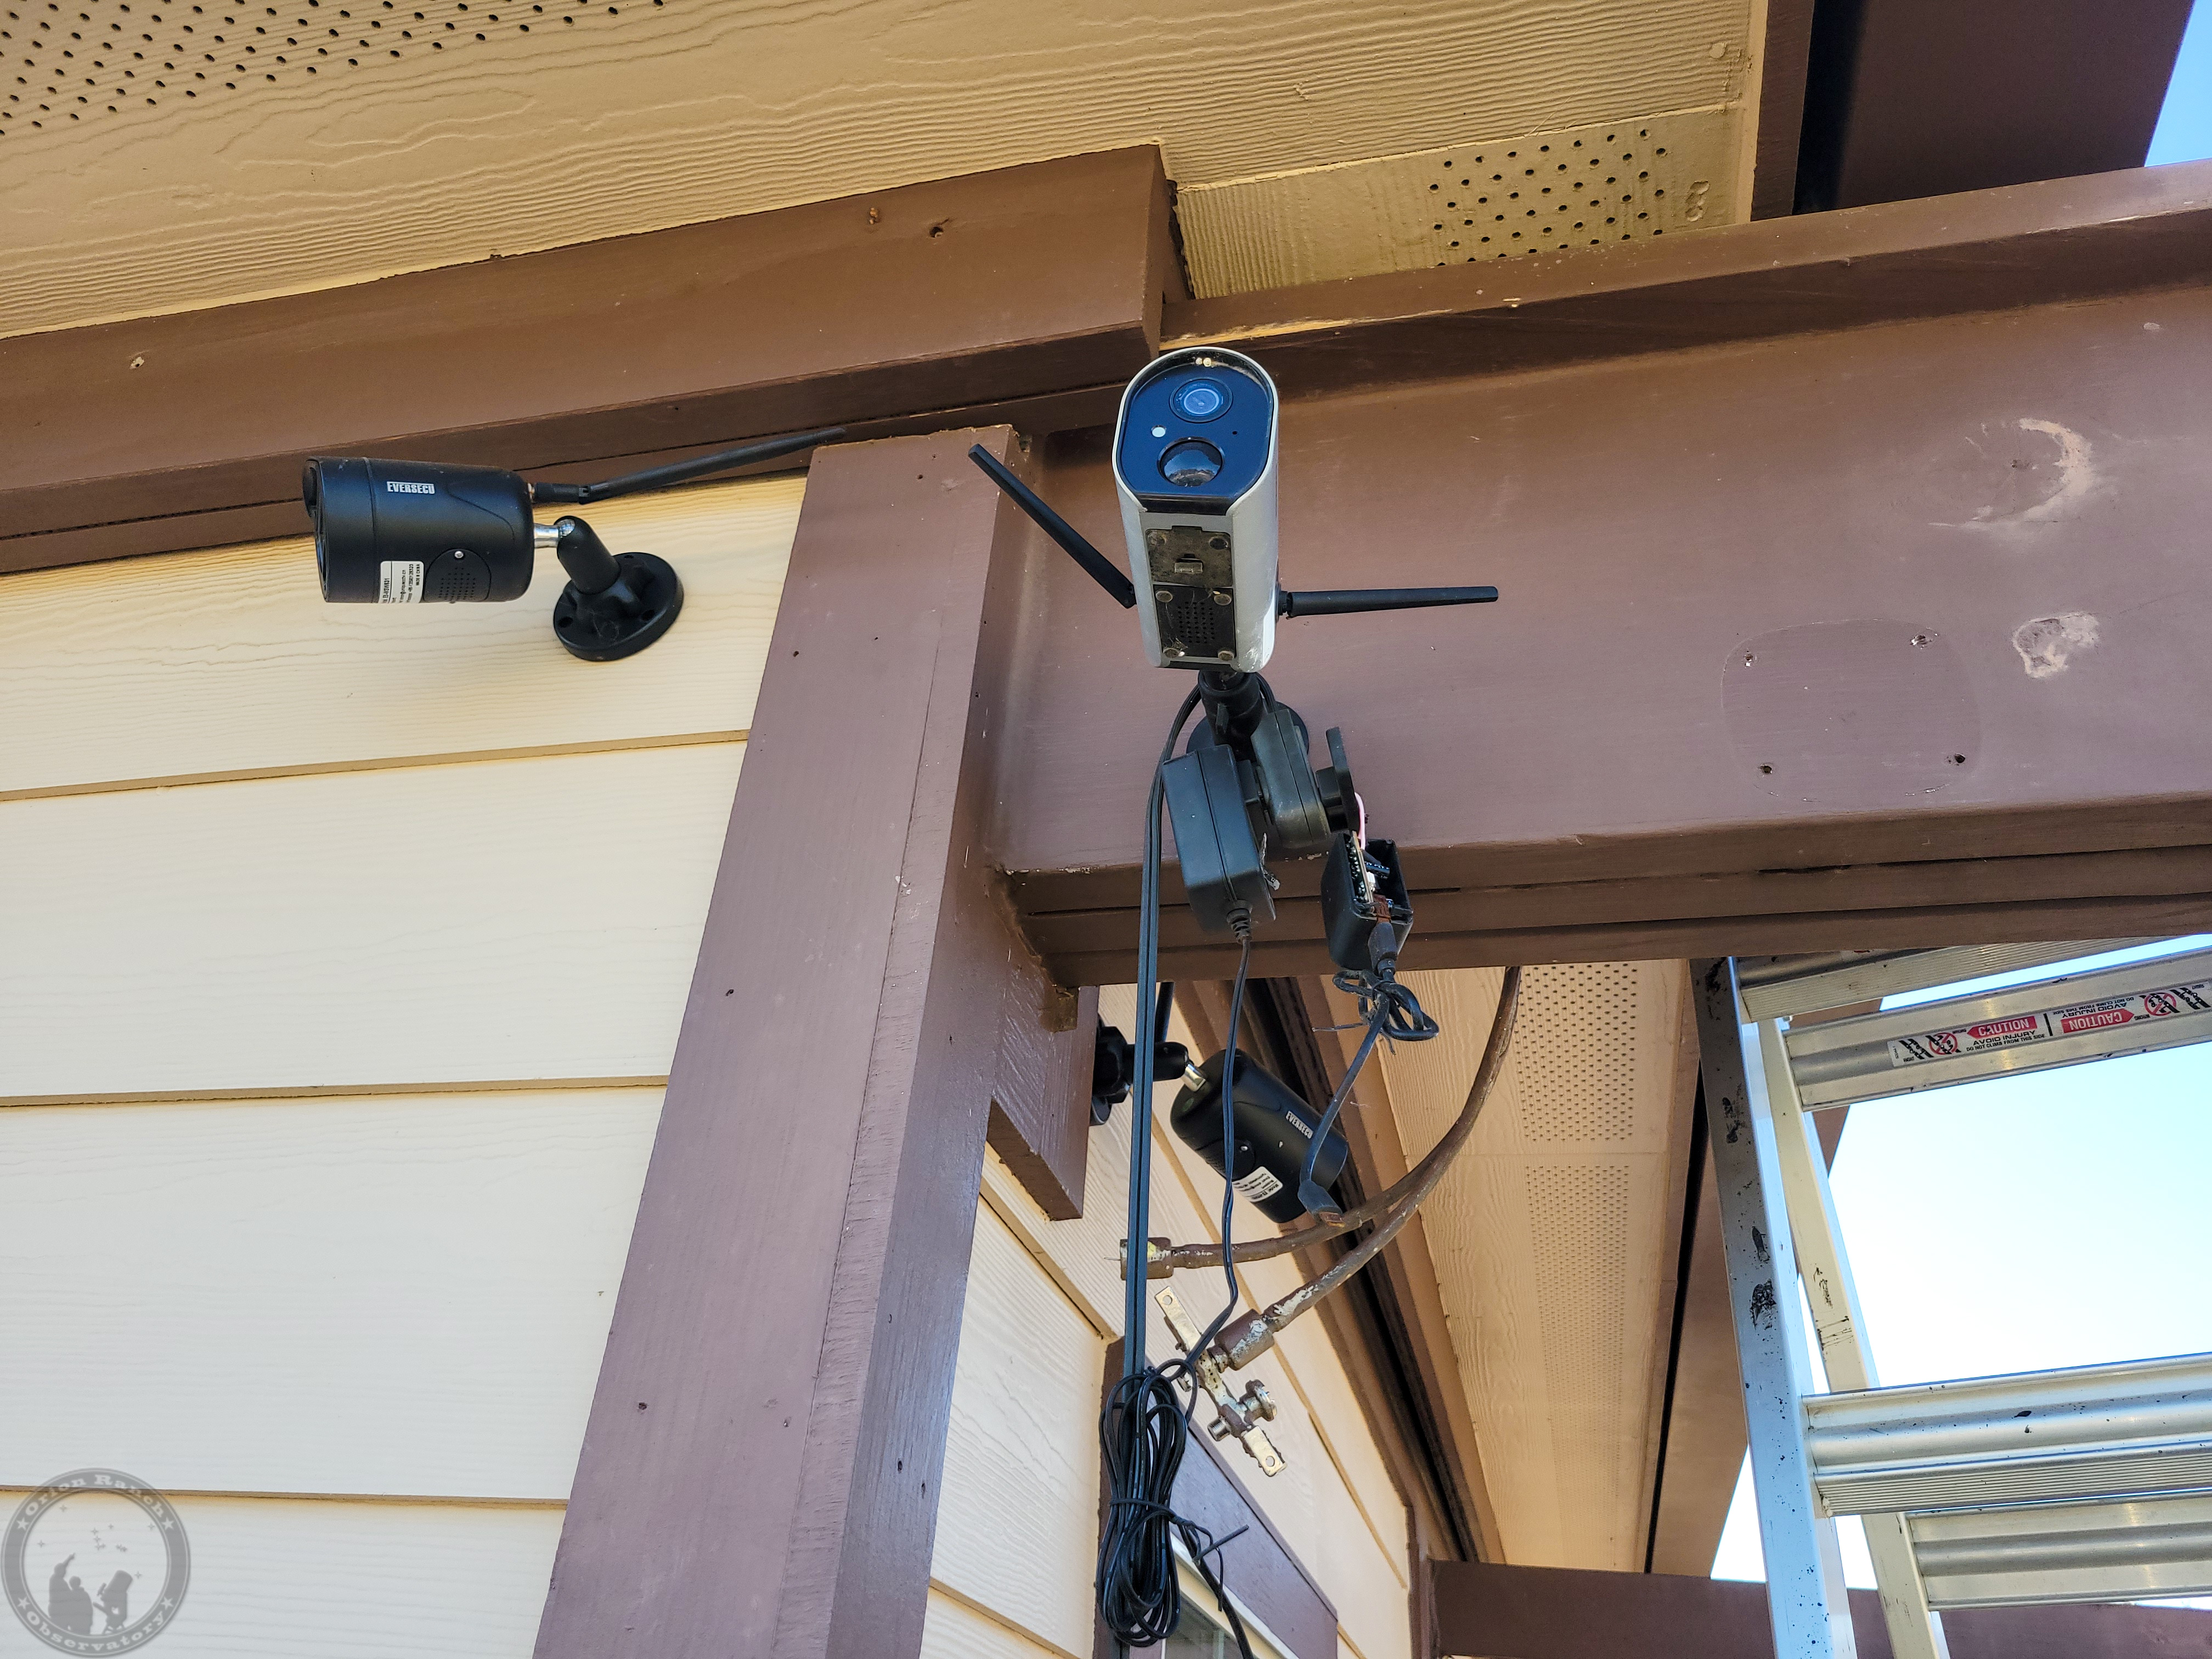
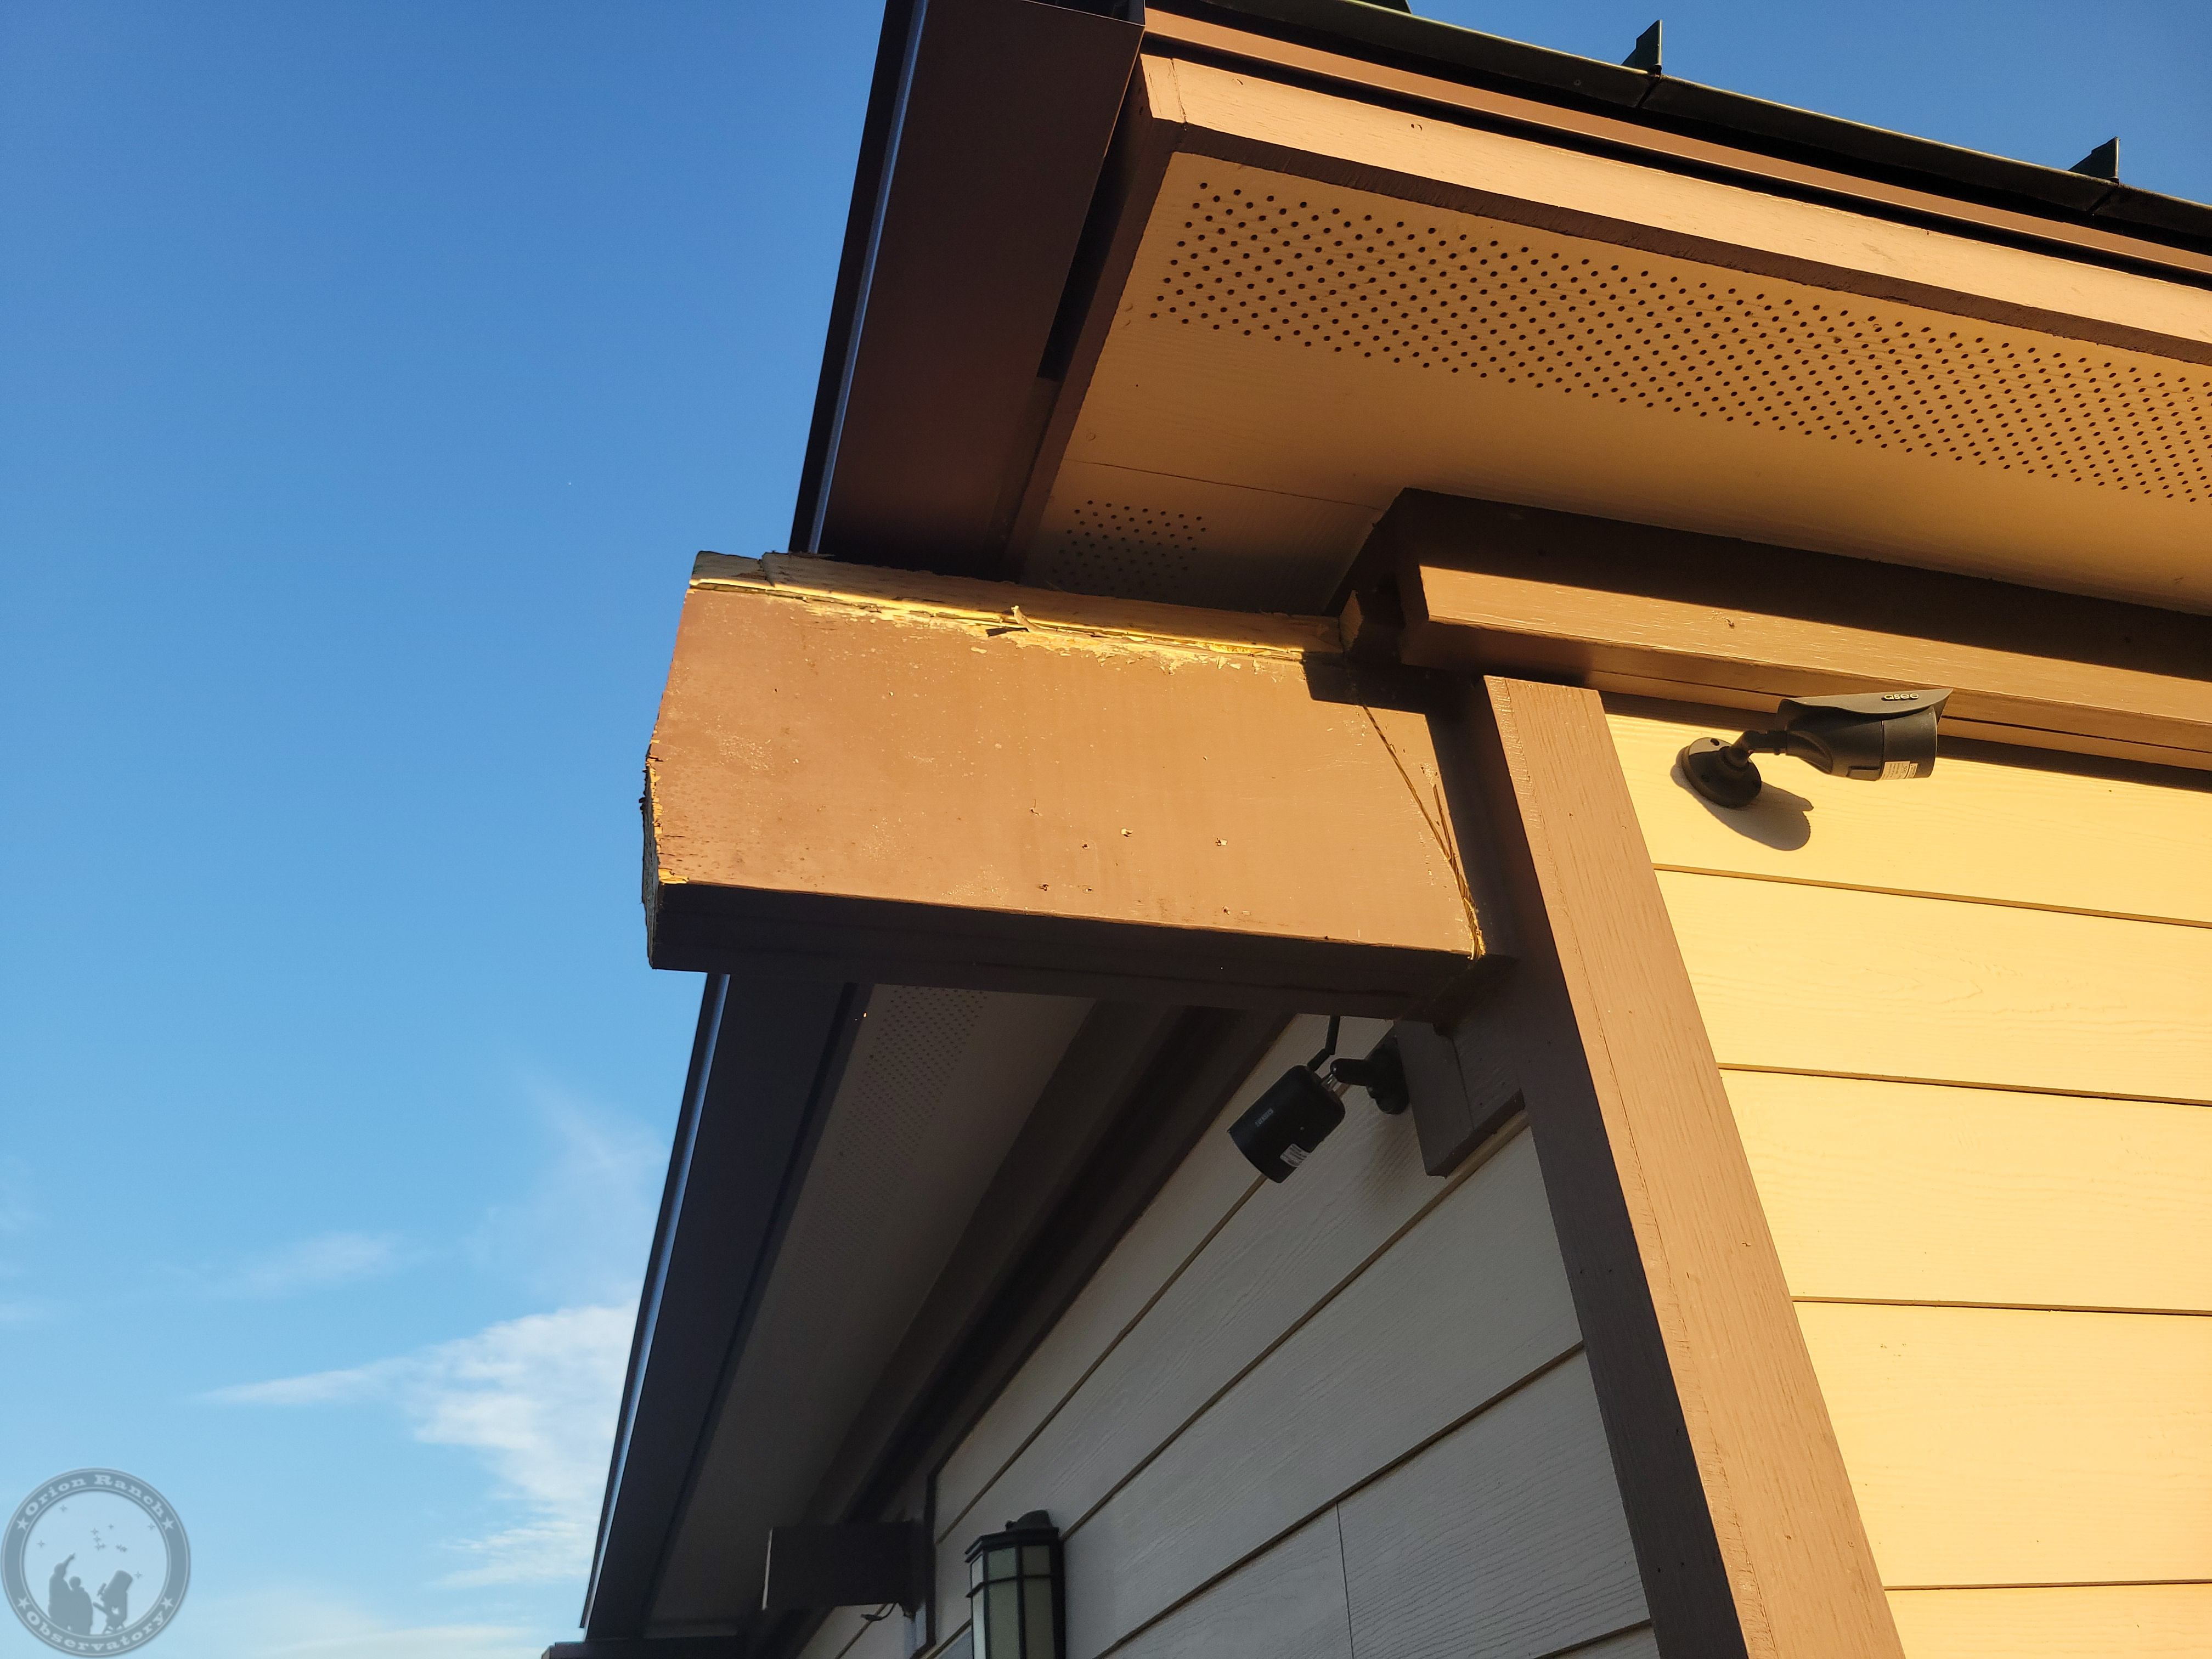
Then came removing the last detritus of the different cameras I’d had mounted to the rails at different times.

From there, I had to remove all of the angle iron for the V-grooves.  I didn’t buy enough extra angle to completely replace all of this, but I’m wondering if that was a good idea.  There was a considerable amount of loose rust underneath some of it, and there are the holes and notches for screwing it down that I just plan to weld over and grind flat.  I don’t think the integrity is really compromised, but I’m debating if I should run a bead down the entire length on both sides to keep water out.  That’s a LOT of welding and welding wire!  We’ll see.  Worst case, I may paint, caulk, and paint.  I have the same situation with the two 1×3’s that will be creating the necessary overhang to match the existing roof capture system.

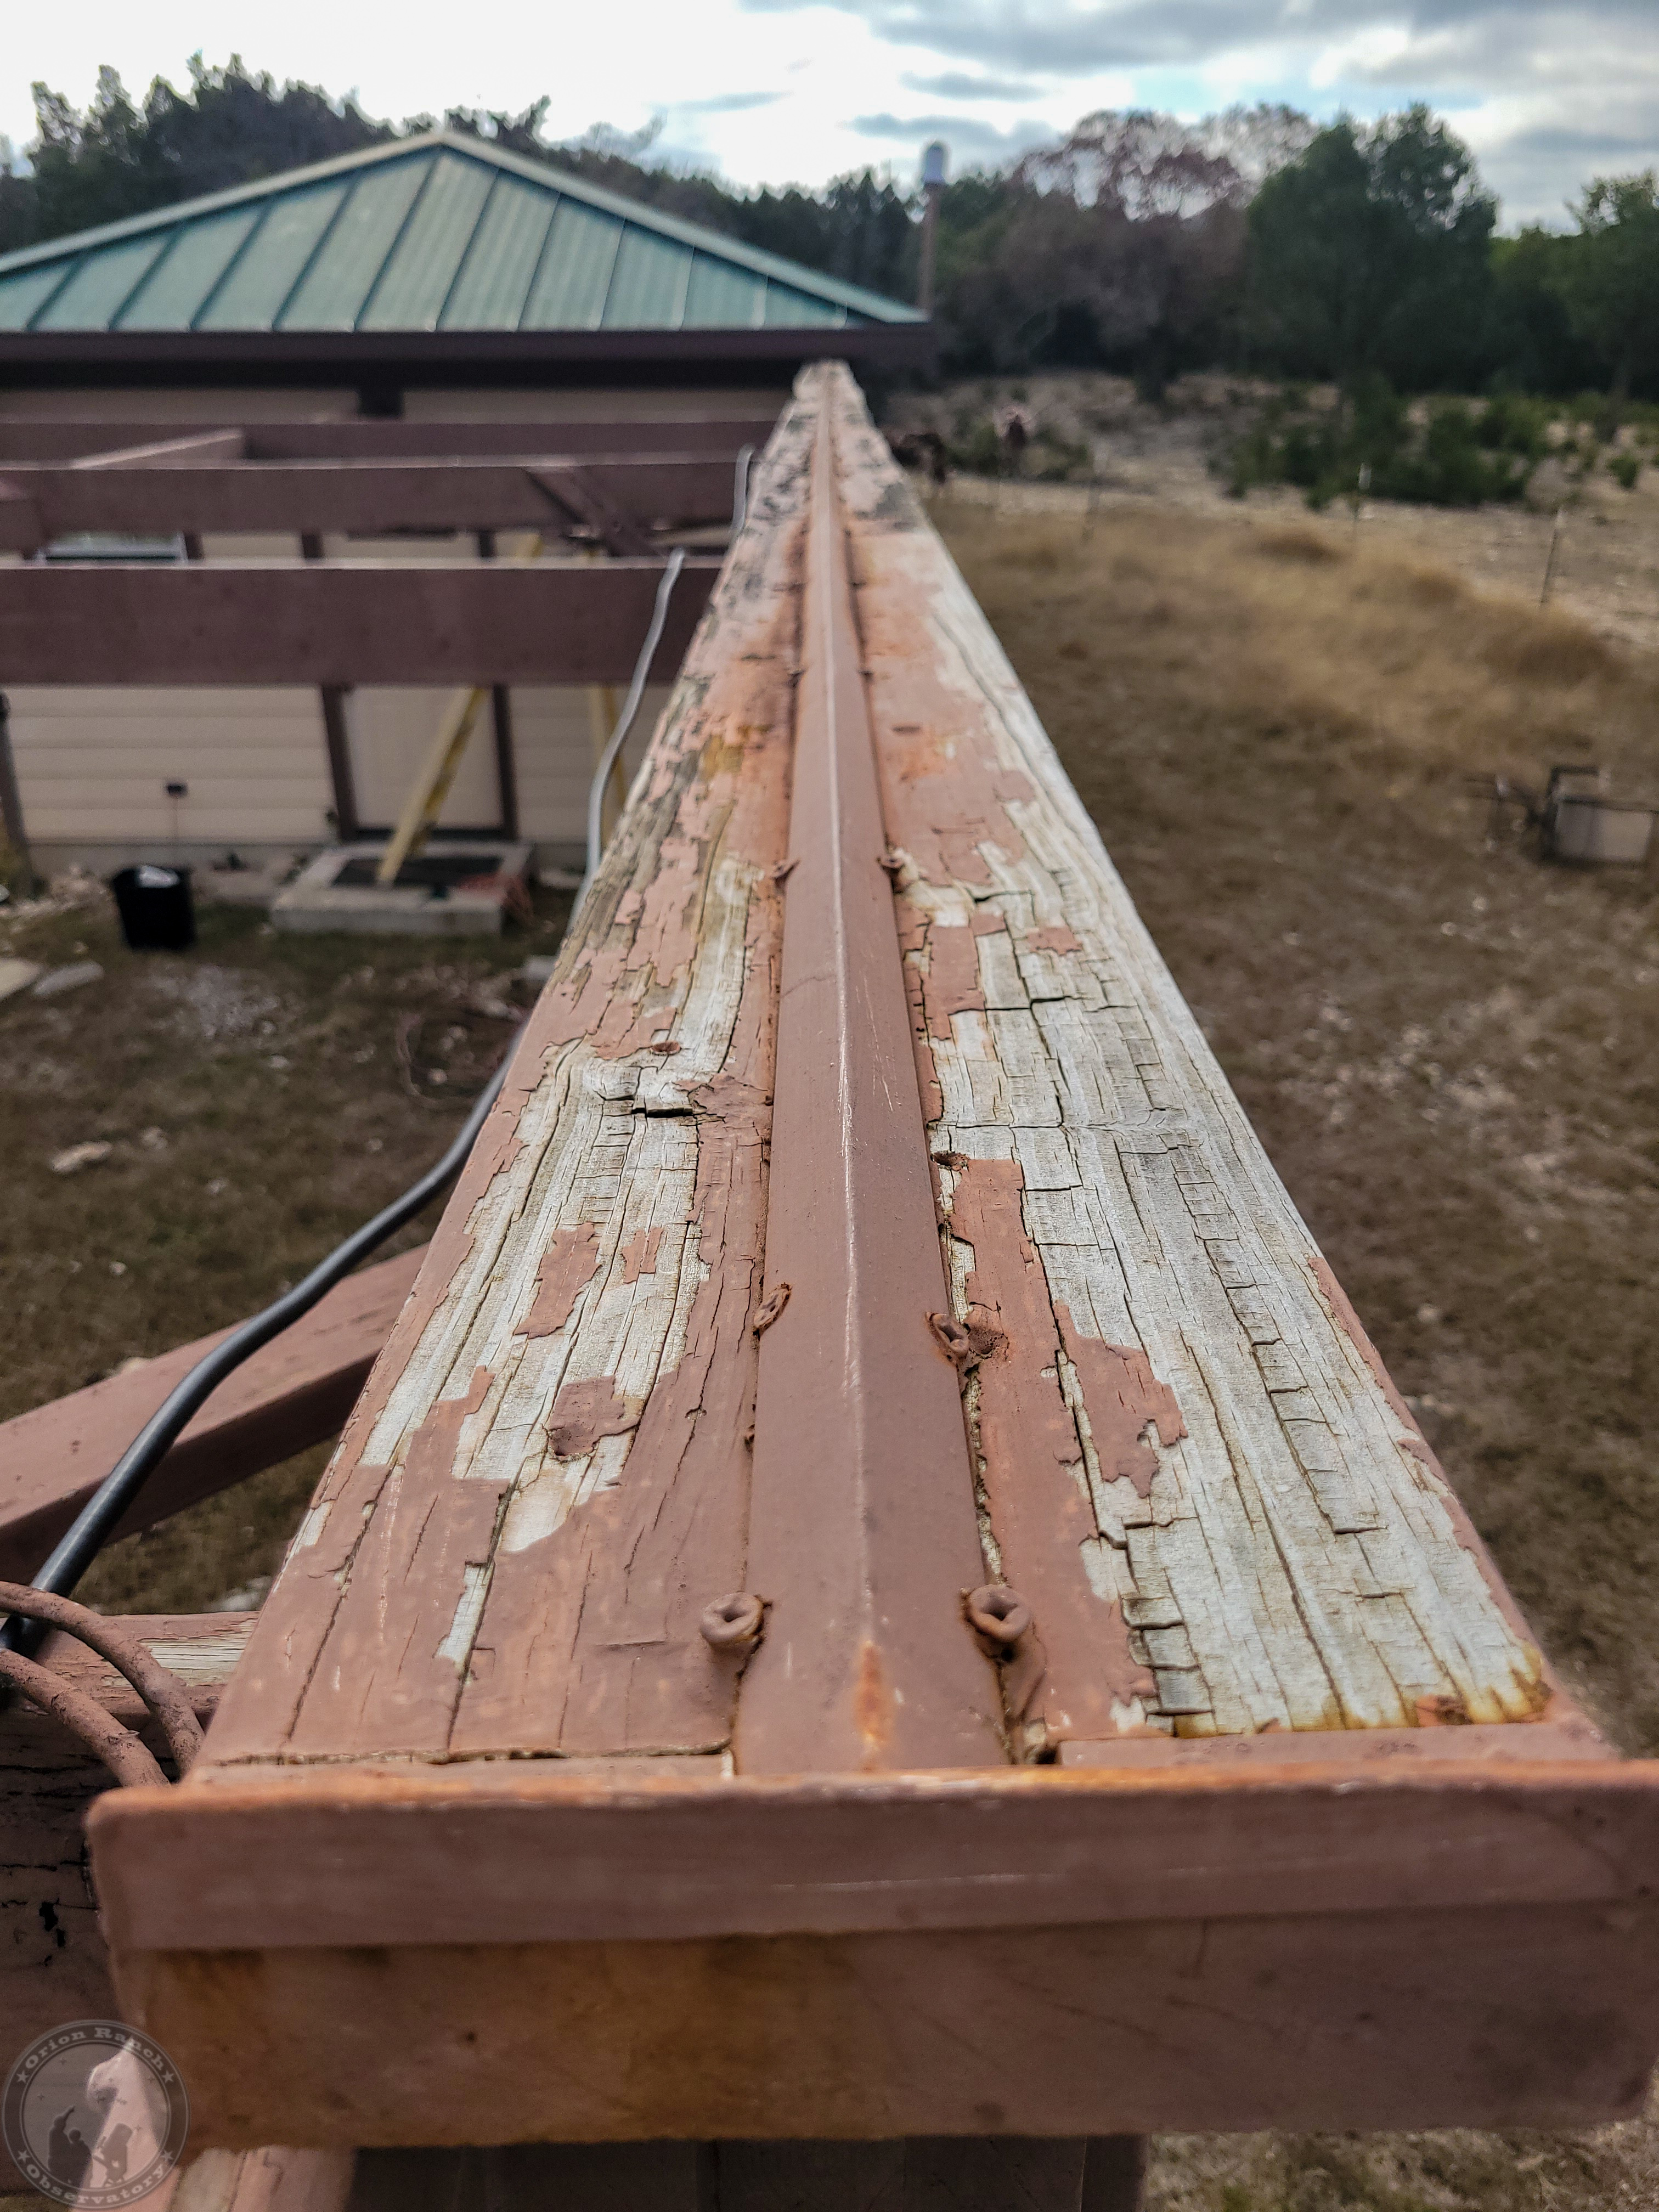
Here’s the top of the east and west rails, respectively.  Both pretty wavy, although the focus isn’t good across the depth.

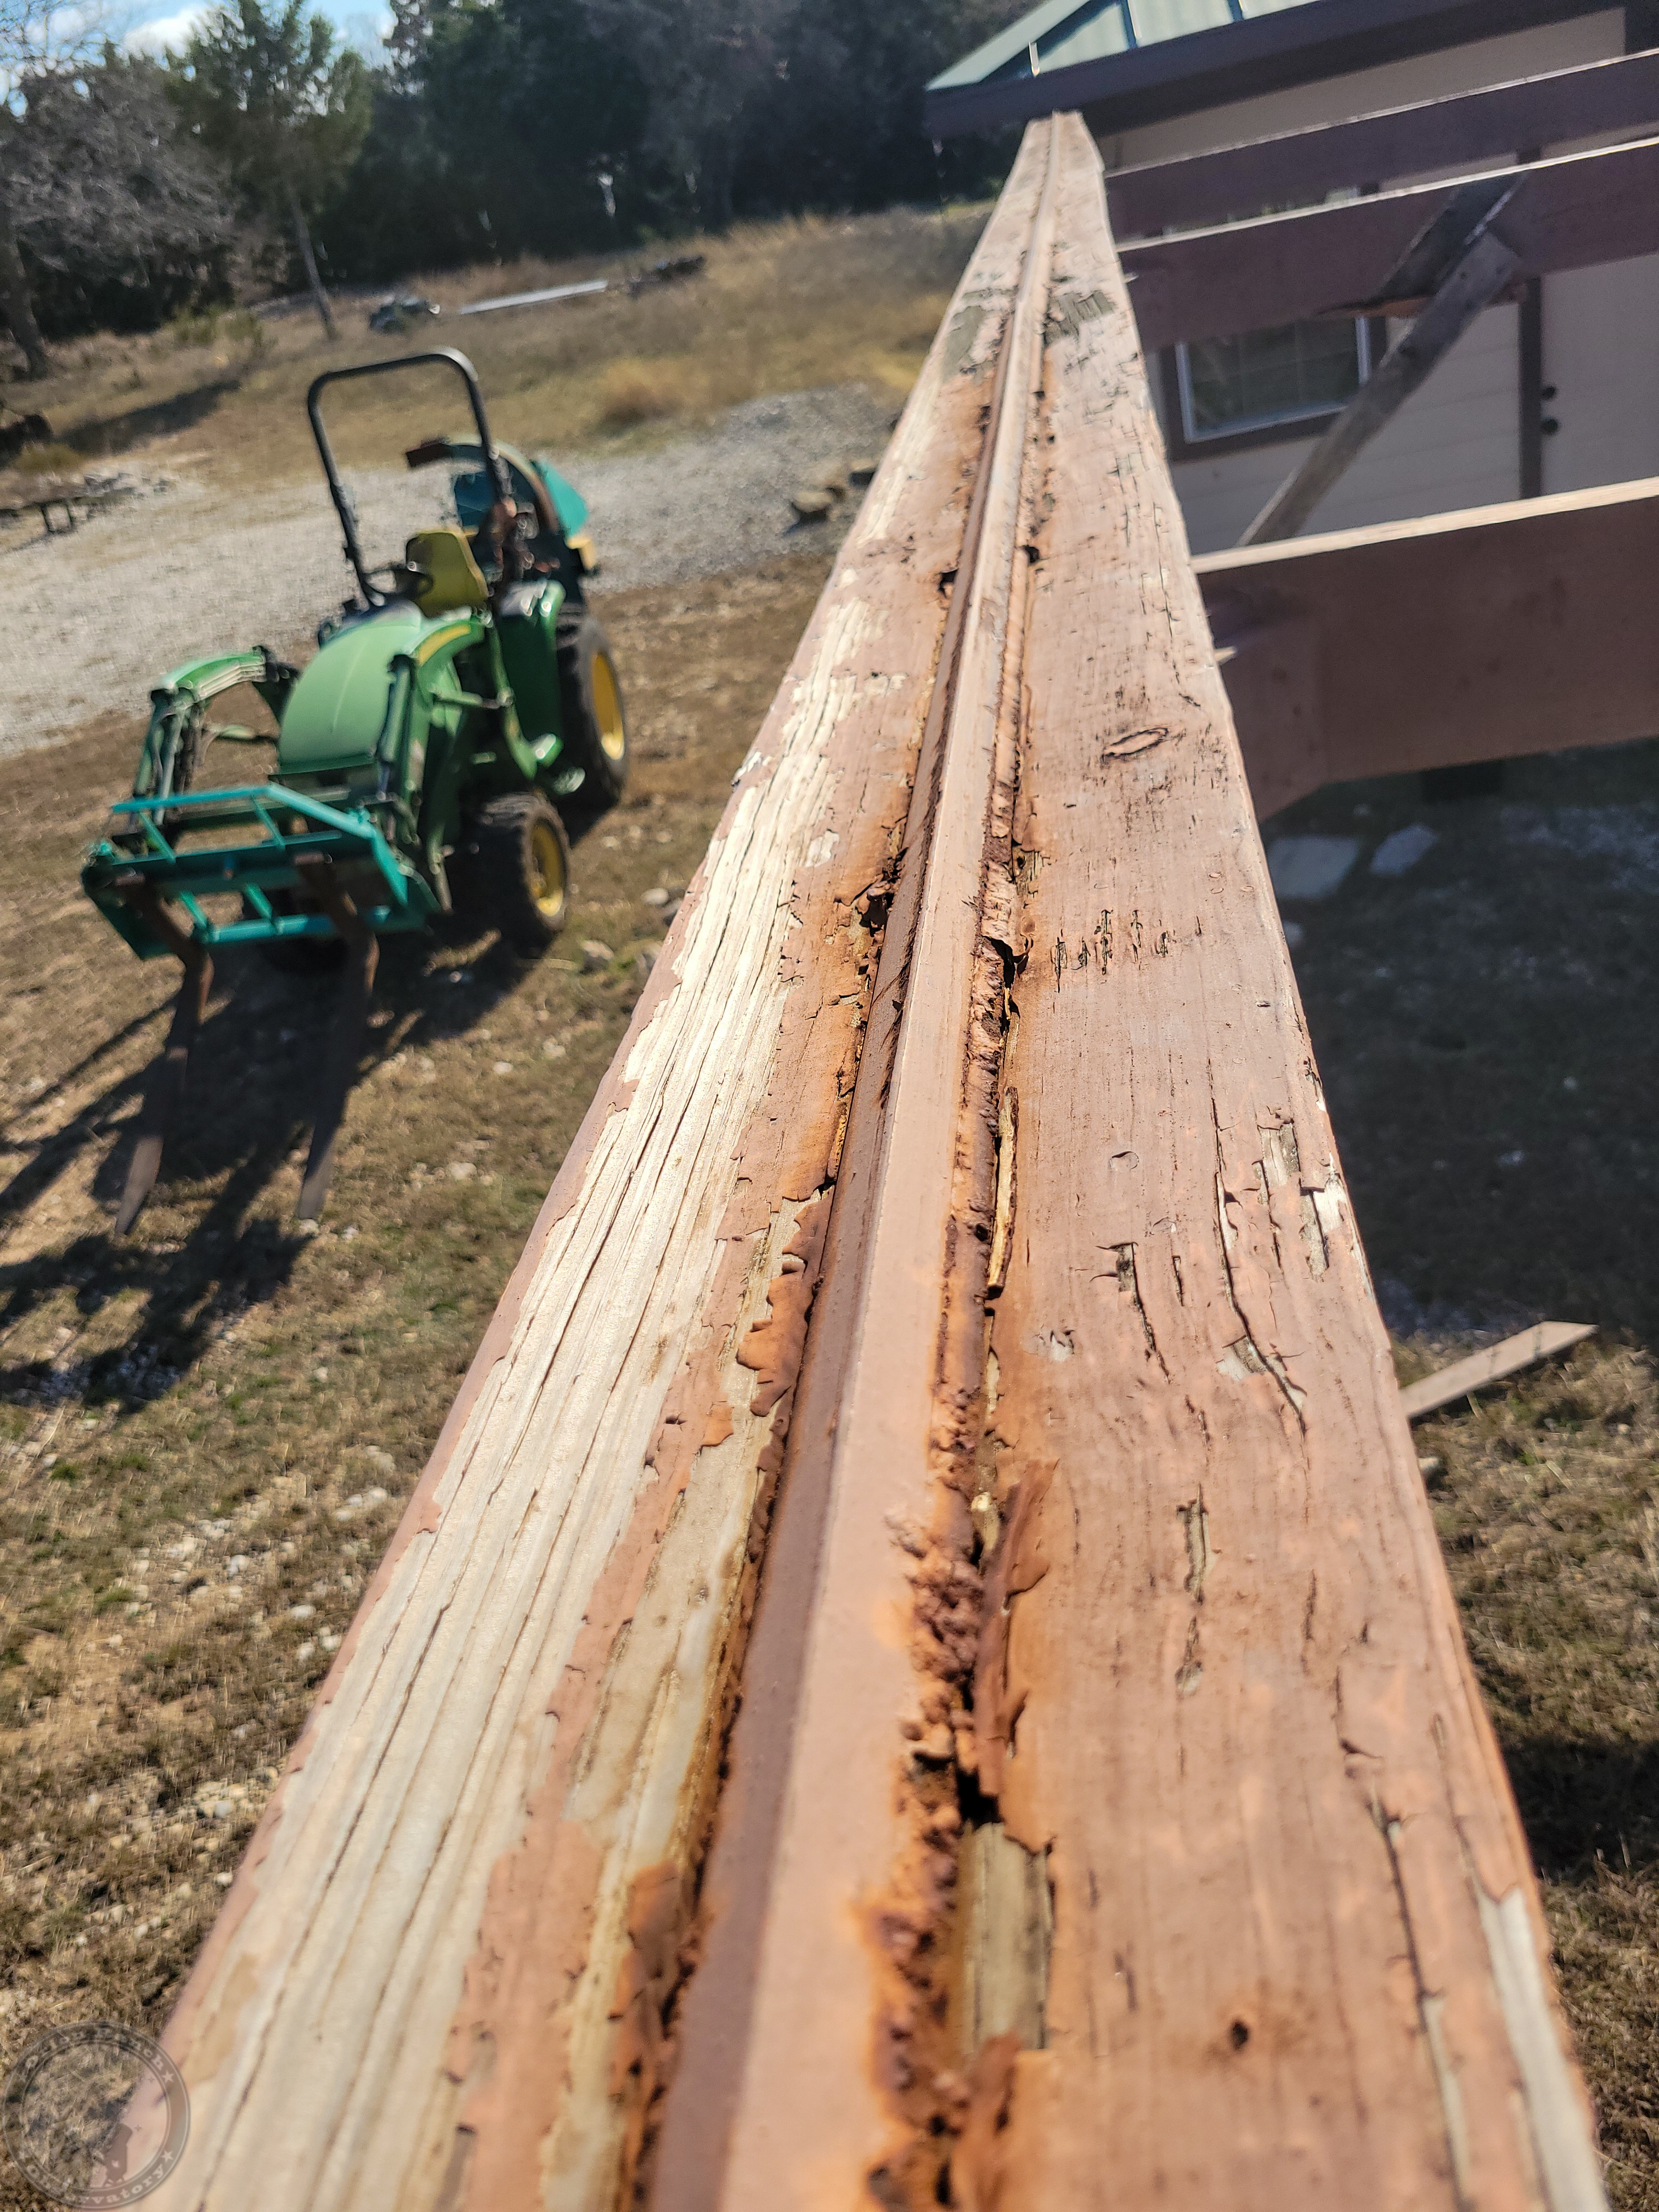
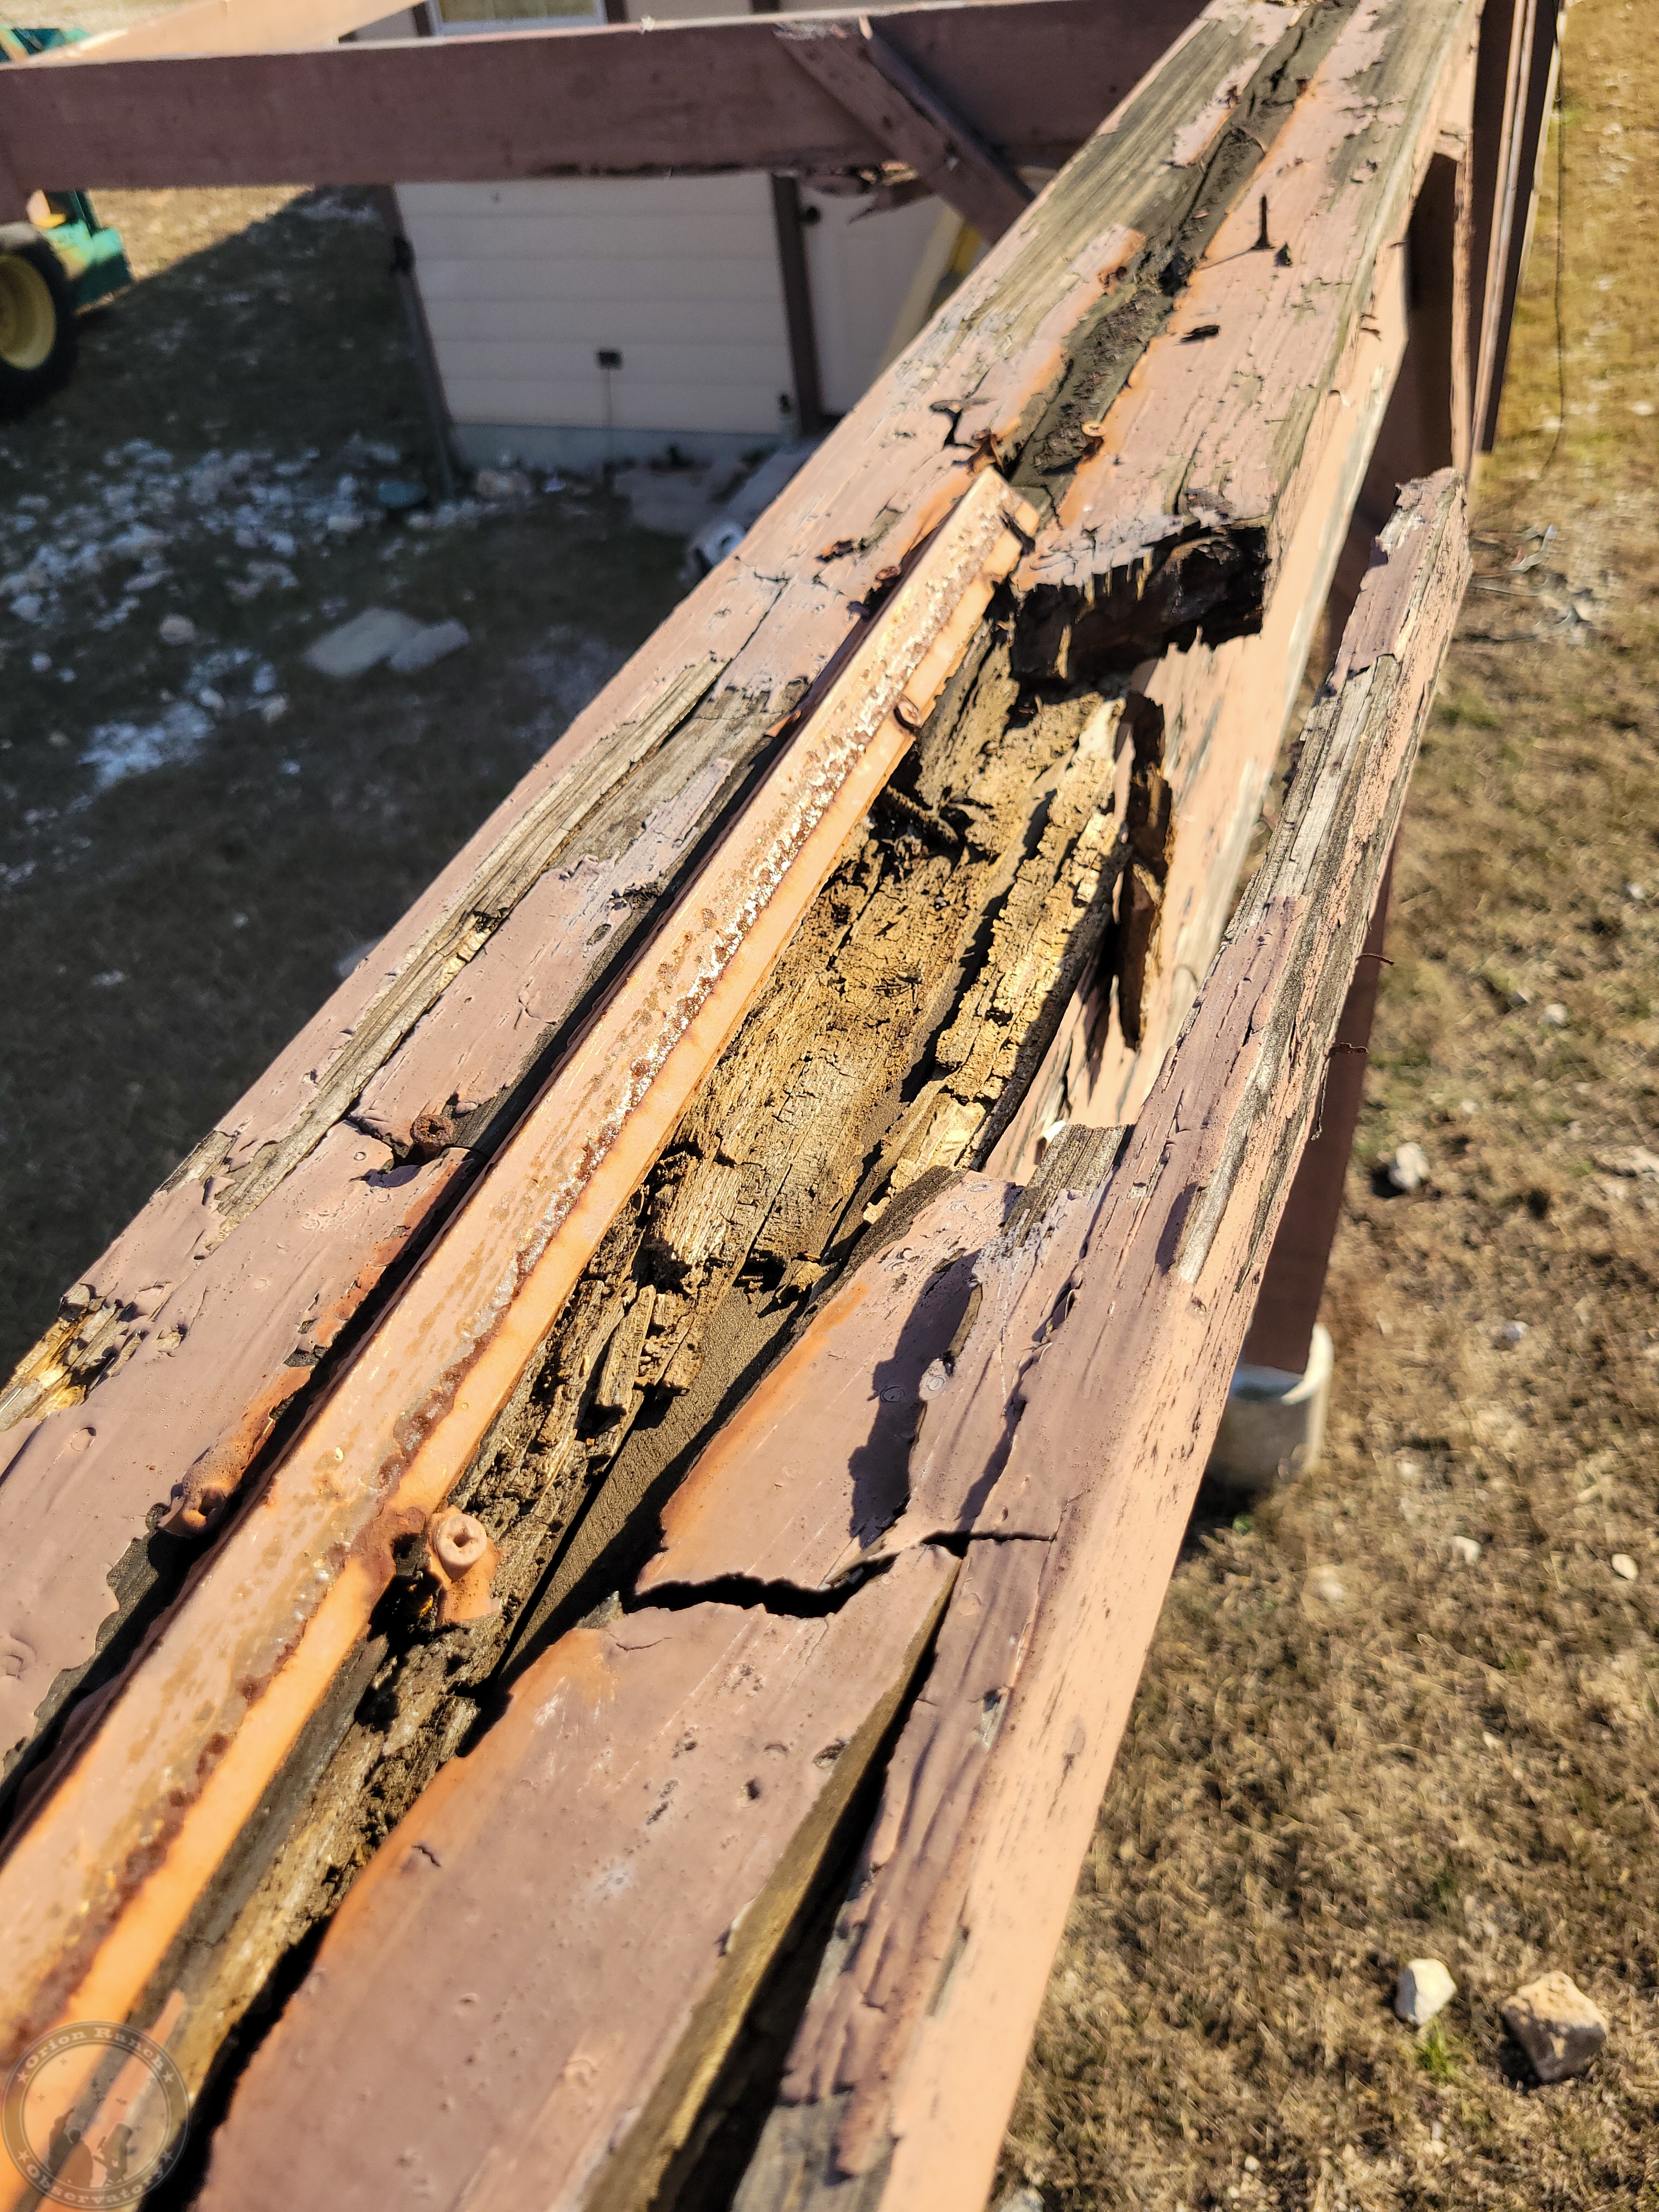
This was really the amazing part, where the wood basically split on either side of the angle, so all the water was going right down into the rail cap.

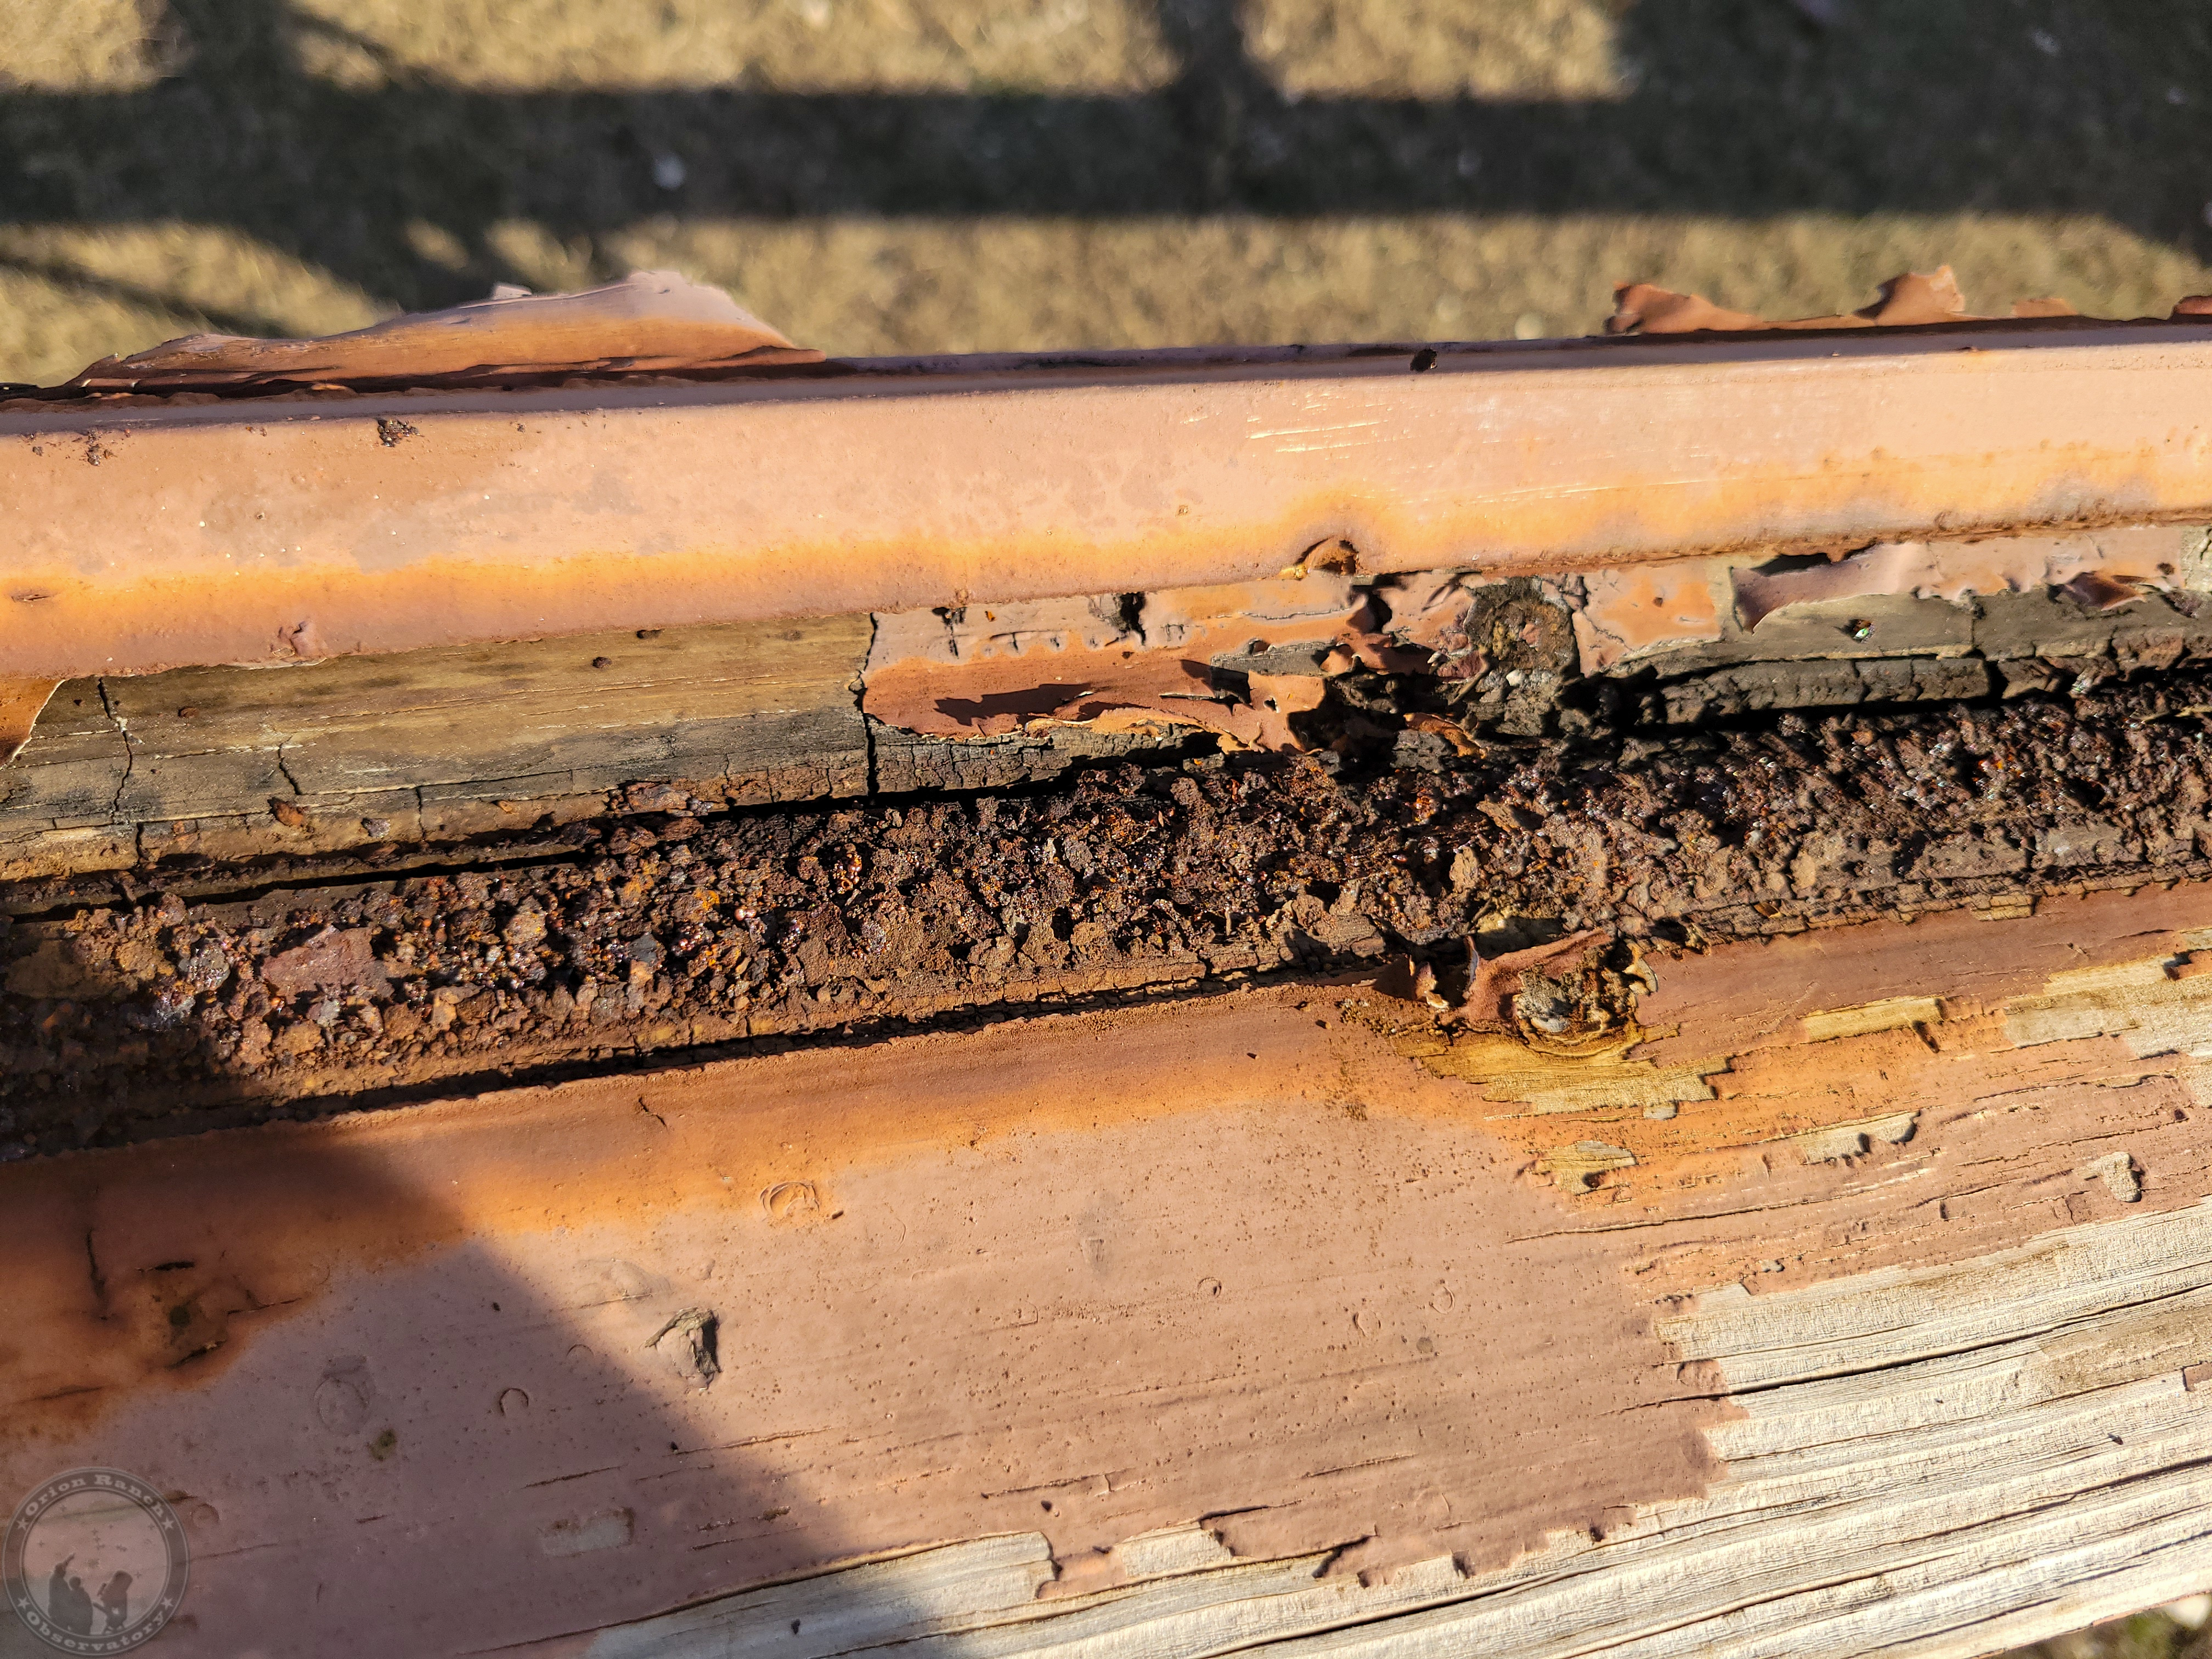
These pictures are all from the west rail, which had the worst of it, but as you’ll see later, it was really only the cap piece.  I didn’t remember until I was taking it all down that I’d actually come back and spaced the cap off with wedges to correct for the sag that occurred as it dried.  Thus, while caulked closed, there was a gap between much of the cap and the rail beam itself.  This is the worst rot area shown previously.  From the surface, it actually almost looks like the wood was burned, largely because the surface was so blackened, but the pieces look the same as what you’d get if you wet down a mostly burnt log to put it out.  Does make me wonder again about a possible lightning strike, although for the most part it’s just rot.  No insects though.

Here’s an example of the rust under the angle in one of the less rotten areas.

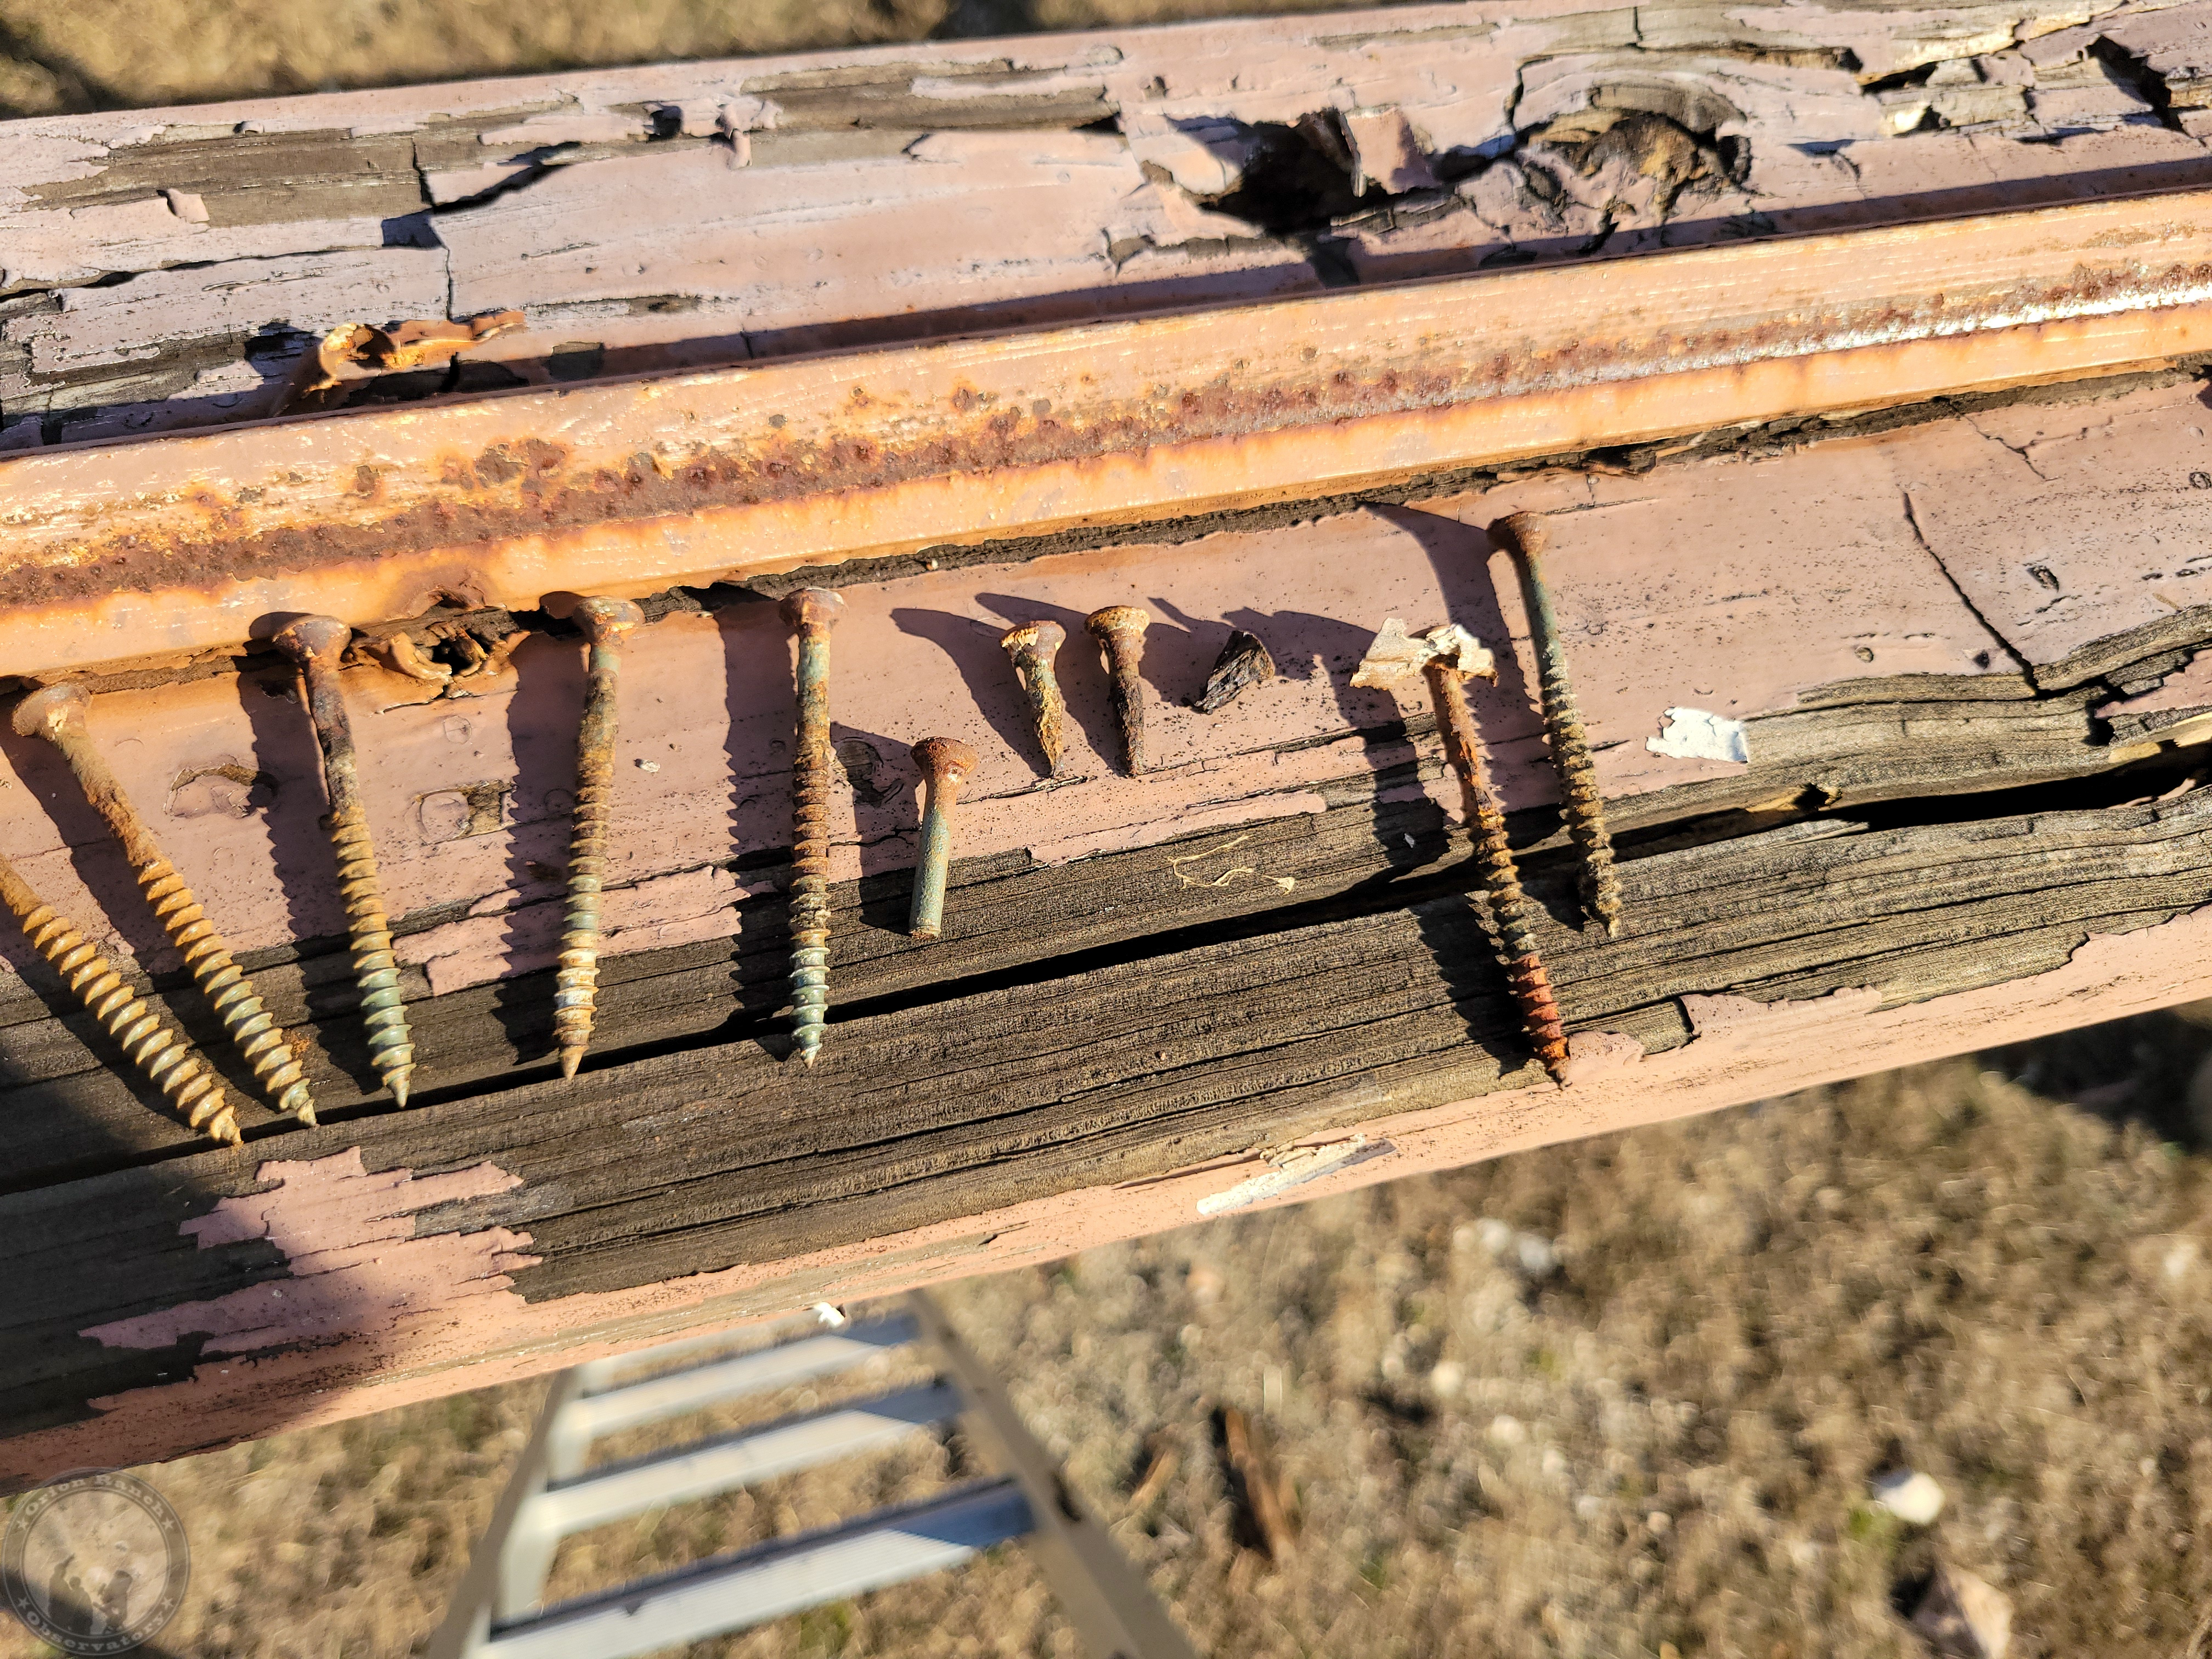
The screws holding down the angle were in various states from fine to sheared off at installation to eroded down to sharp little points.  I suspect some of the latter is from the dissimilar metals in the pressure treated wood interacting with the steel in the screws where the paint was abraded at installation.

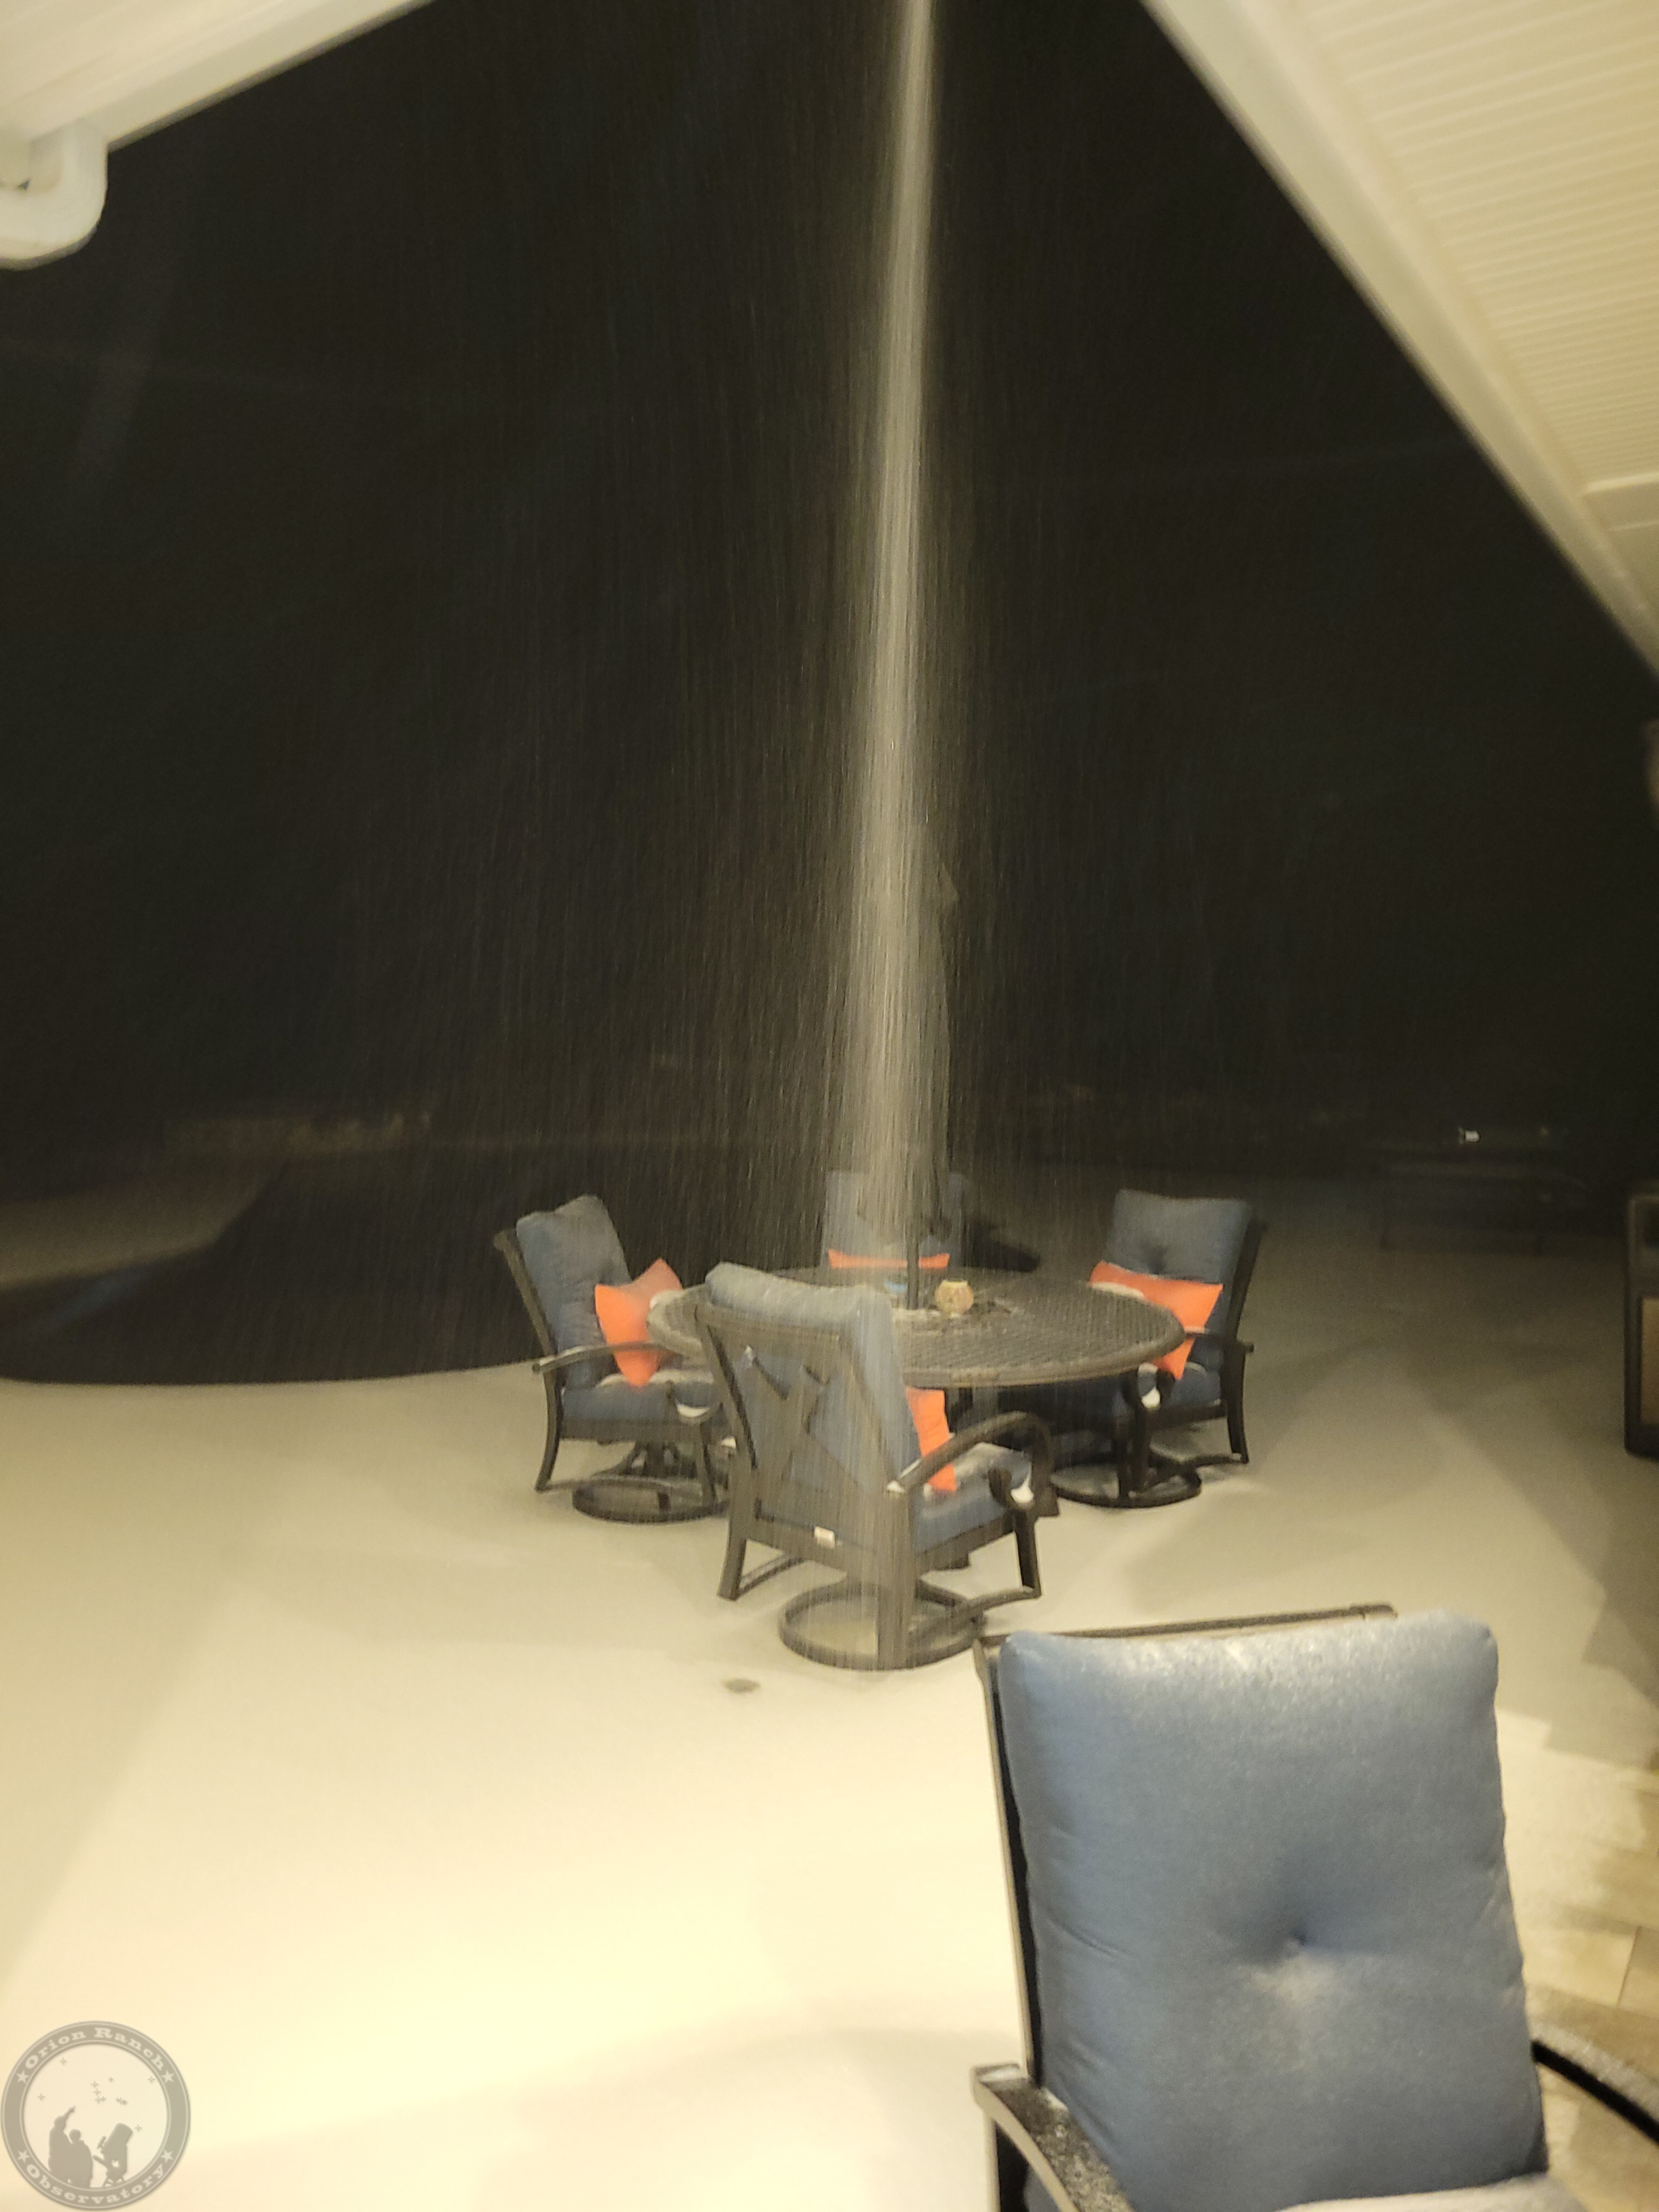
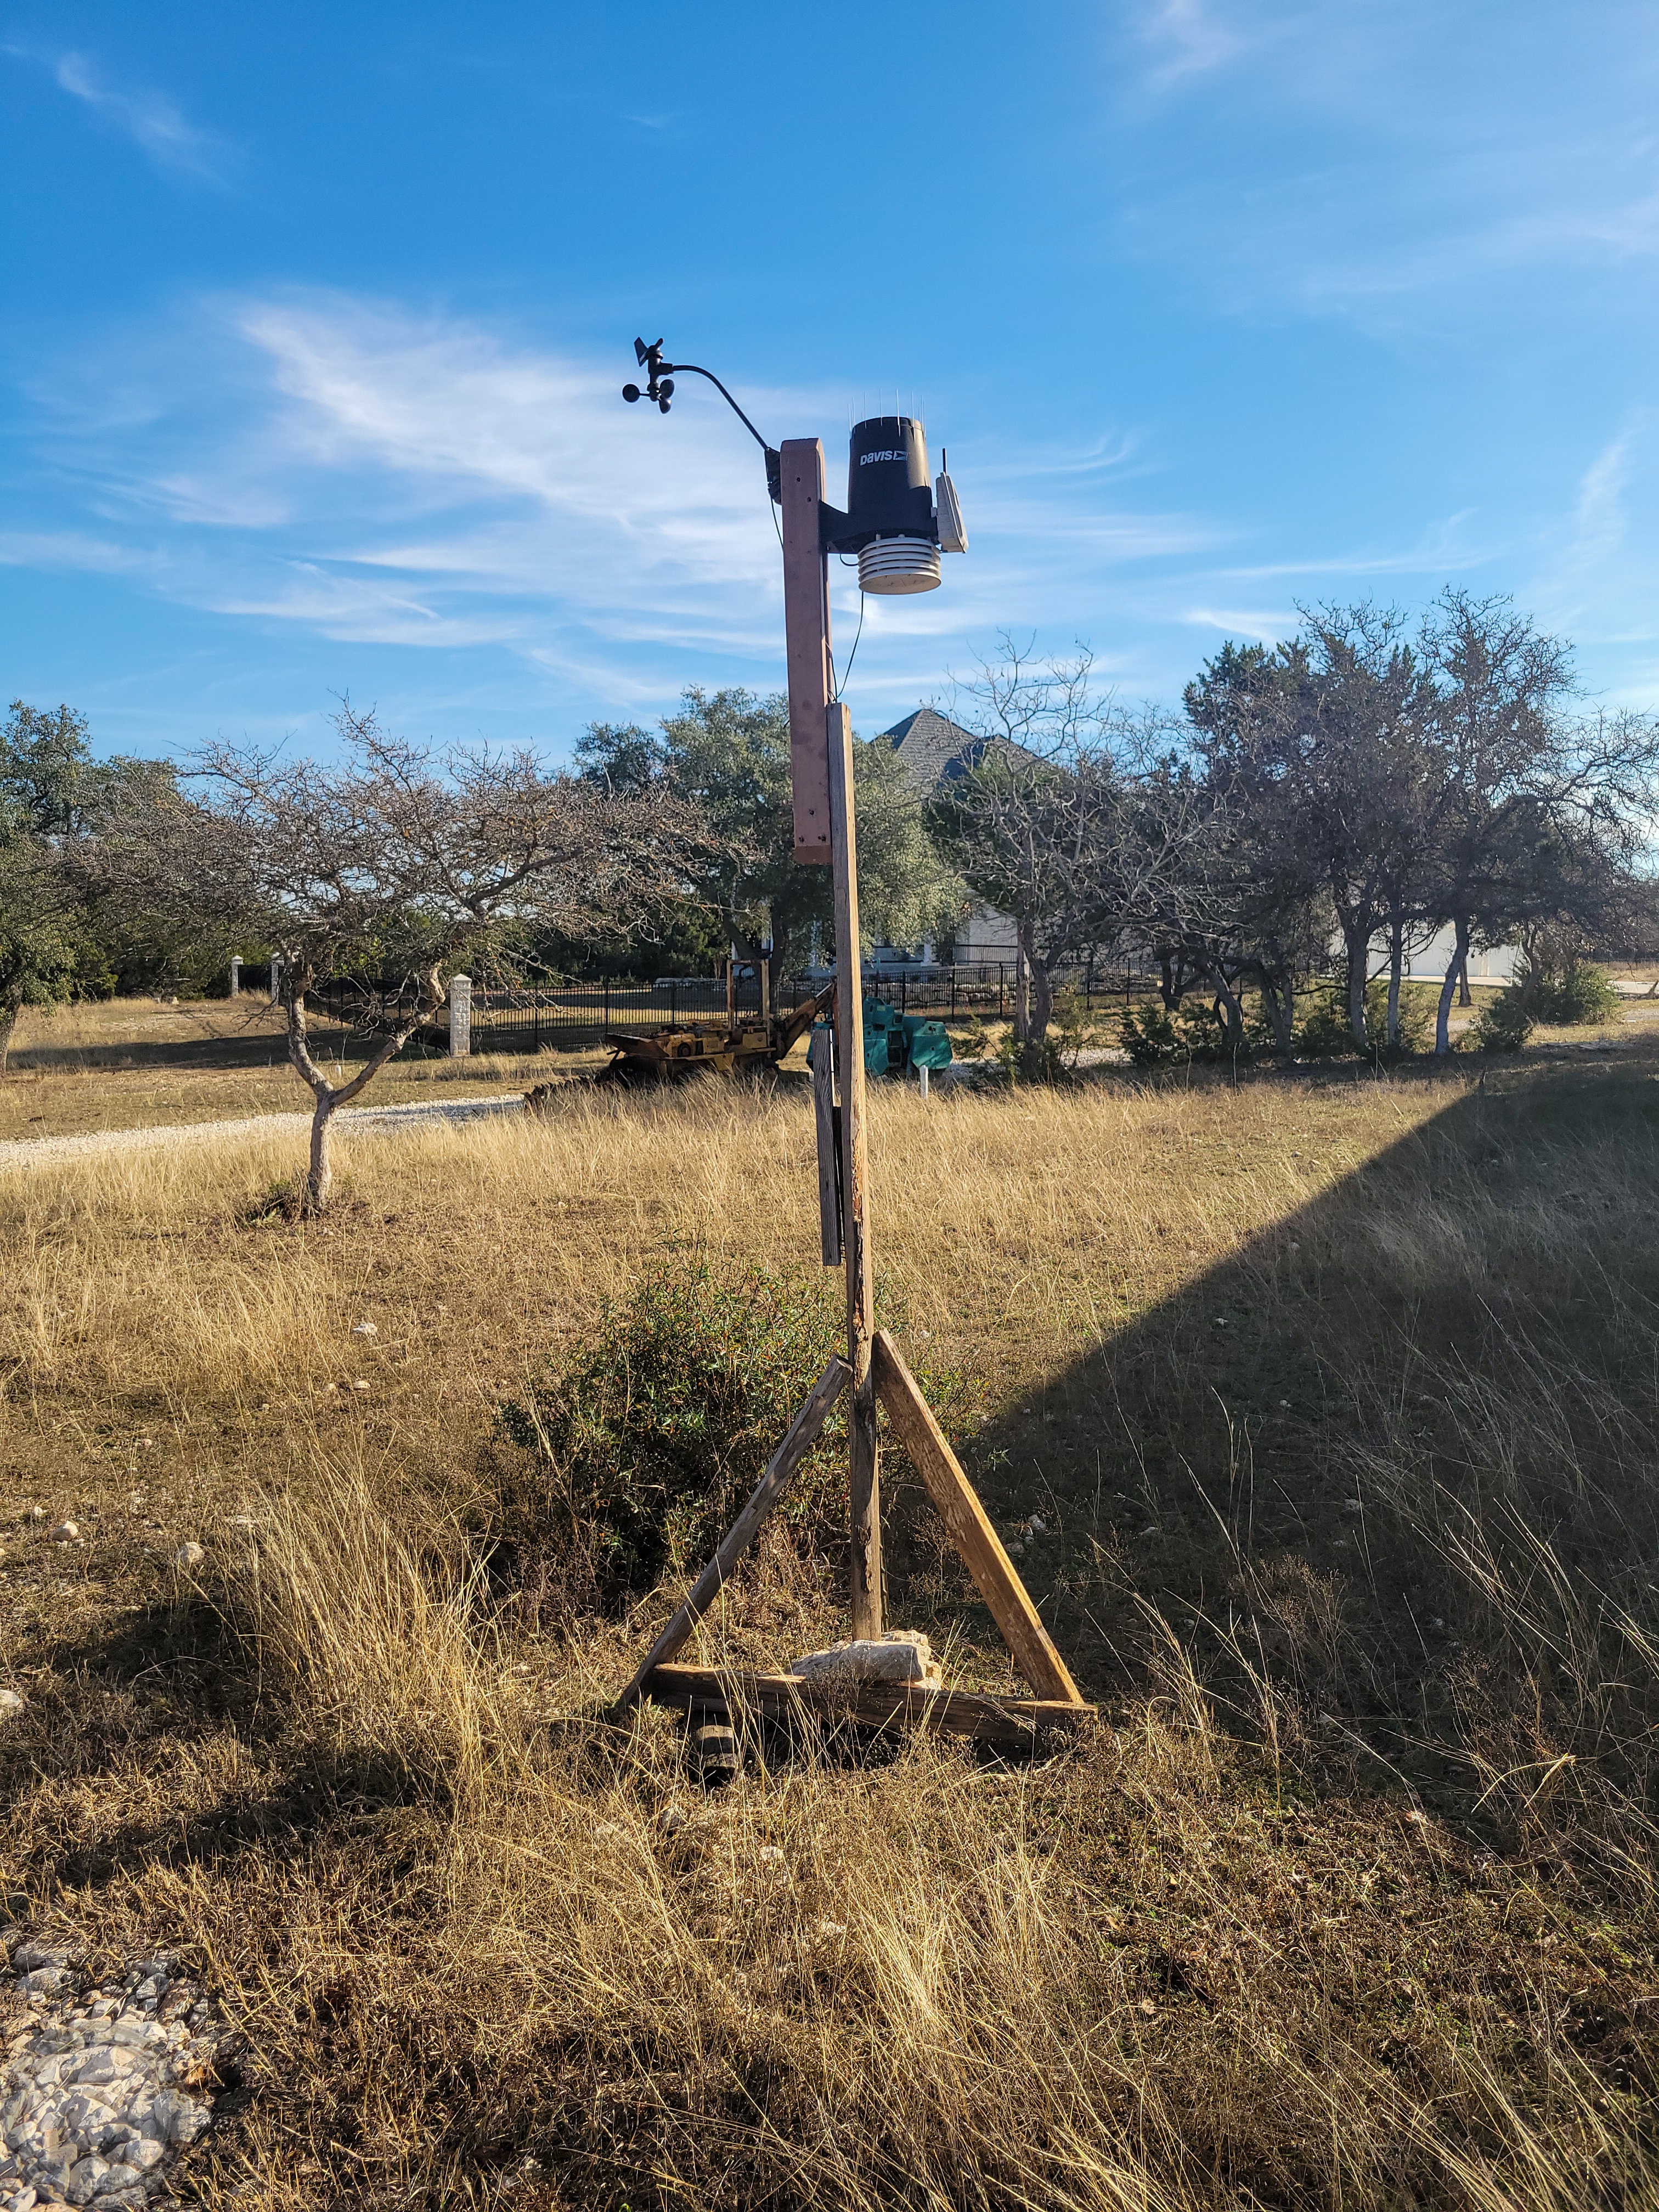
Finally, I had to make a temporary stand to hold the weather station and get it moved without bouncing it around too much to “make it rain”.  I should probably be sending it off to be refurbished while I have it down, but I really hate being without it.

And now the rail system is clear of everything but wood and screws!

Next up — Tearing it down!

December 25th, 2025

Here’s wishing everyone a Merry Christmas!
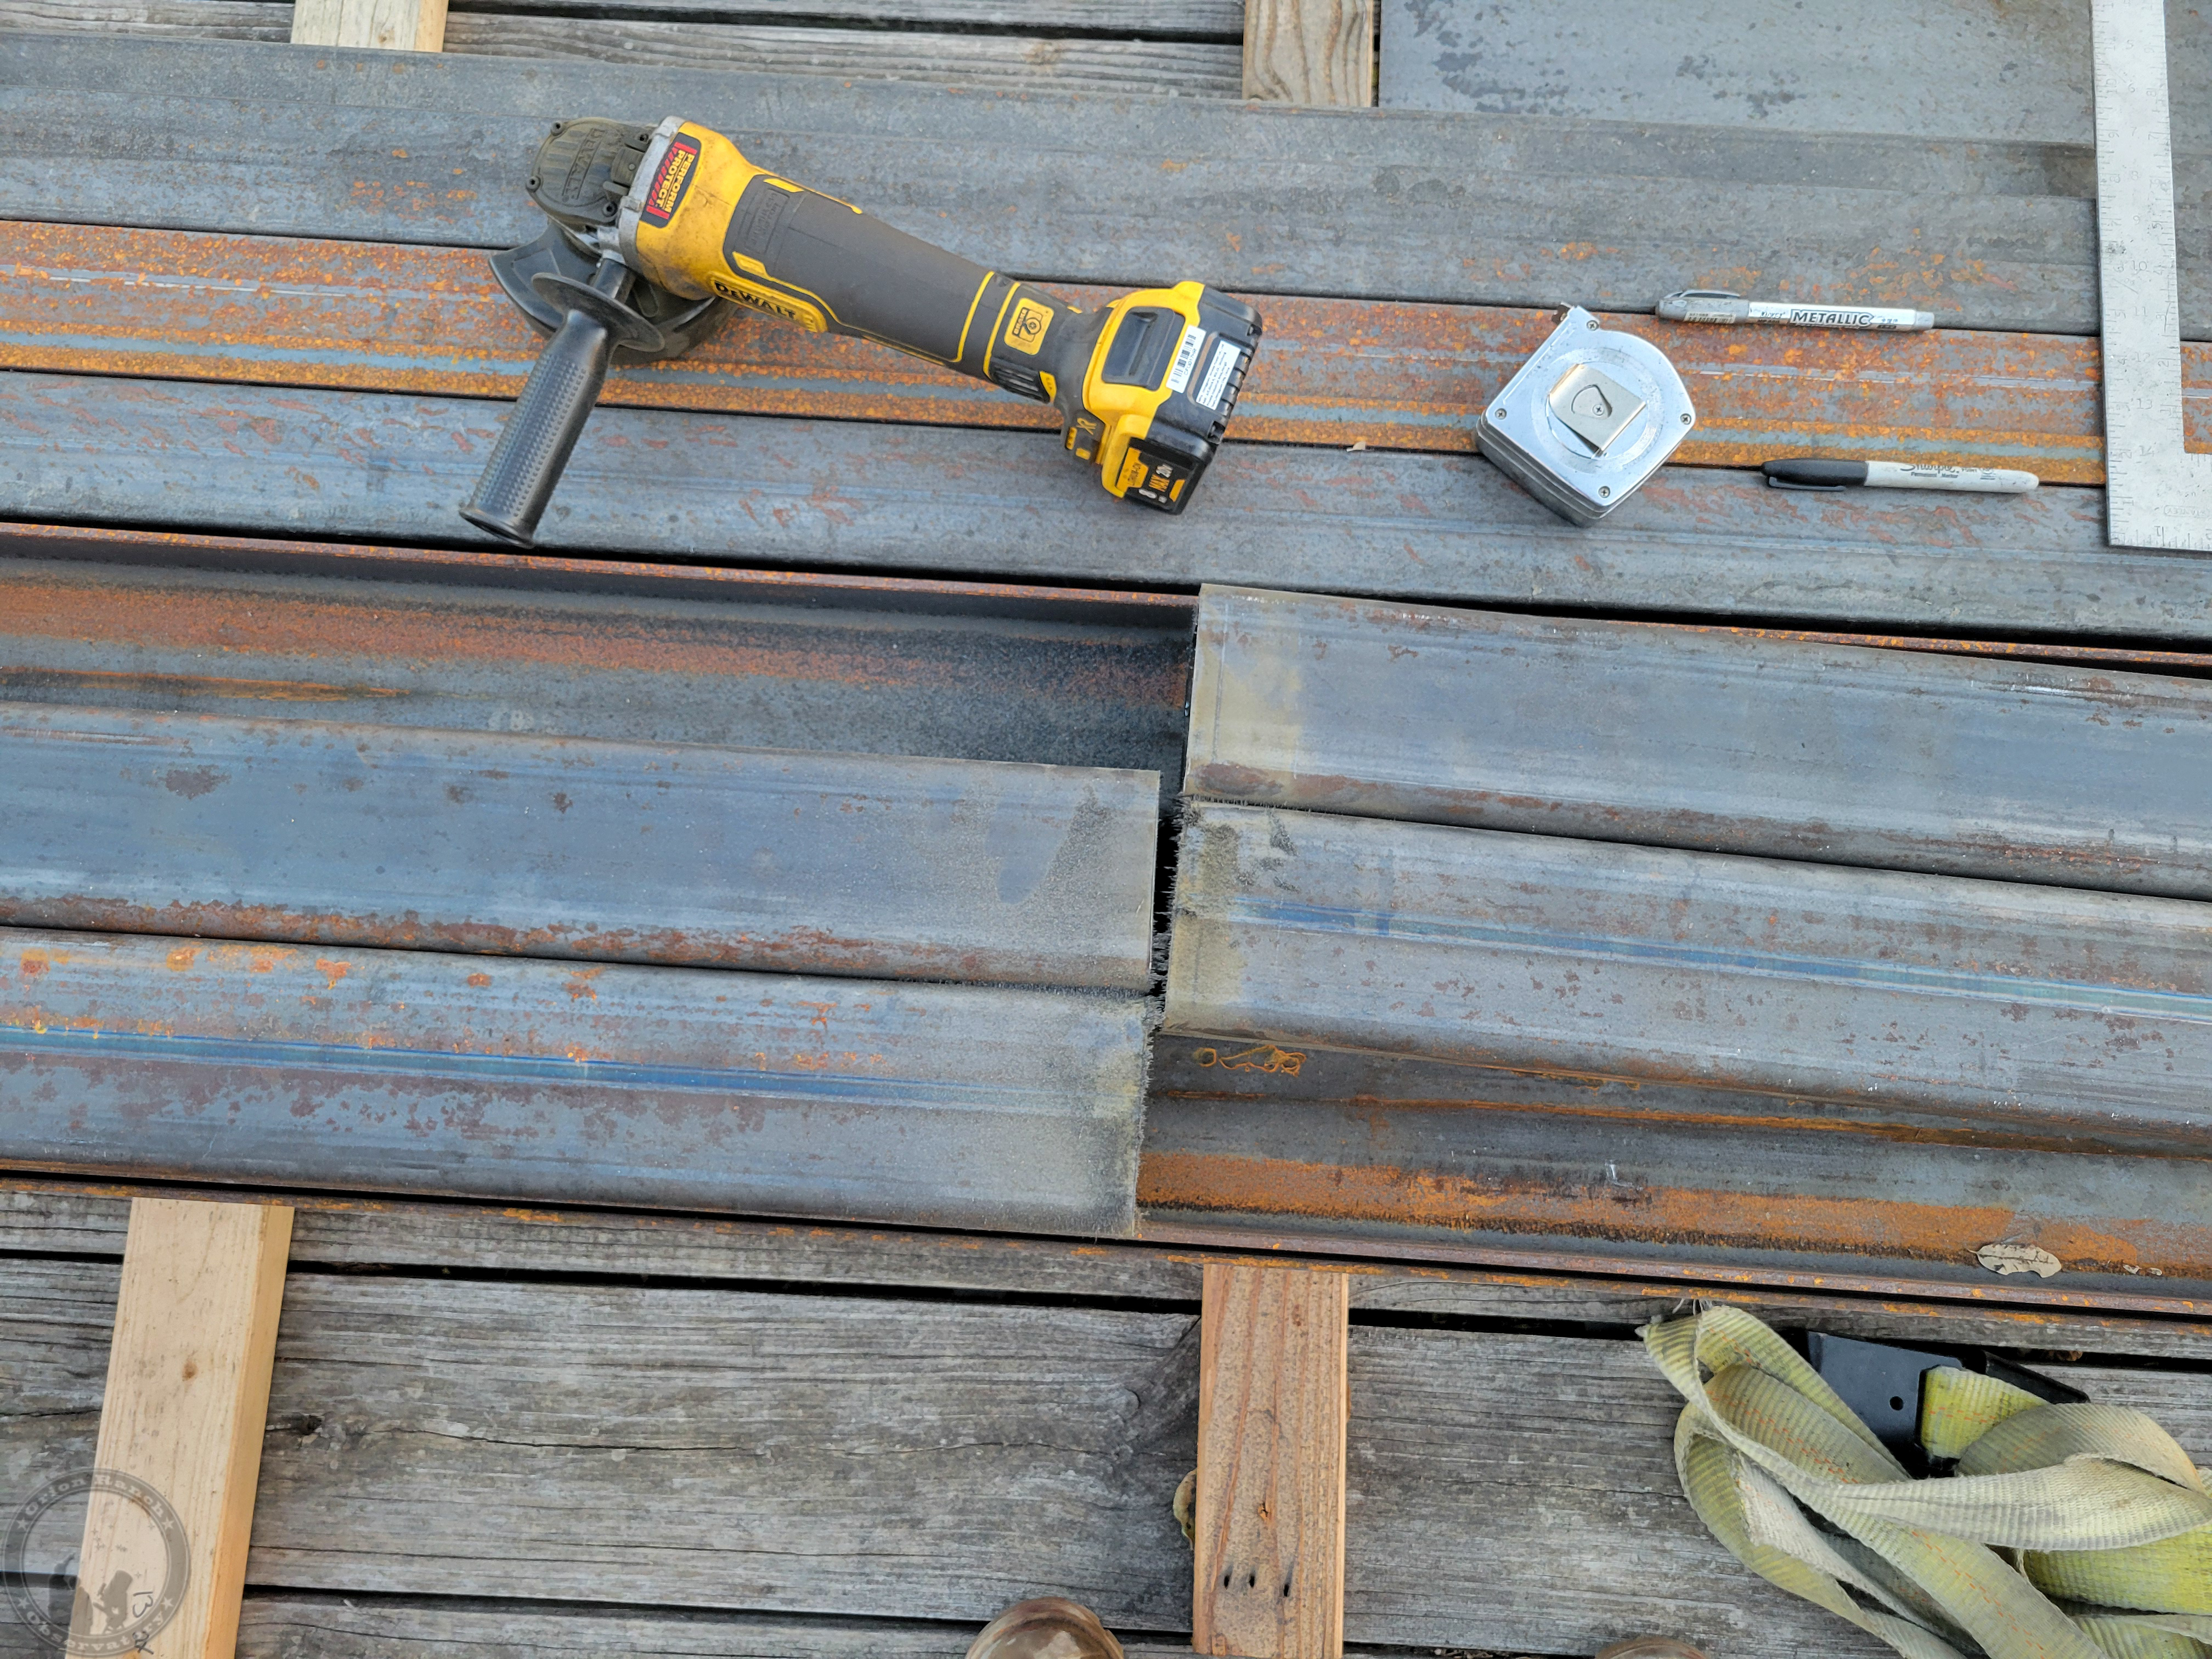
December 26th, 2025

First Cuts!  Using my chain saw to take this down quickly.  I had to sharpen the chain by the time I got to the last rail as it wasn’t cutting anything.  I probably hit some screws along the way.  Either that, or the pressure treatment was especially hard on it.  Cut through all of the diagonals at the post and removed the end rail cross brace in one piece.

Then came the center longitudinal sections and mid-span cross brace.

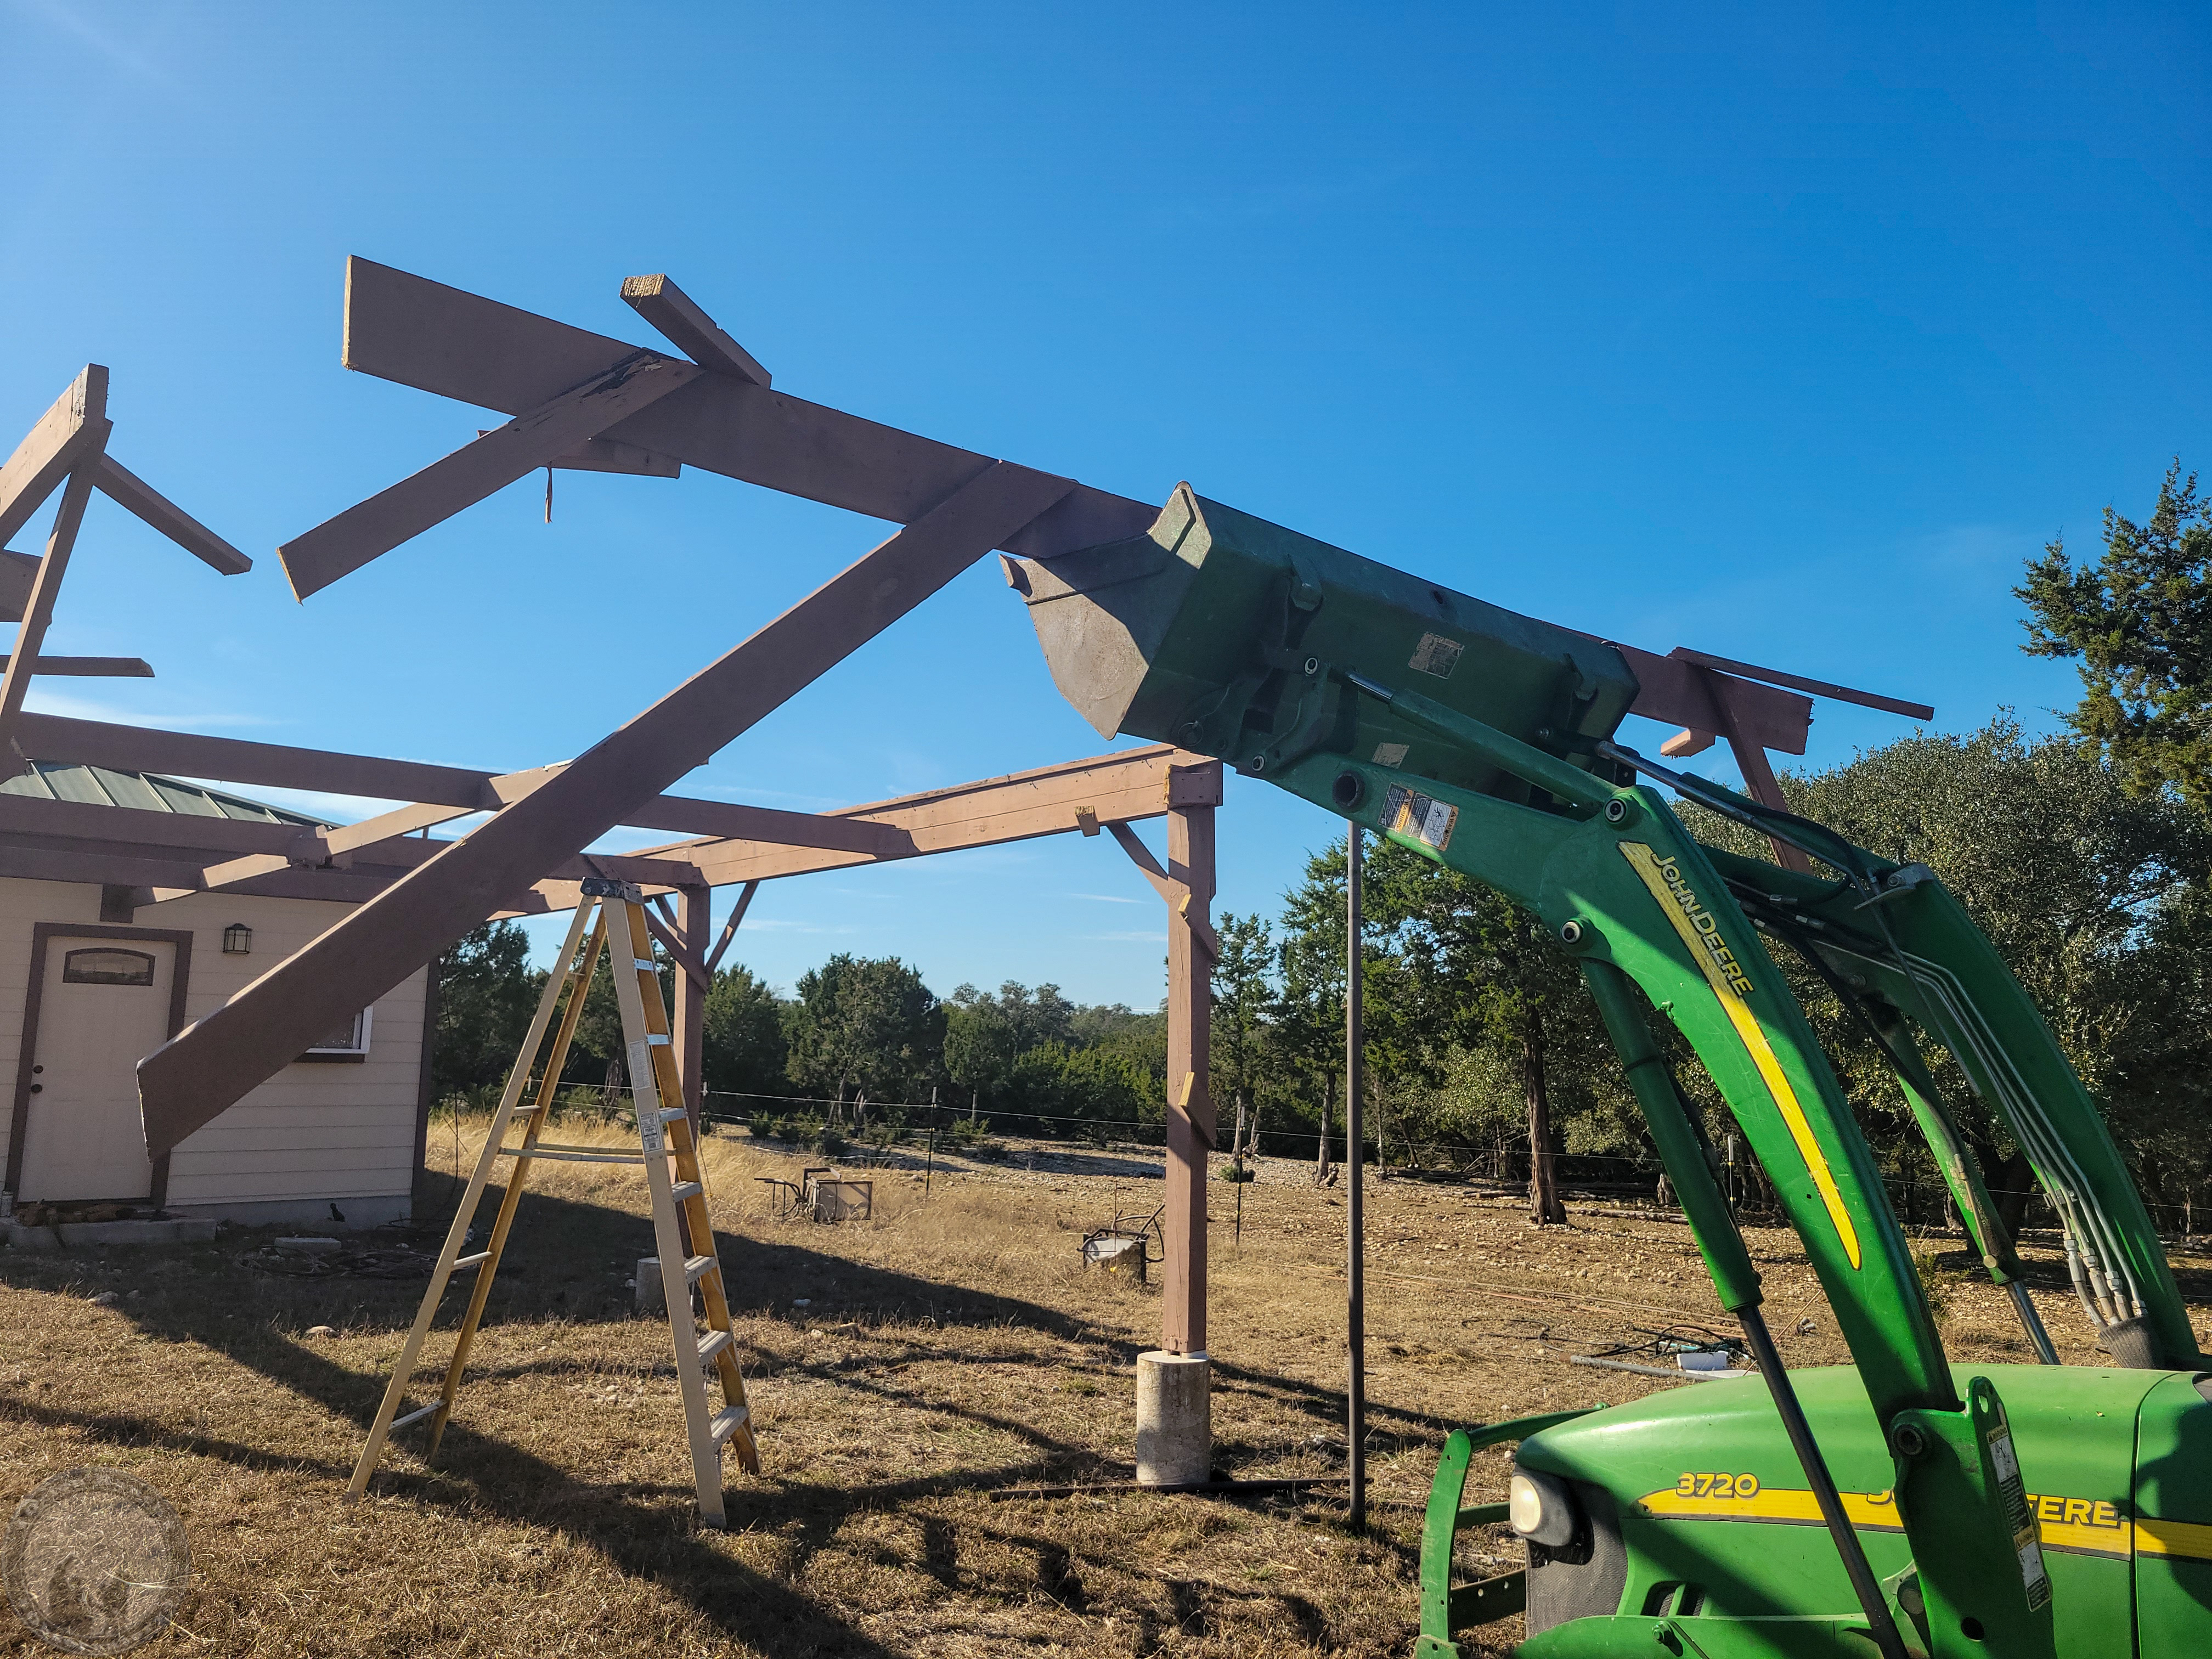
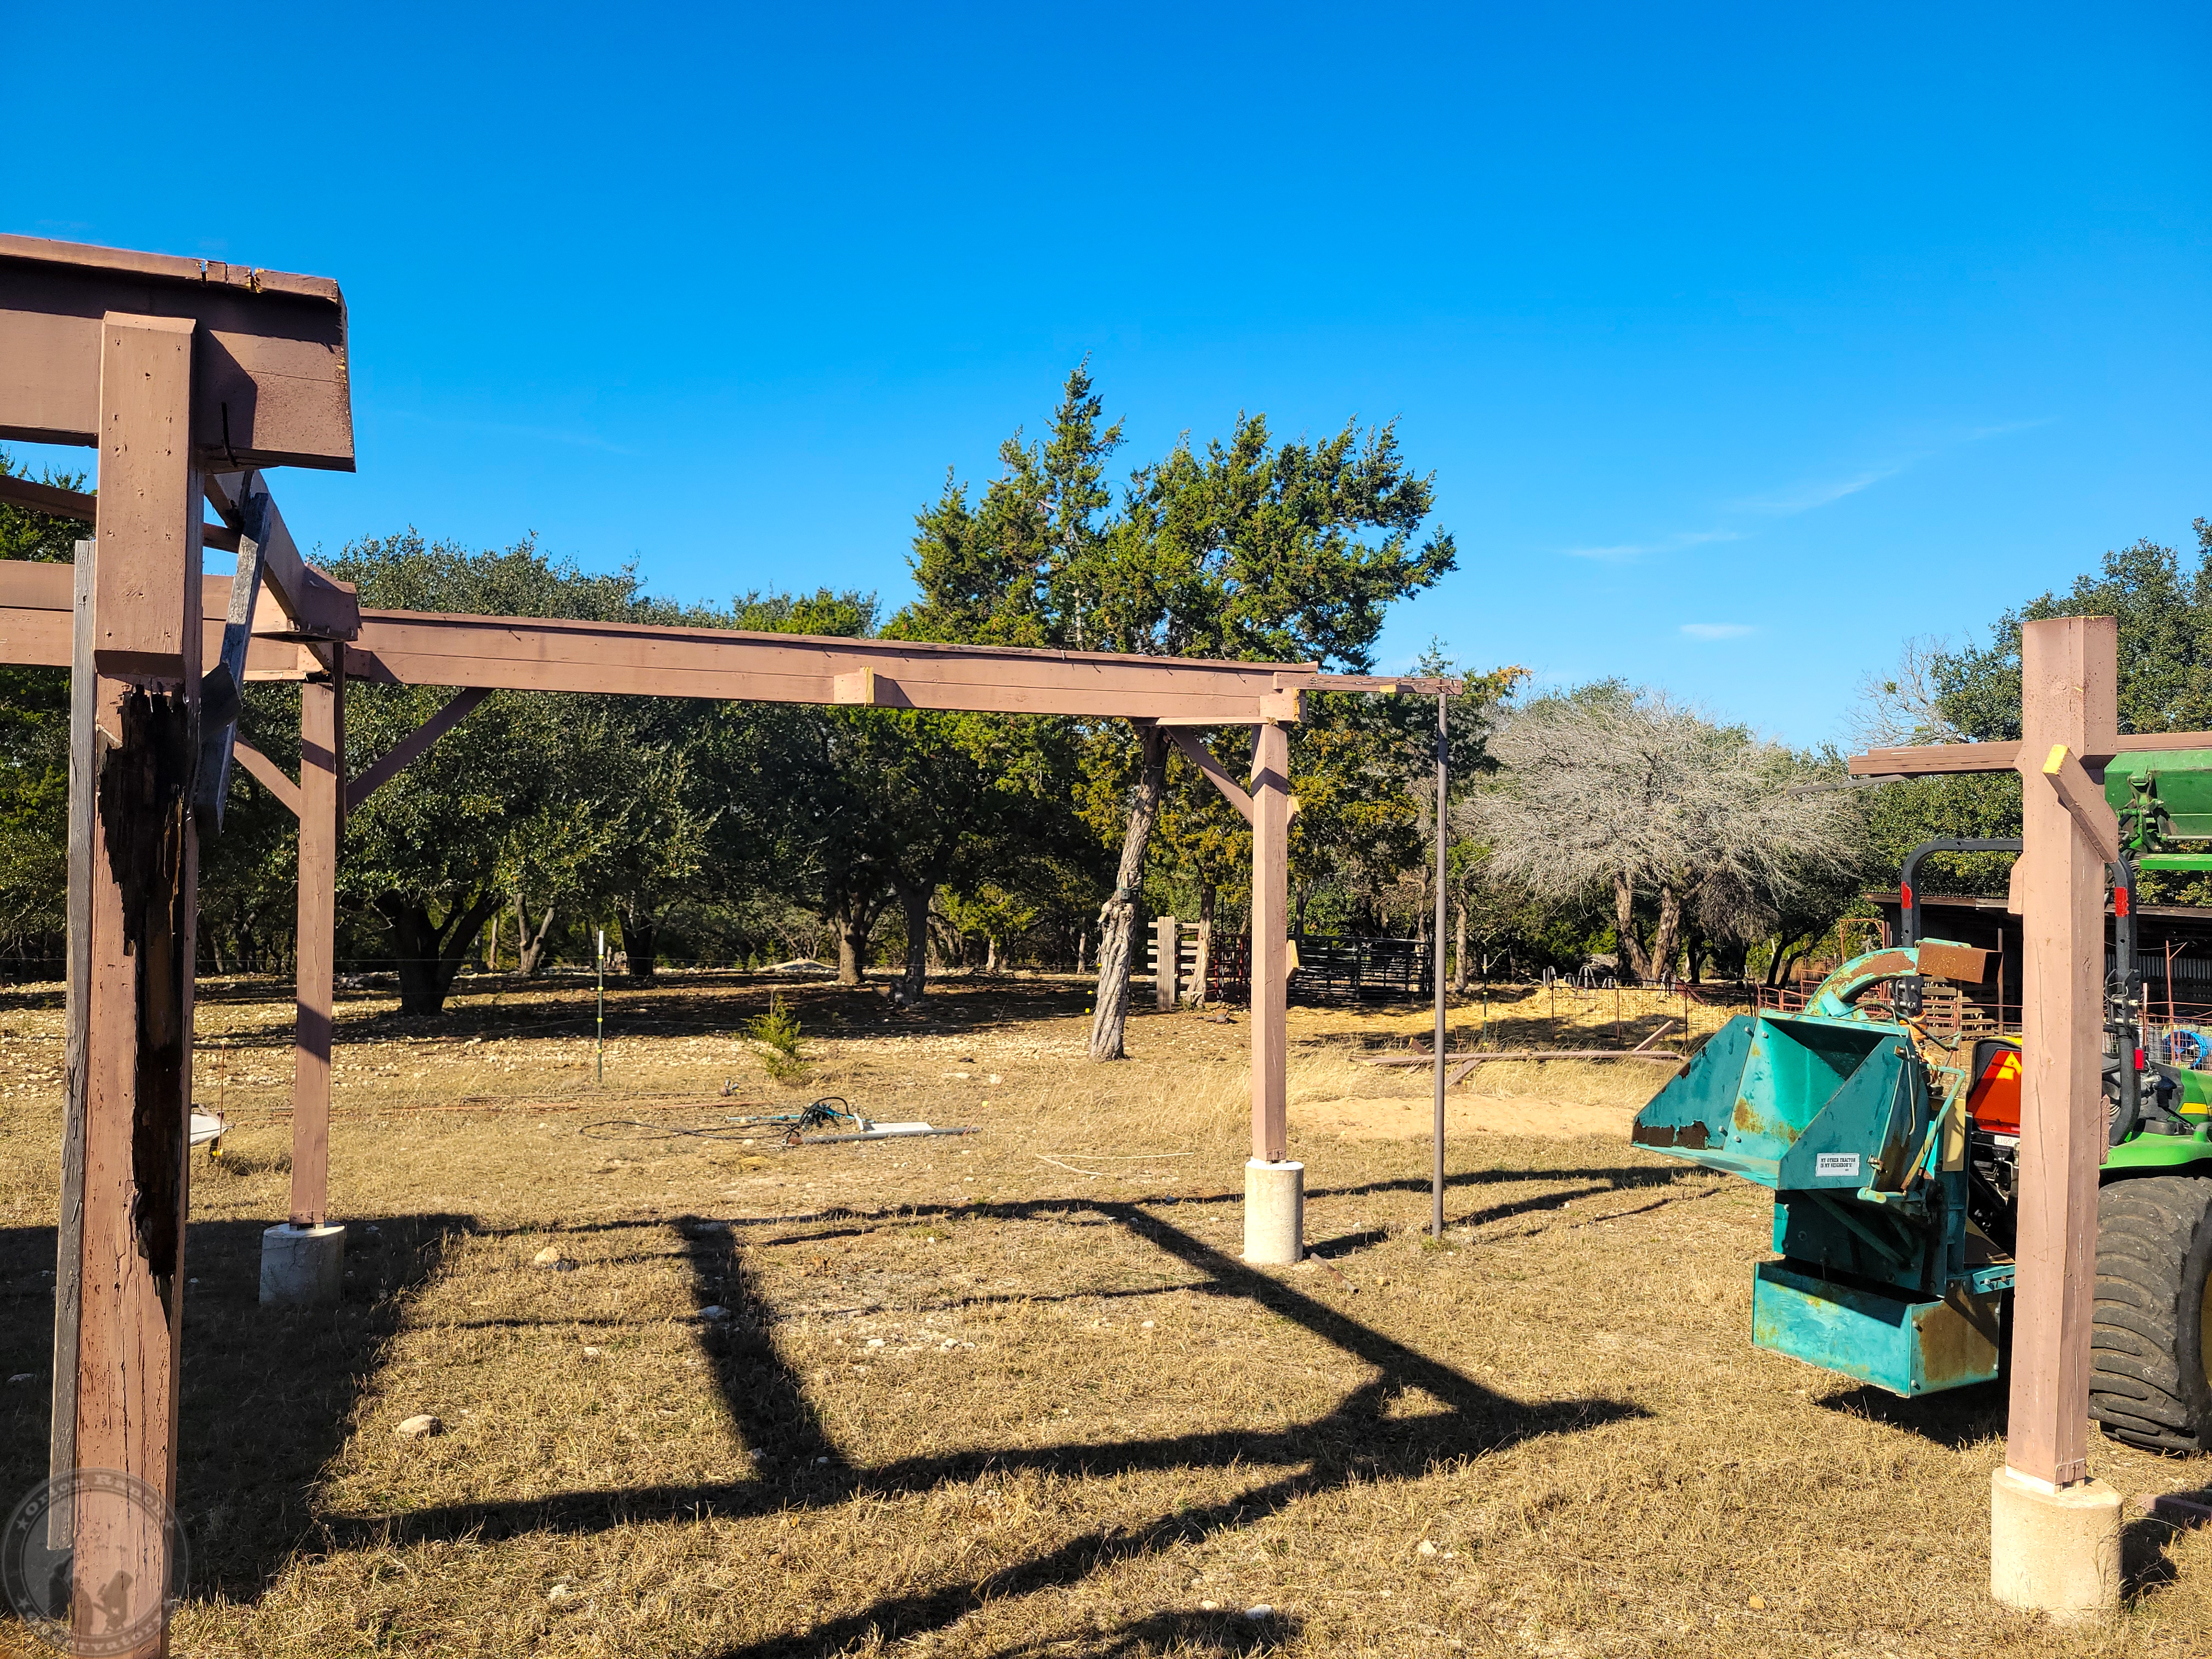
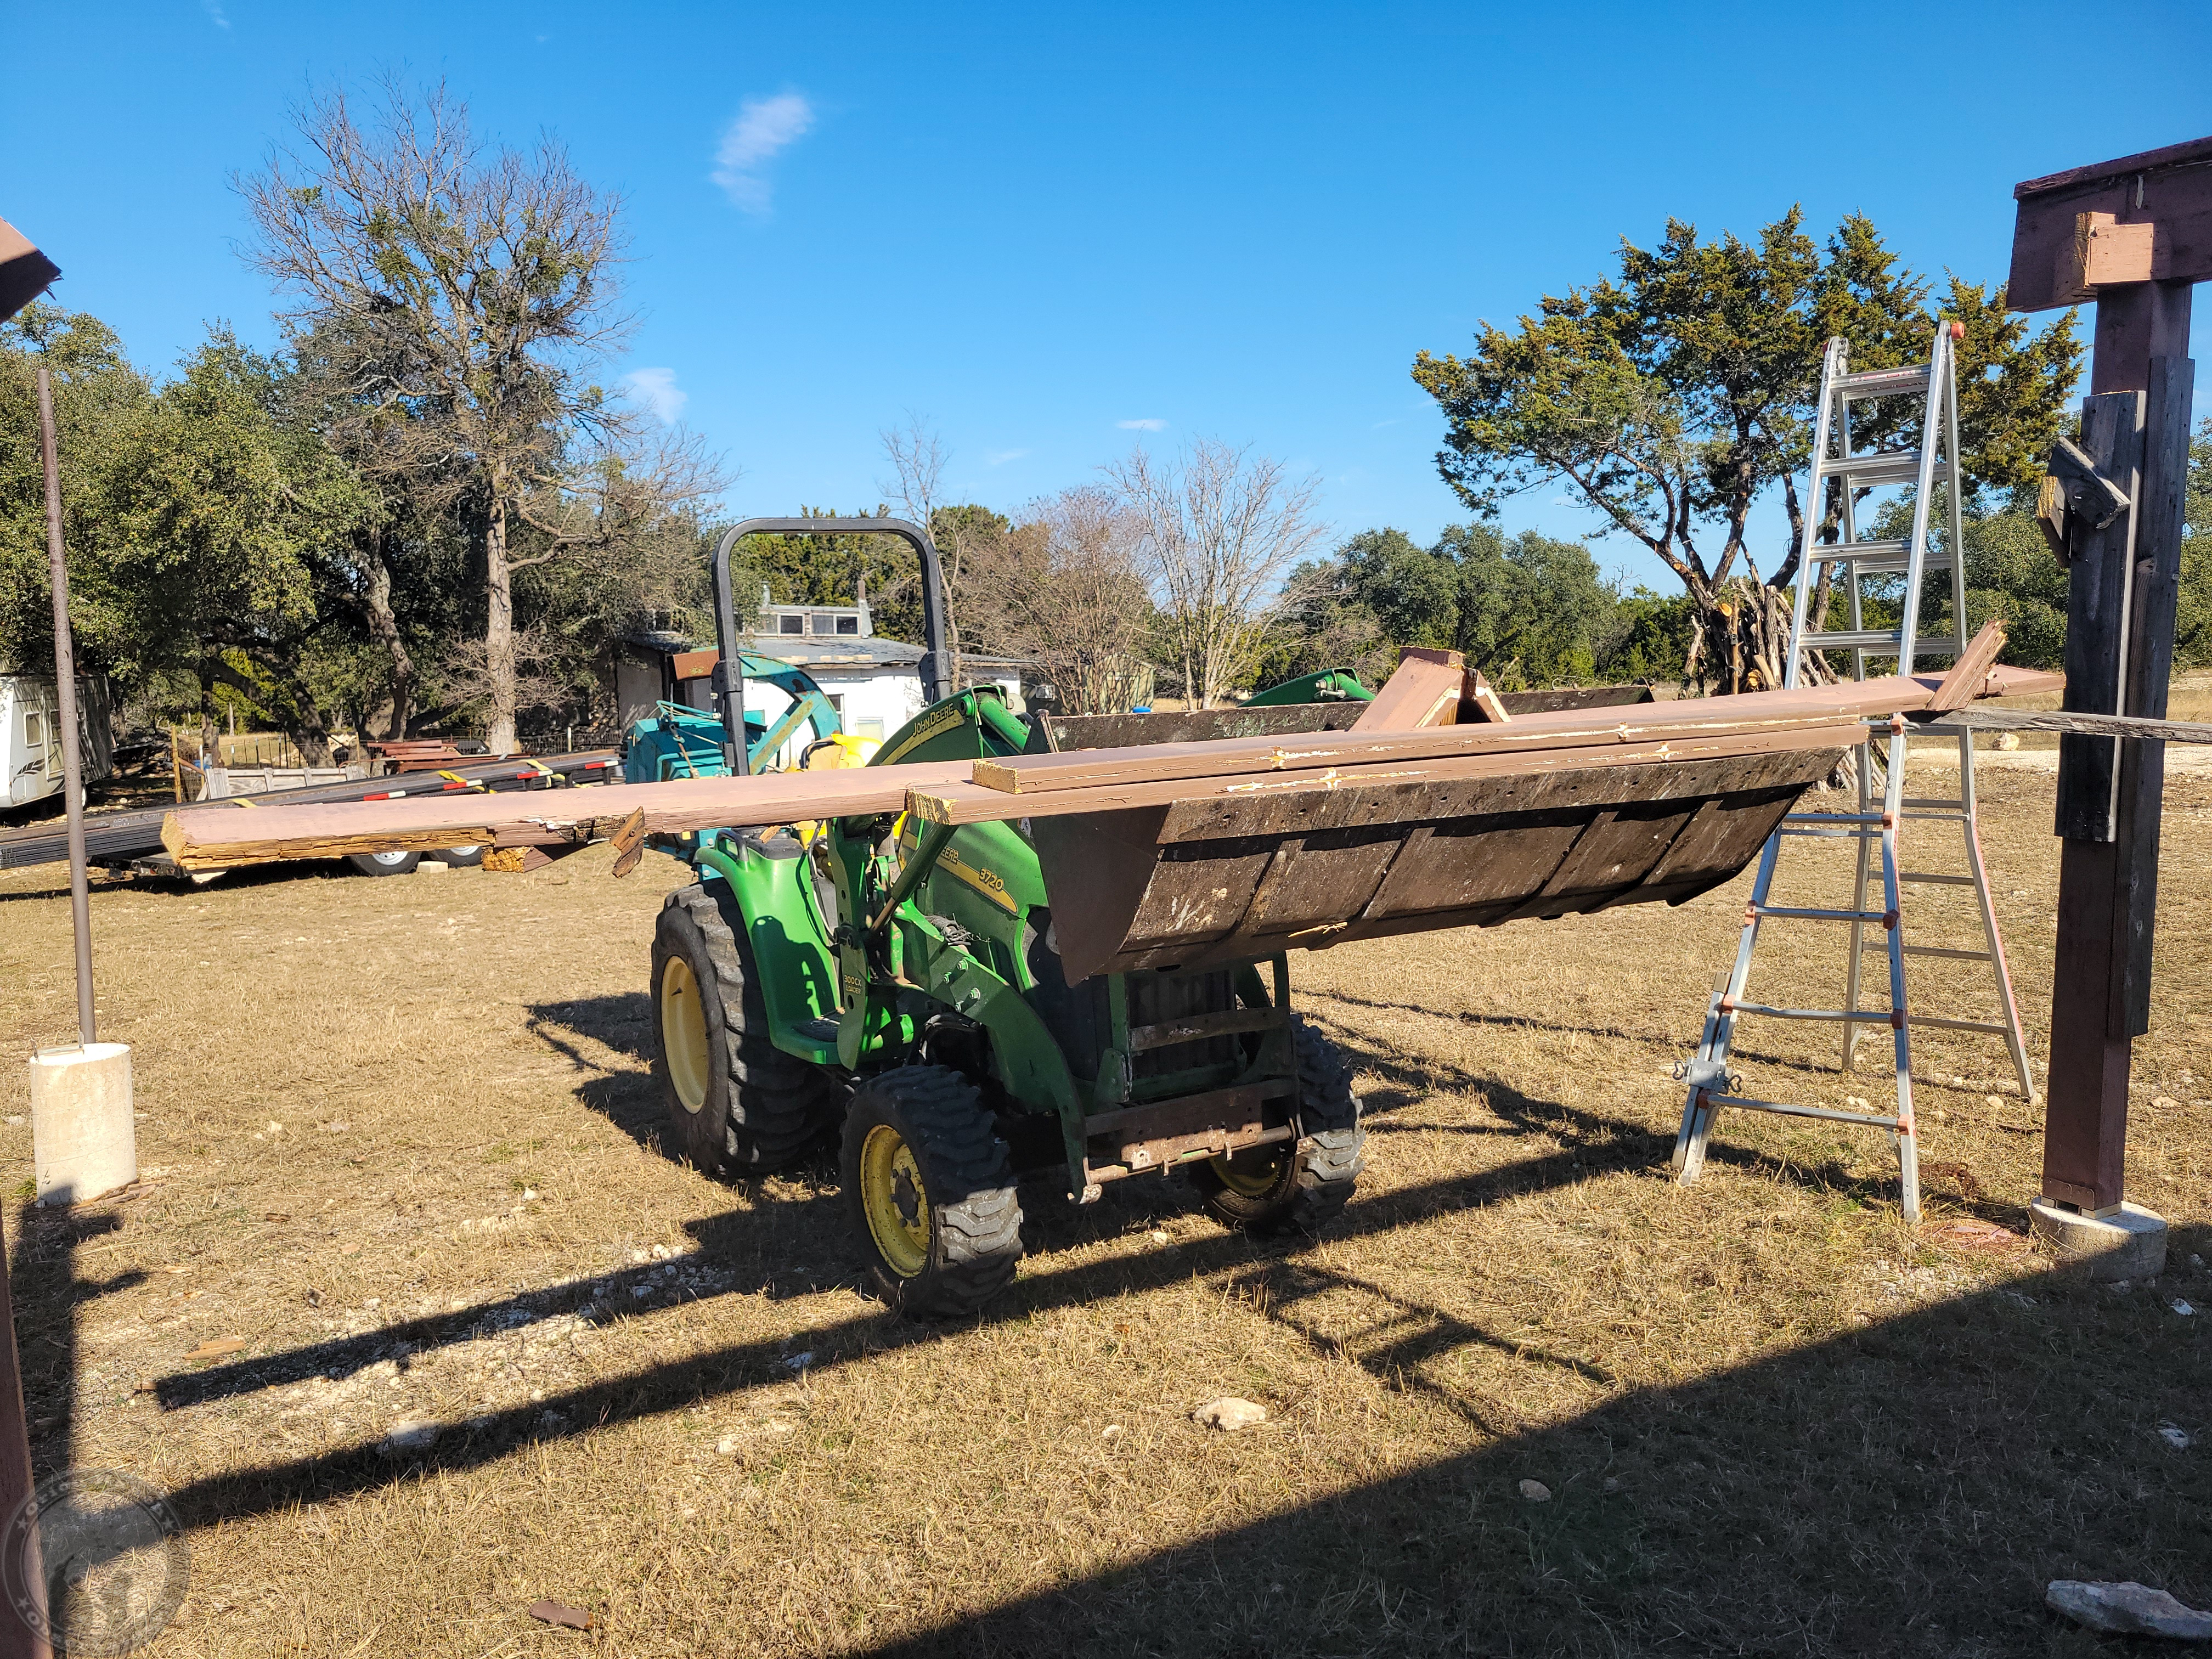
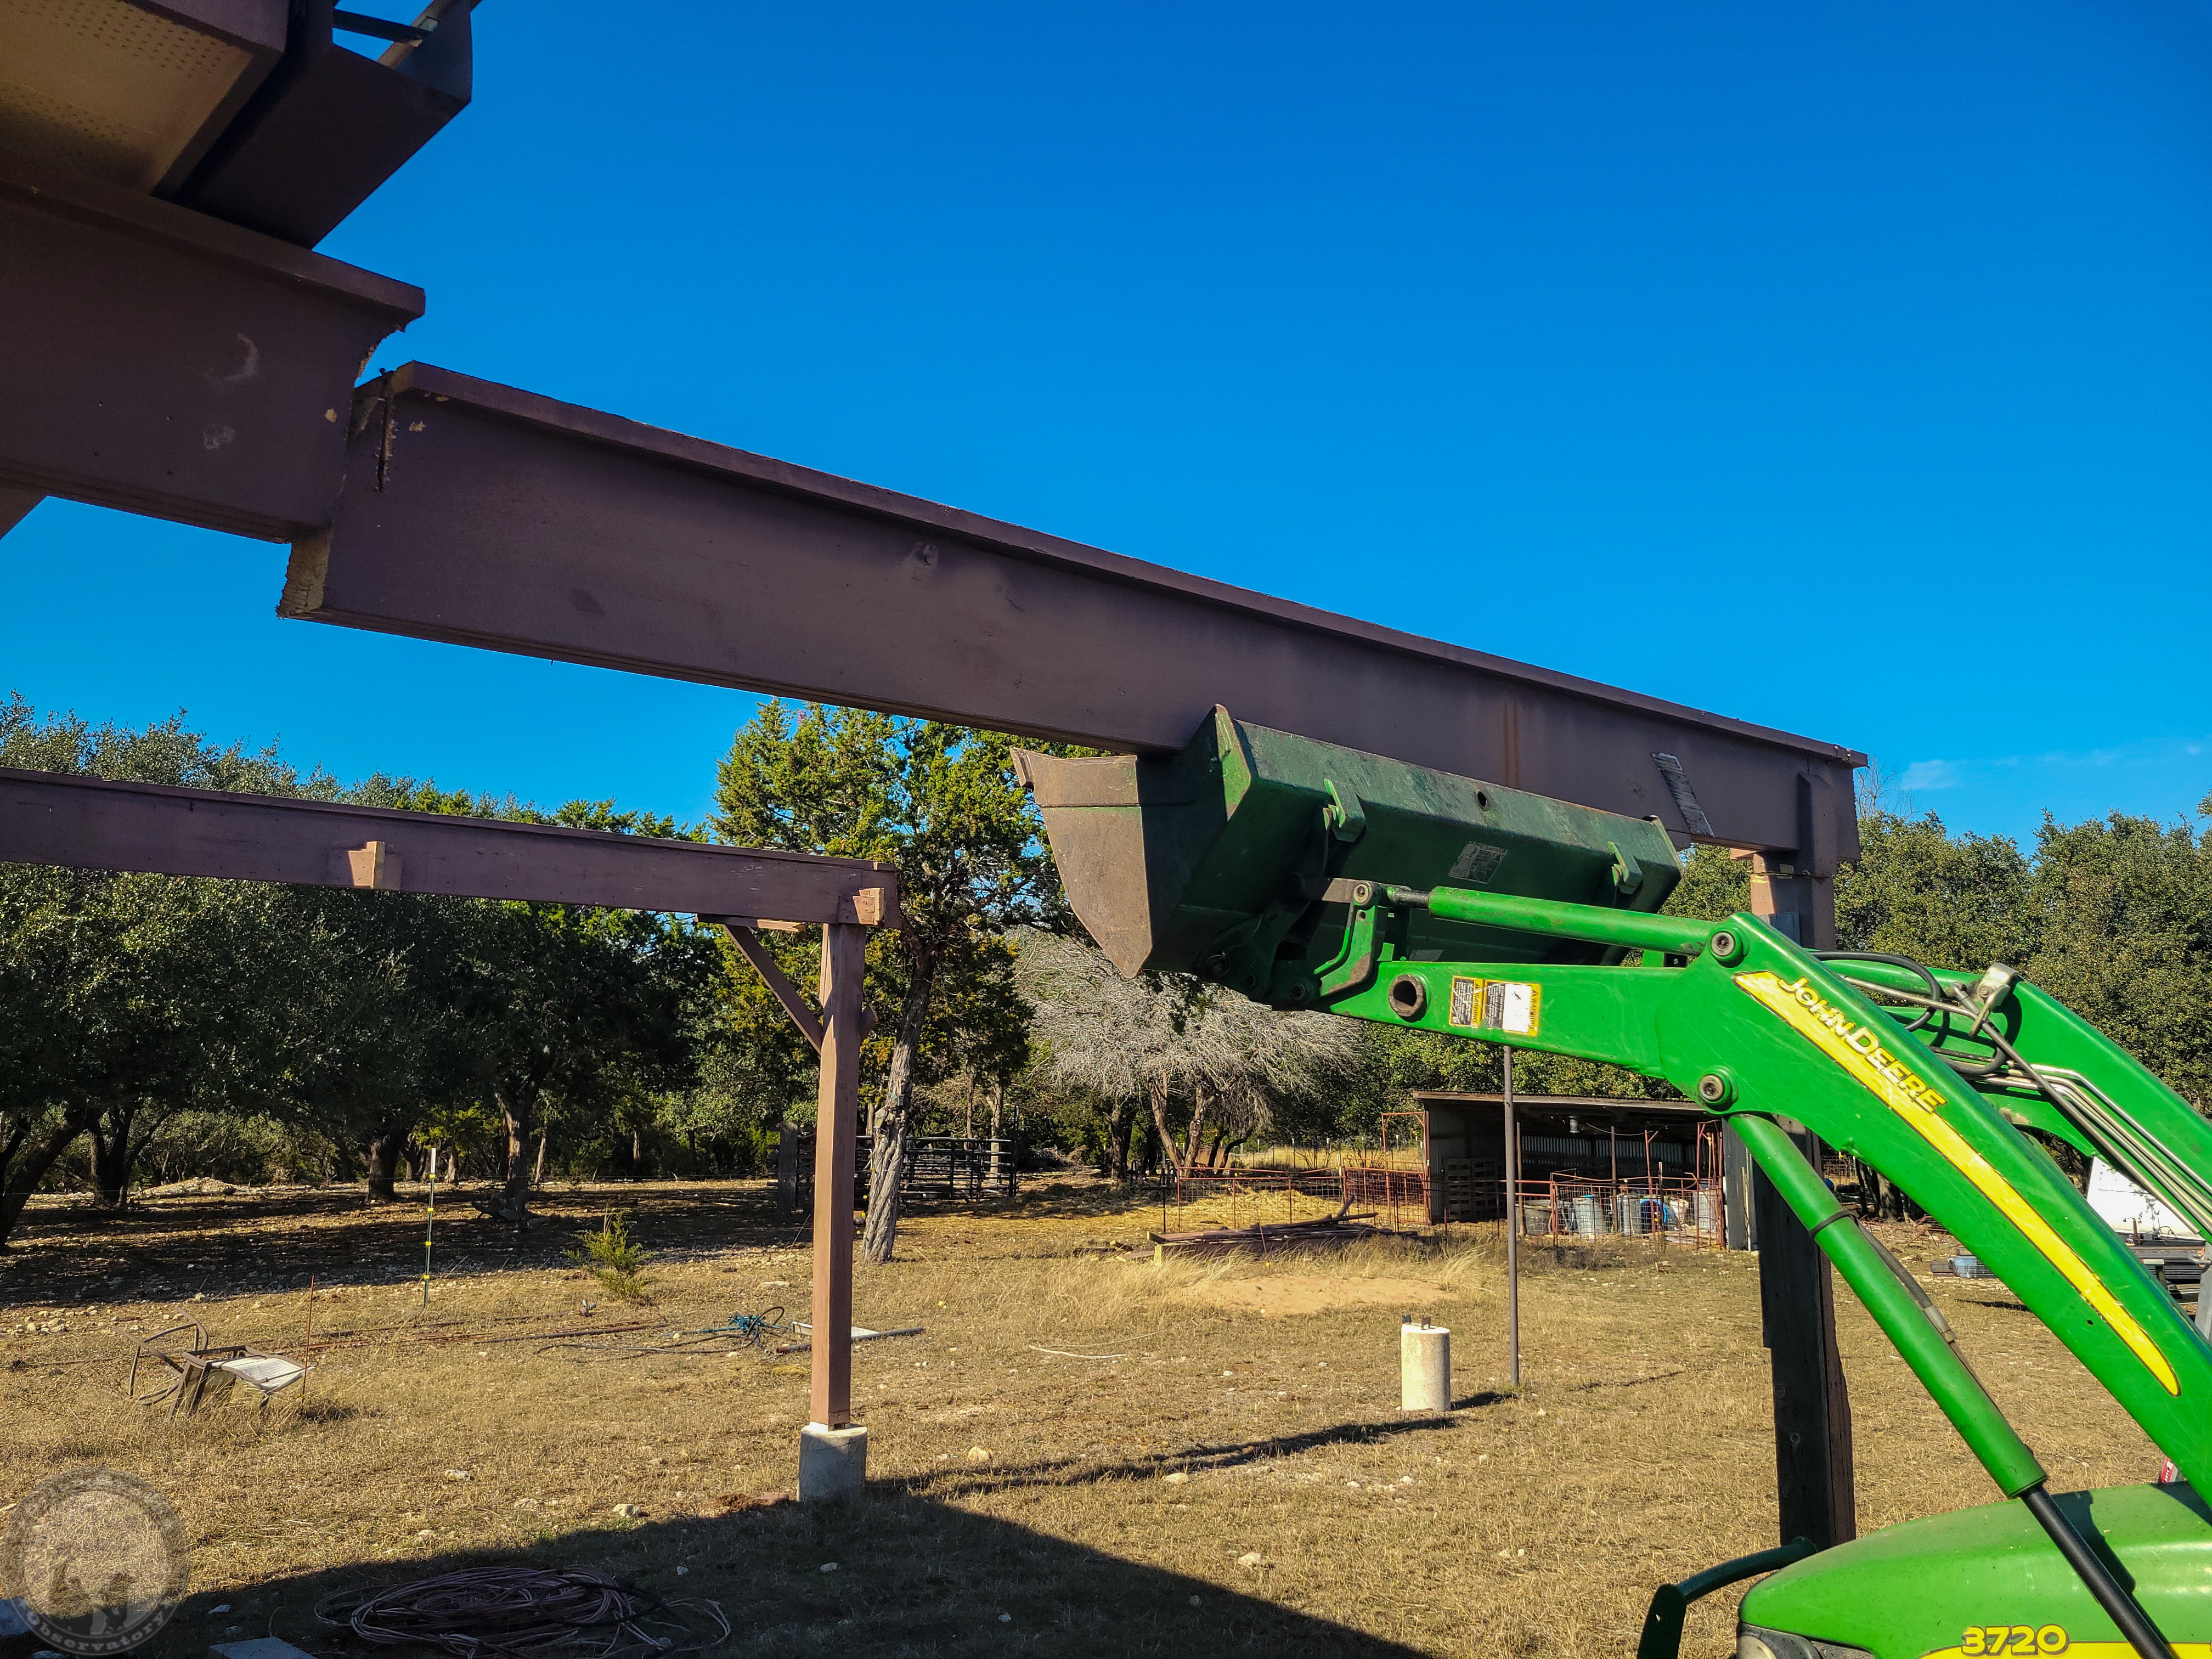
And then the first 16′ rail section.  I basically cut the top off the post on the outer part since the post is actually integrated into the middle of the beam, and then cut away from the rest of the rail system through the beam.  Really was painful cutting through the perfectly good beams!

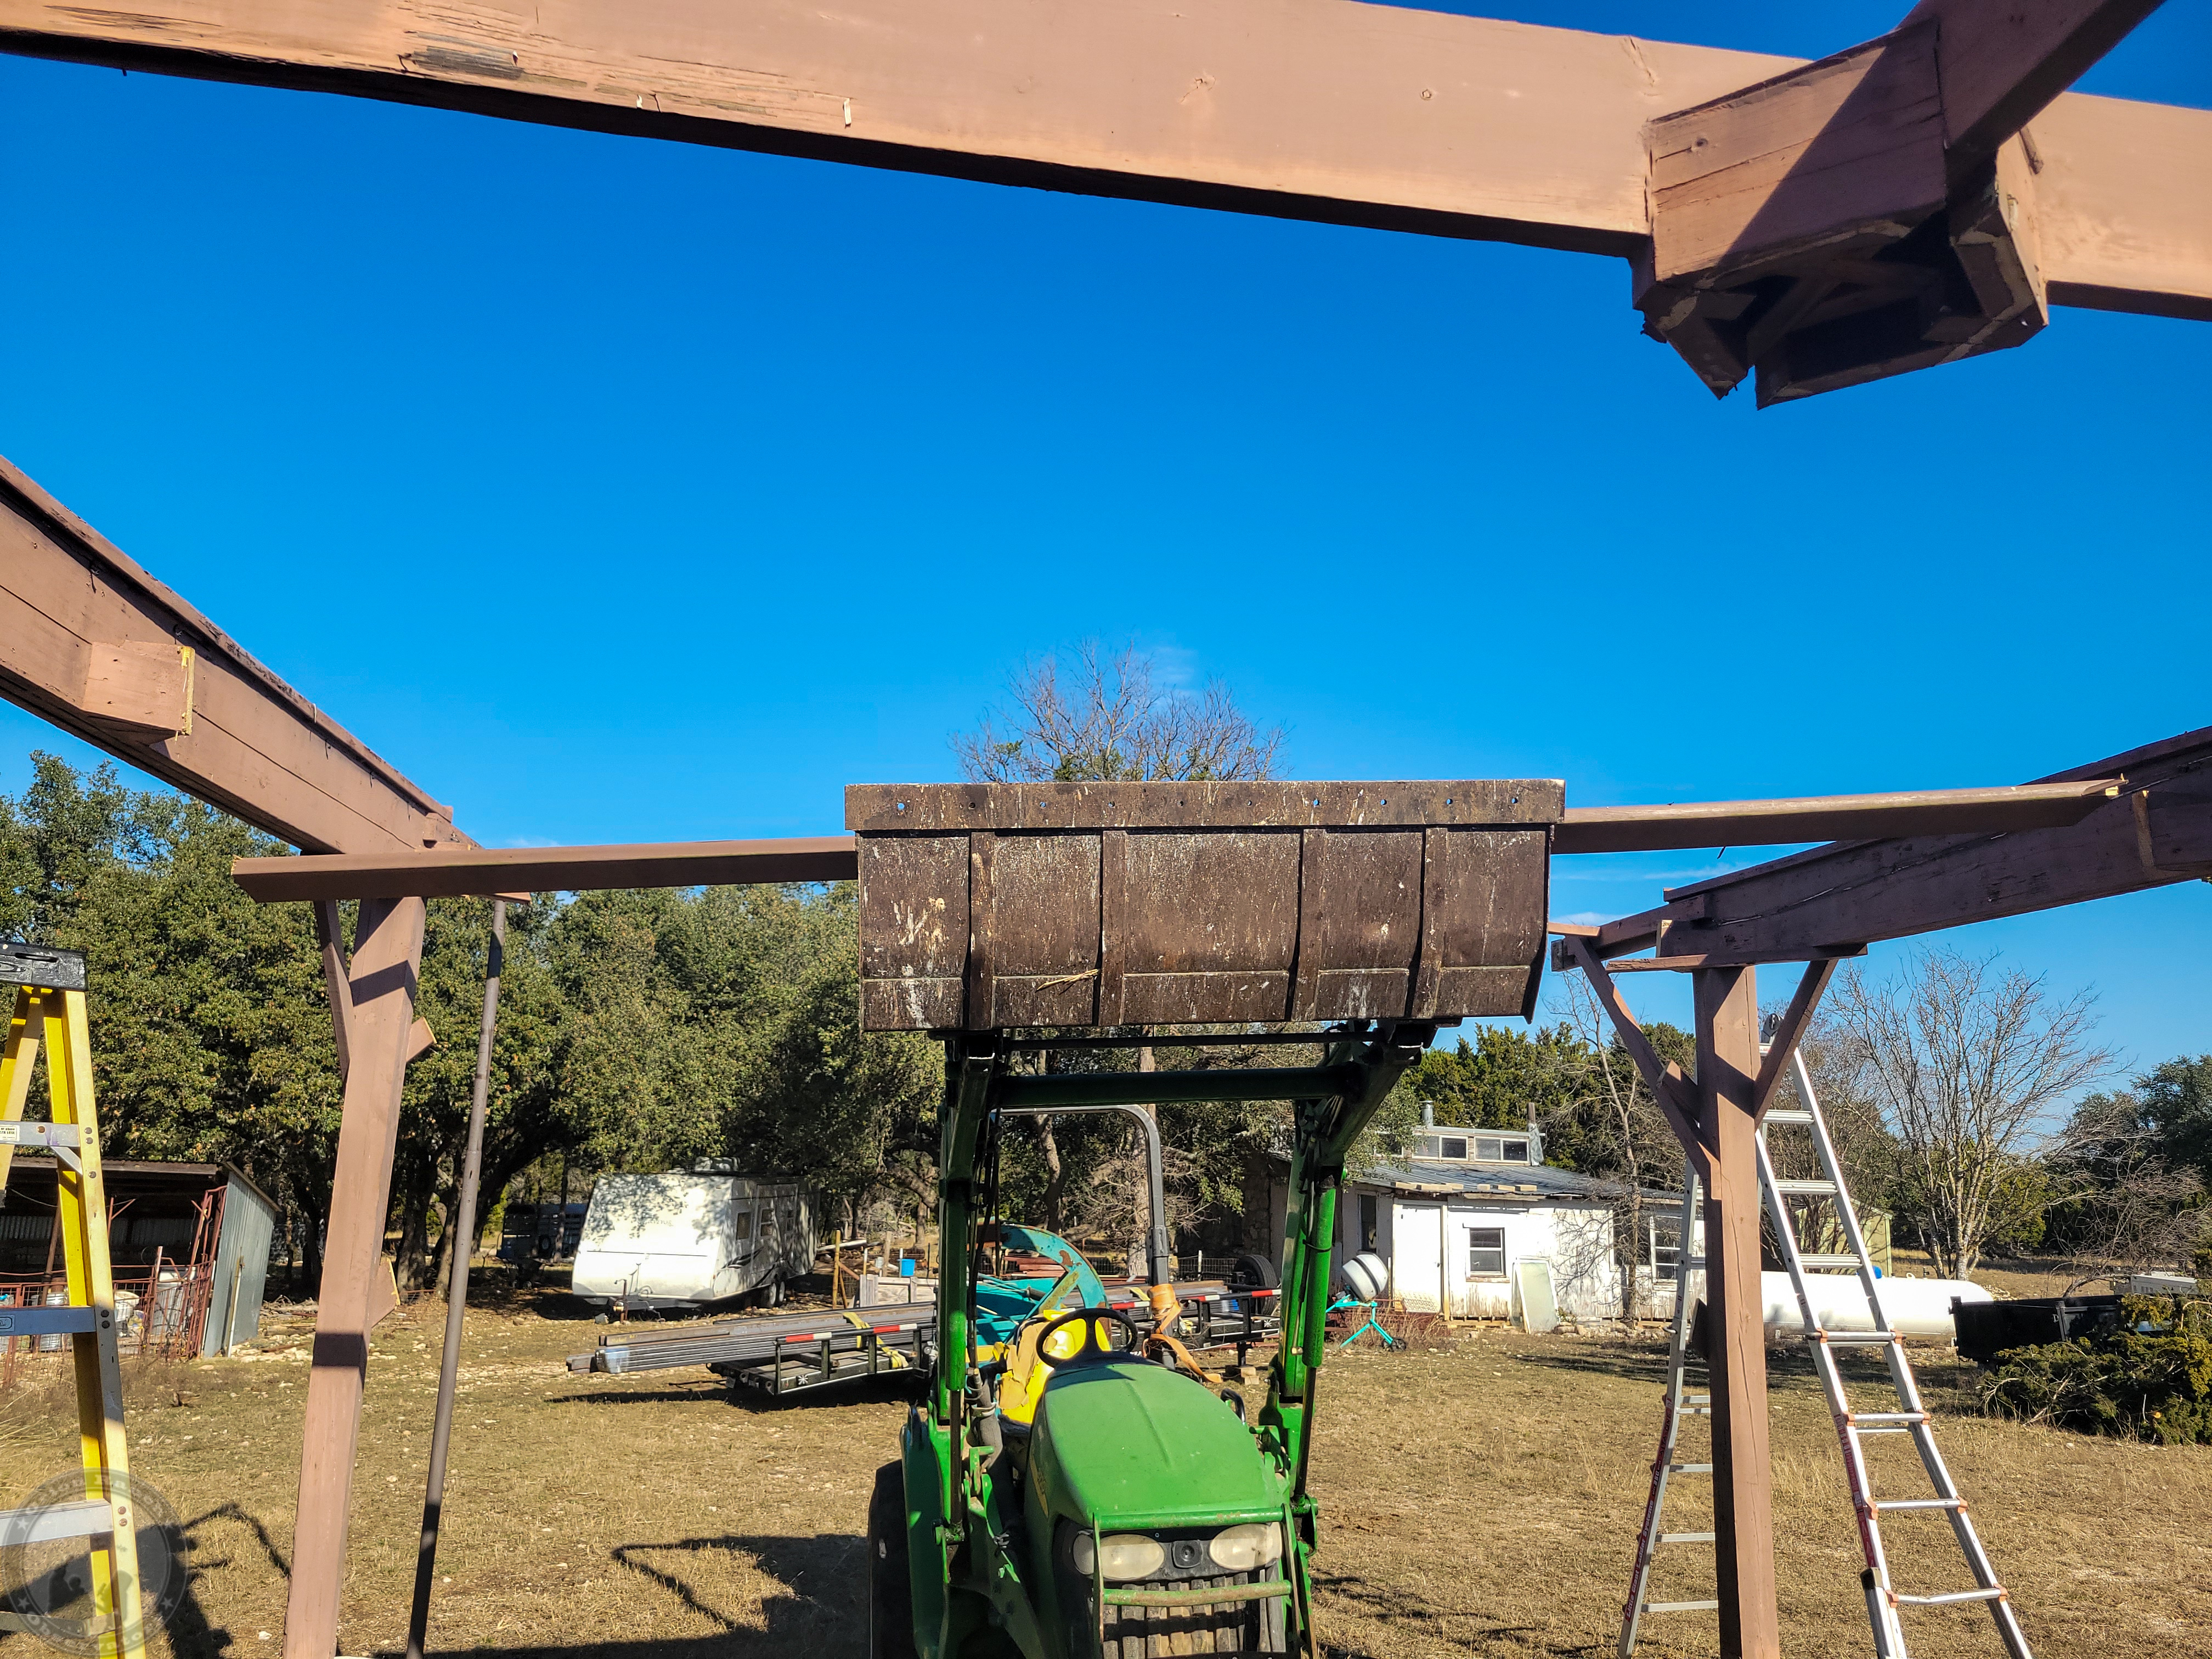
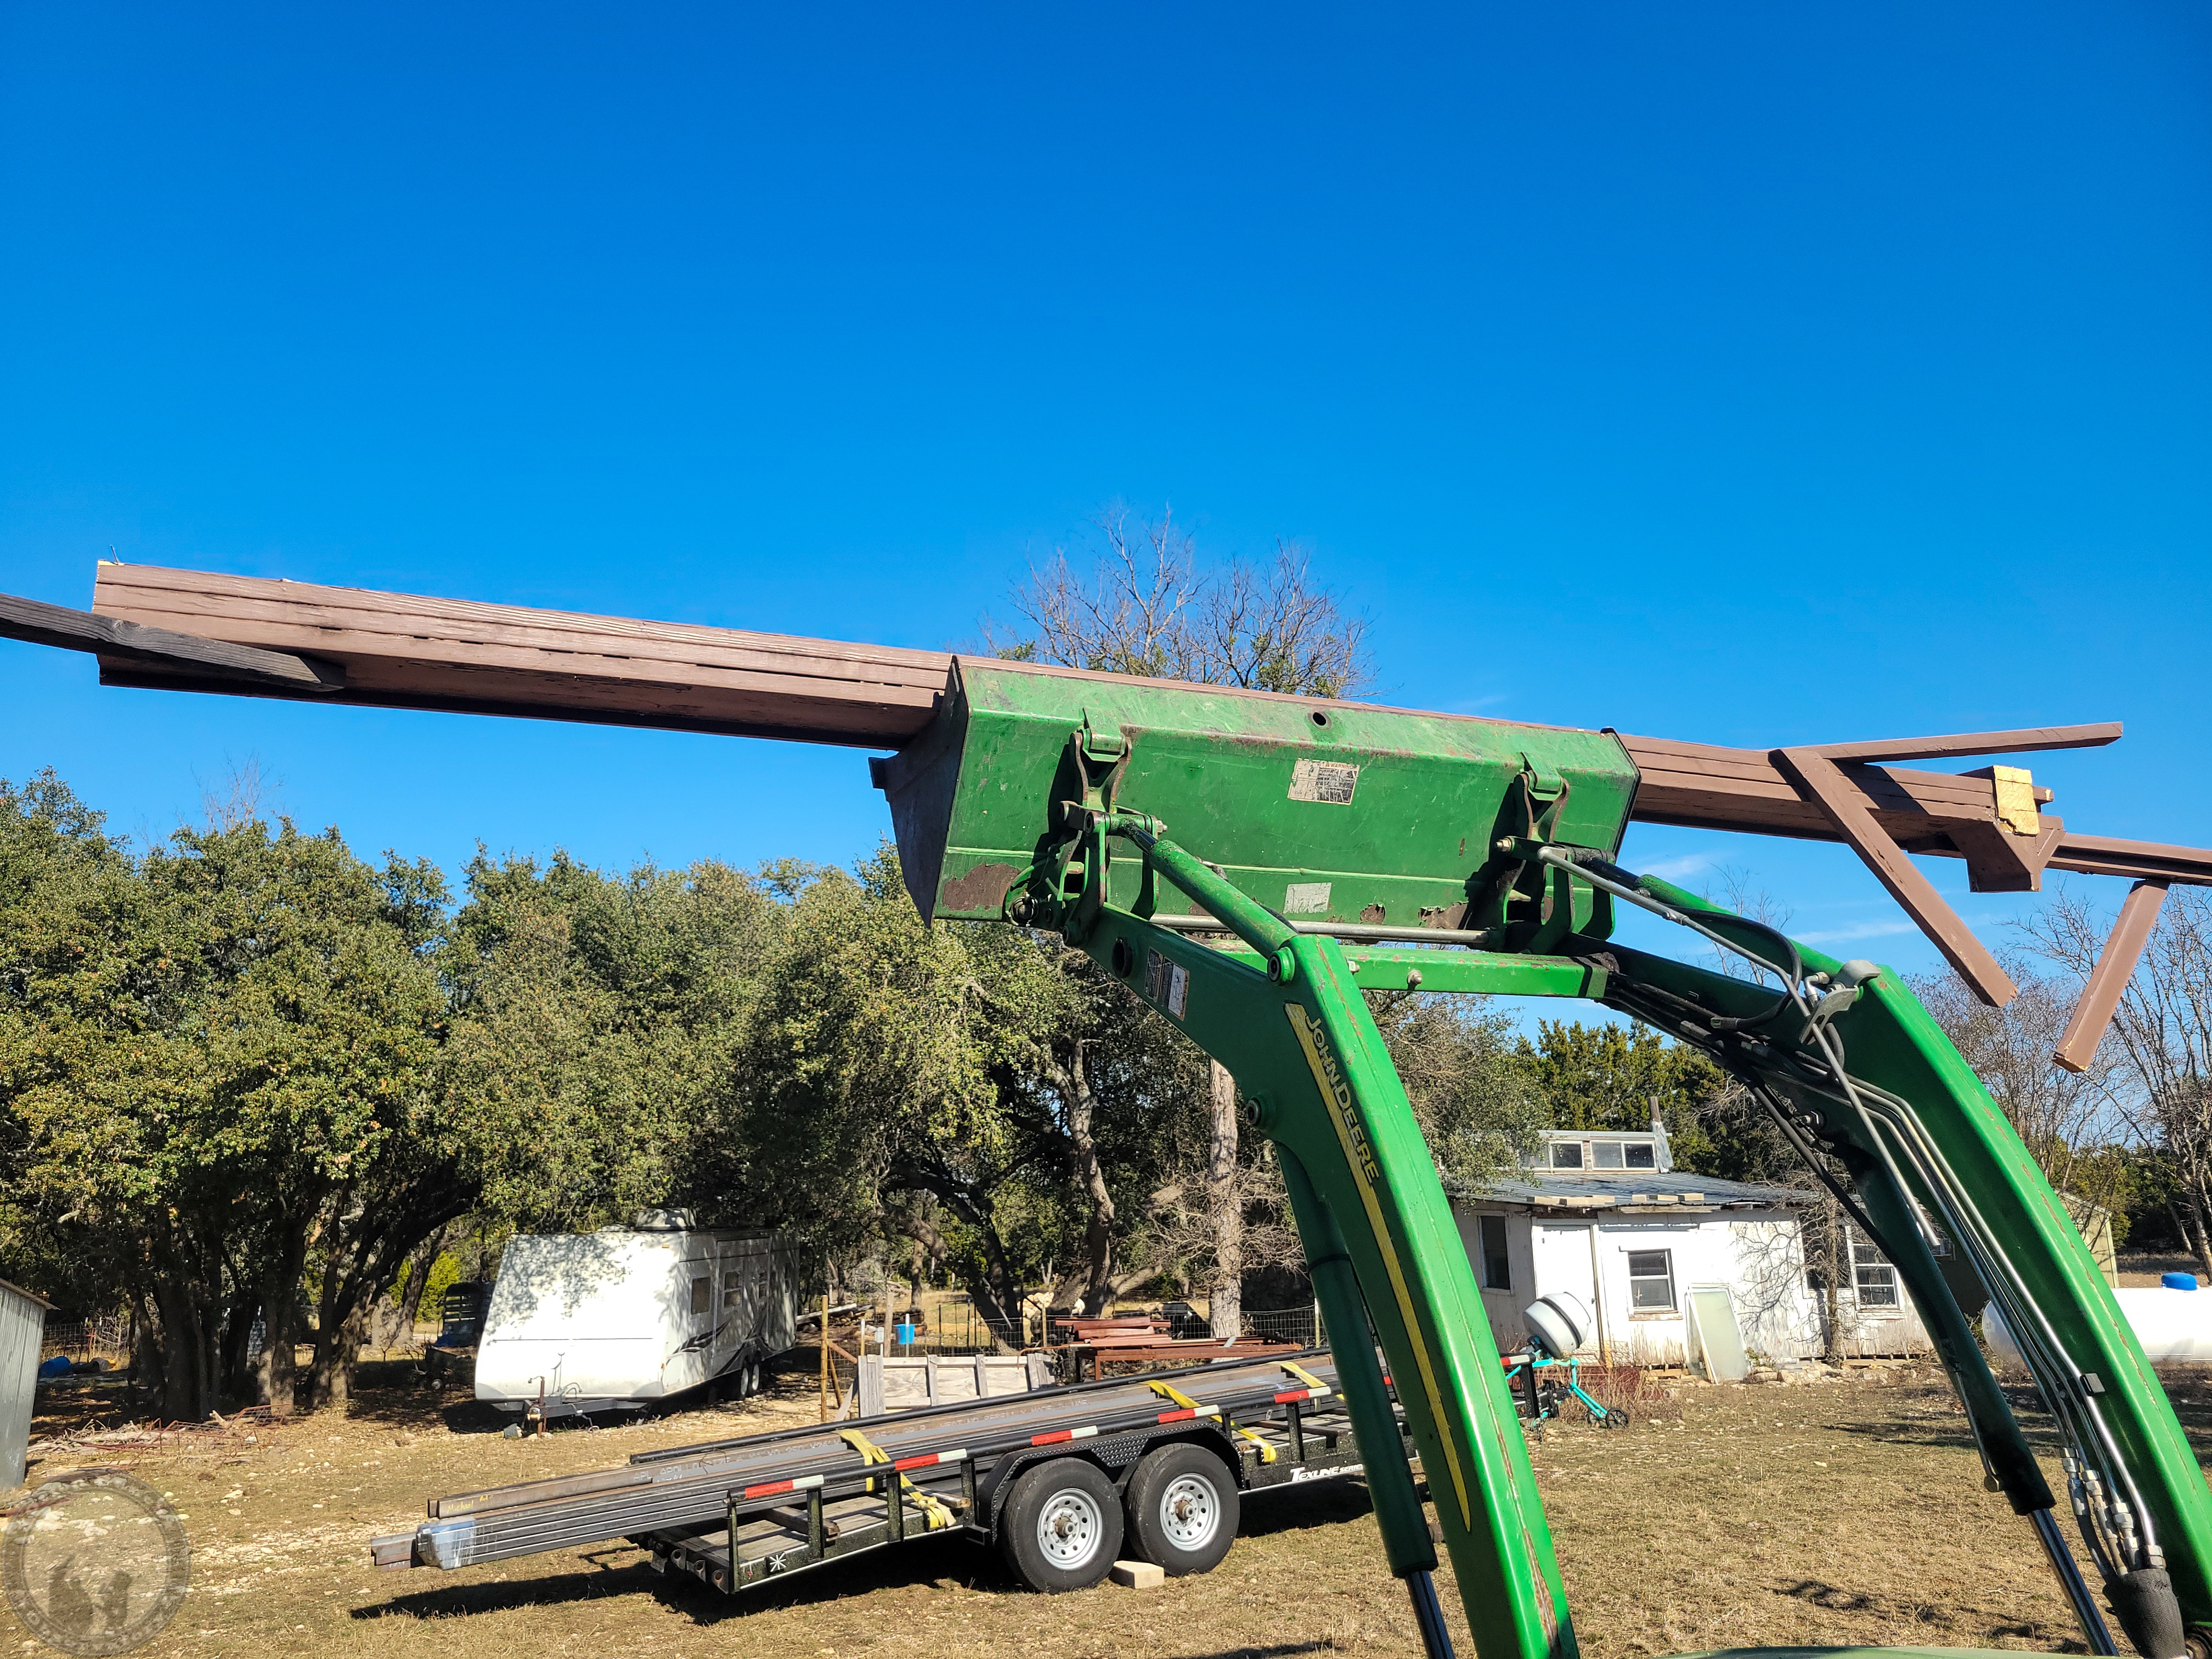
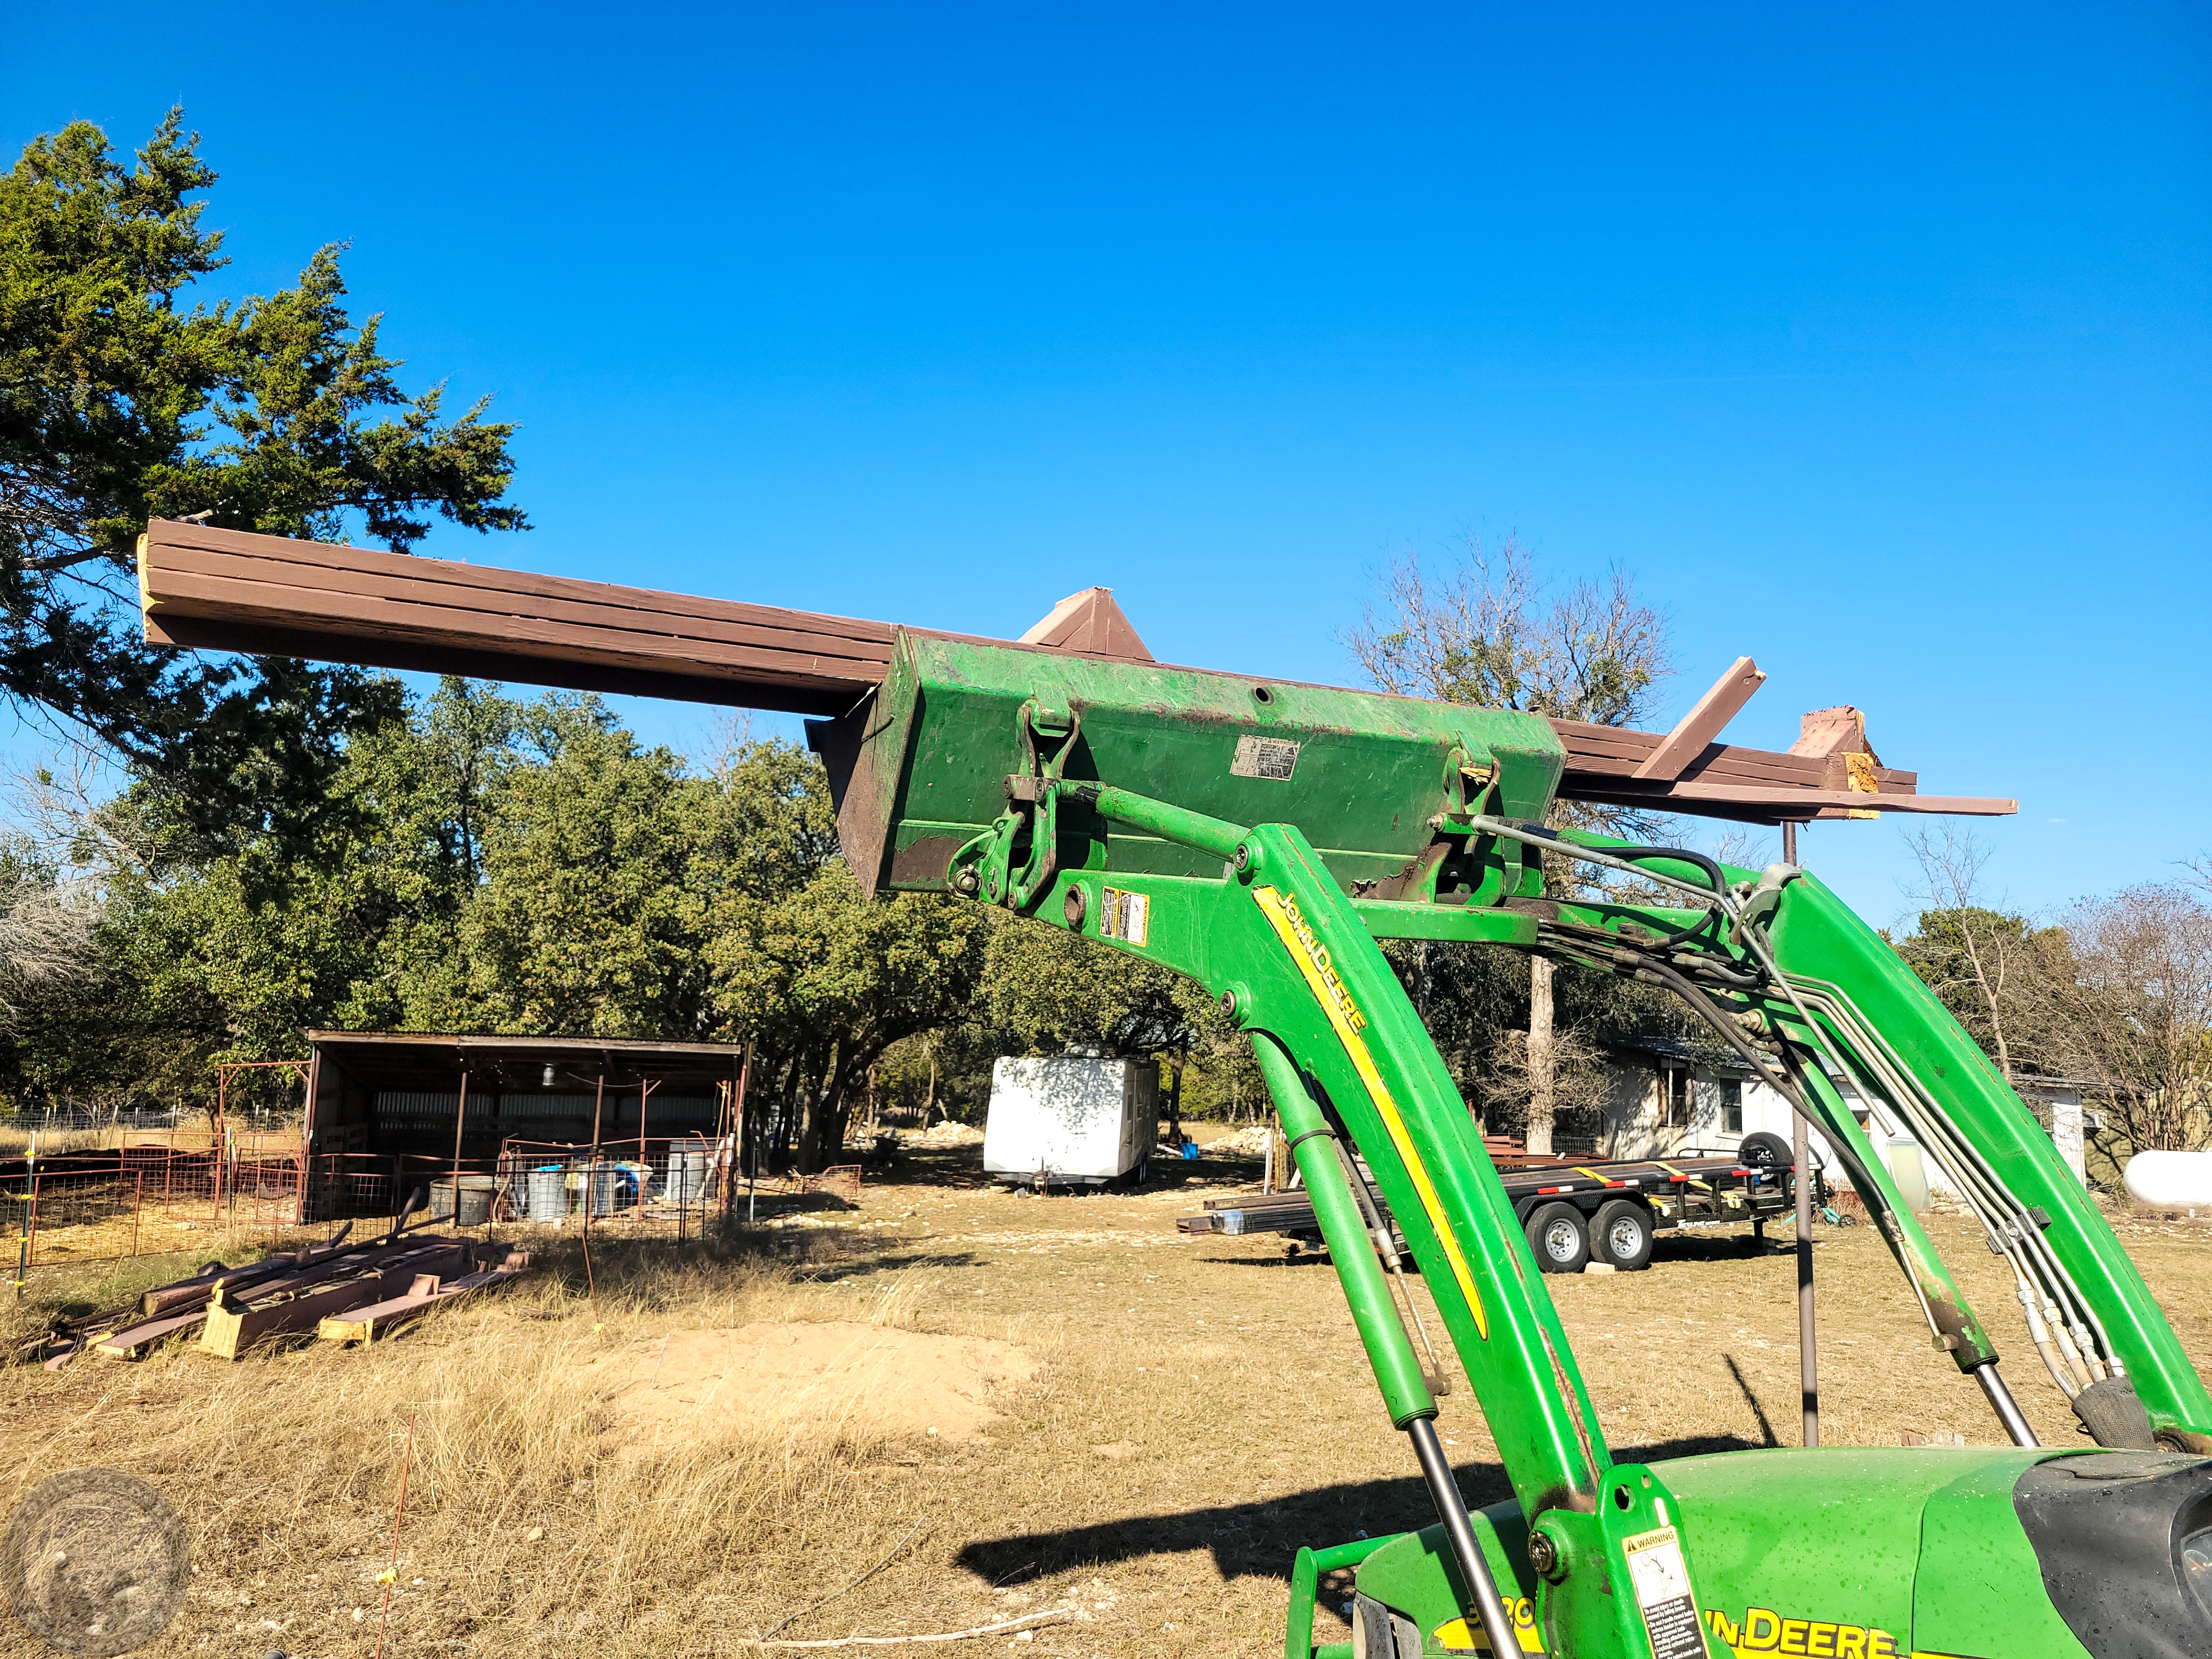
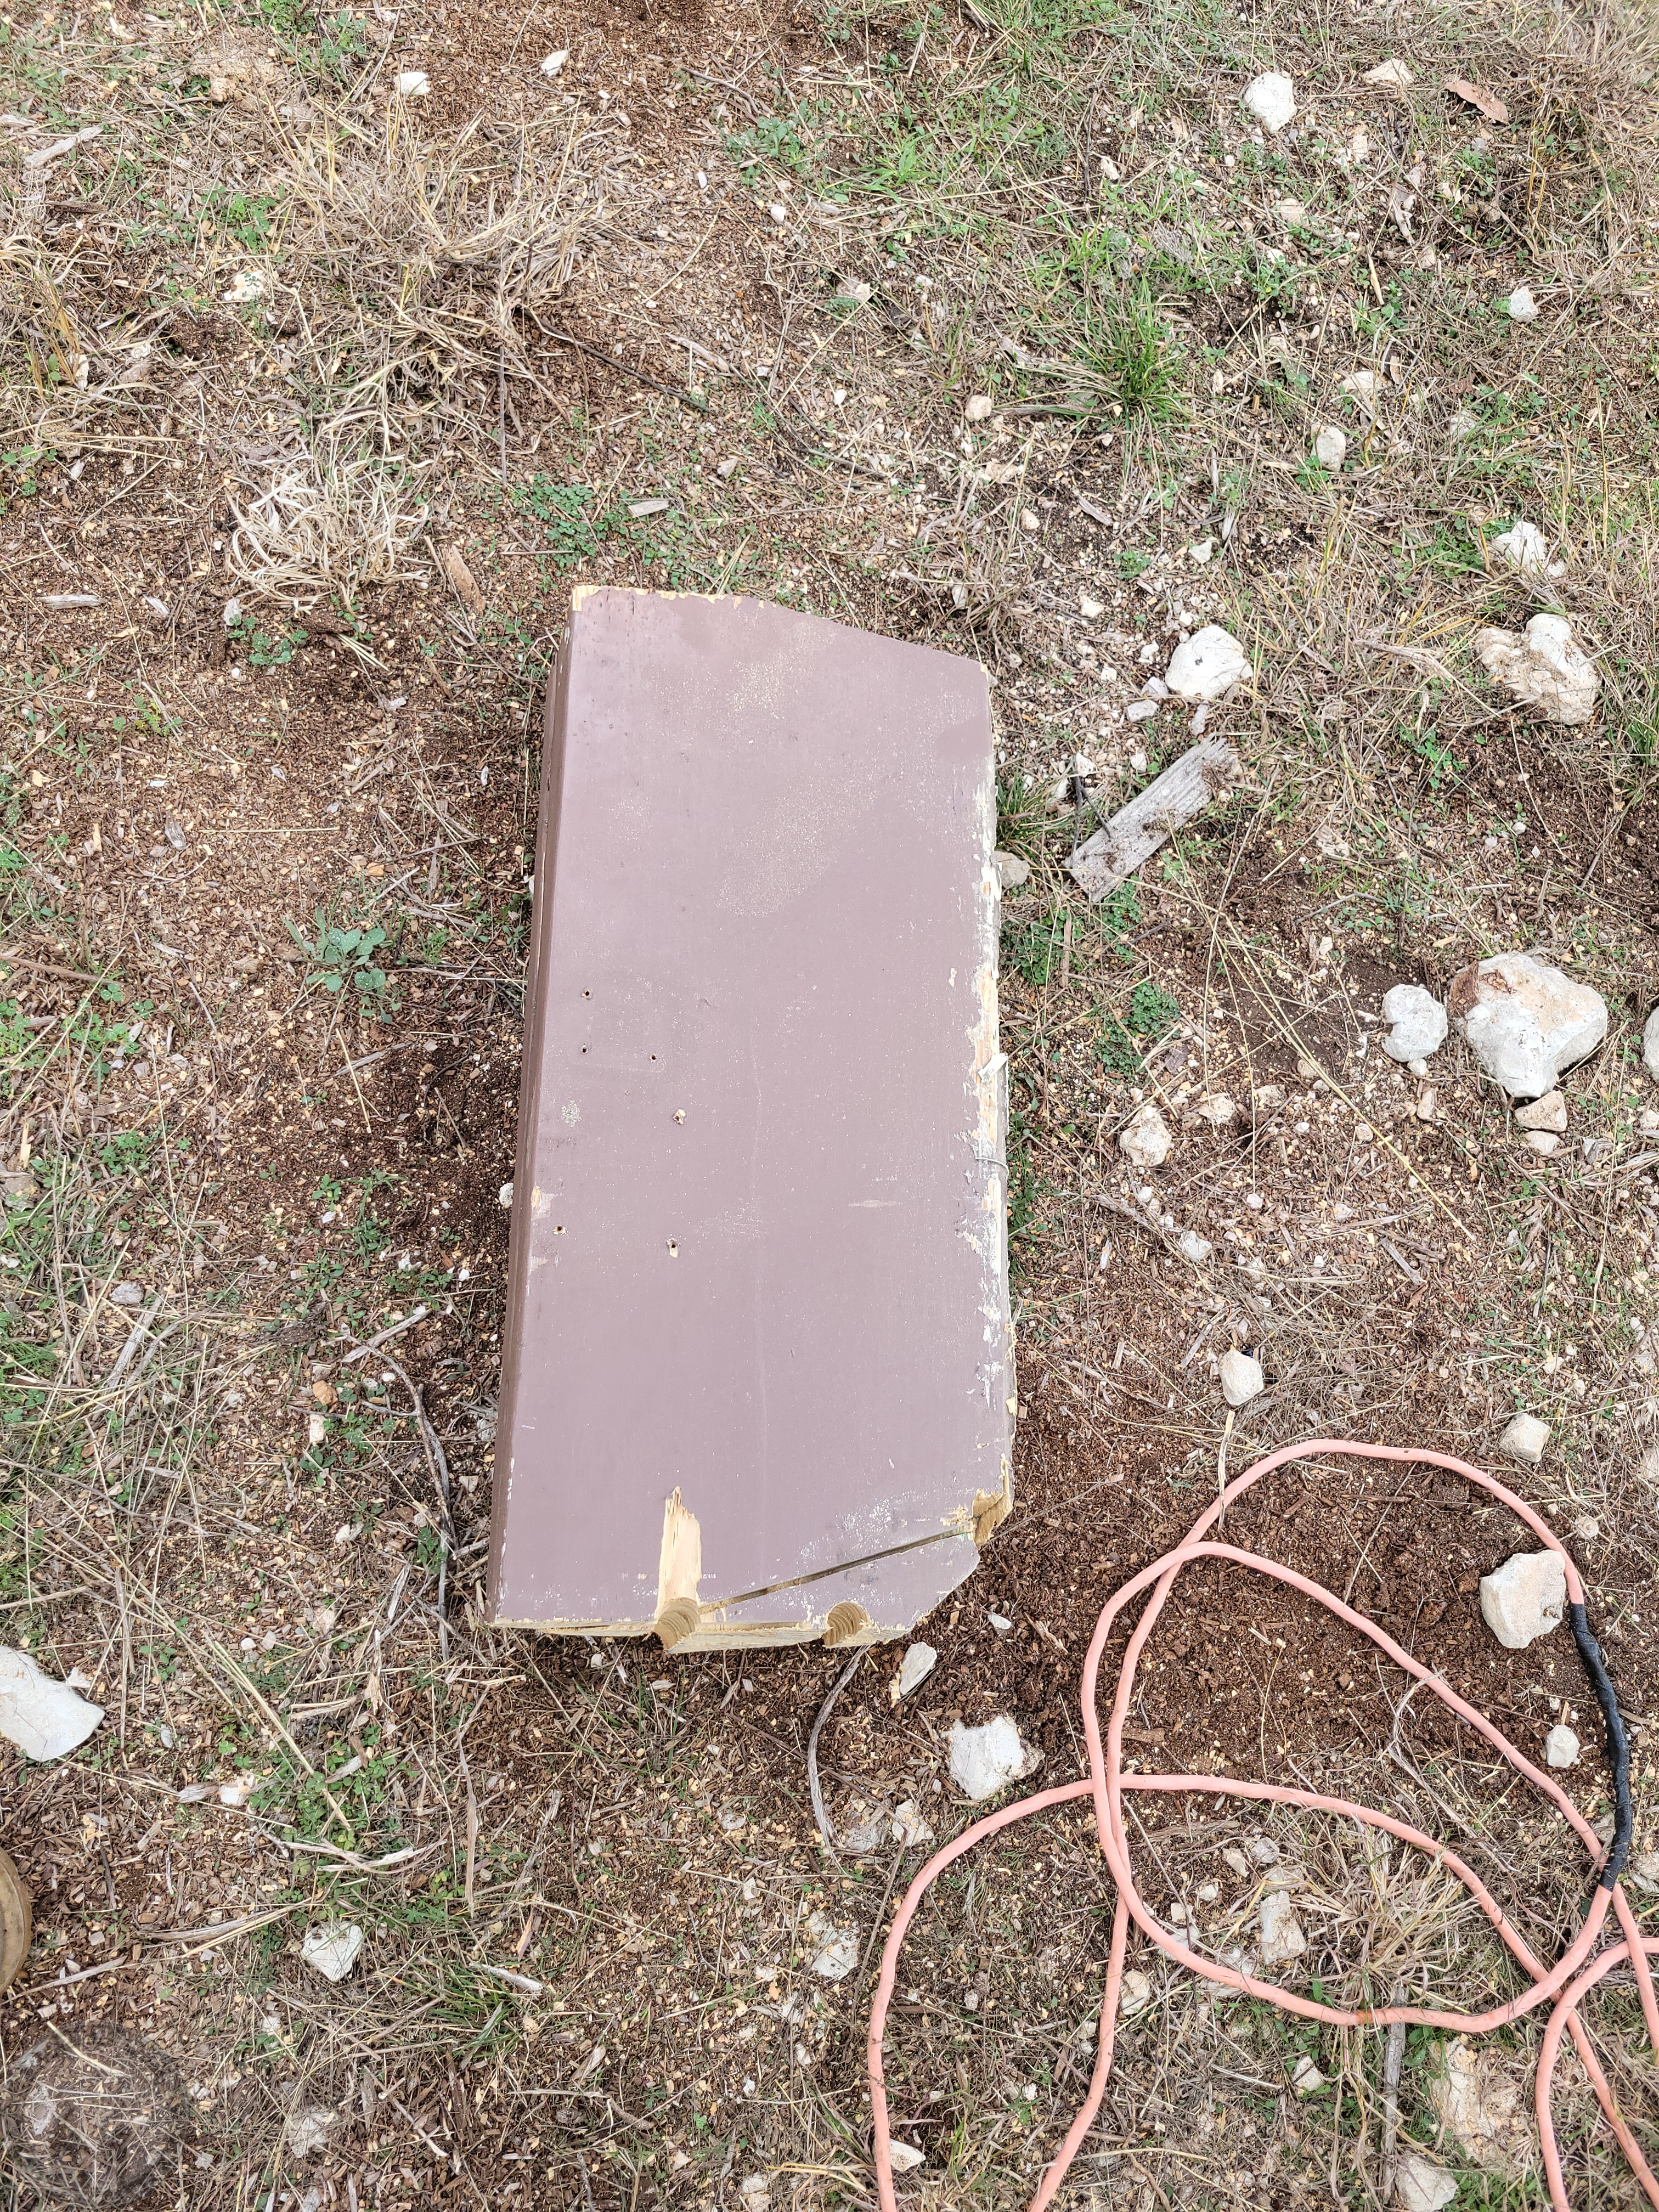
Taking down the second beam, which was the tallest and had the most rot, I ended up dropping it.  Trying to pick it back up by hand to get it into the bucket, the top rail crumbled, revealing the perfect beam underneath, as well as all of the wedge spacers I’d used to get the top perfect.  It was also amazing just how light the triple laminated beam was!  Putting it up, I remember that I could barely lift one soggy 2×12 into place at a time!  Now the entire beam probably weighs about what one 2×12 did!

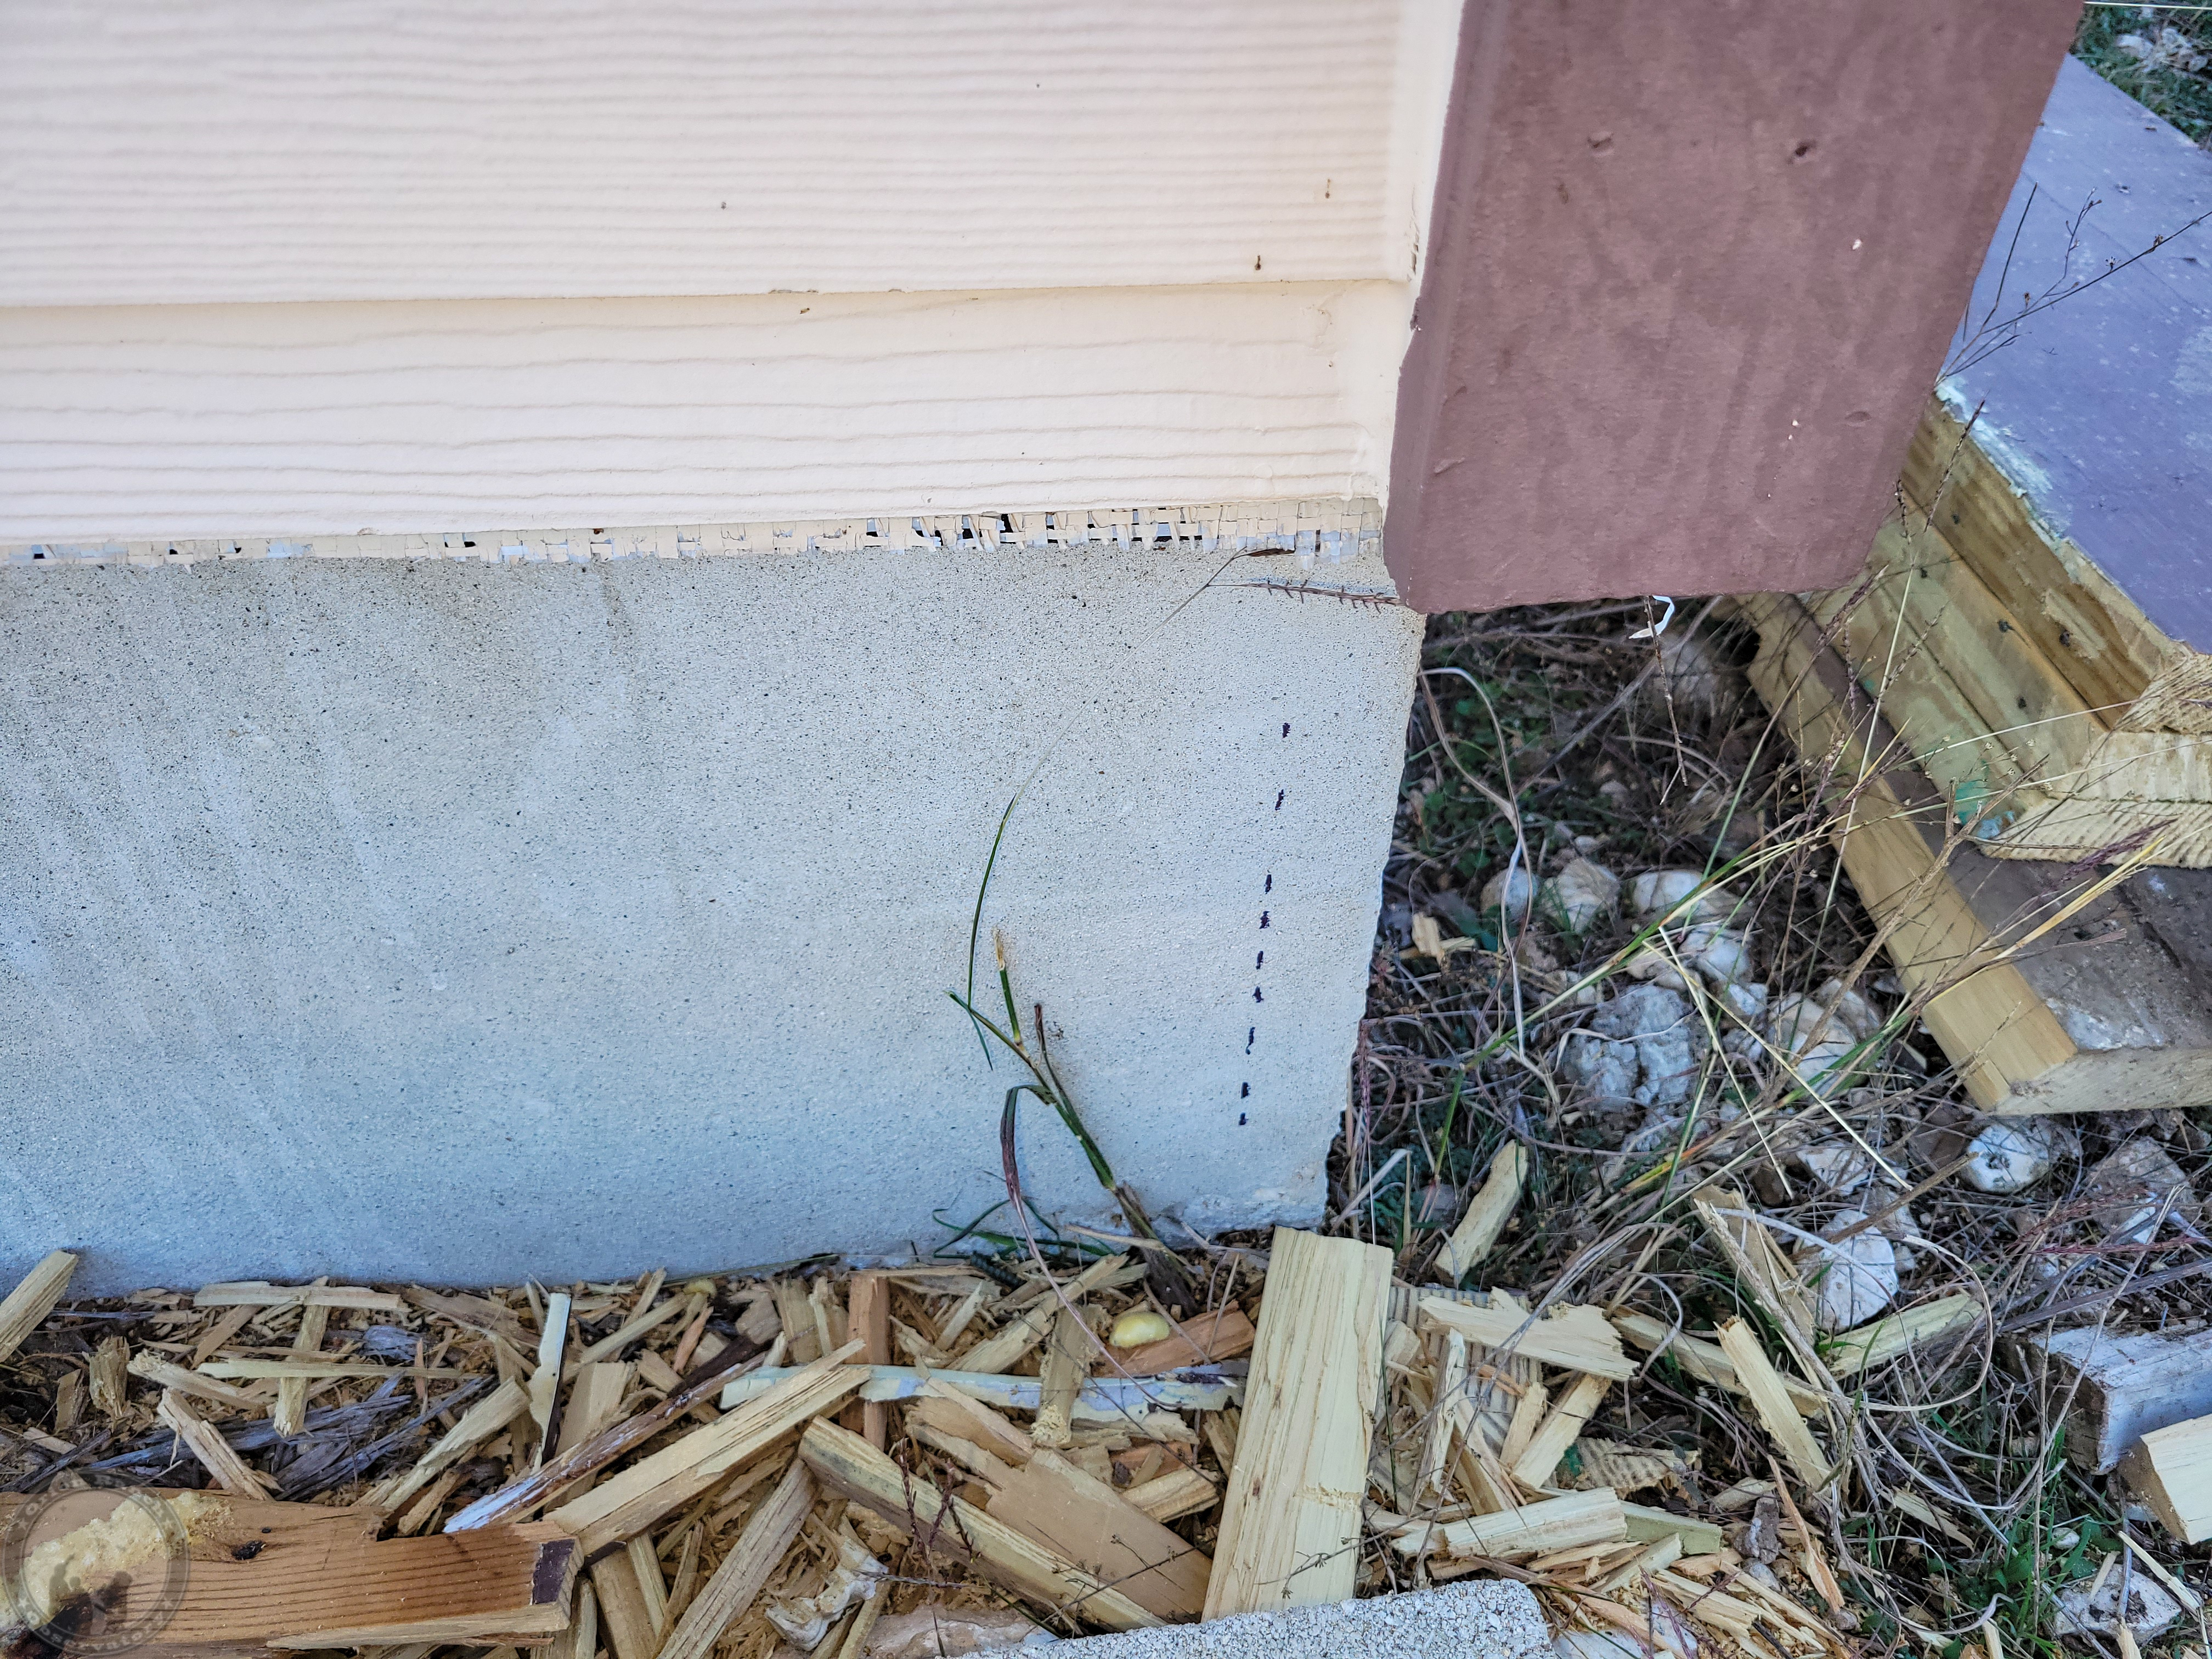
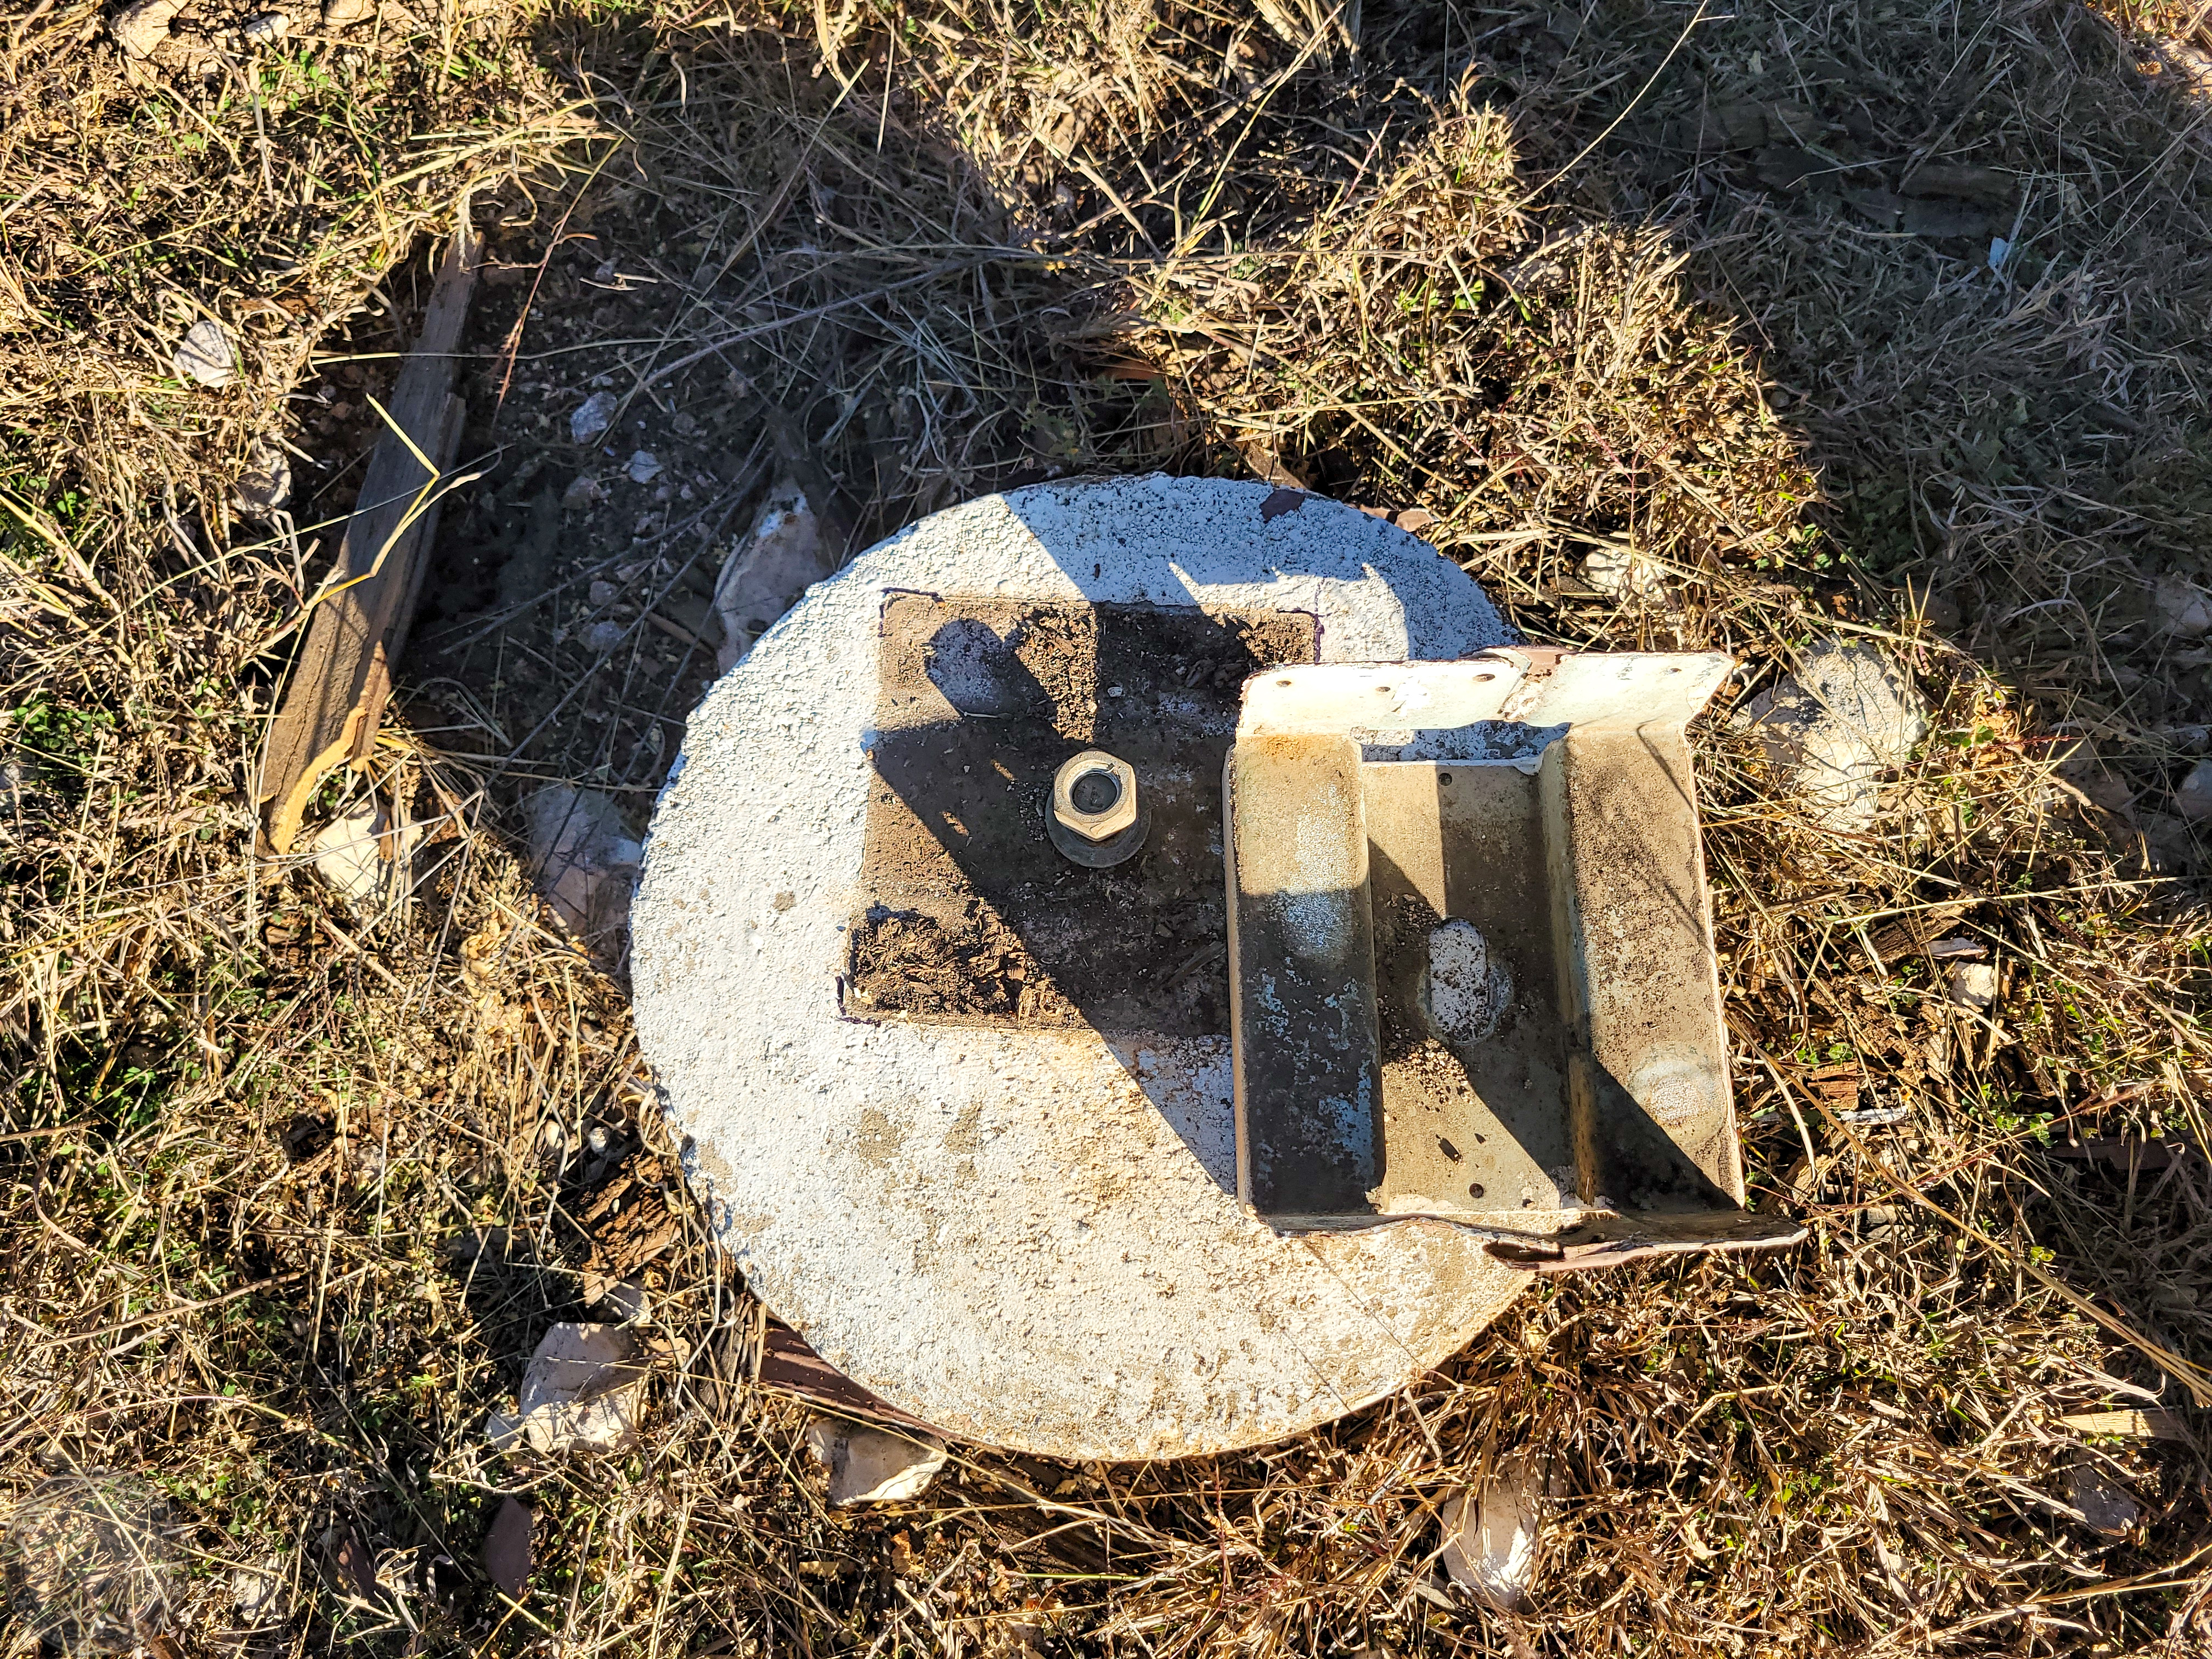
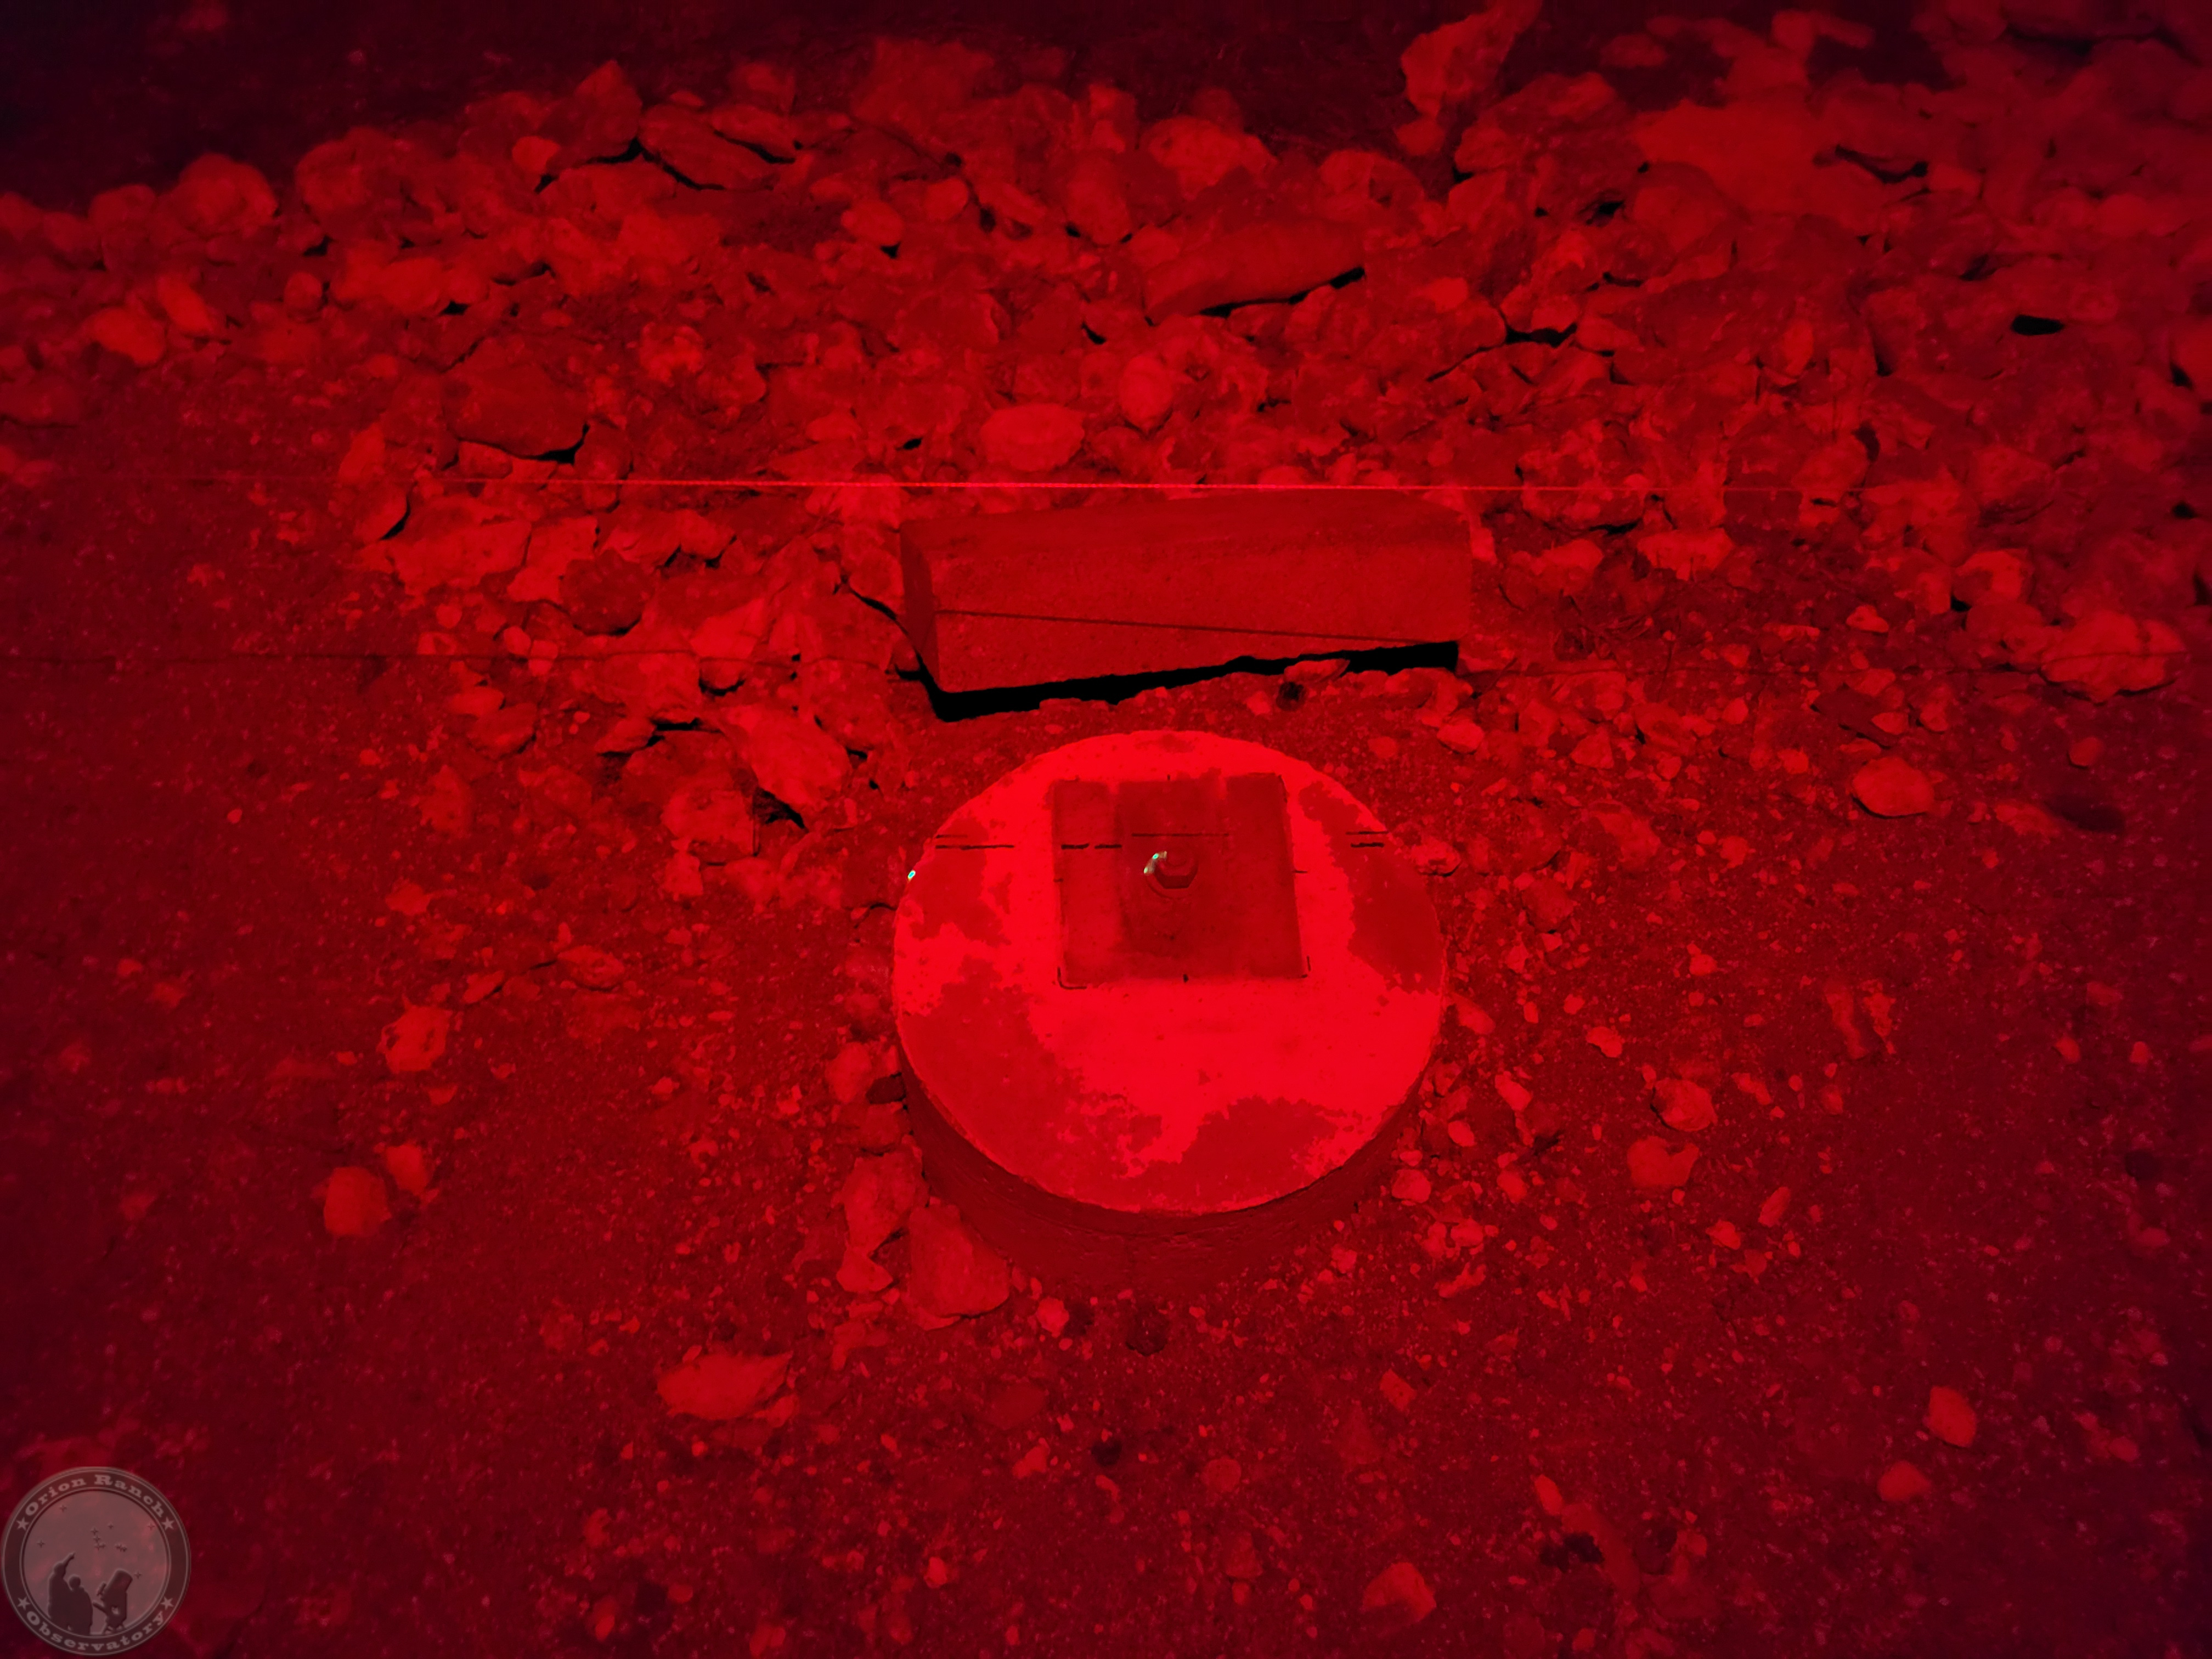
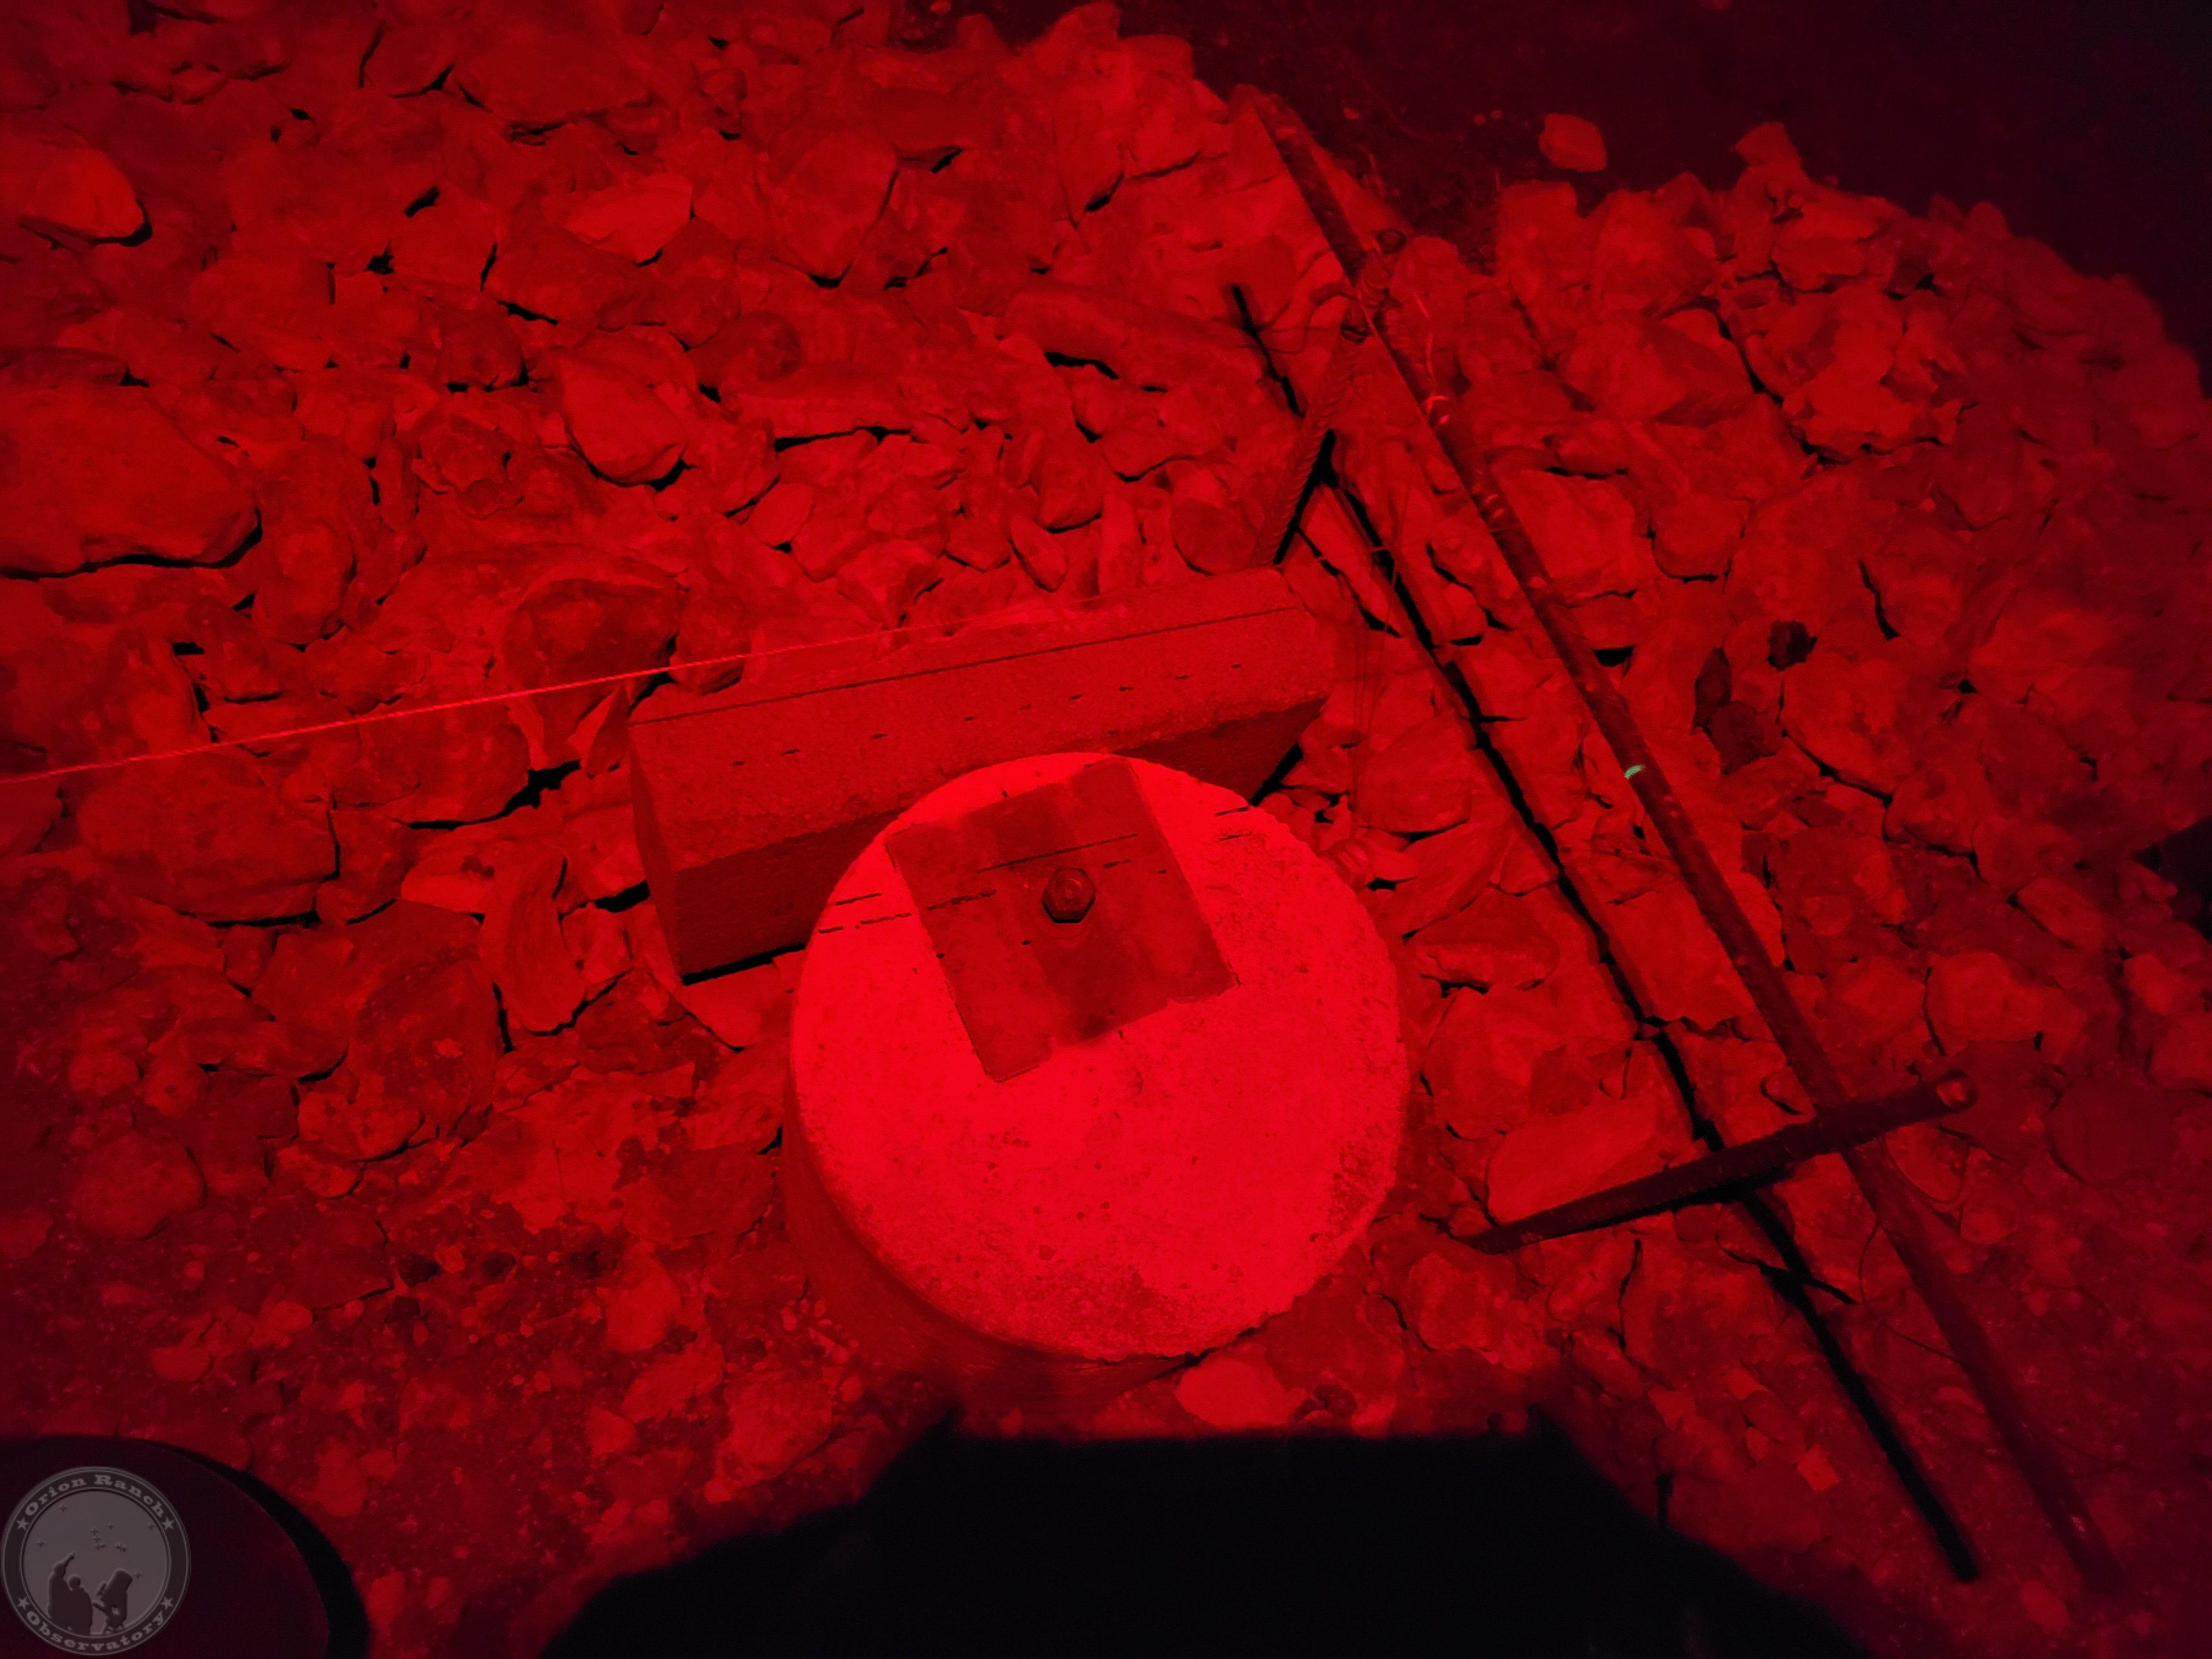
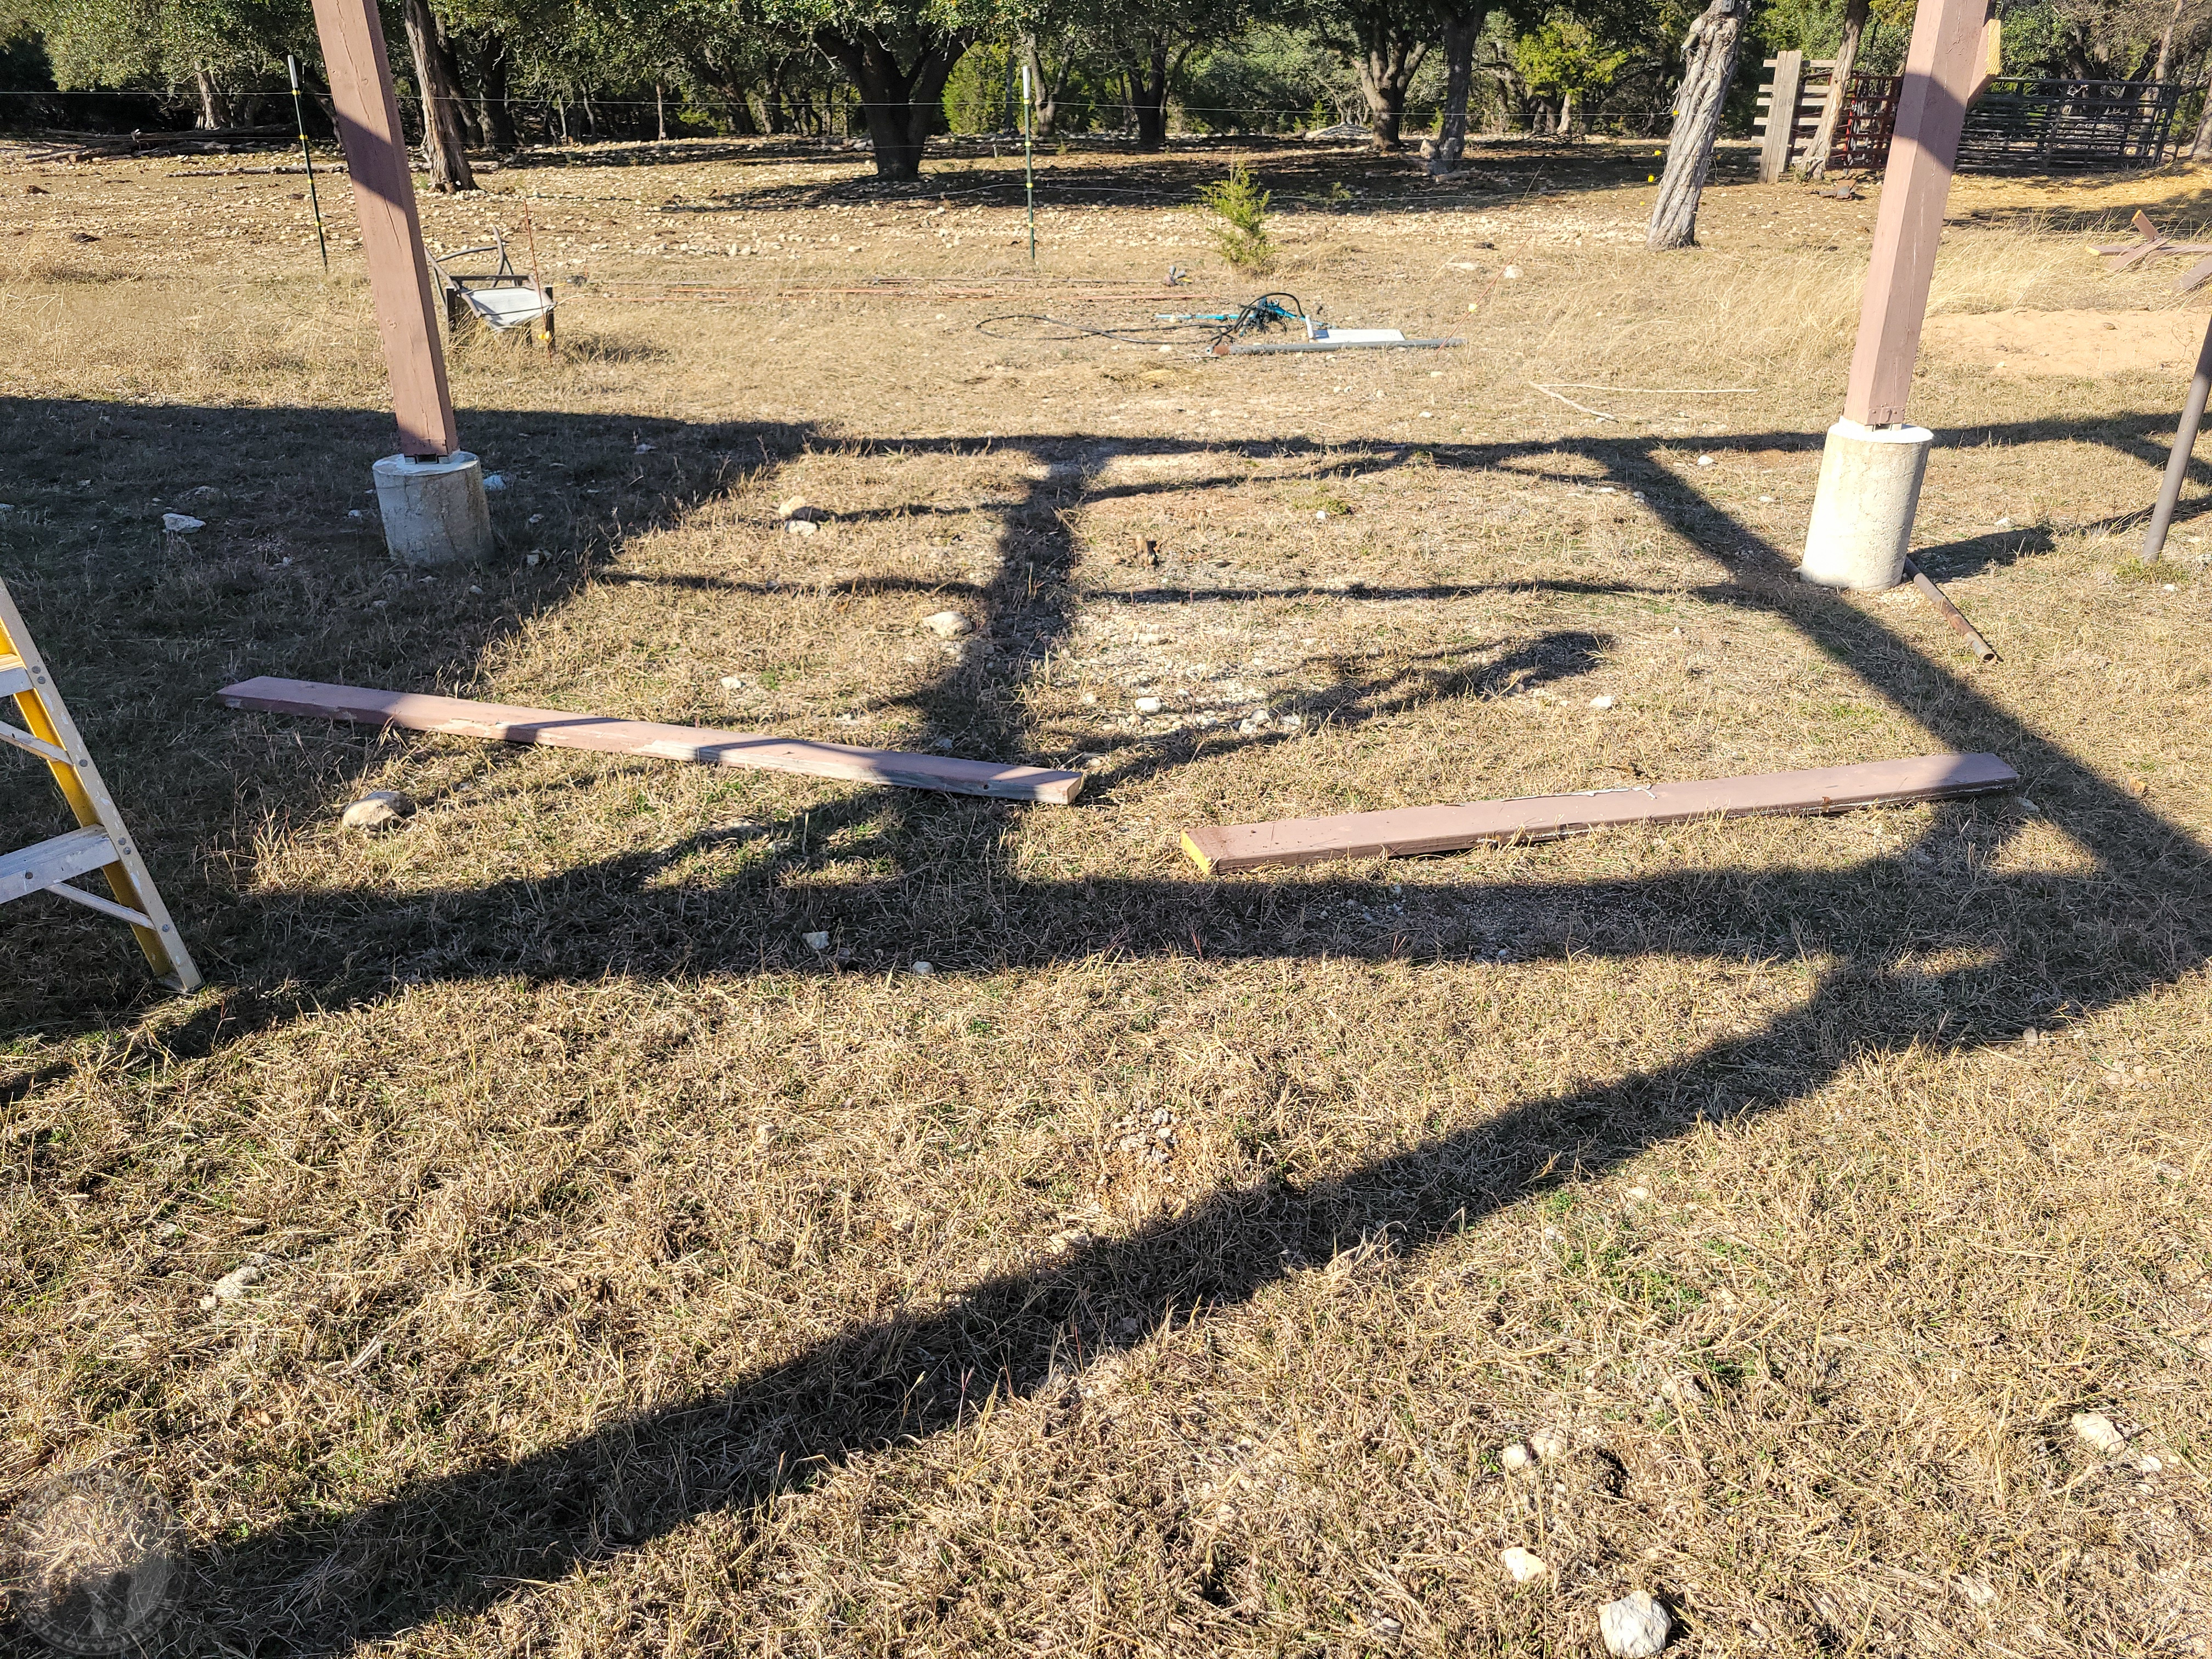
Next, I removed the nails from the post holders at the base and dropped the first two posts.  Again, pretty light.  They’d started out with lots of cracks that I’d caulked originally, and there was some evidence of weak areas, so I would have wanted to replace all the posts and the top cap, along with all of the diagonal bracing, etc. if I’d tried to restore it vs. replace it.  Just as well!  And again, they were incredibly light compared to new wood.
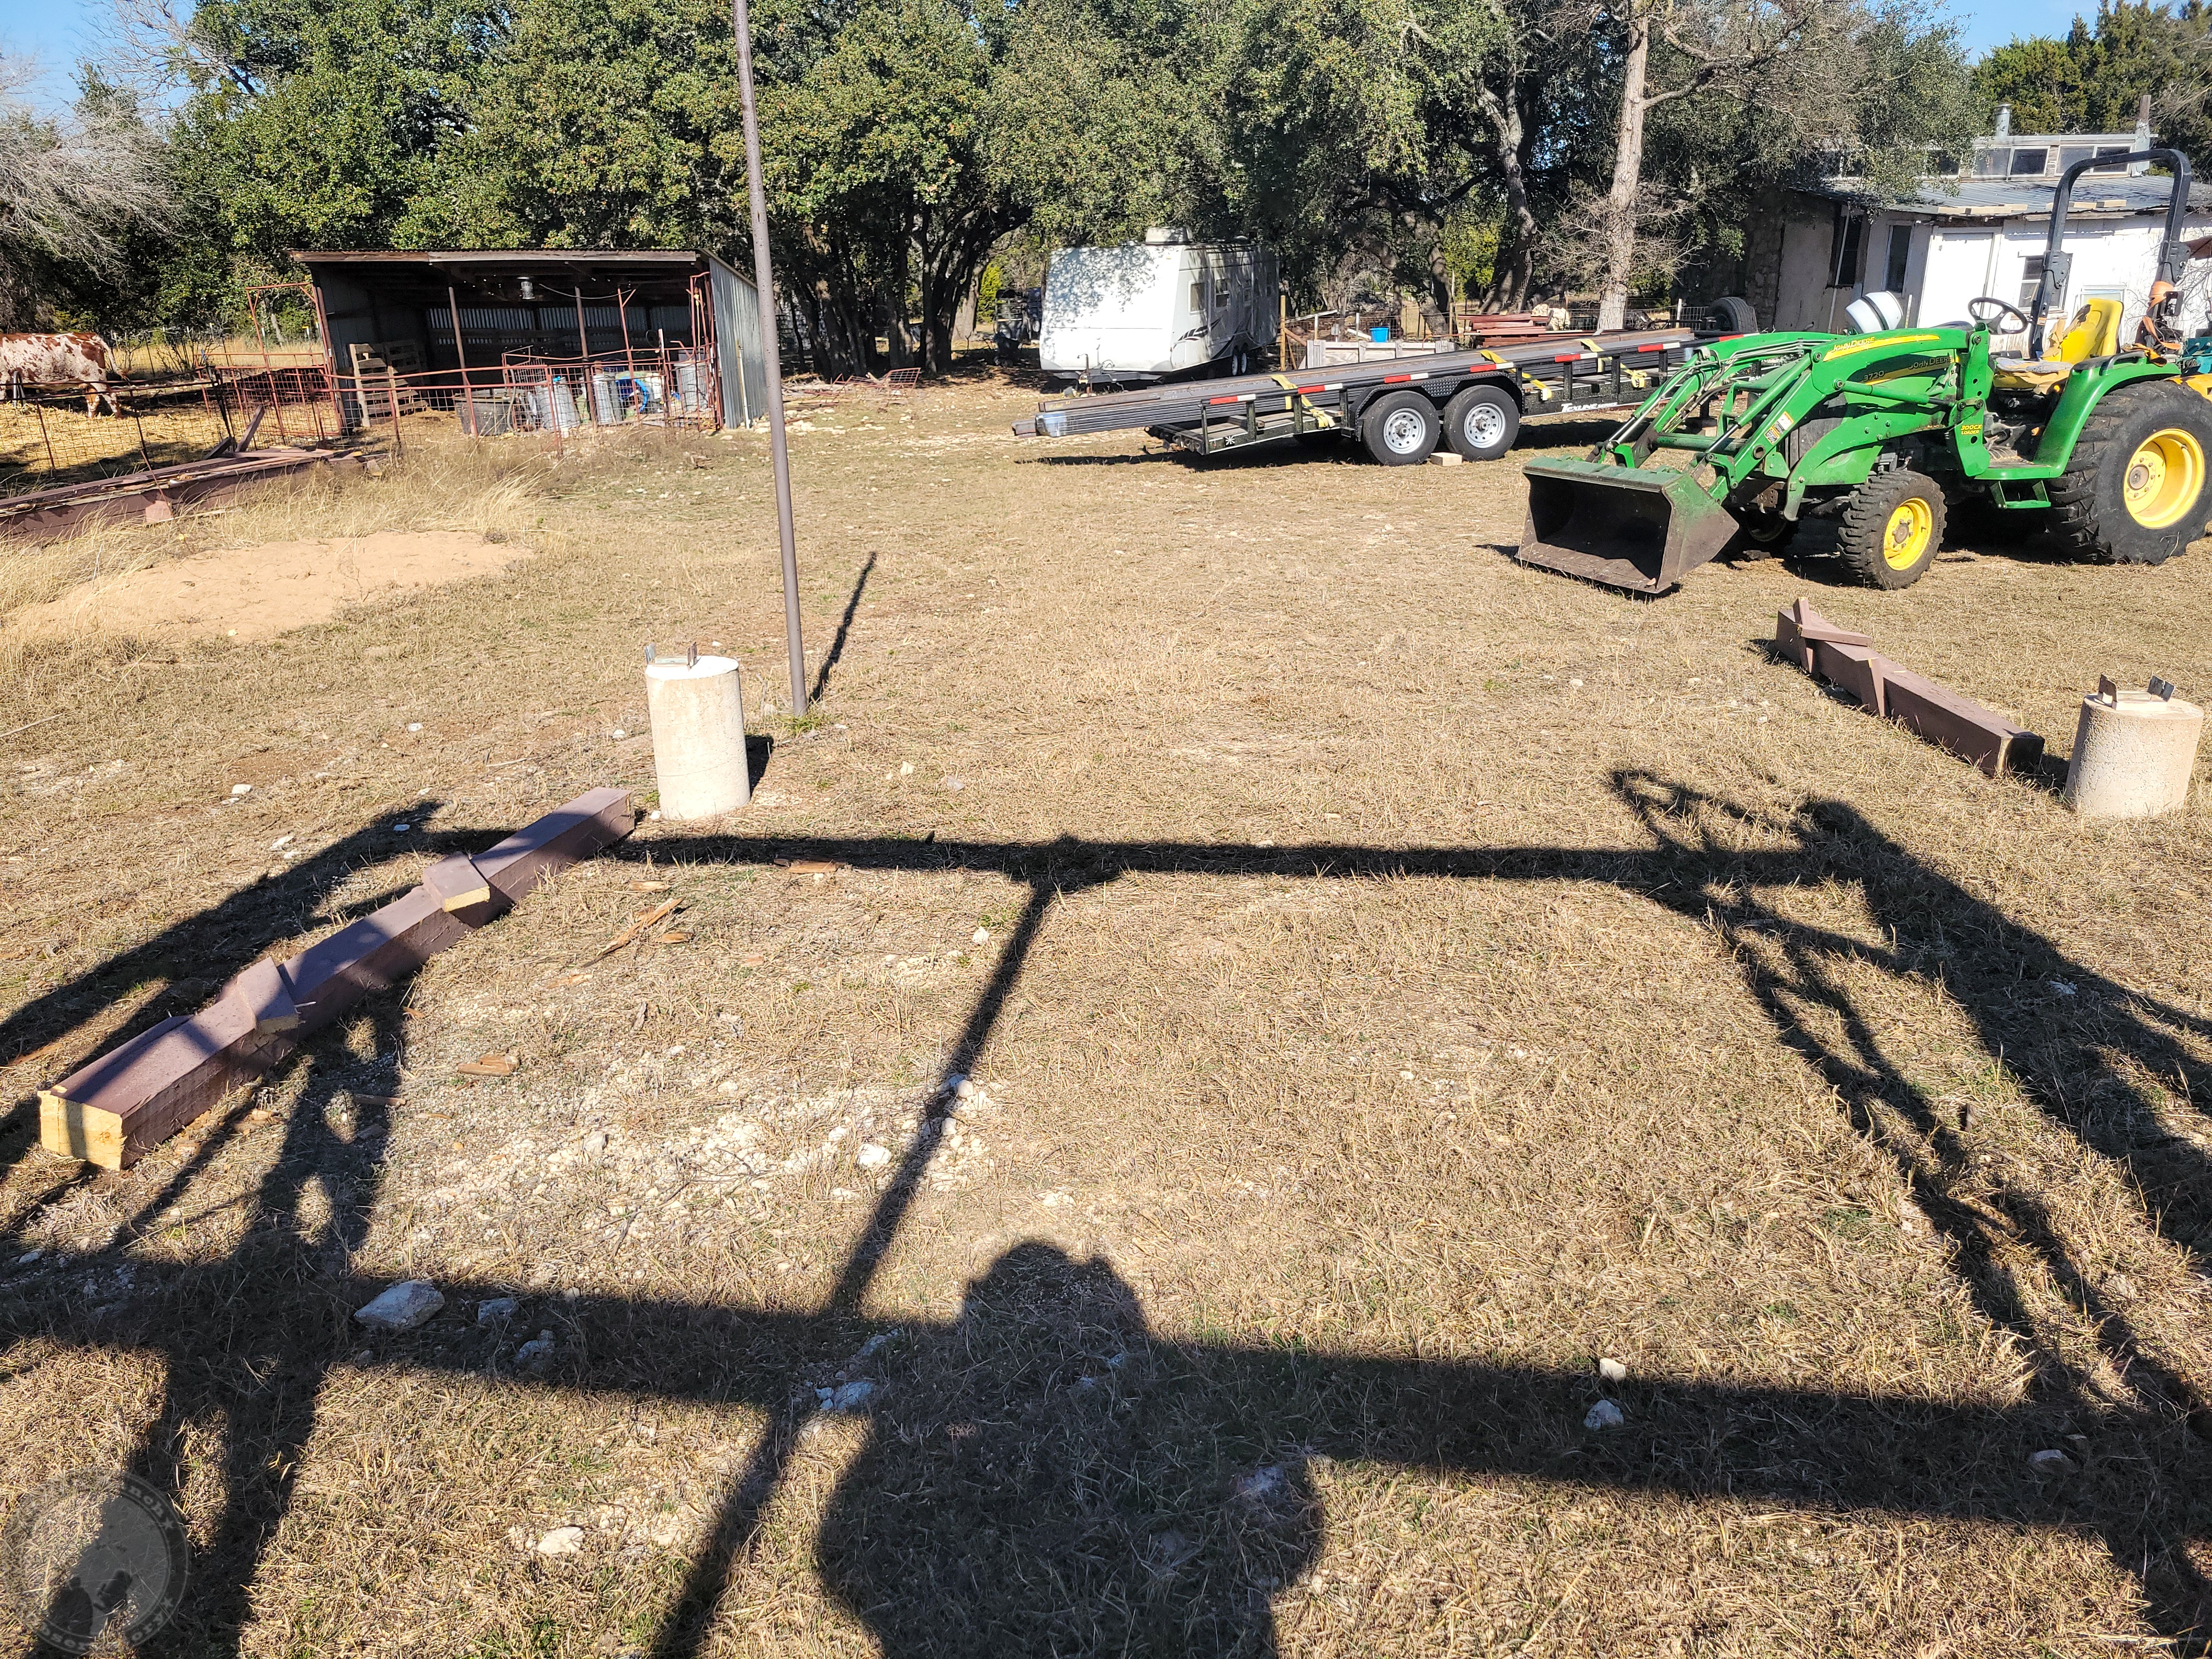
Half way there!

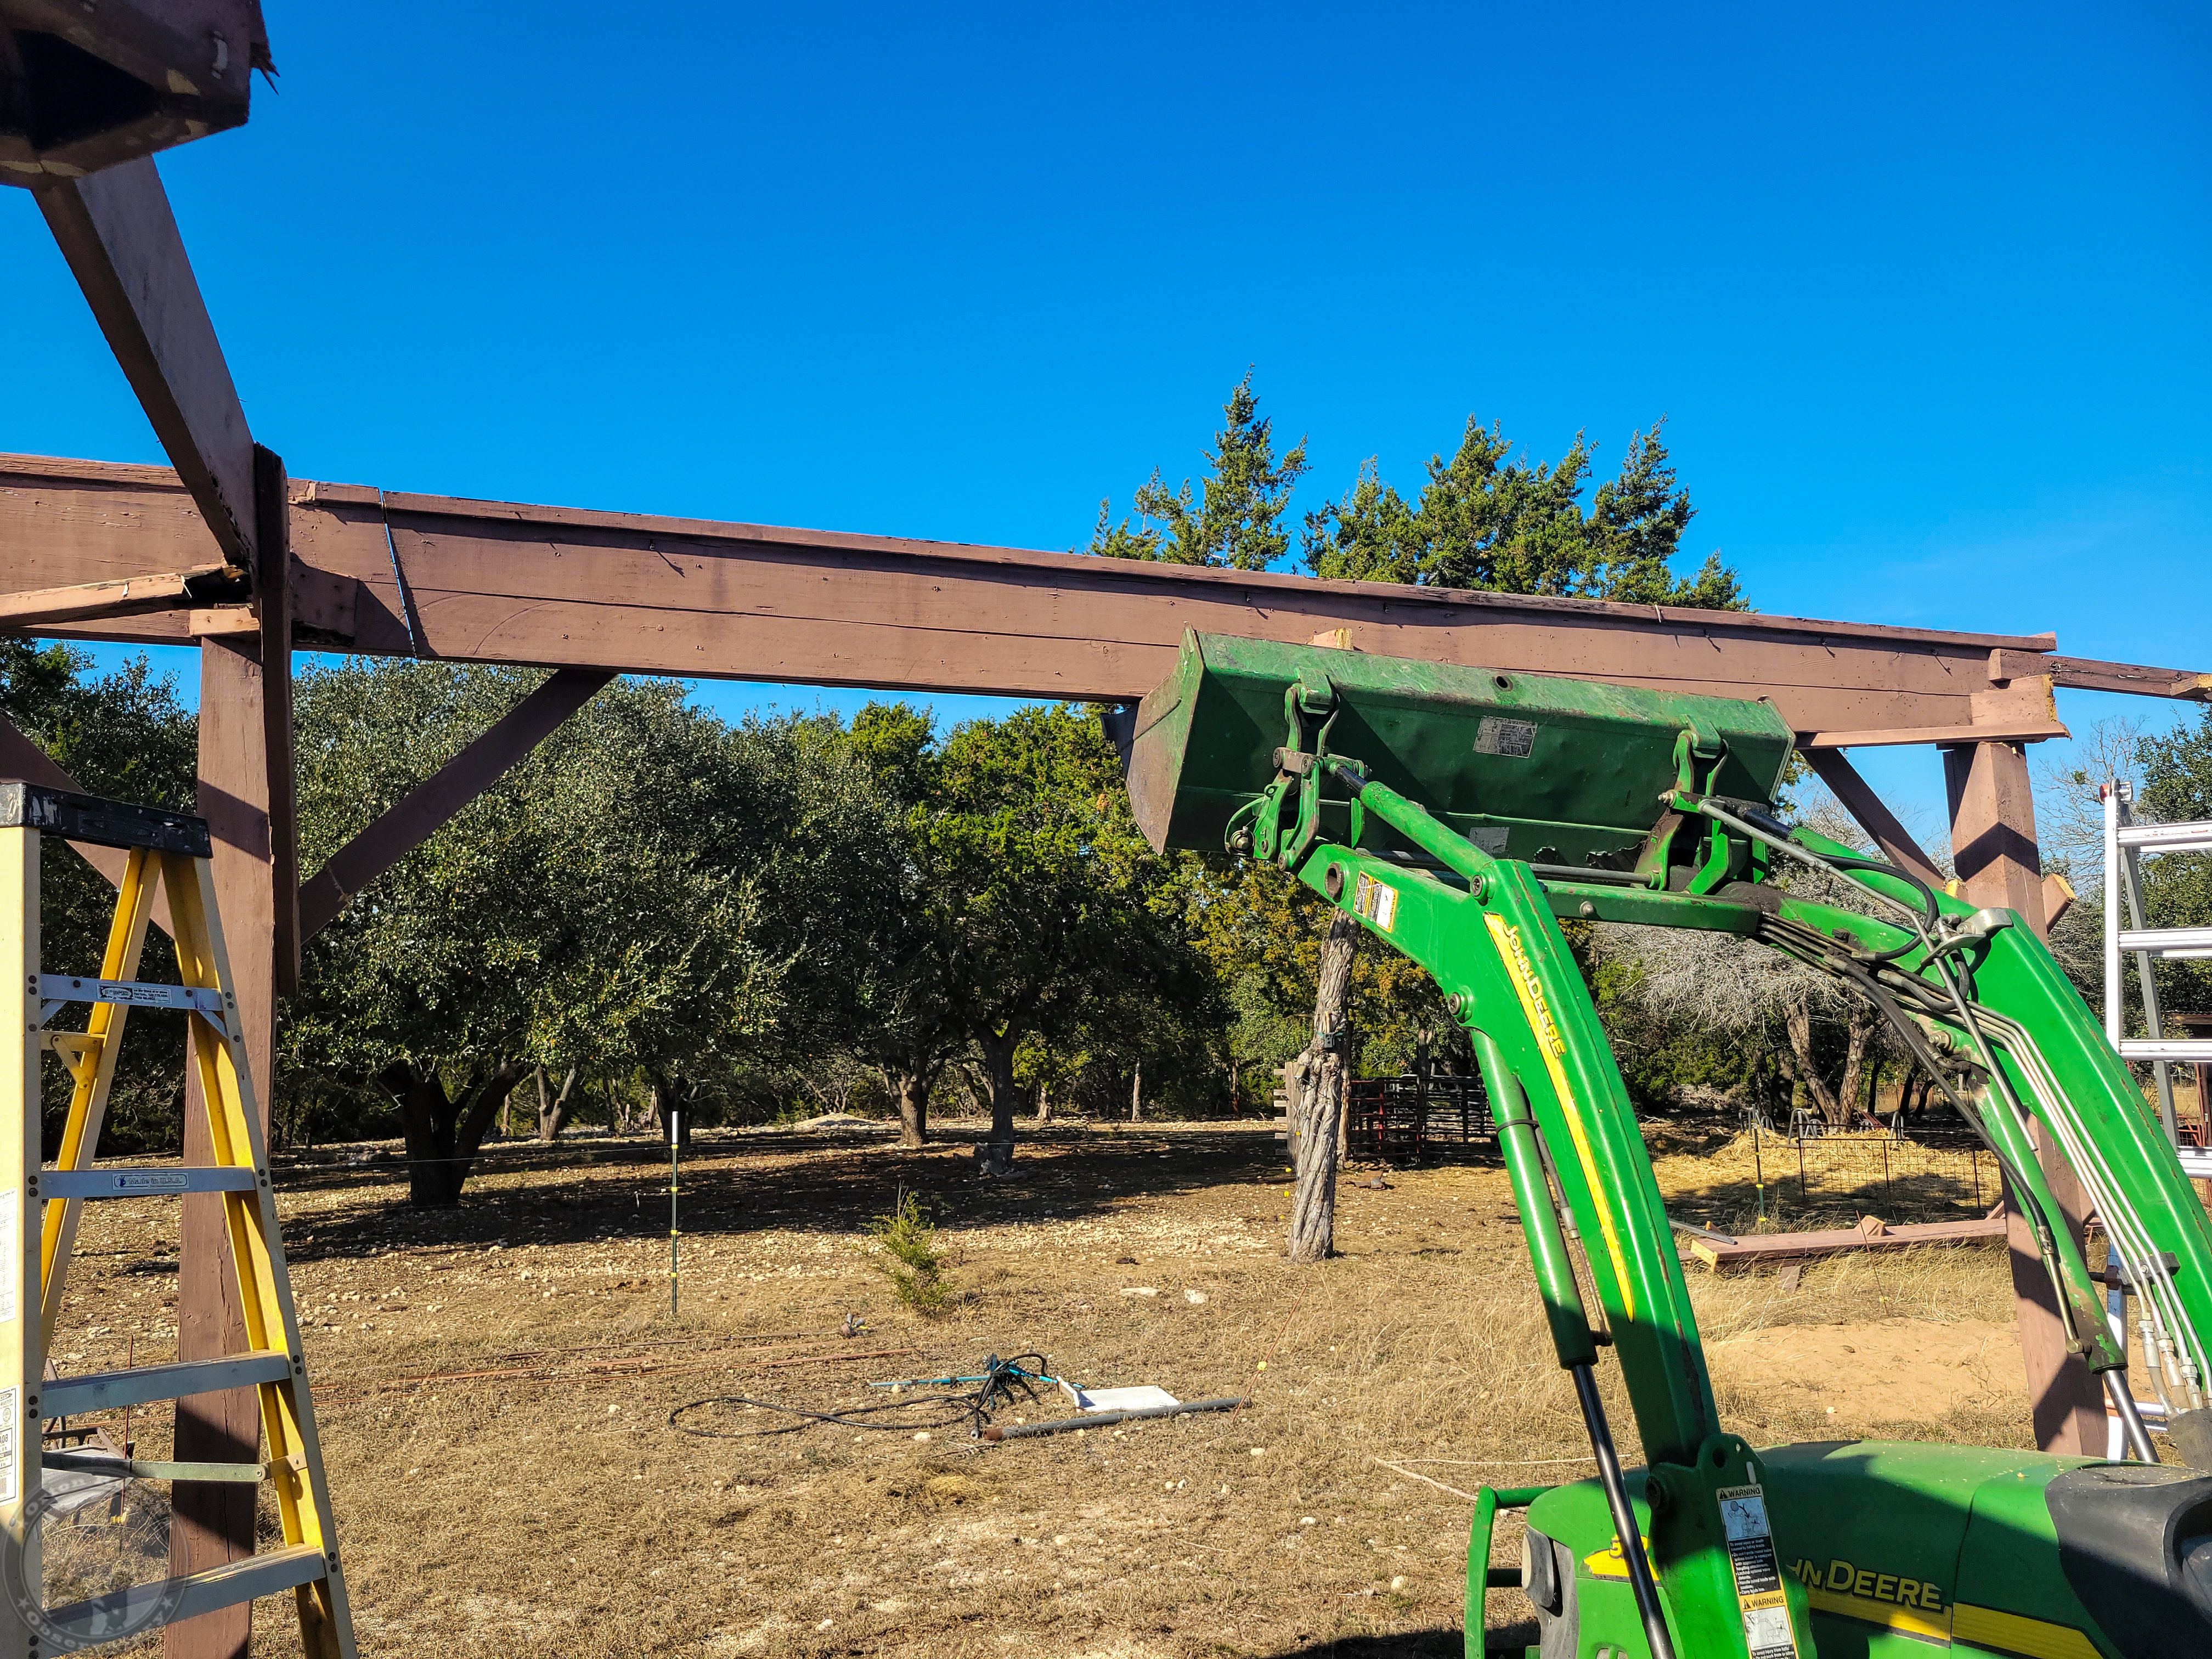
The second 16′ section pretty much proceeded like the first, although I had to leave an overhang from each rail to avoid risk of damaging the soffits and gutter, as well as because there’s still an overhanging piece of angle iron from the observatory.  Still need to decide if I’m leaving it or cutting it at the seam to the new rail.  Right now I’m proceeding as though I’ll be leaving it.

Anyway, first comes the middle cross brace and longitudinal braces, followed by the mid-span brace.

Then the east rail beam.

Followed by the west rail beam.

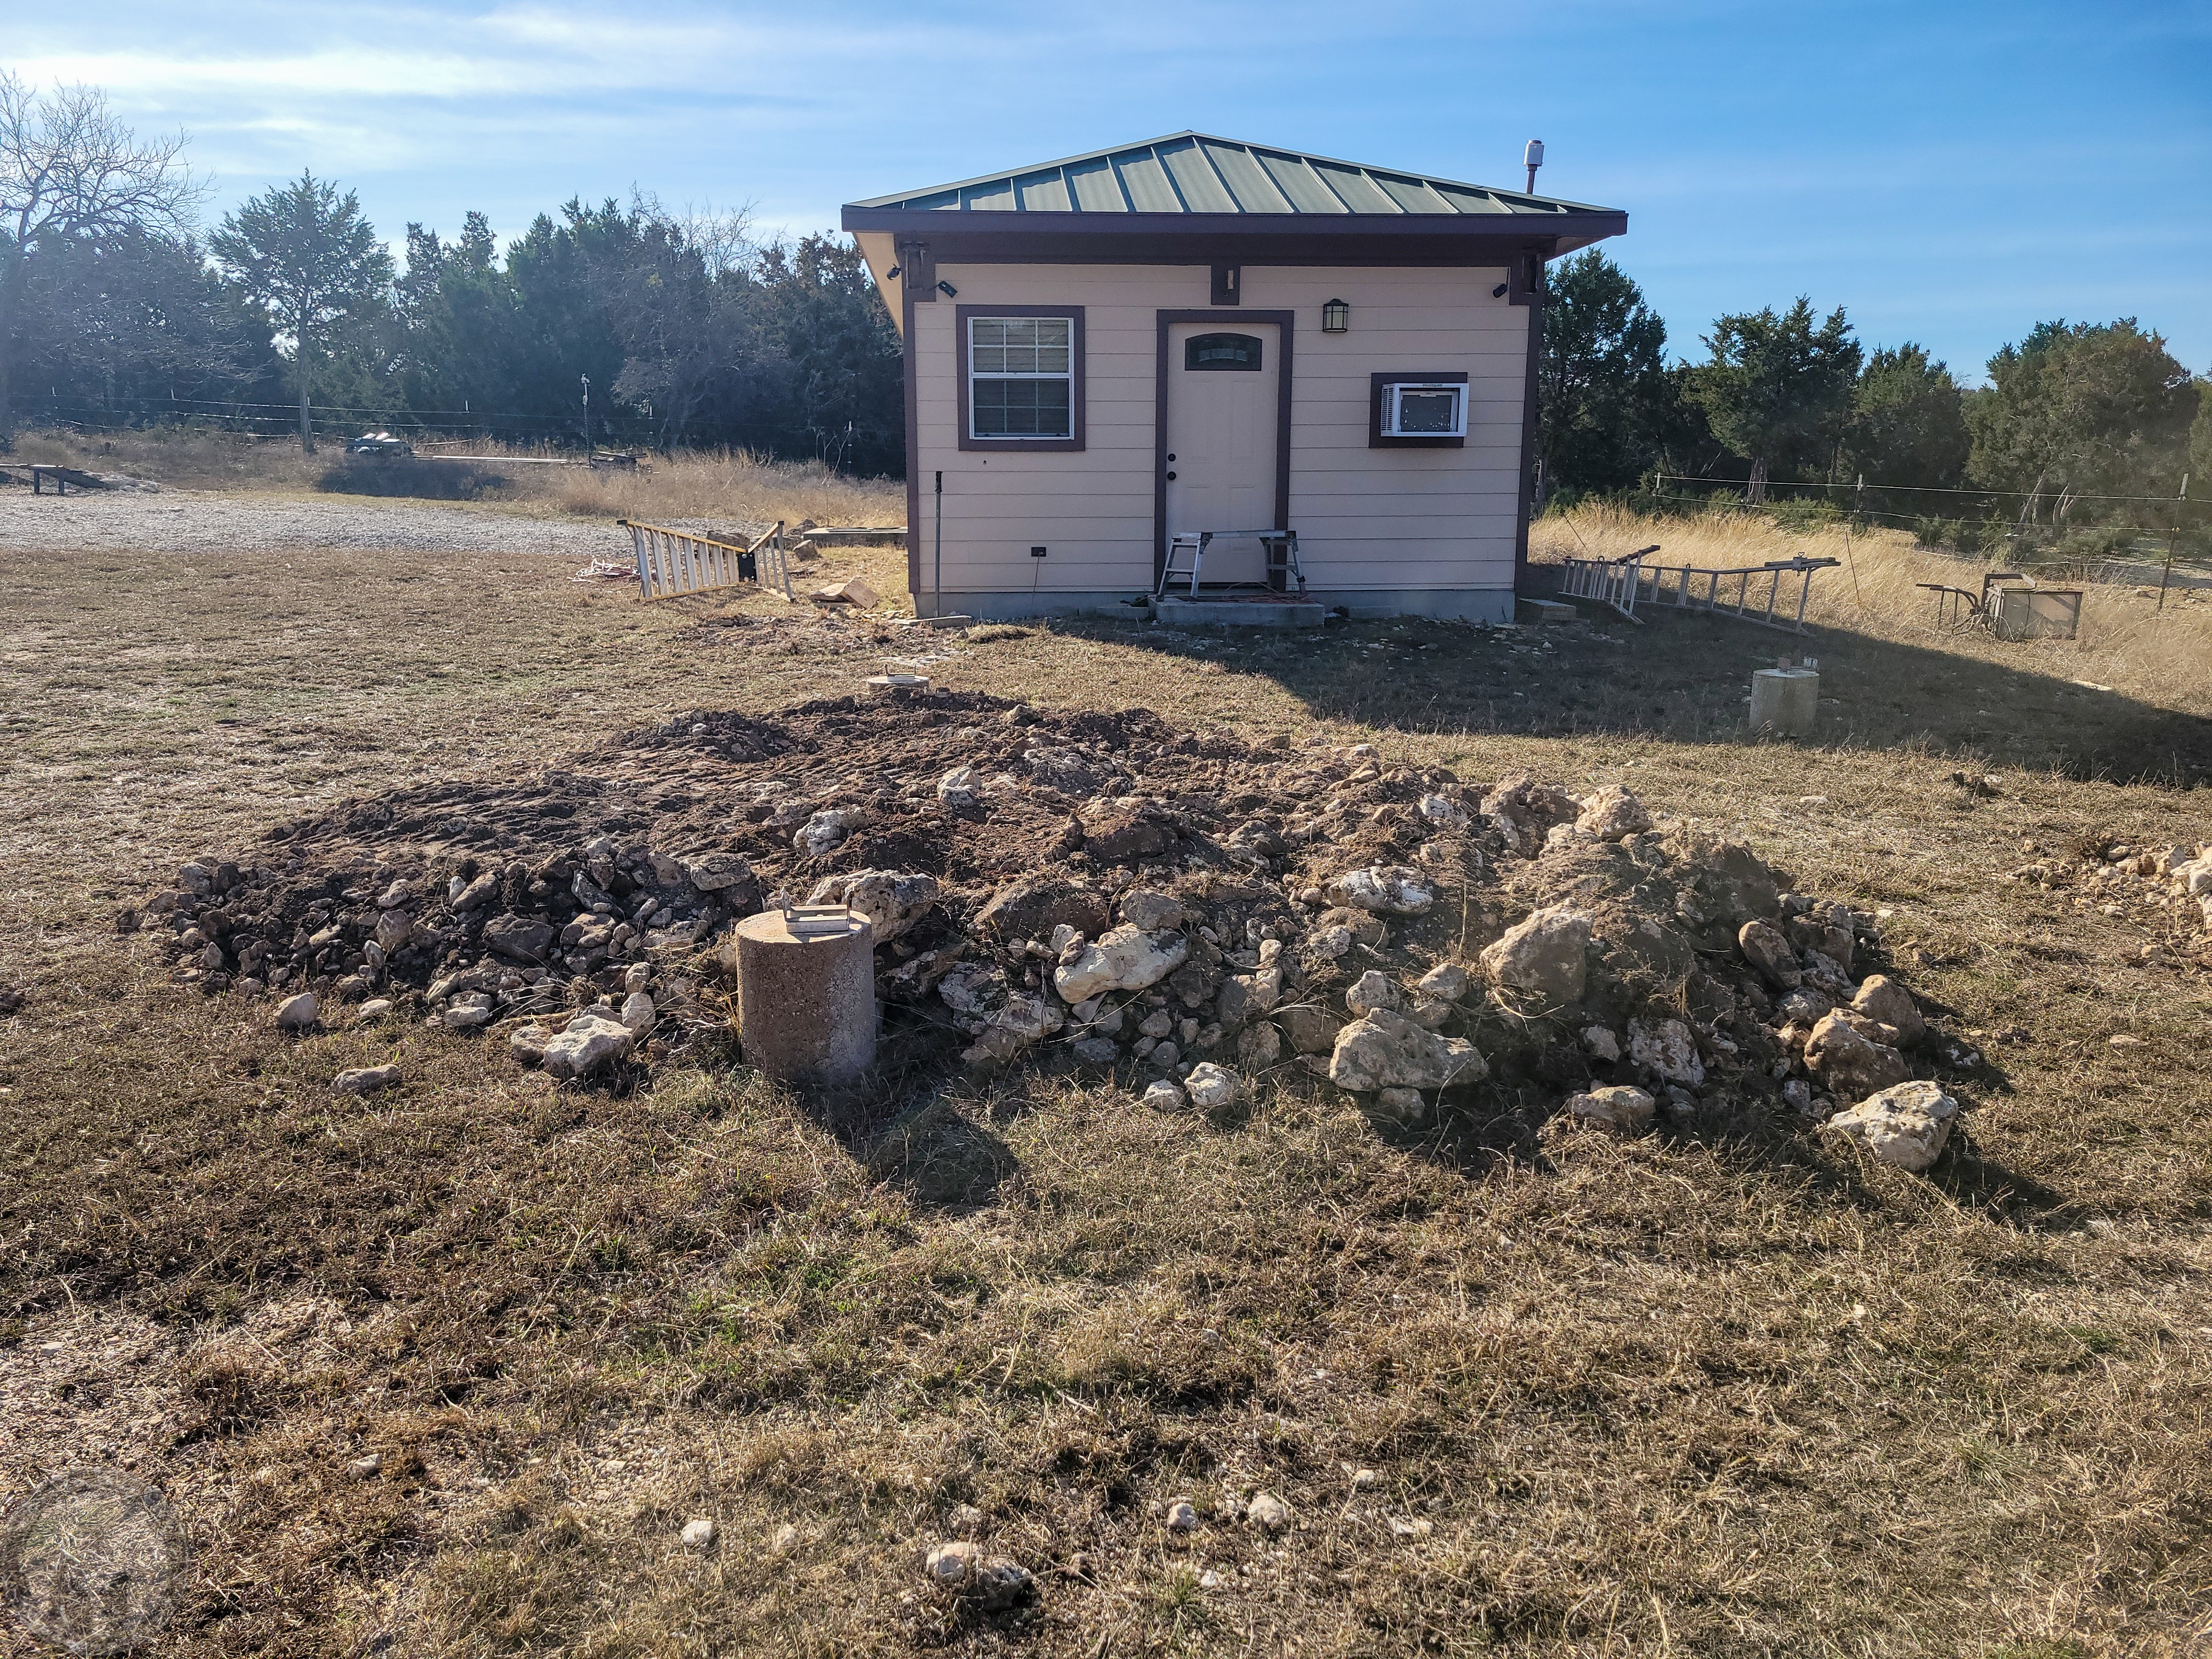
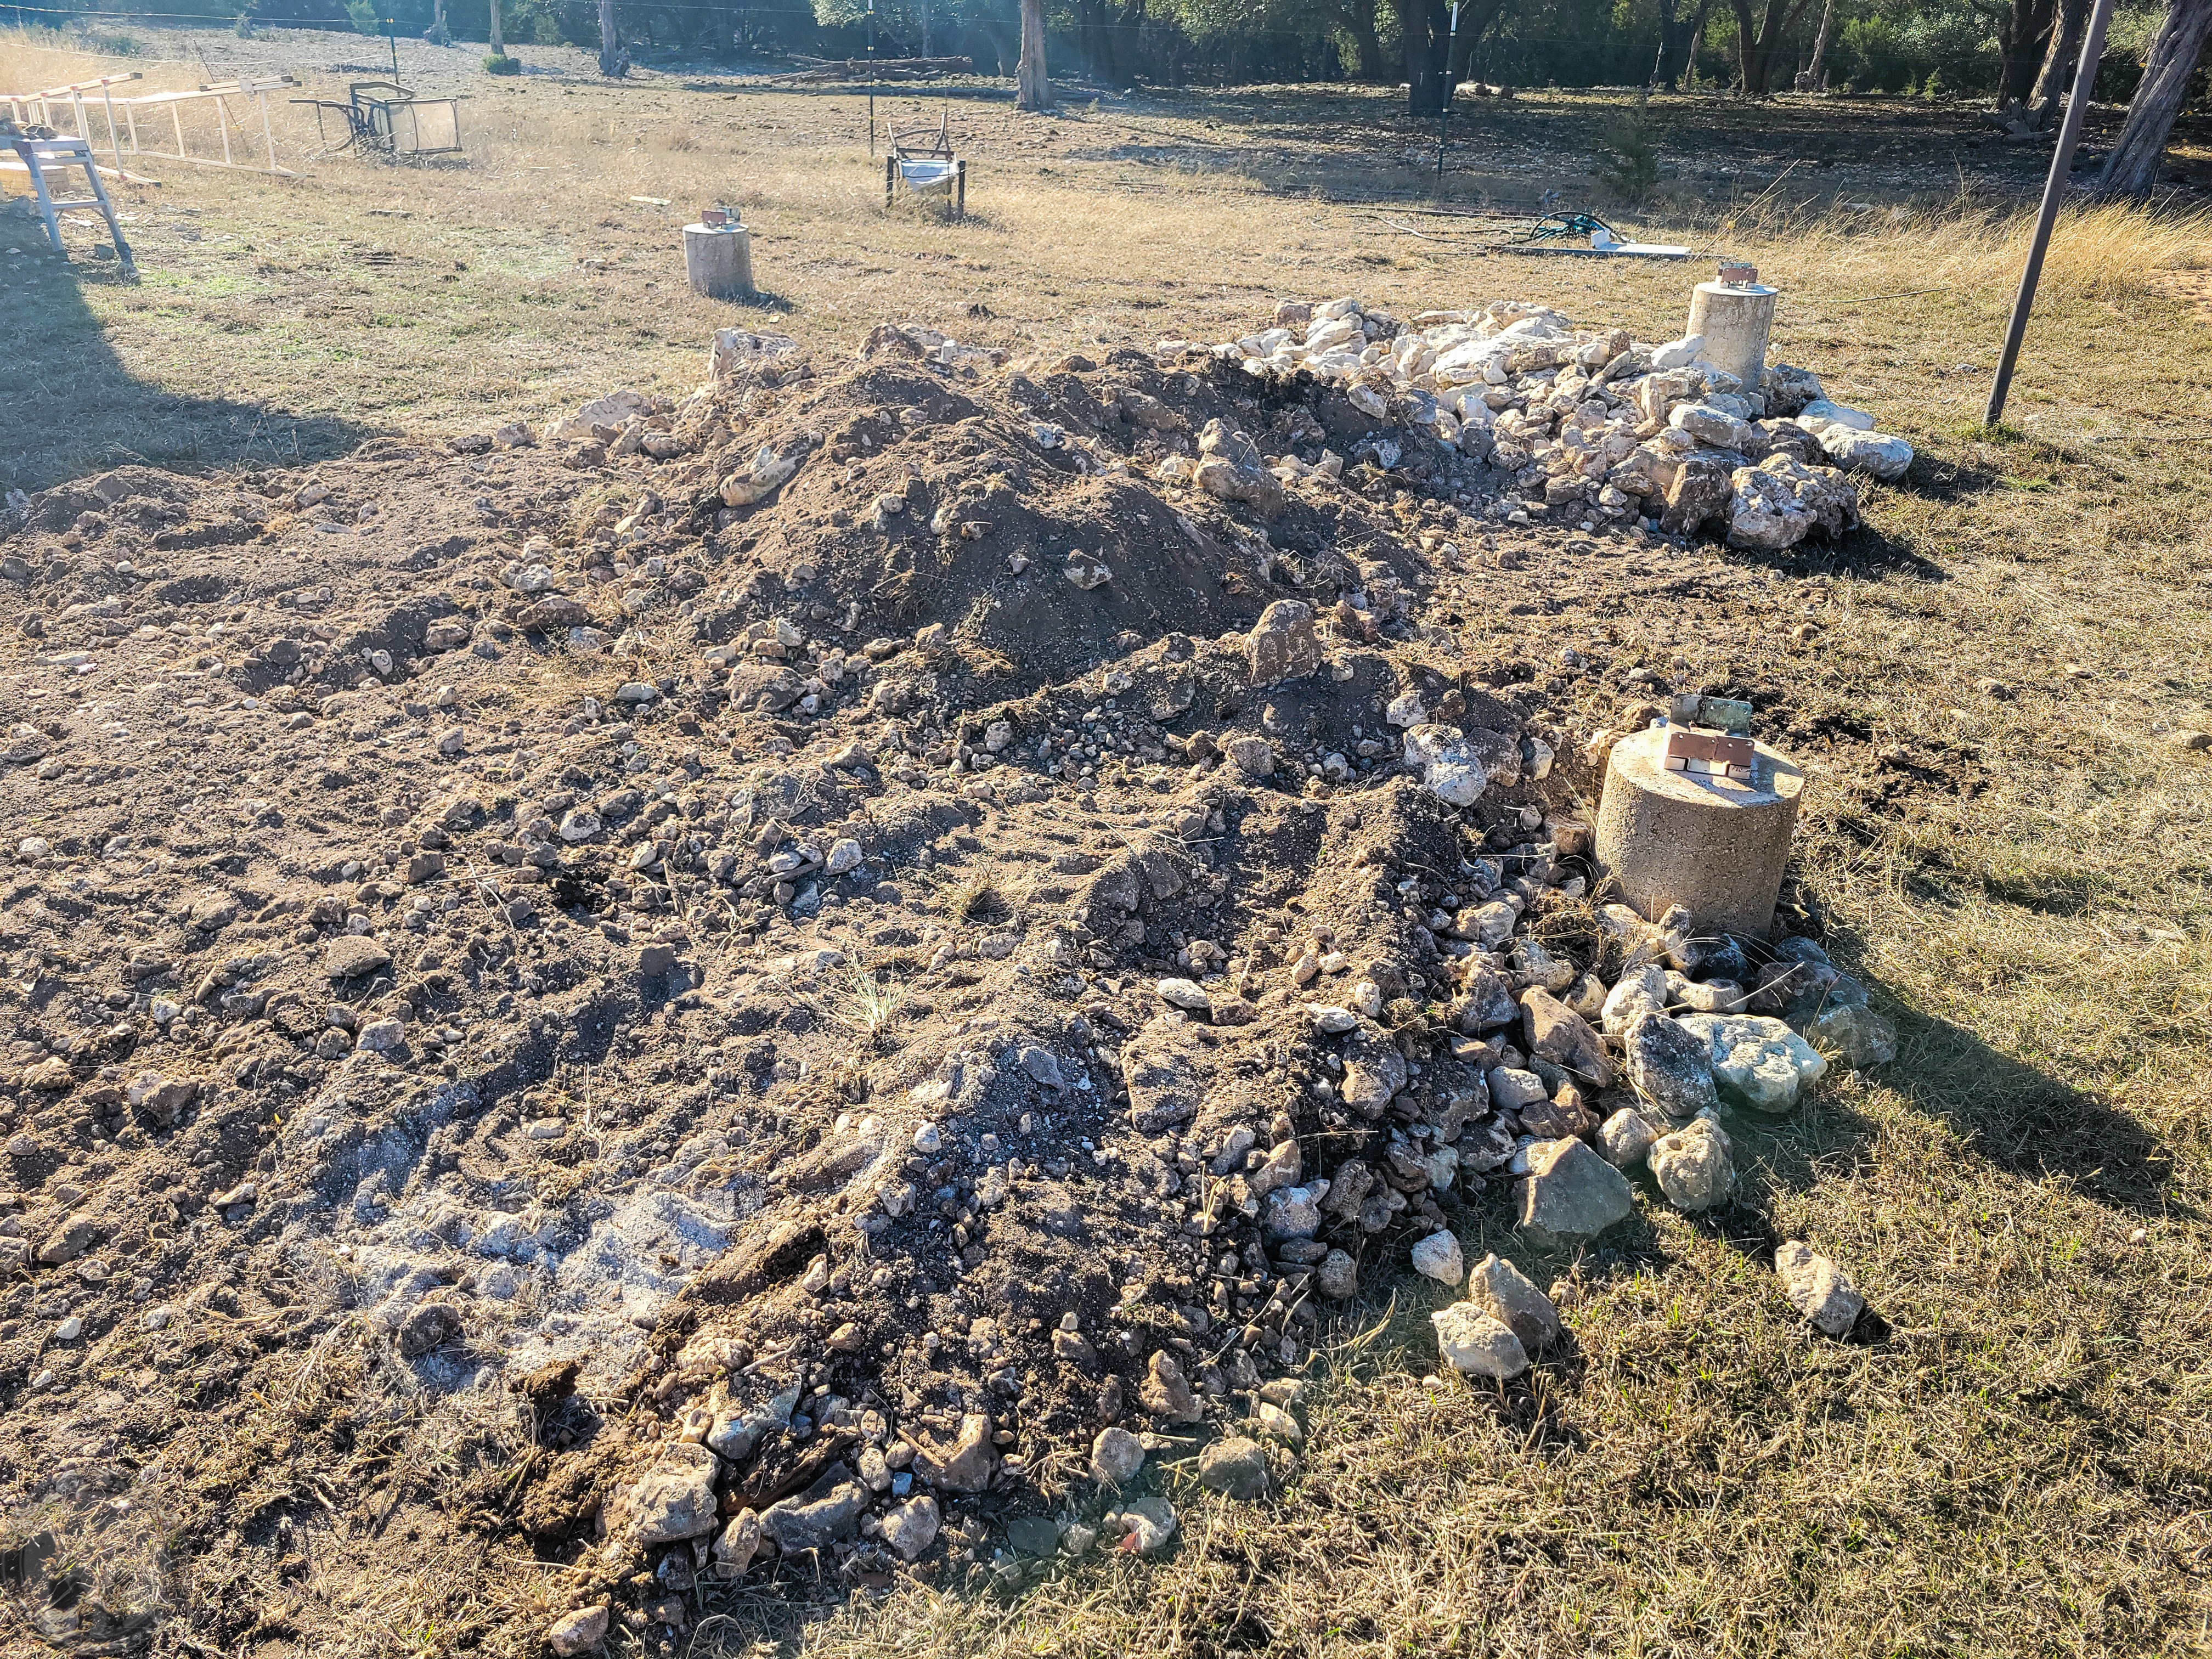
And the last two posts.

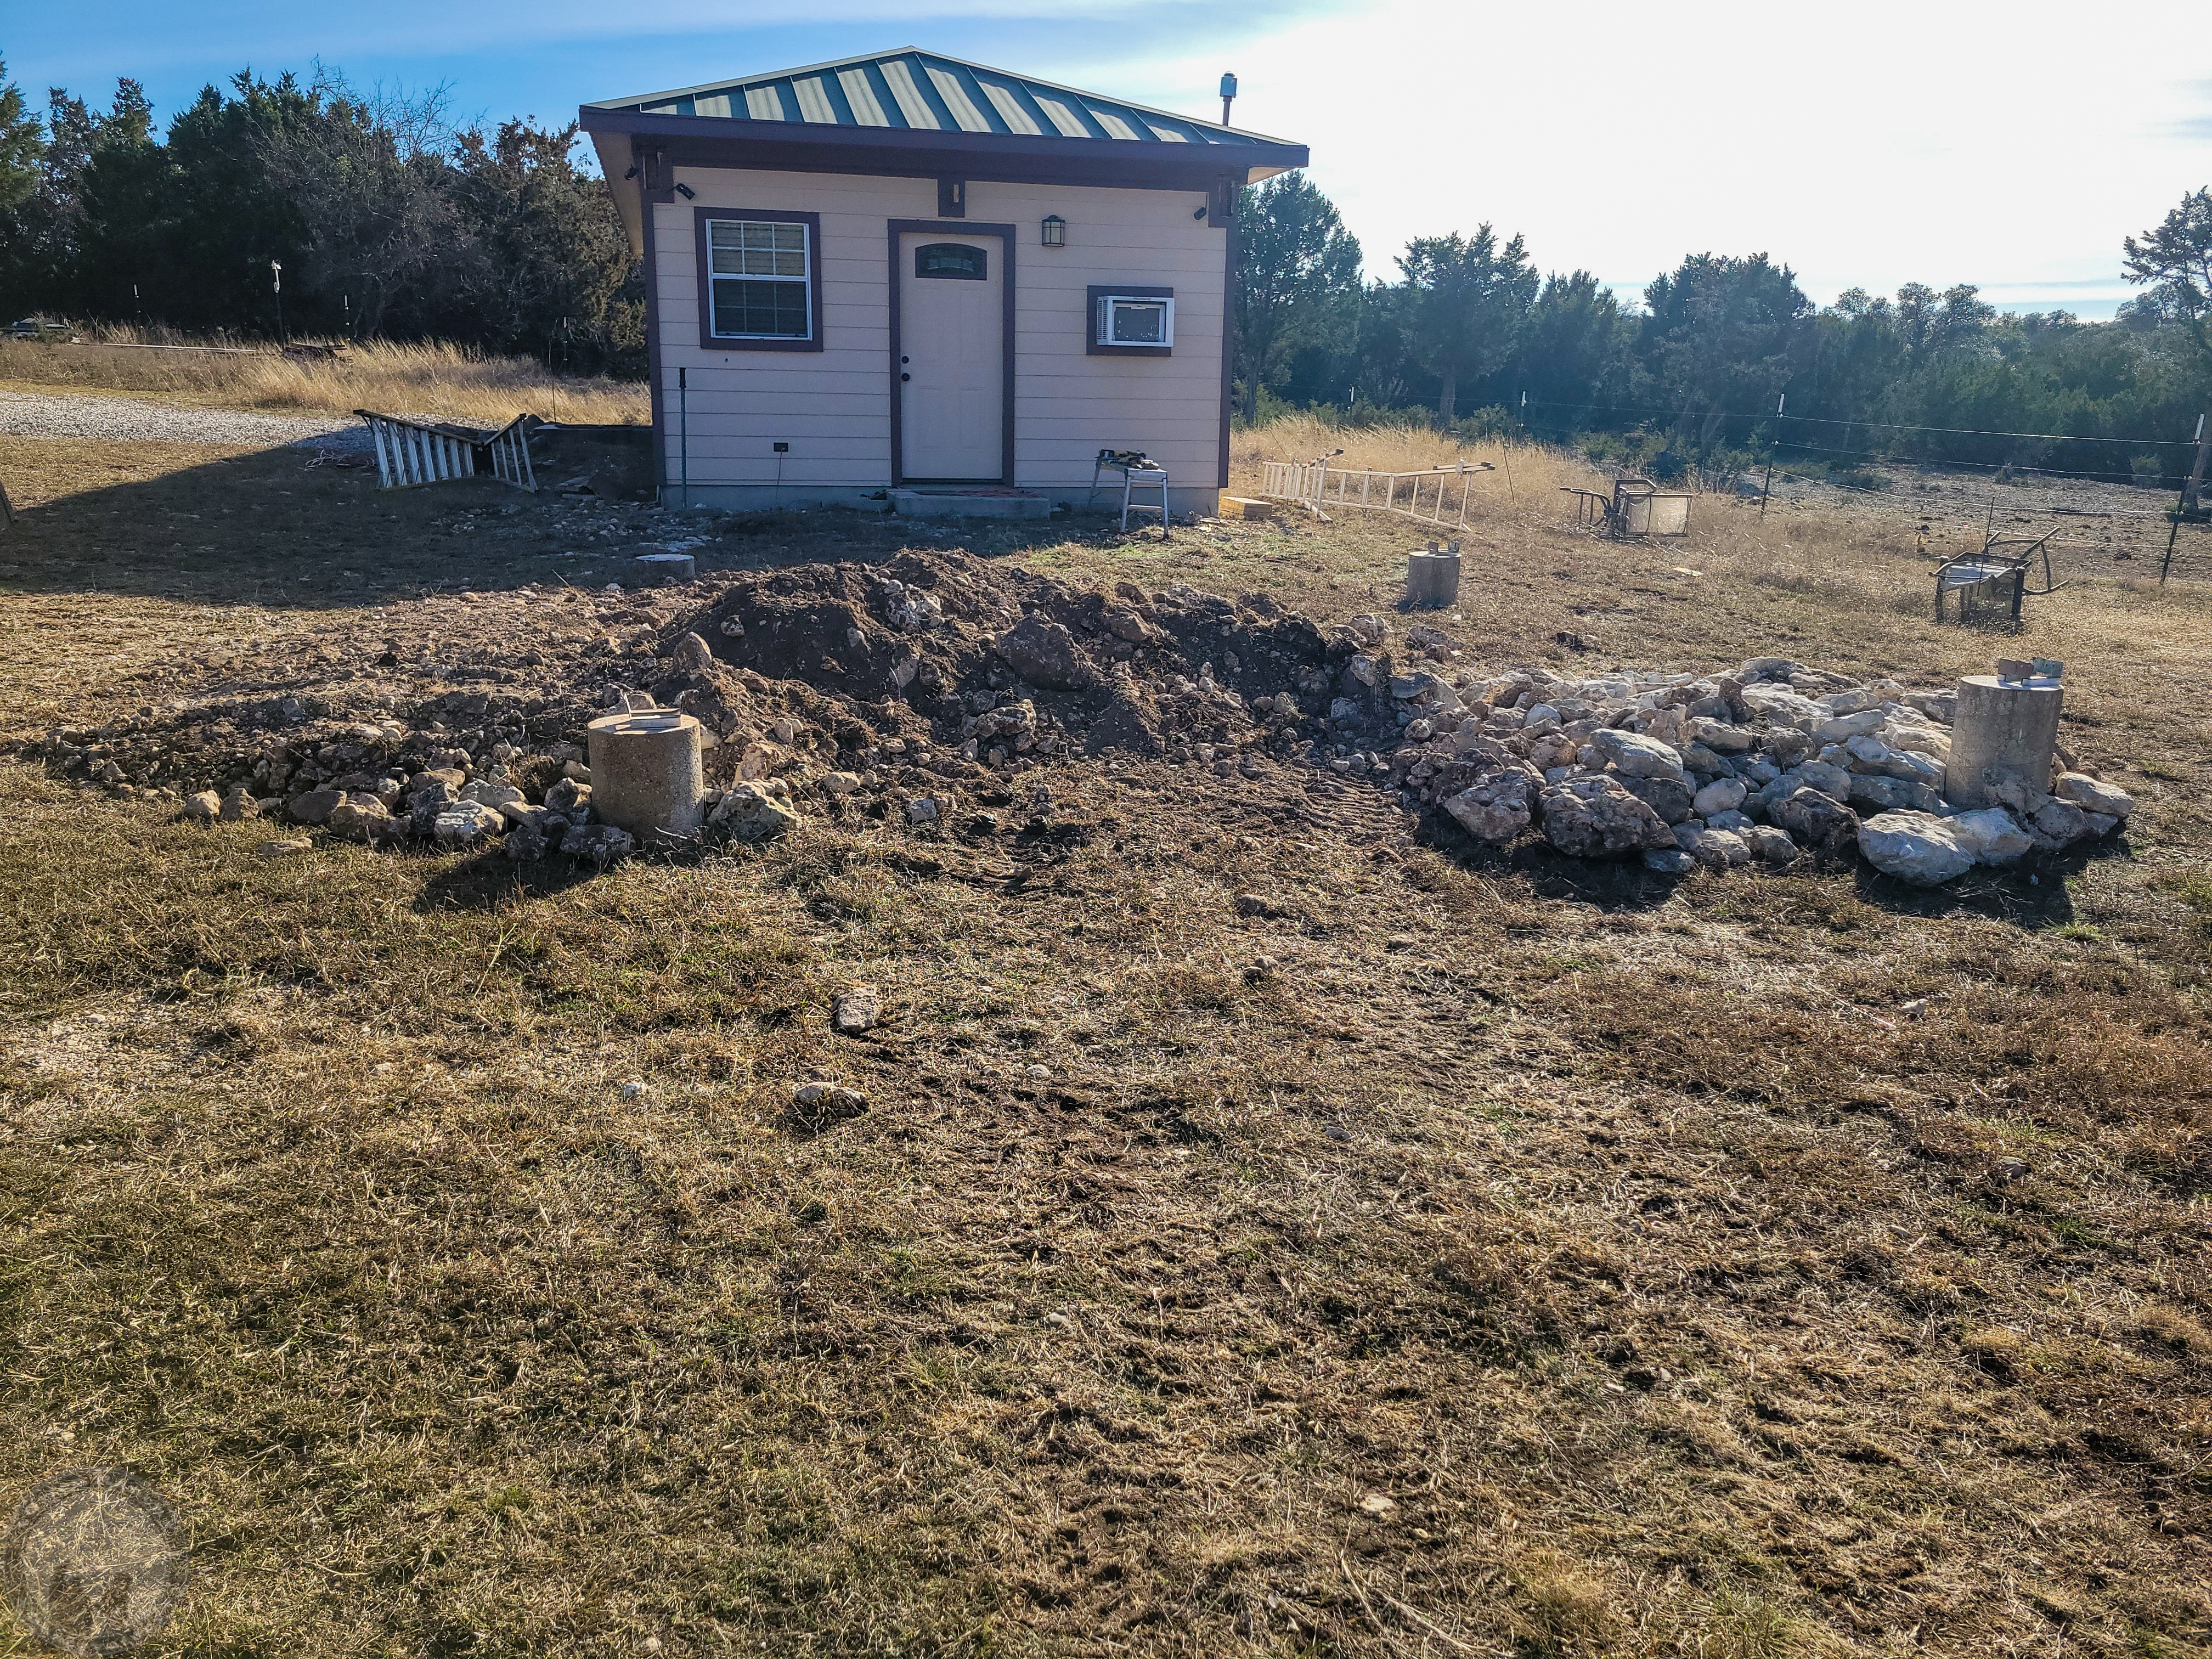
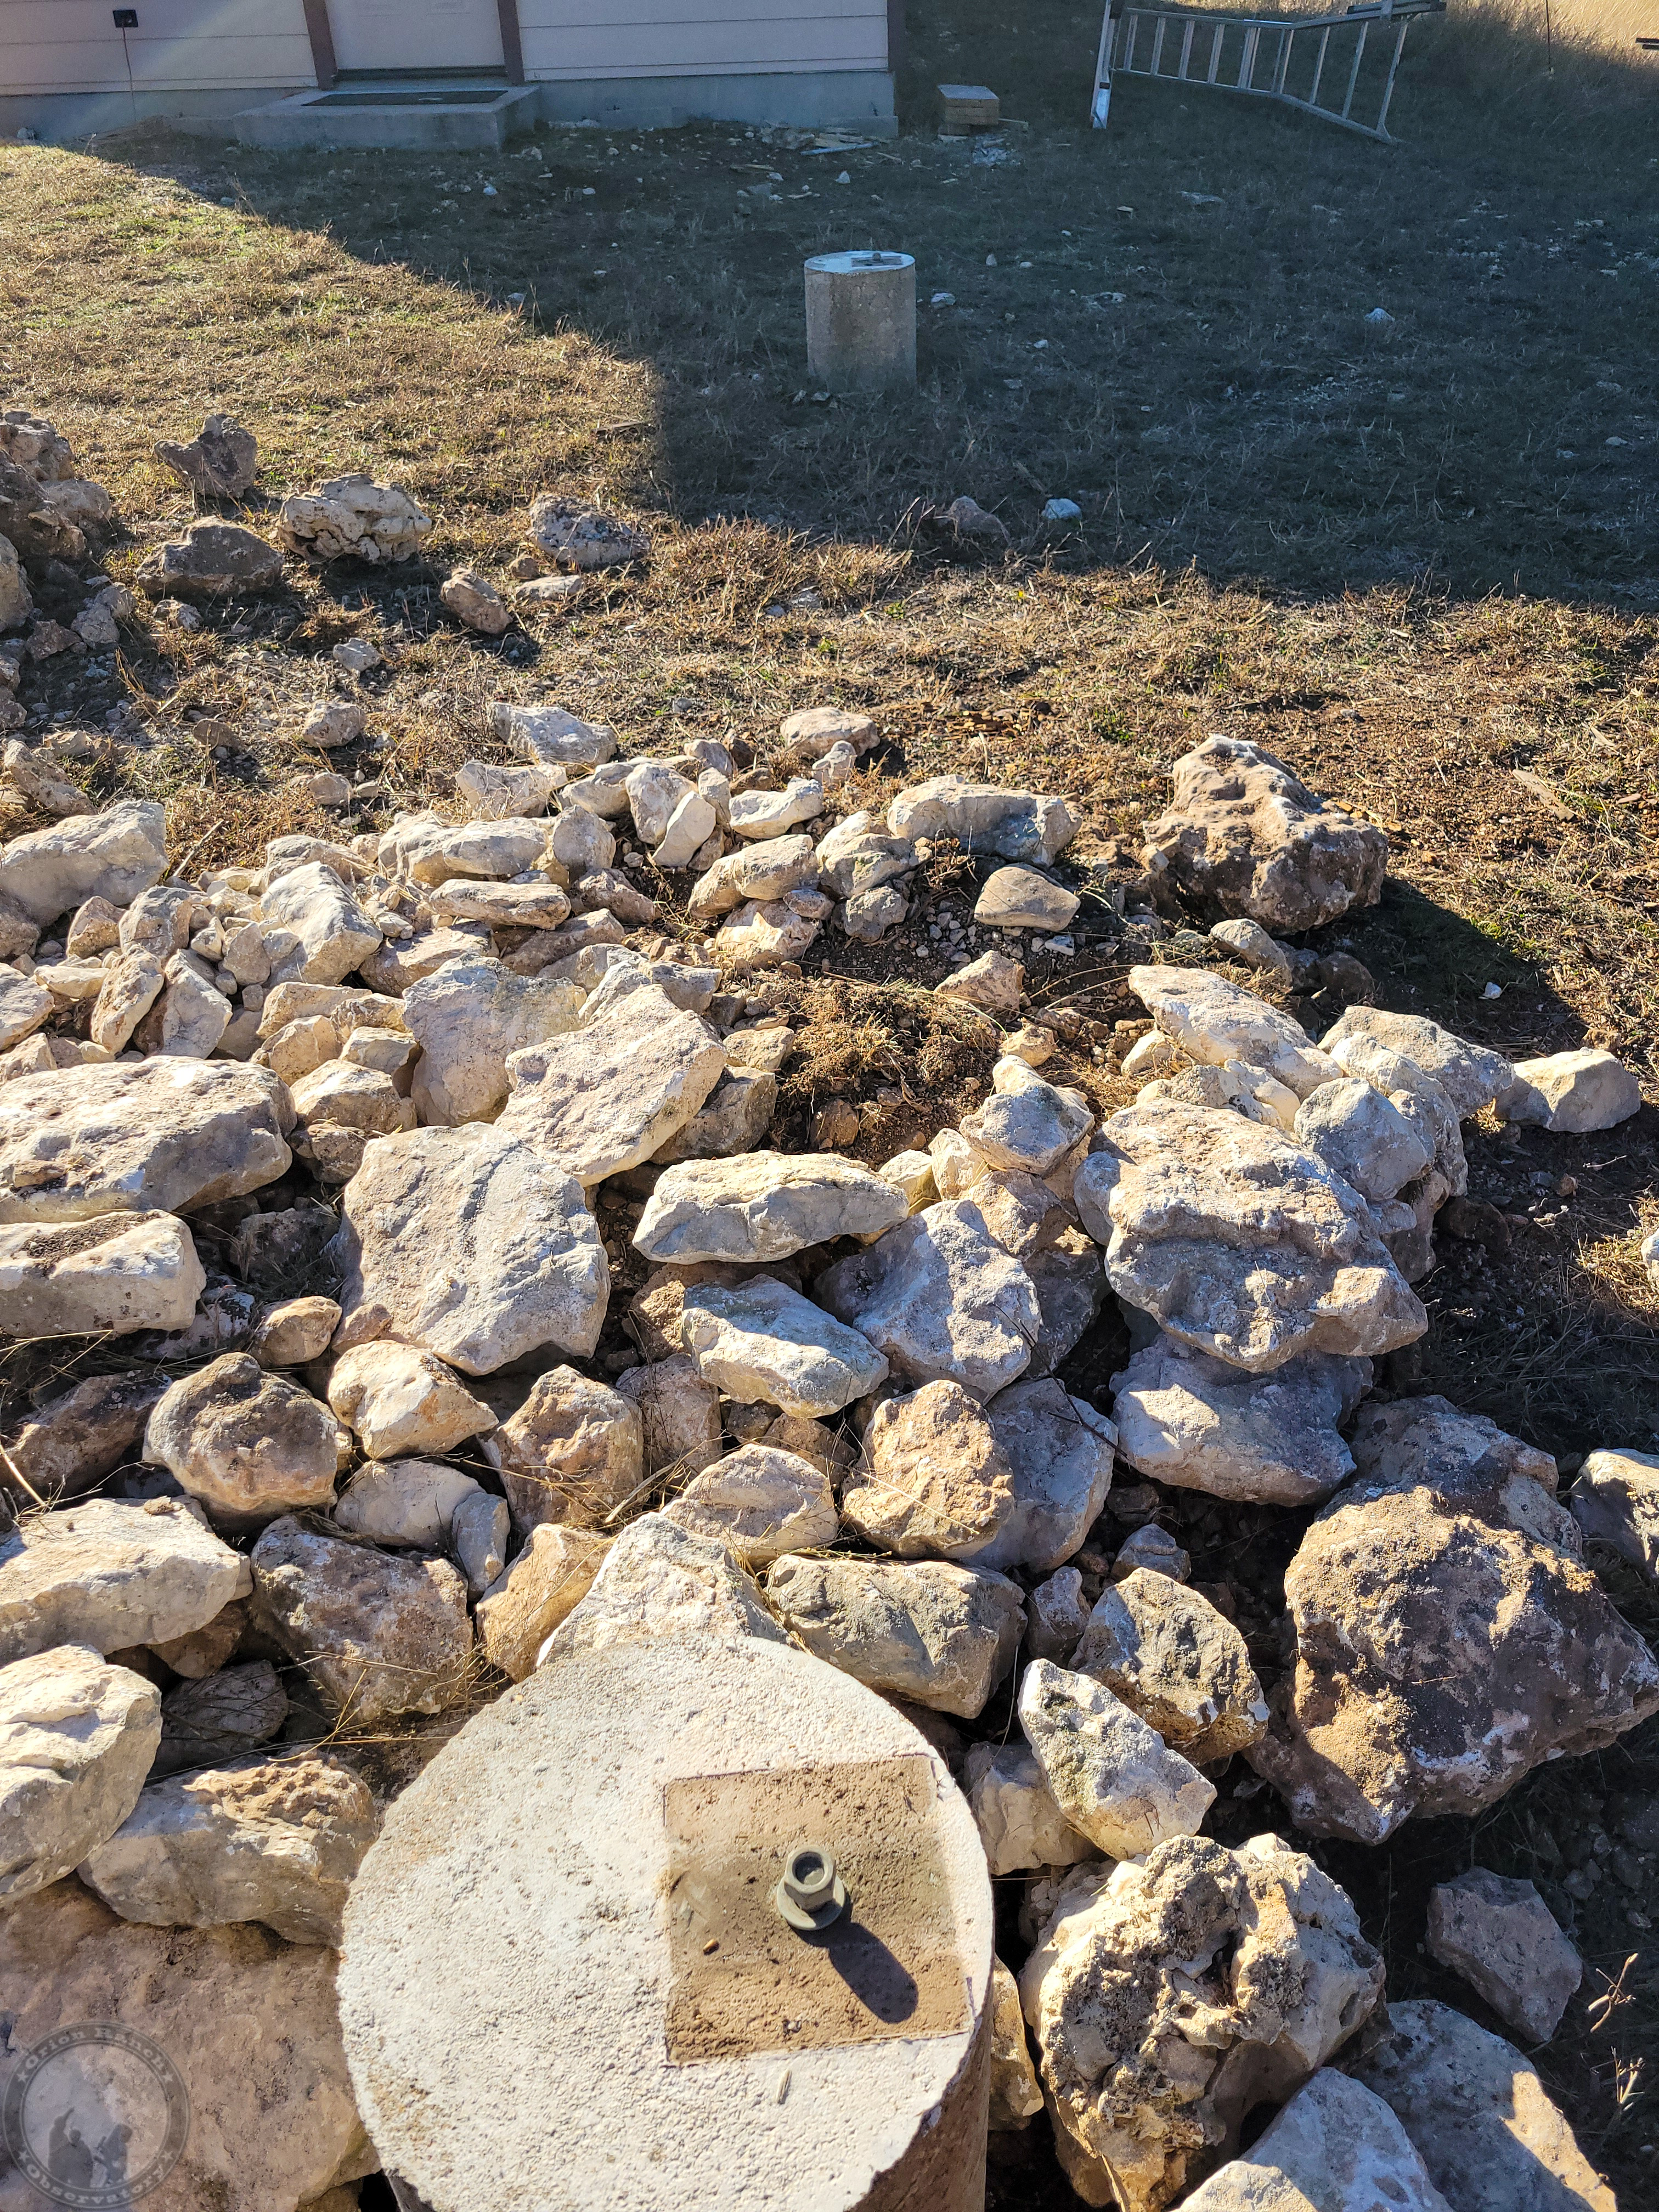
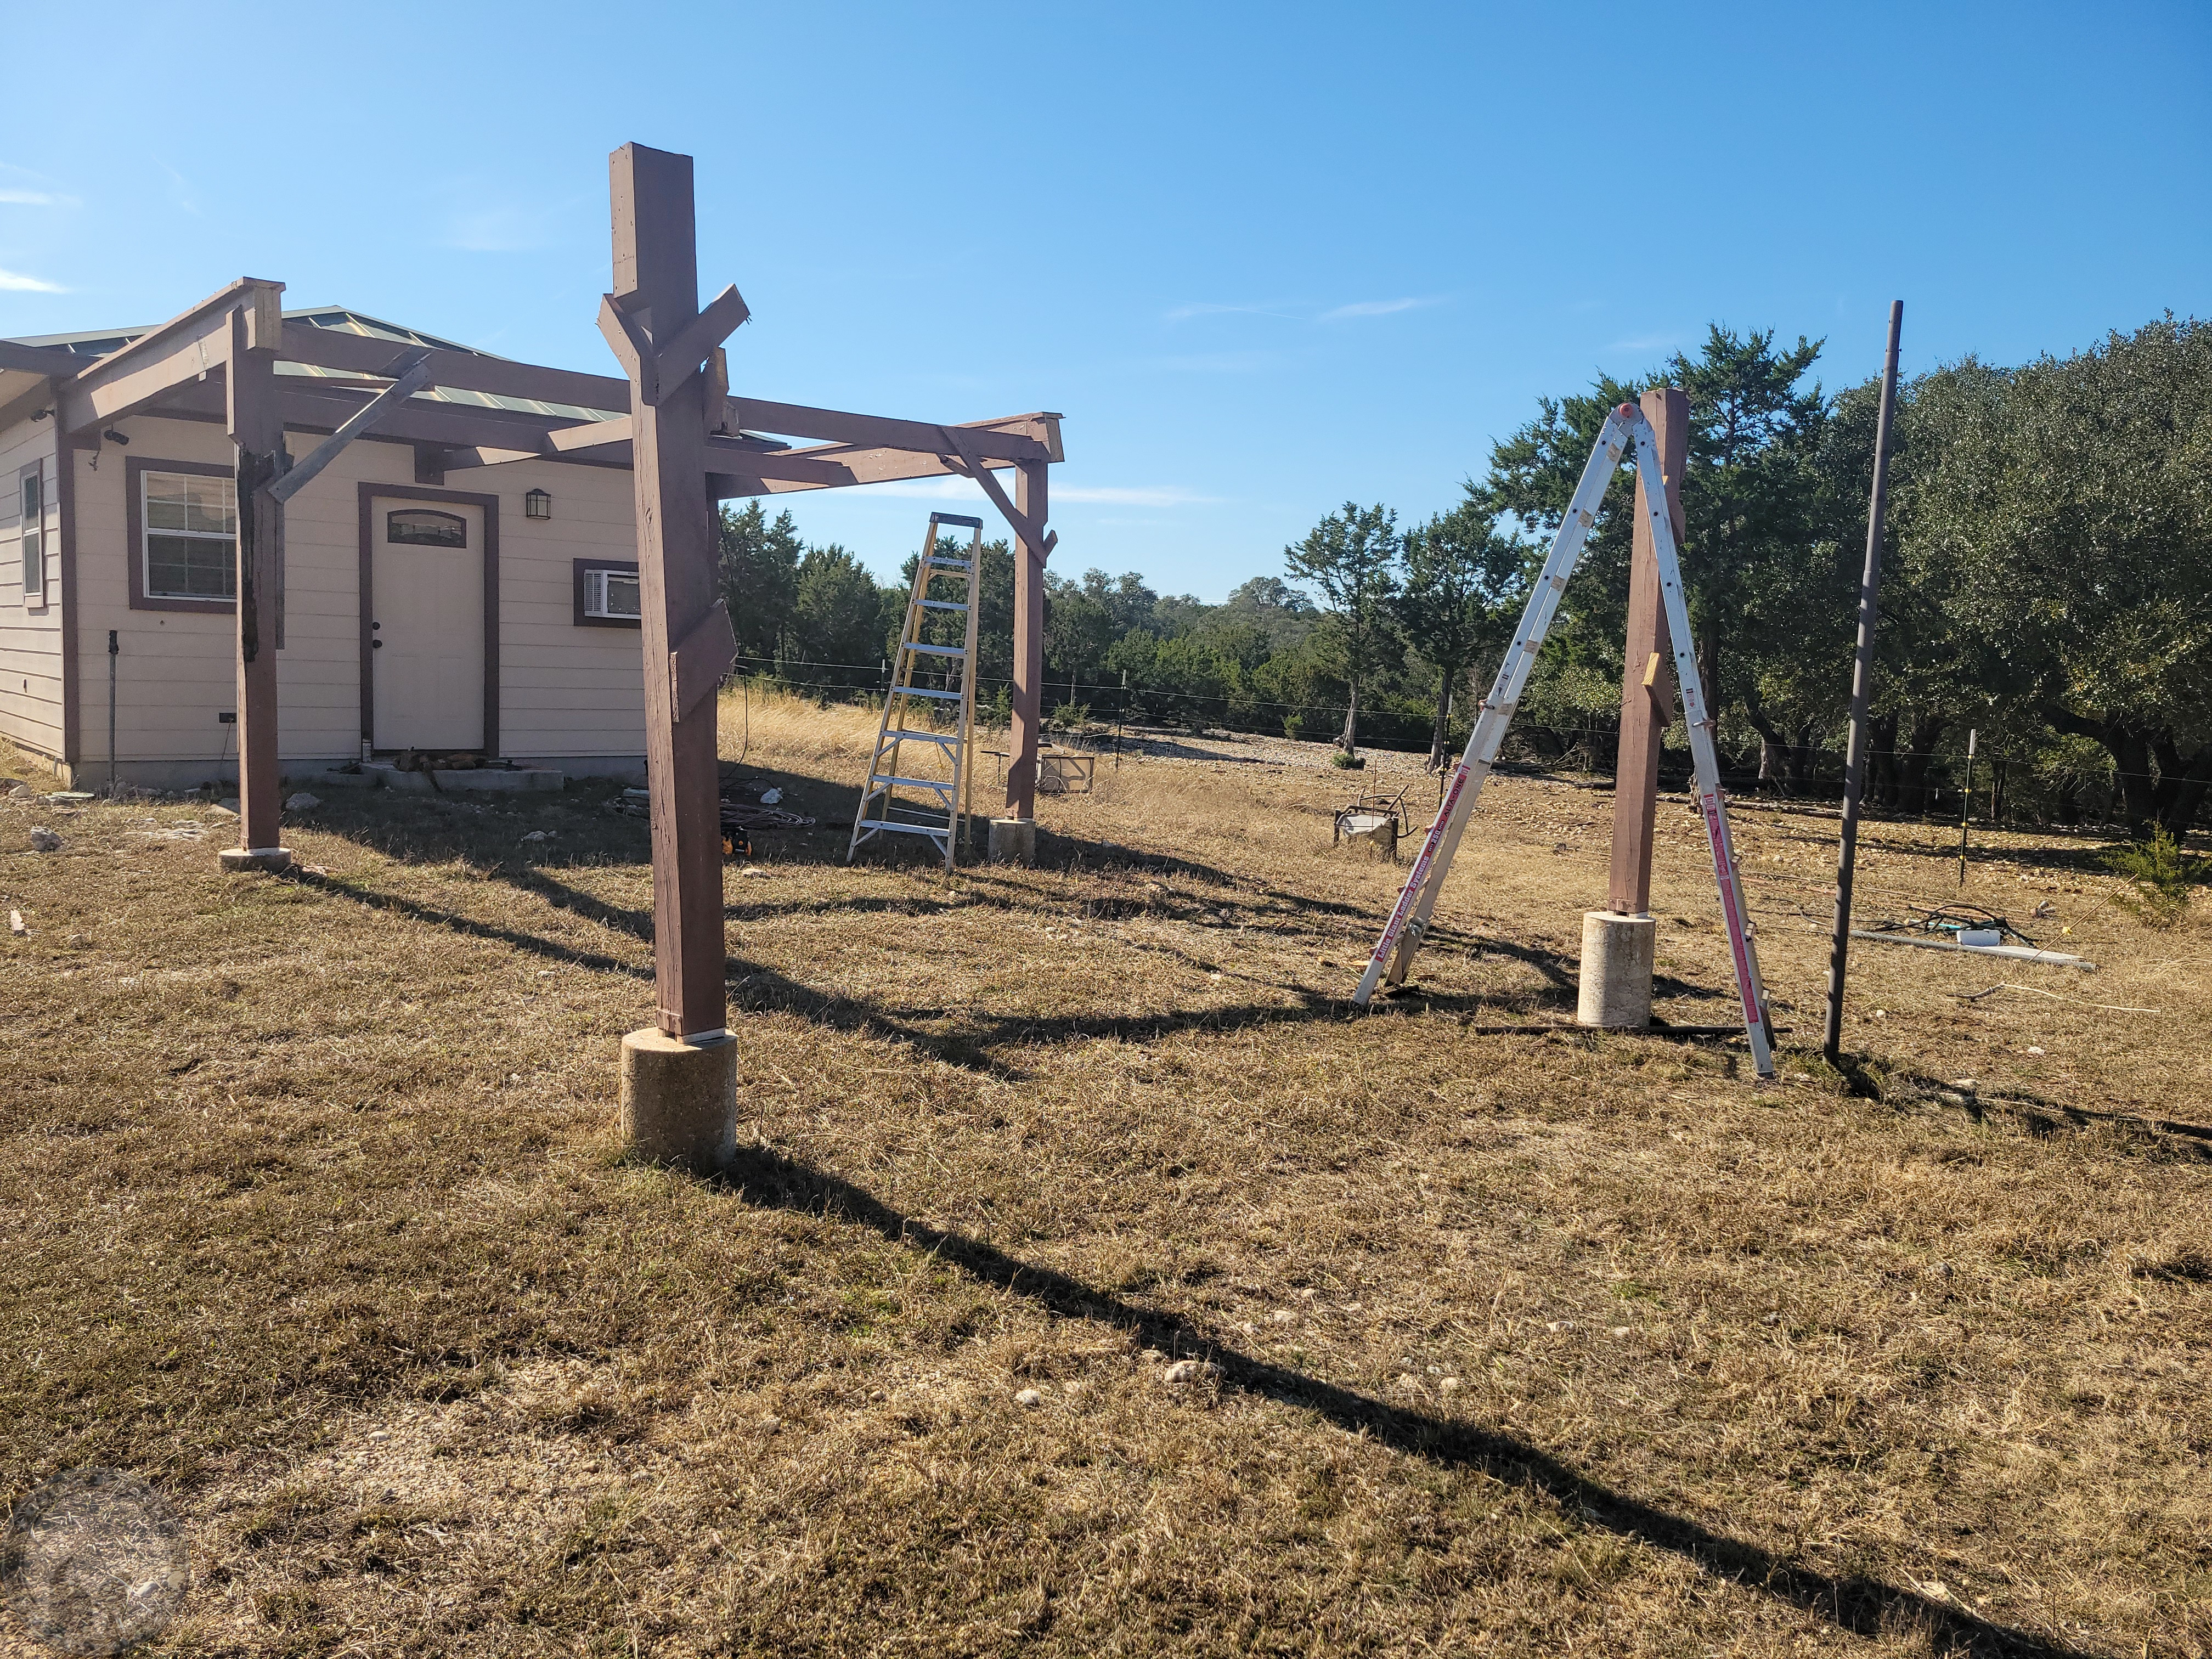
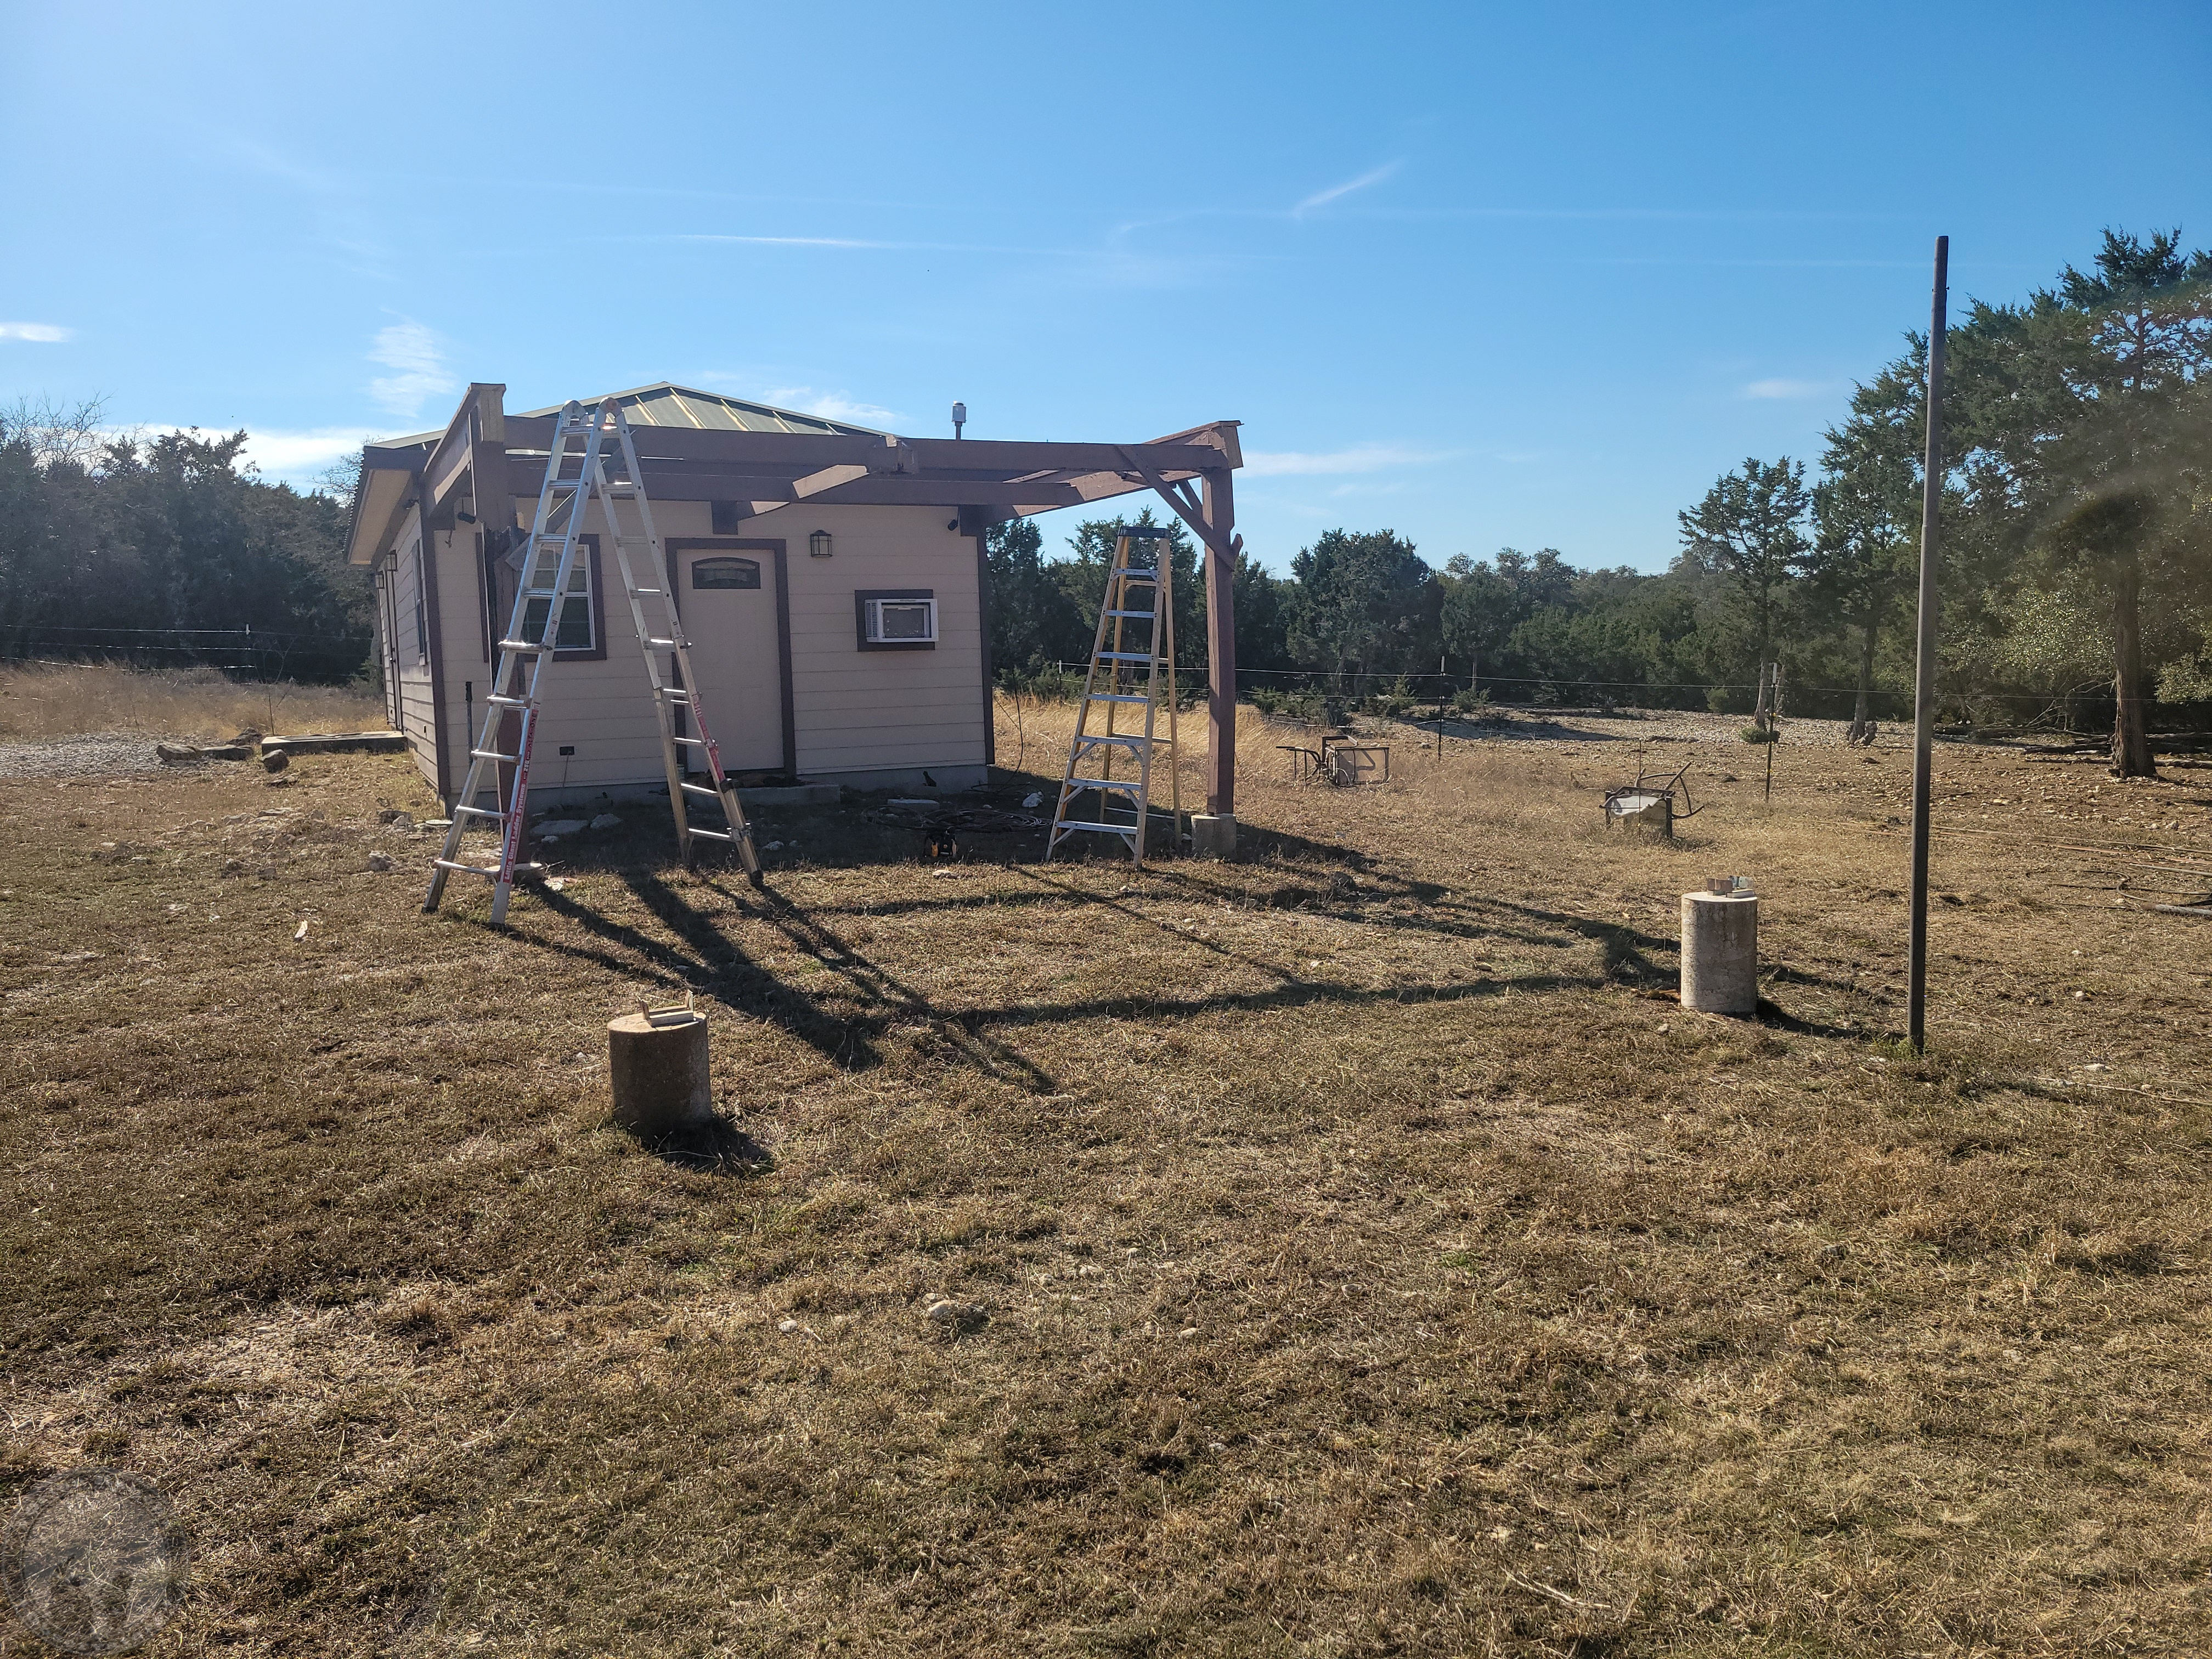
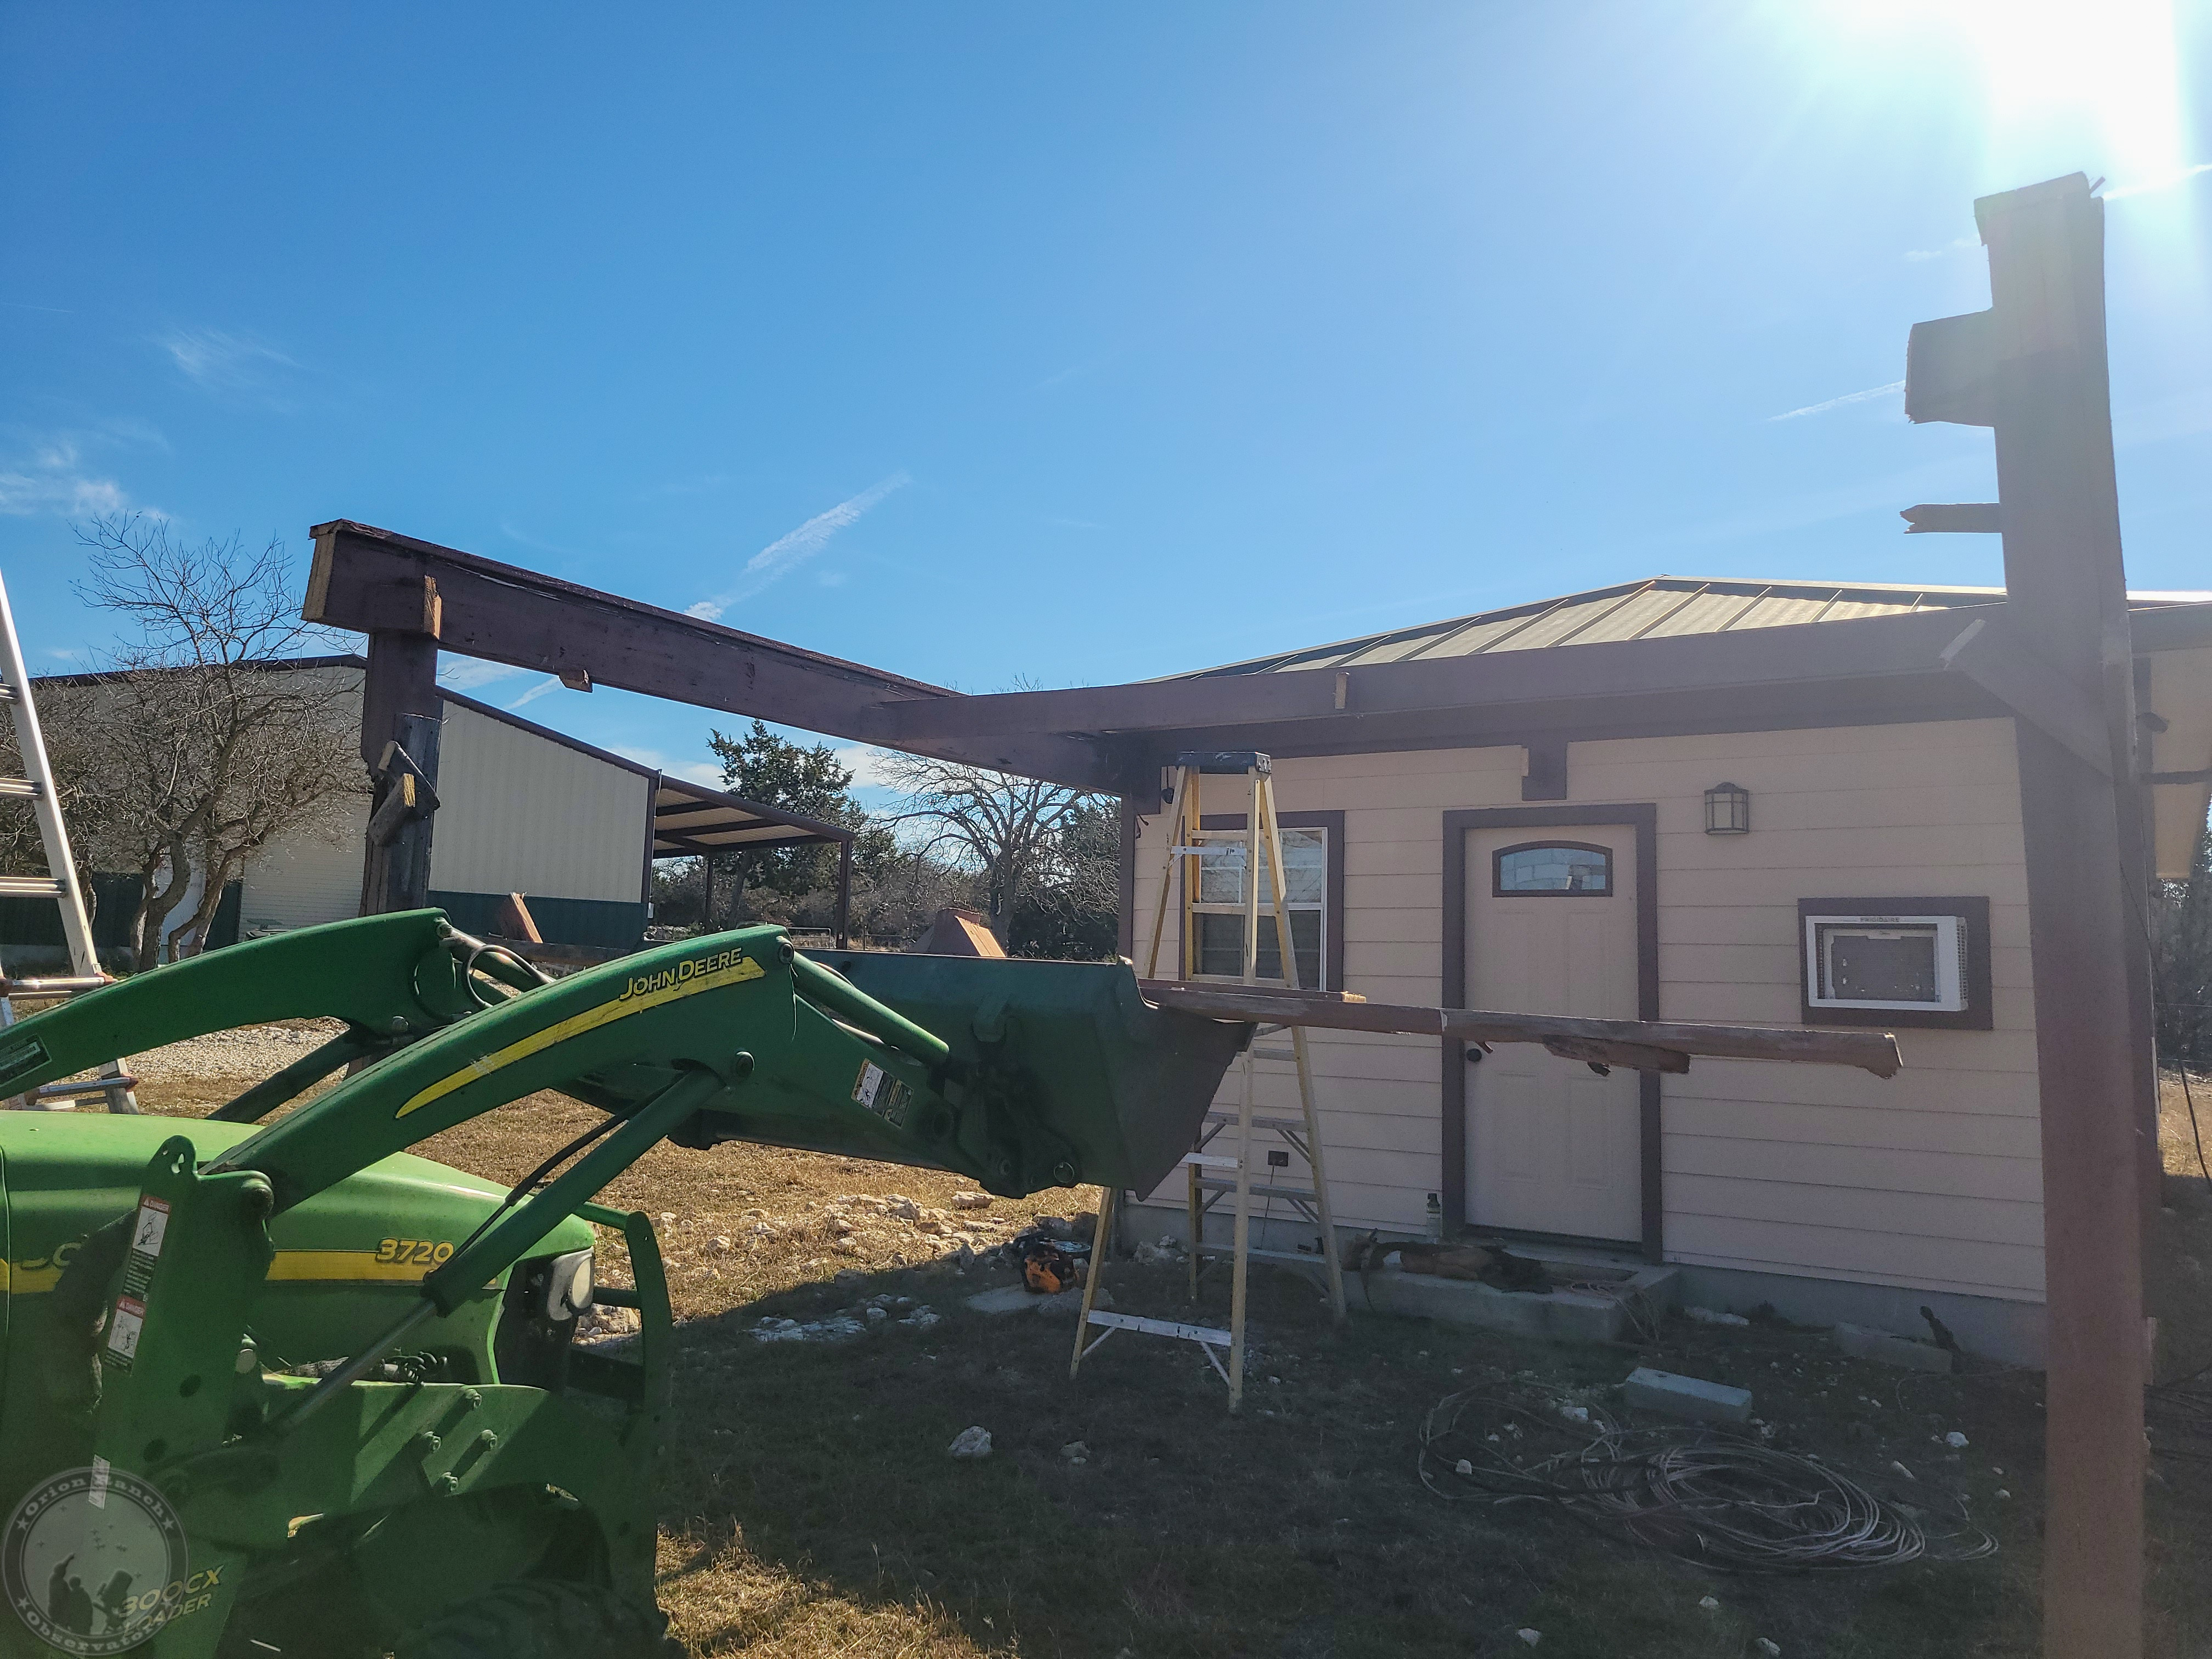
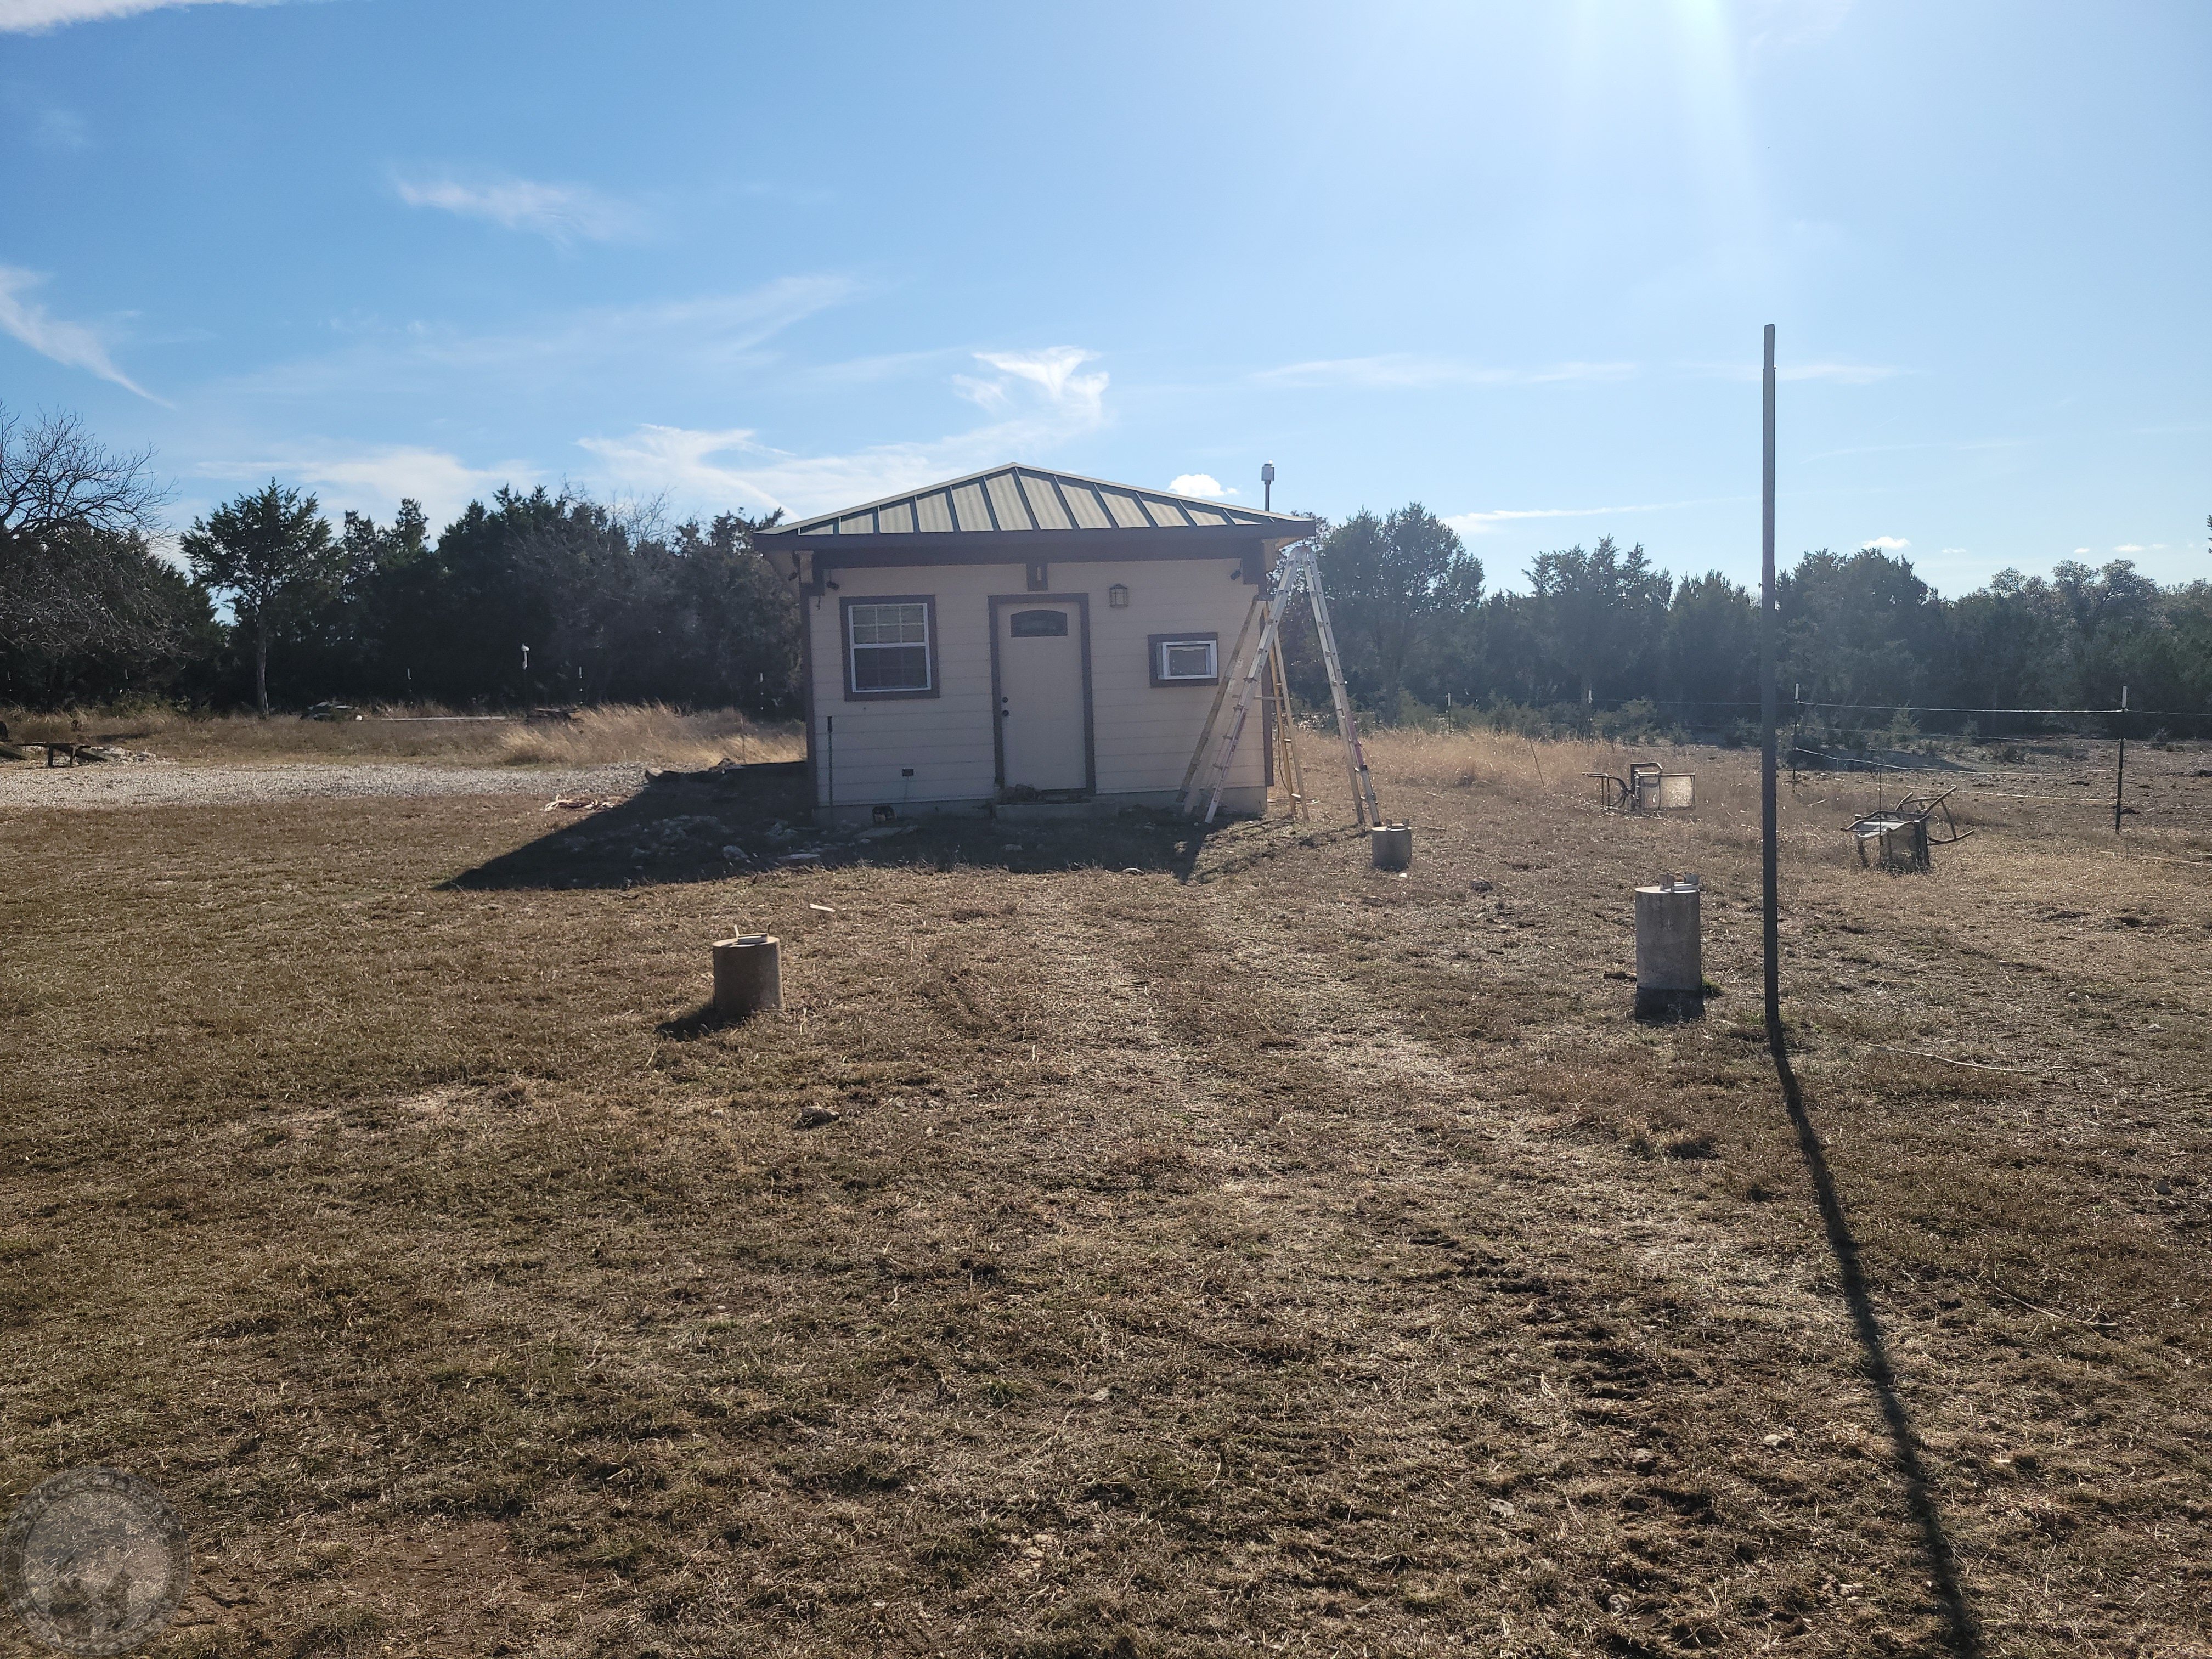
Resulting in my completely denuded observatory.  Actually looks like a pretty normal building now!

Of course, in the process I noticed something that I actually believe I saw before and completely forgot about.  Either this was one particularly angry piece of hail, or more likely from the angle, an errant rough-housing Texas Longhorn!  I certainly don’t recall doing anything myself that would have caused this, although I can’t guarantee that no one else did.

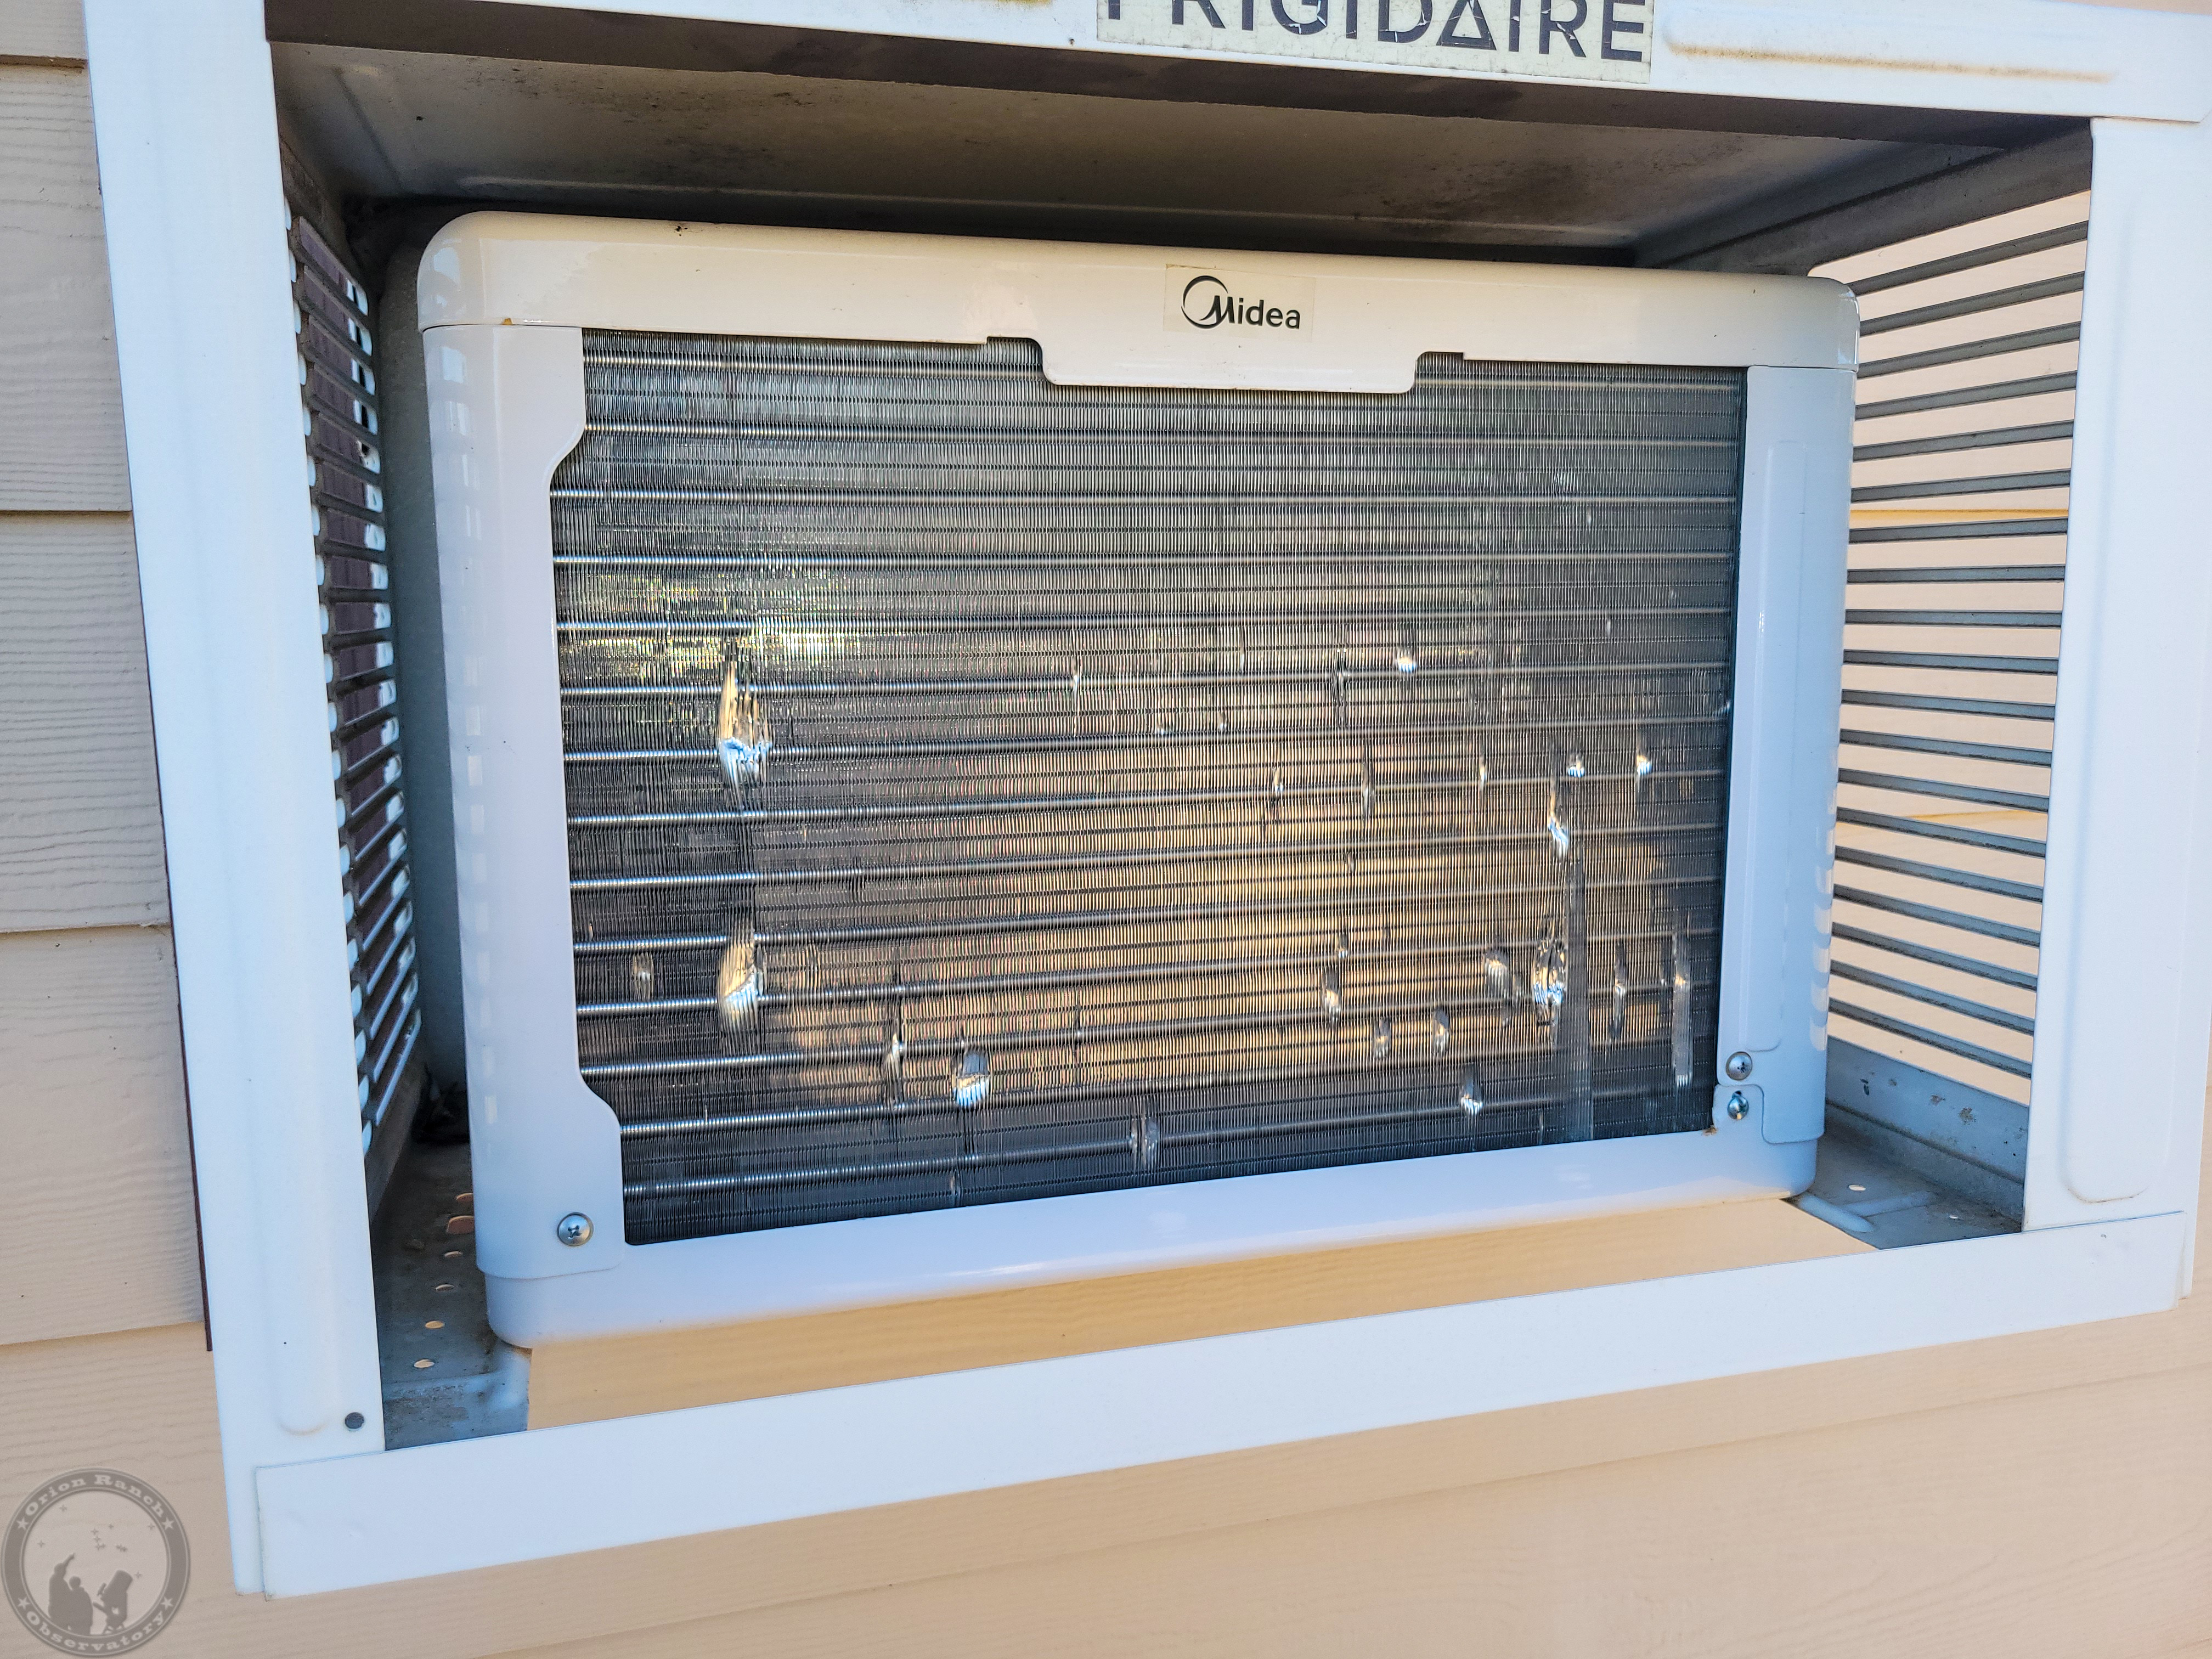
There are also a bunch of dents I need to straighten out on the condenser of the new AC unit I put in place of the old one that failed.  I don’t think the longhorns would be knocking on something this high, but that would have required some pretty horizontal hail to be getting past the top of the old outer cover.

Next Episode:  Getting a Rail out of a Wall!

December 27th, 2025

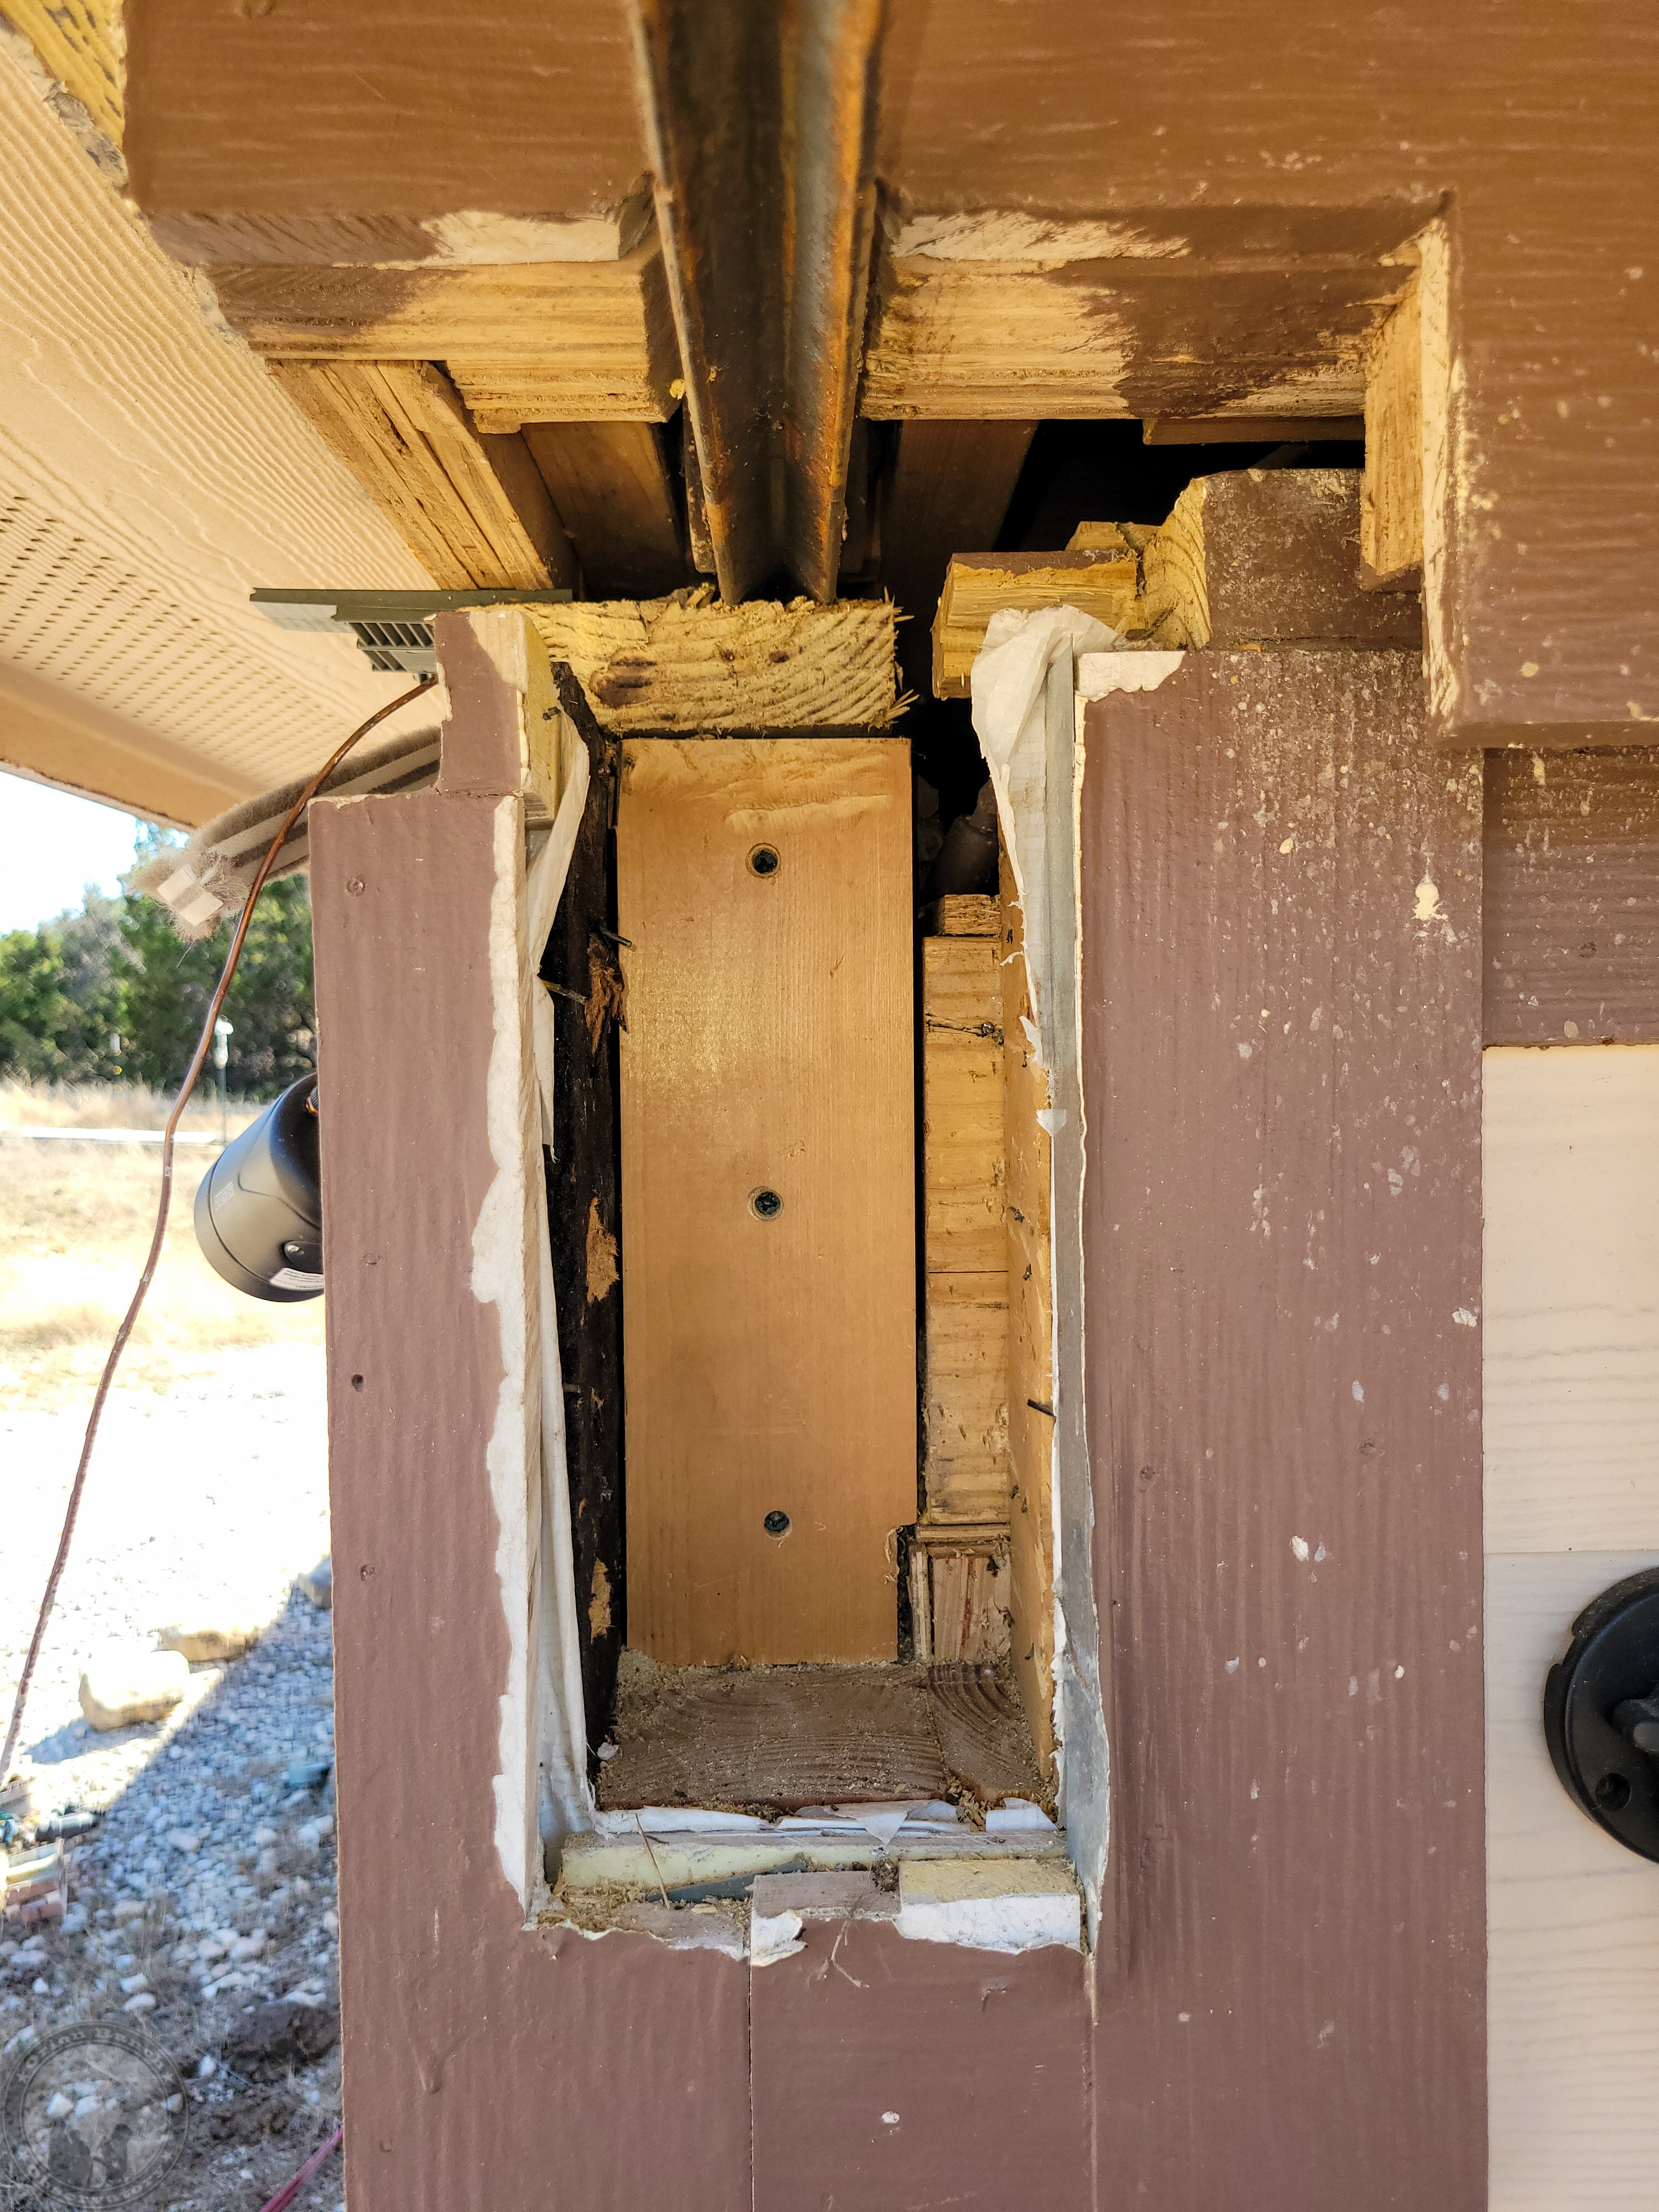
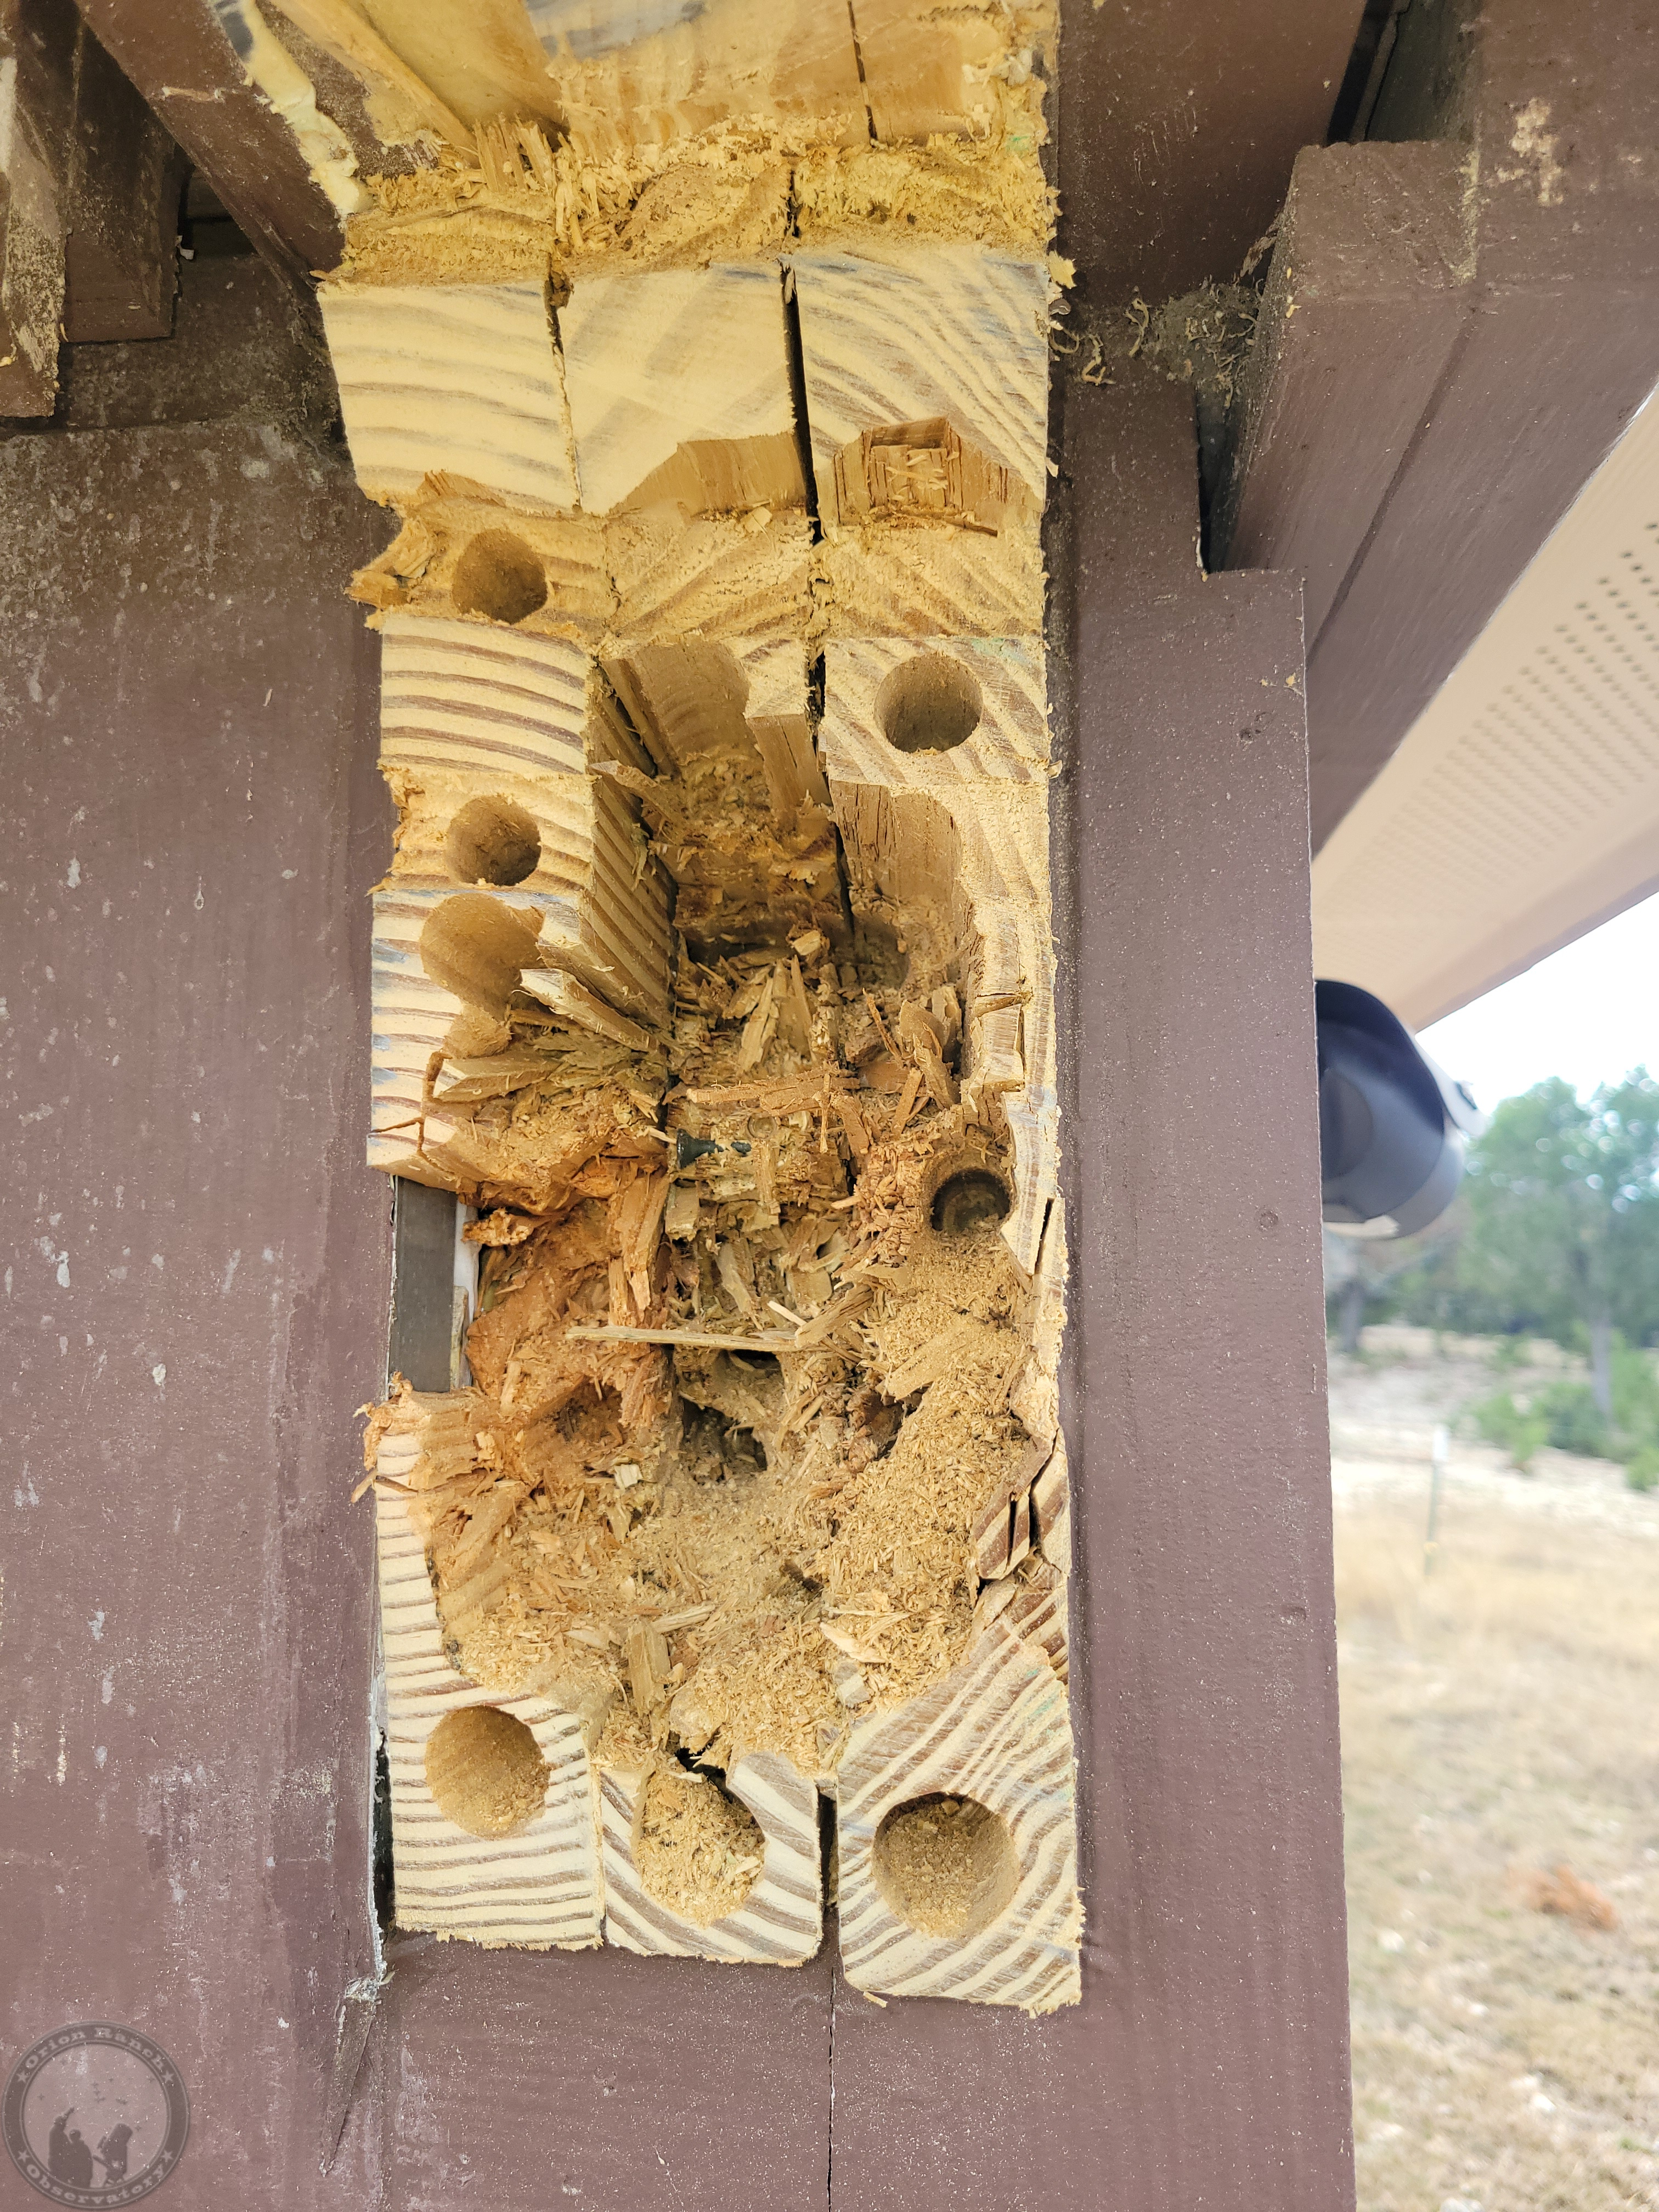
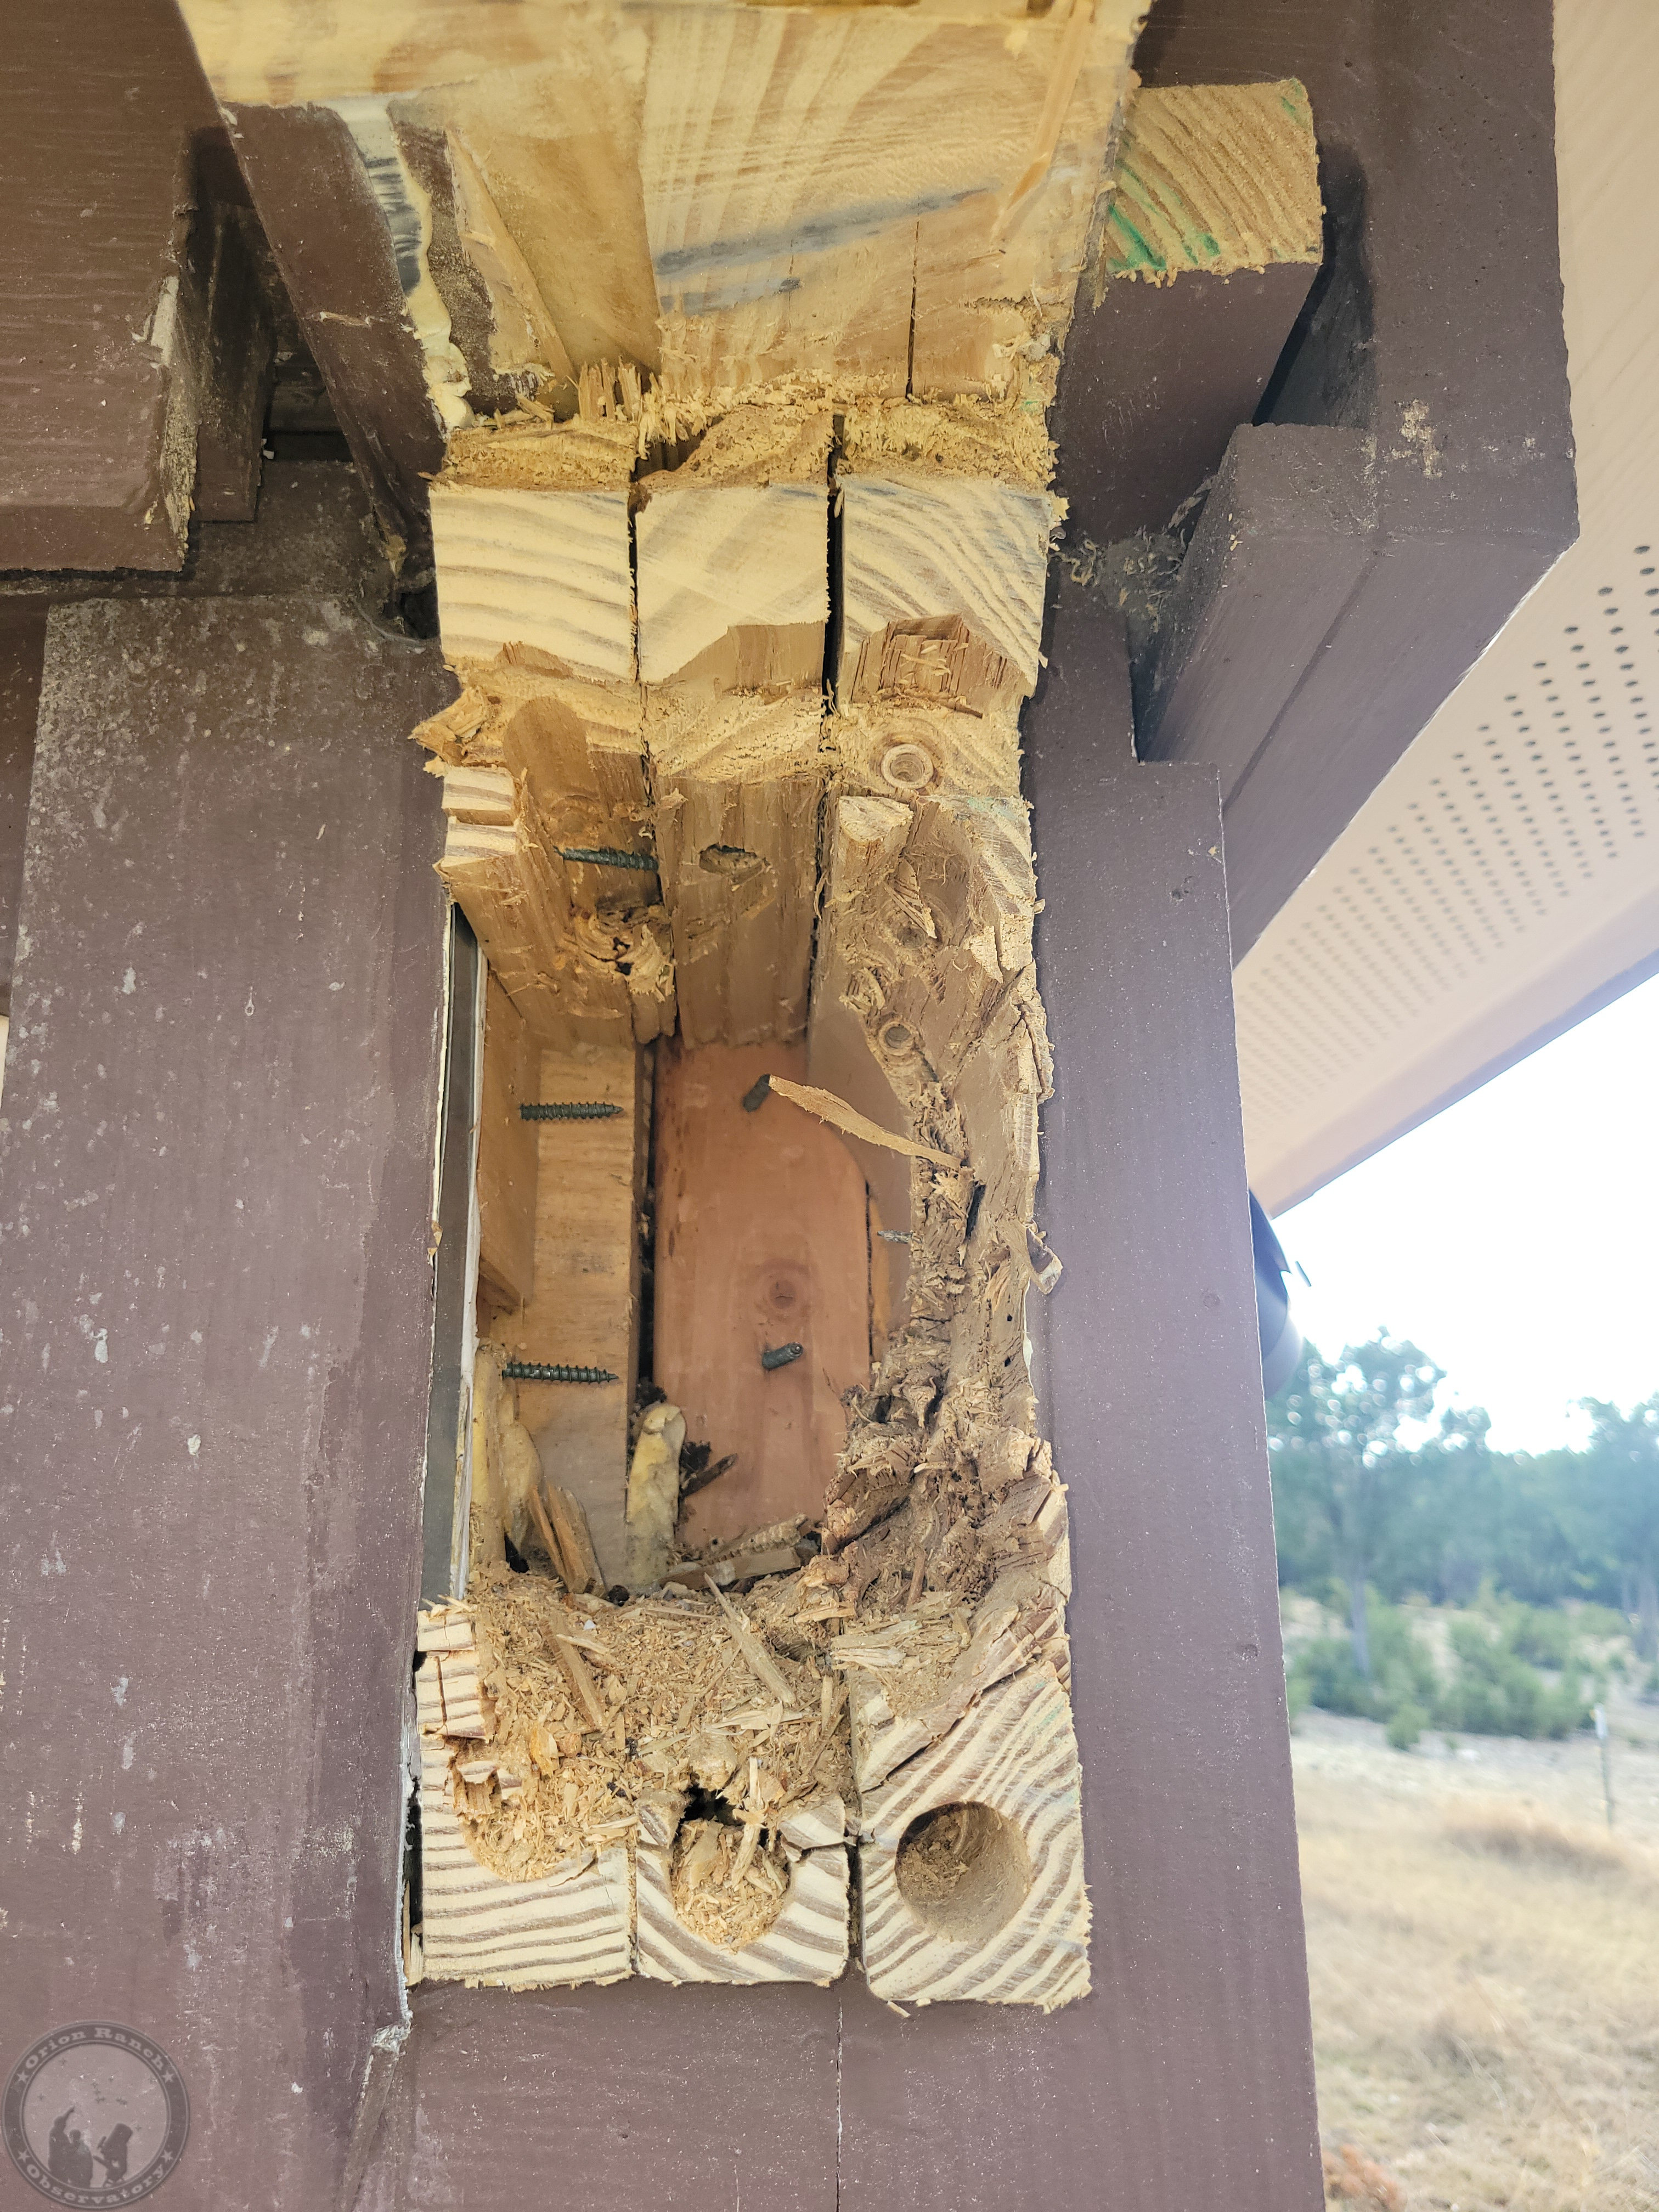
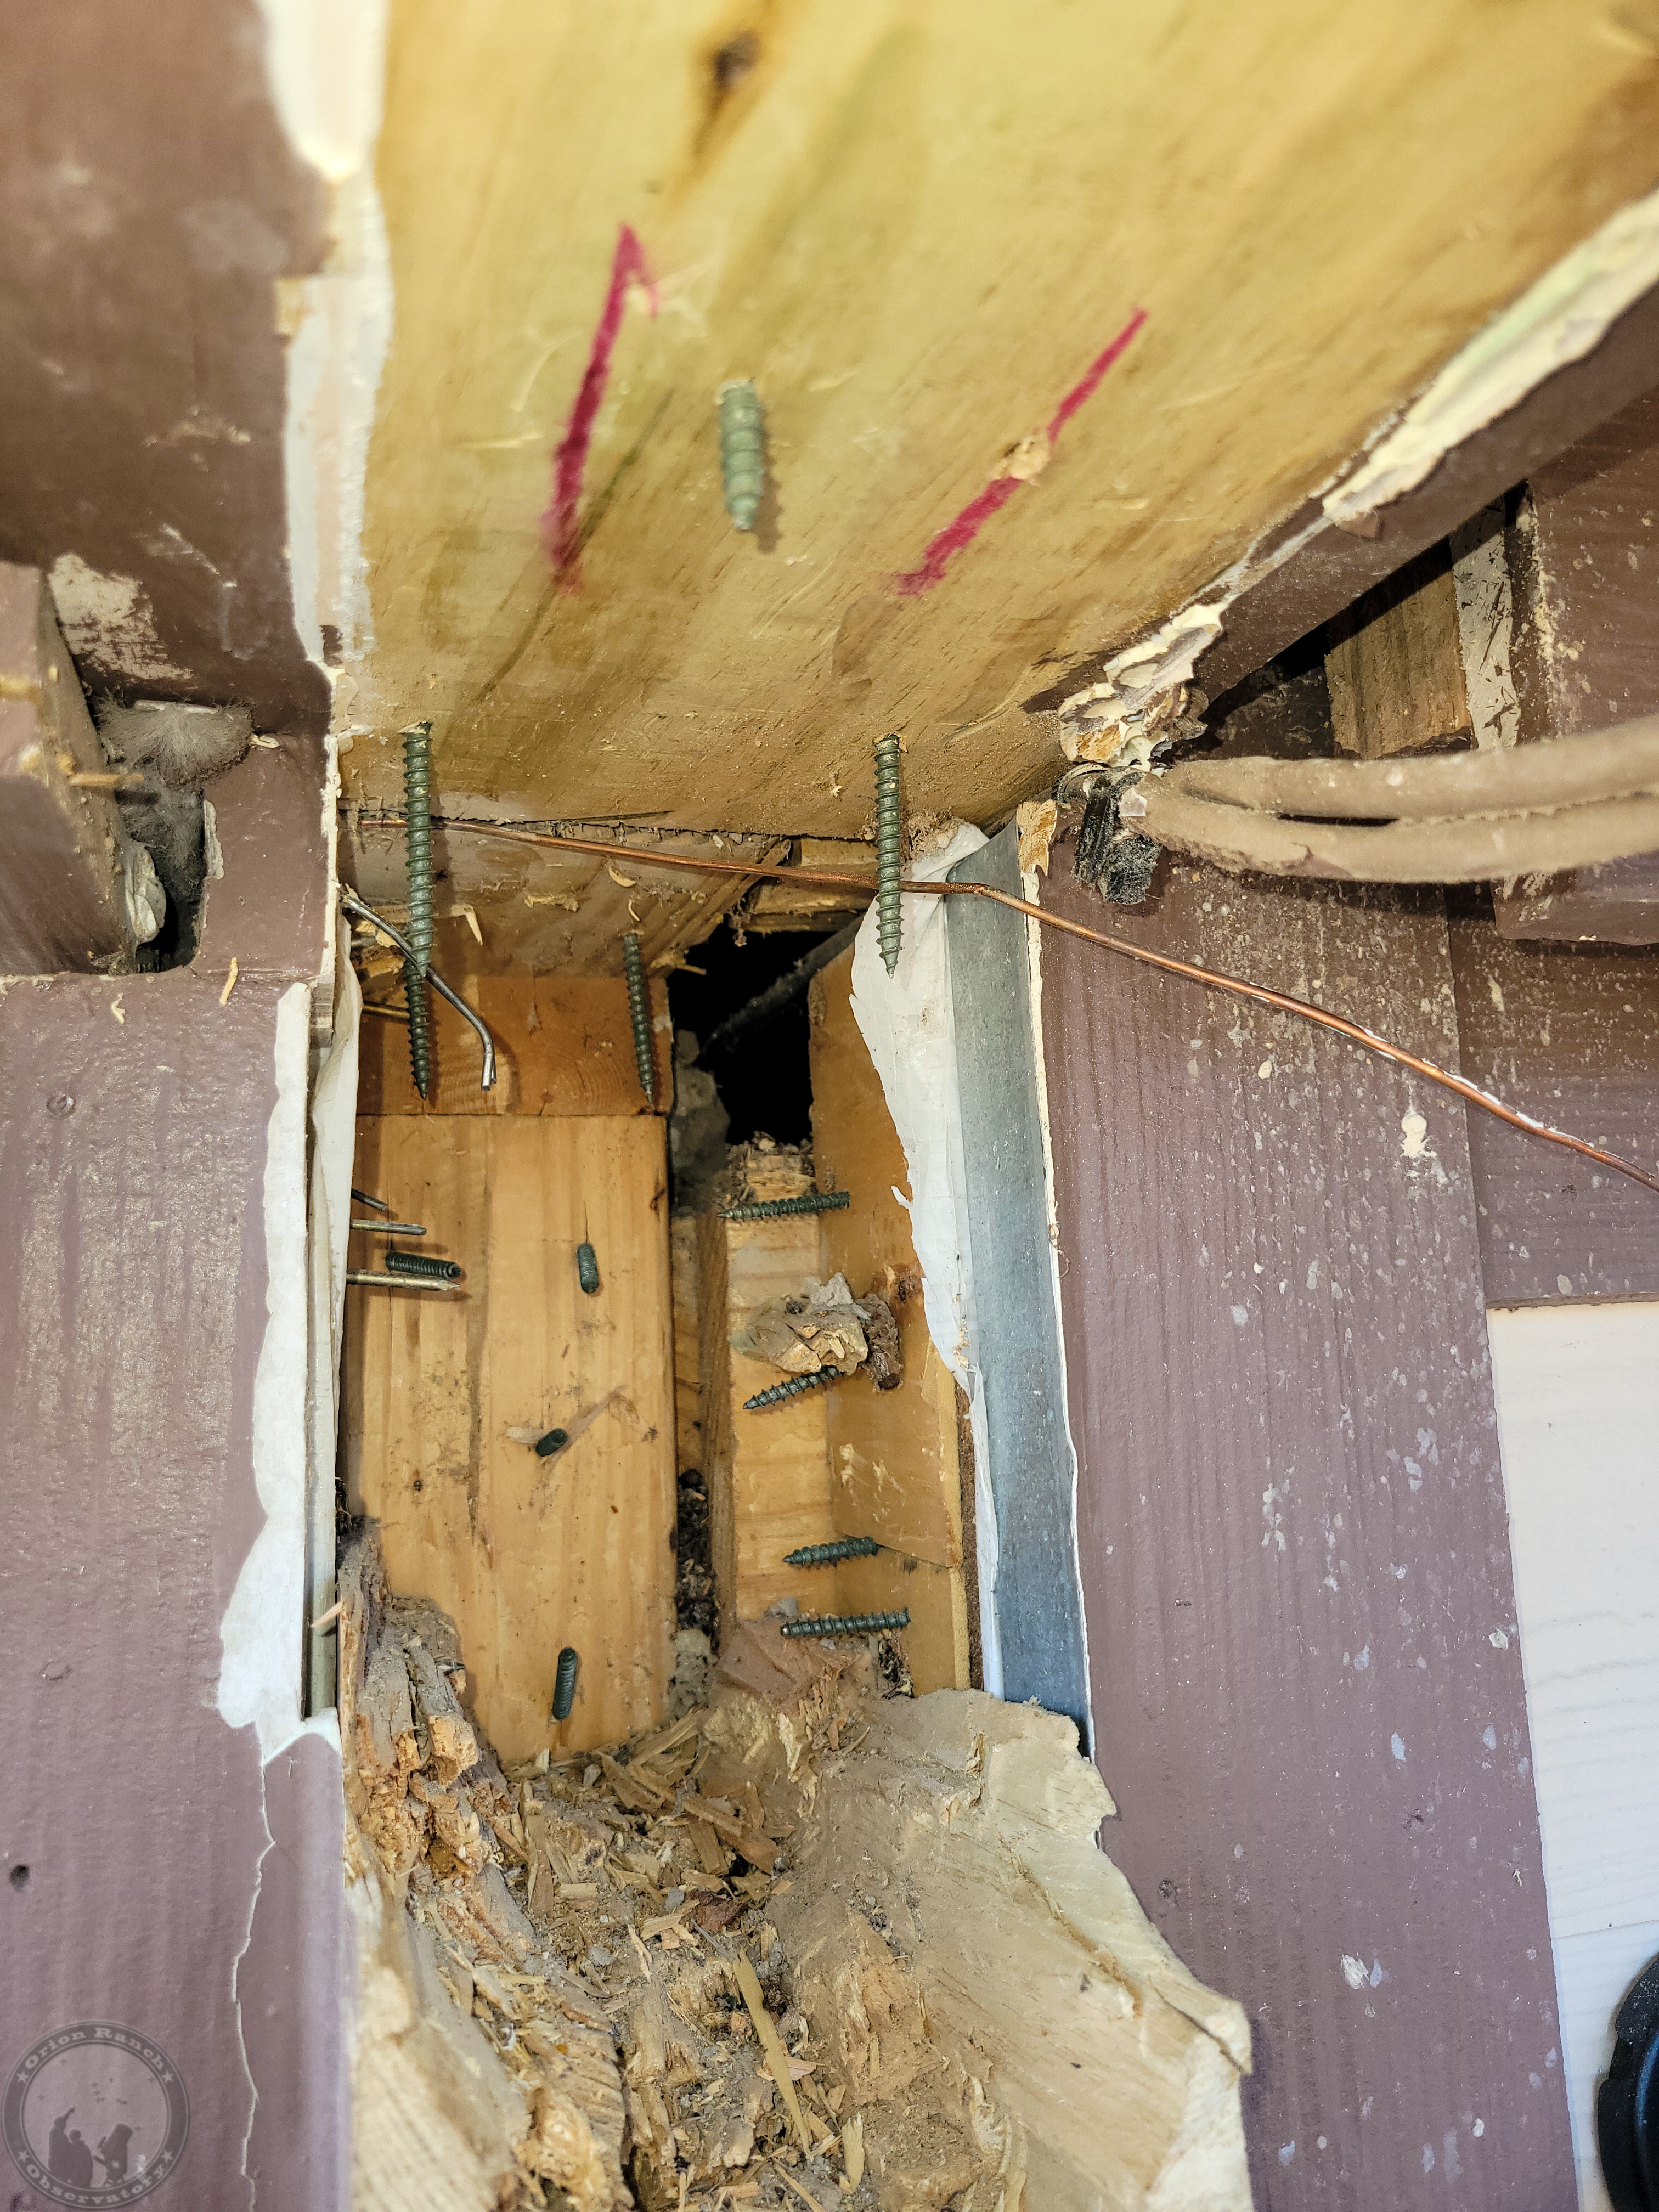
I’ll have to check the timelapse later, but this took me the better part of a day to get this rail removed without damaging everything else.  First I had to remove the big cell phone booster cable I’d run through on this side.  The other one with the small RG cables and ground wire will be even harder to avoid damage.  Still, after dulling two spade bits beyond use and a lot of chiseling, I finally got the entire rail out.  Need to decide if I’m going to keep that overlapping cap board or not.  Probably not.

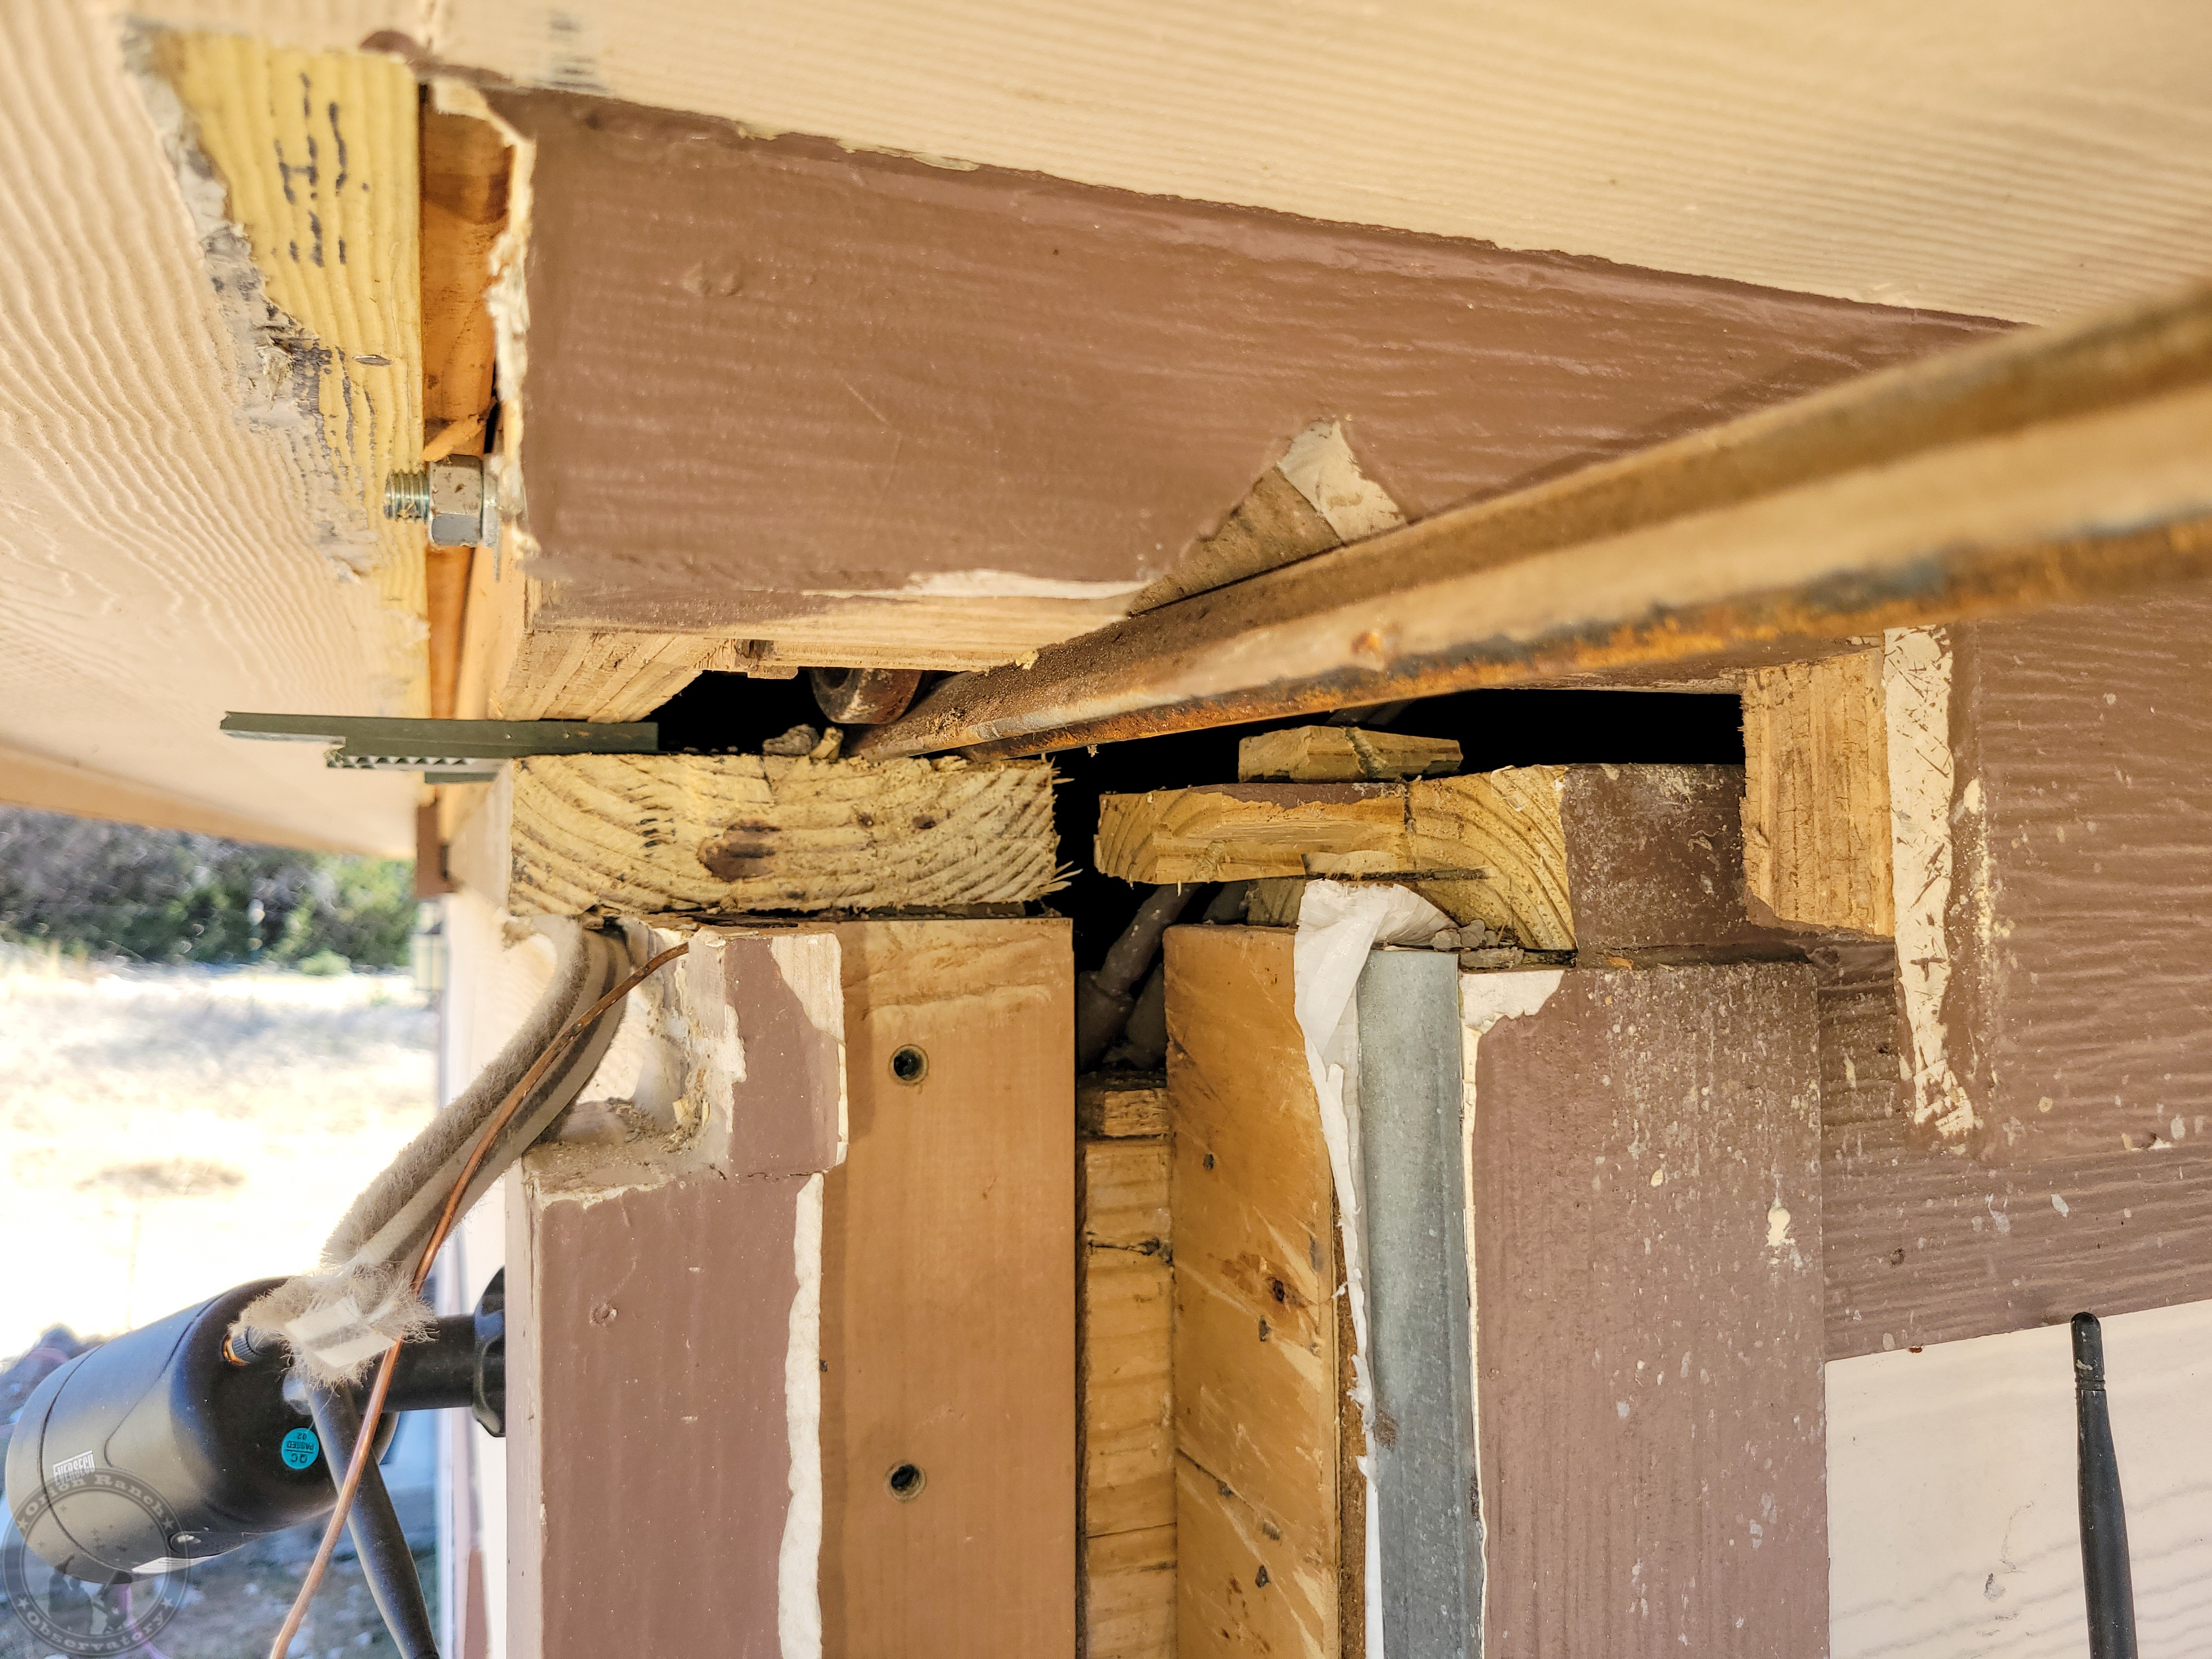
First I’d started by working to cut the bulk of the beam away from the top cap and building before giving up the night before.  The top cap is screwed into the remaining angle iron and there’s no way to remove the screws from the top, so I have to work up to them.

Eventually, I got there the next morning.

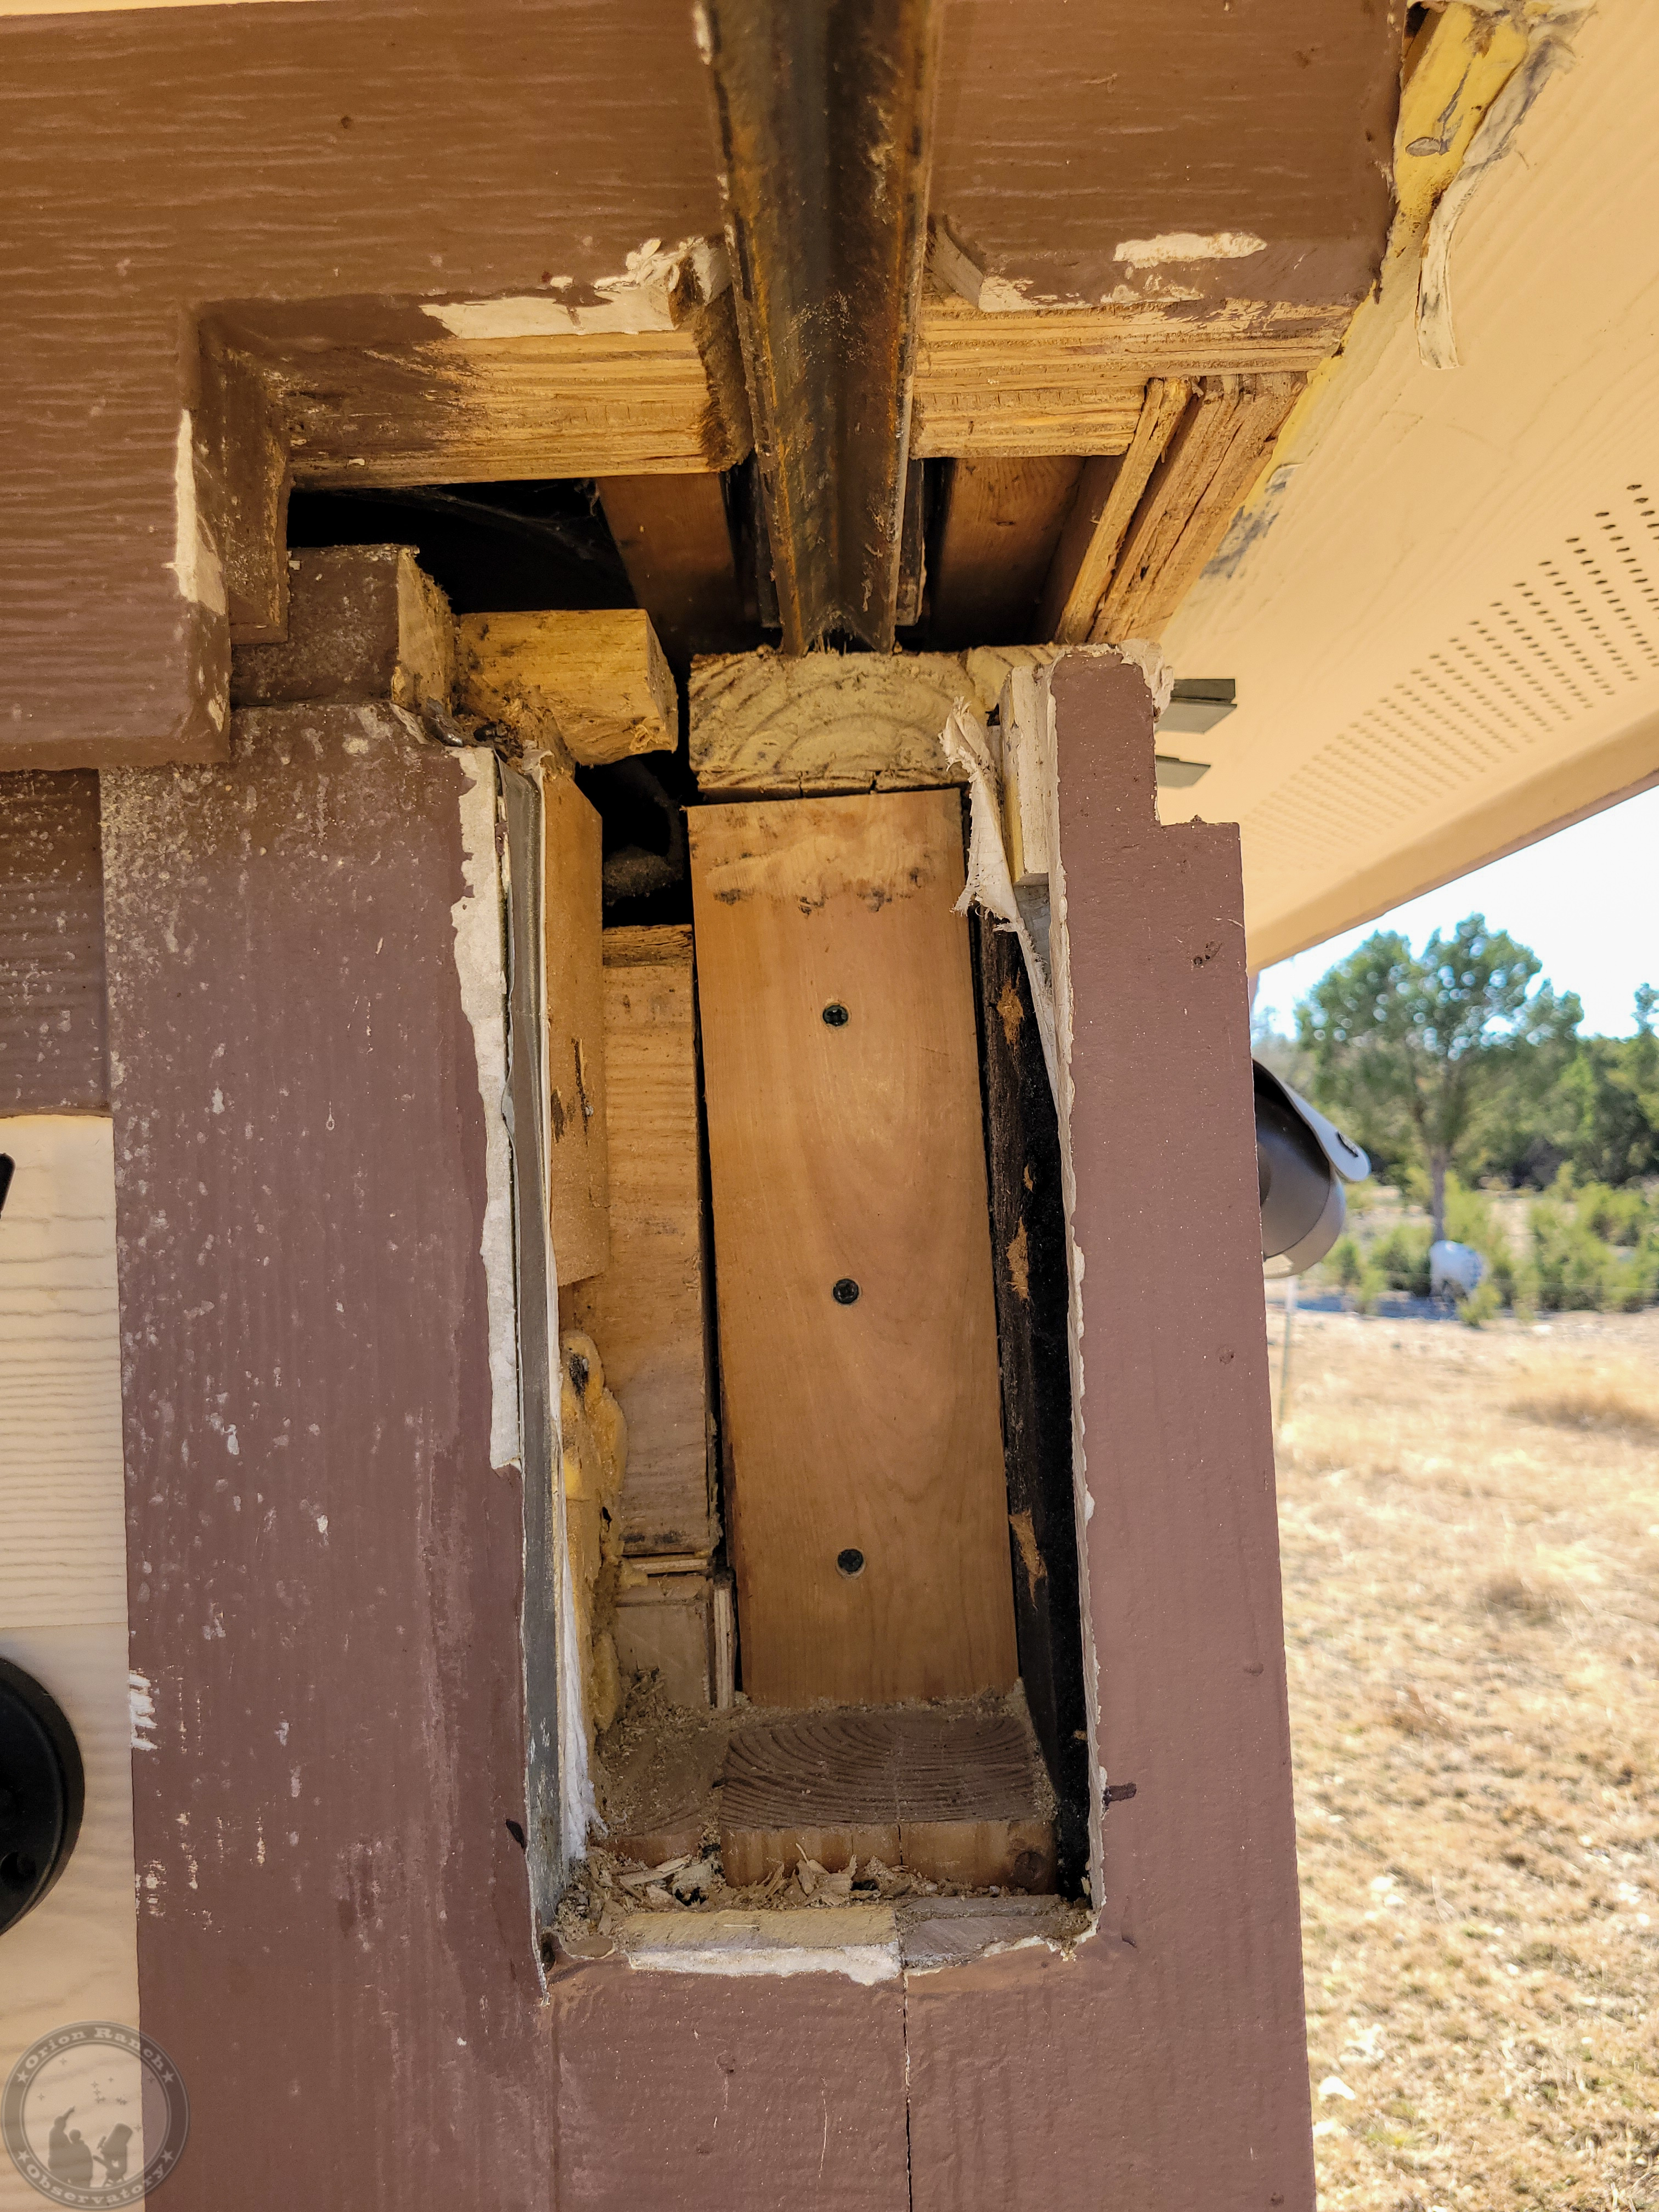
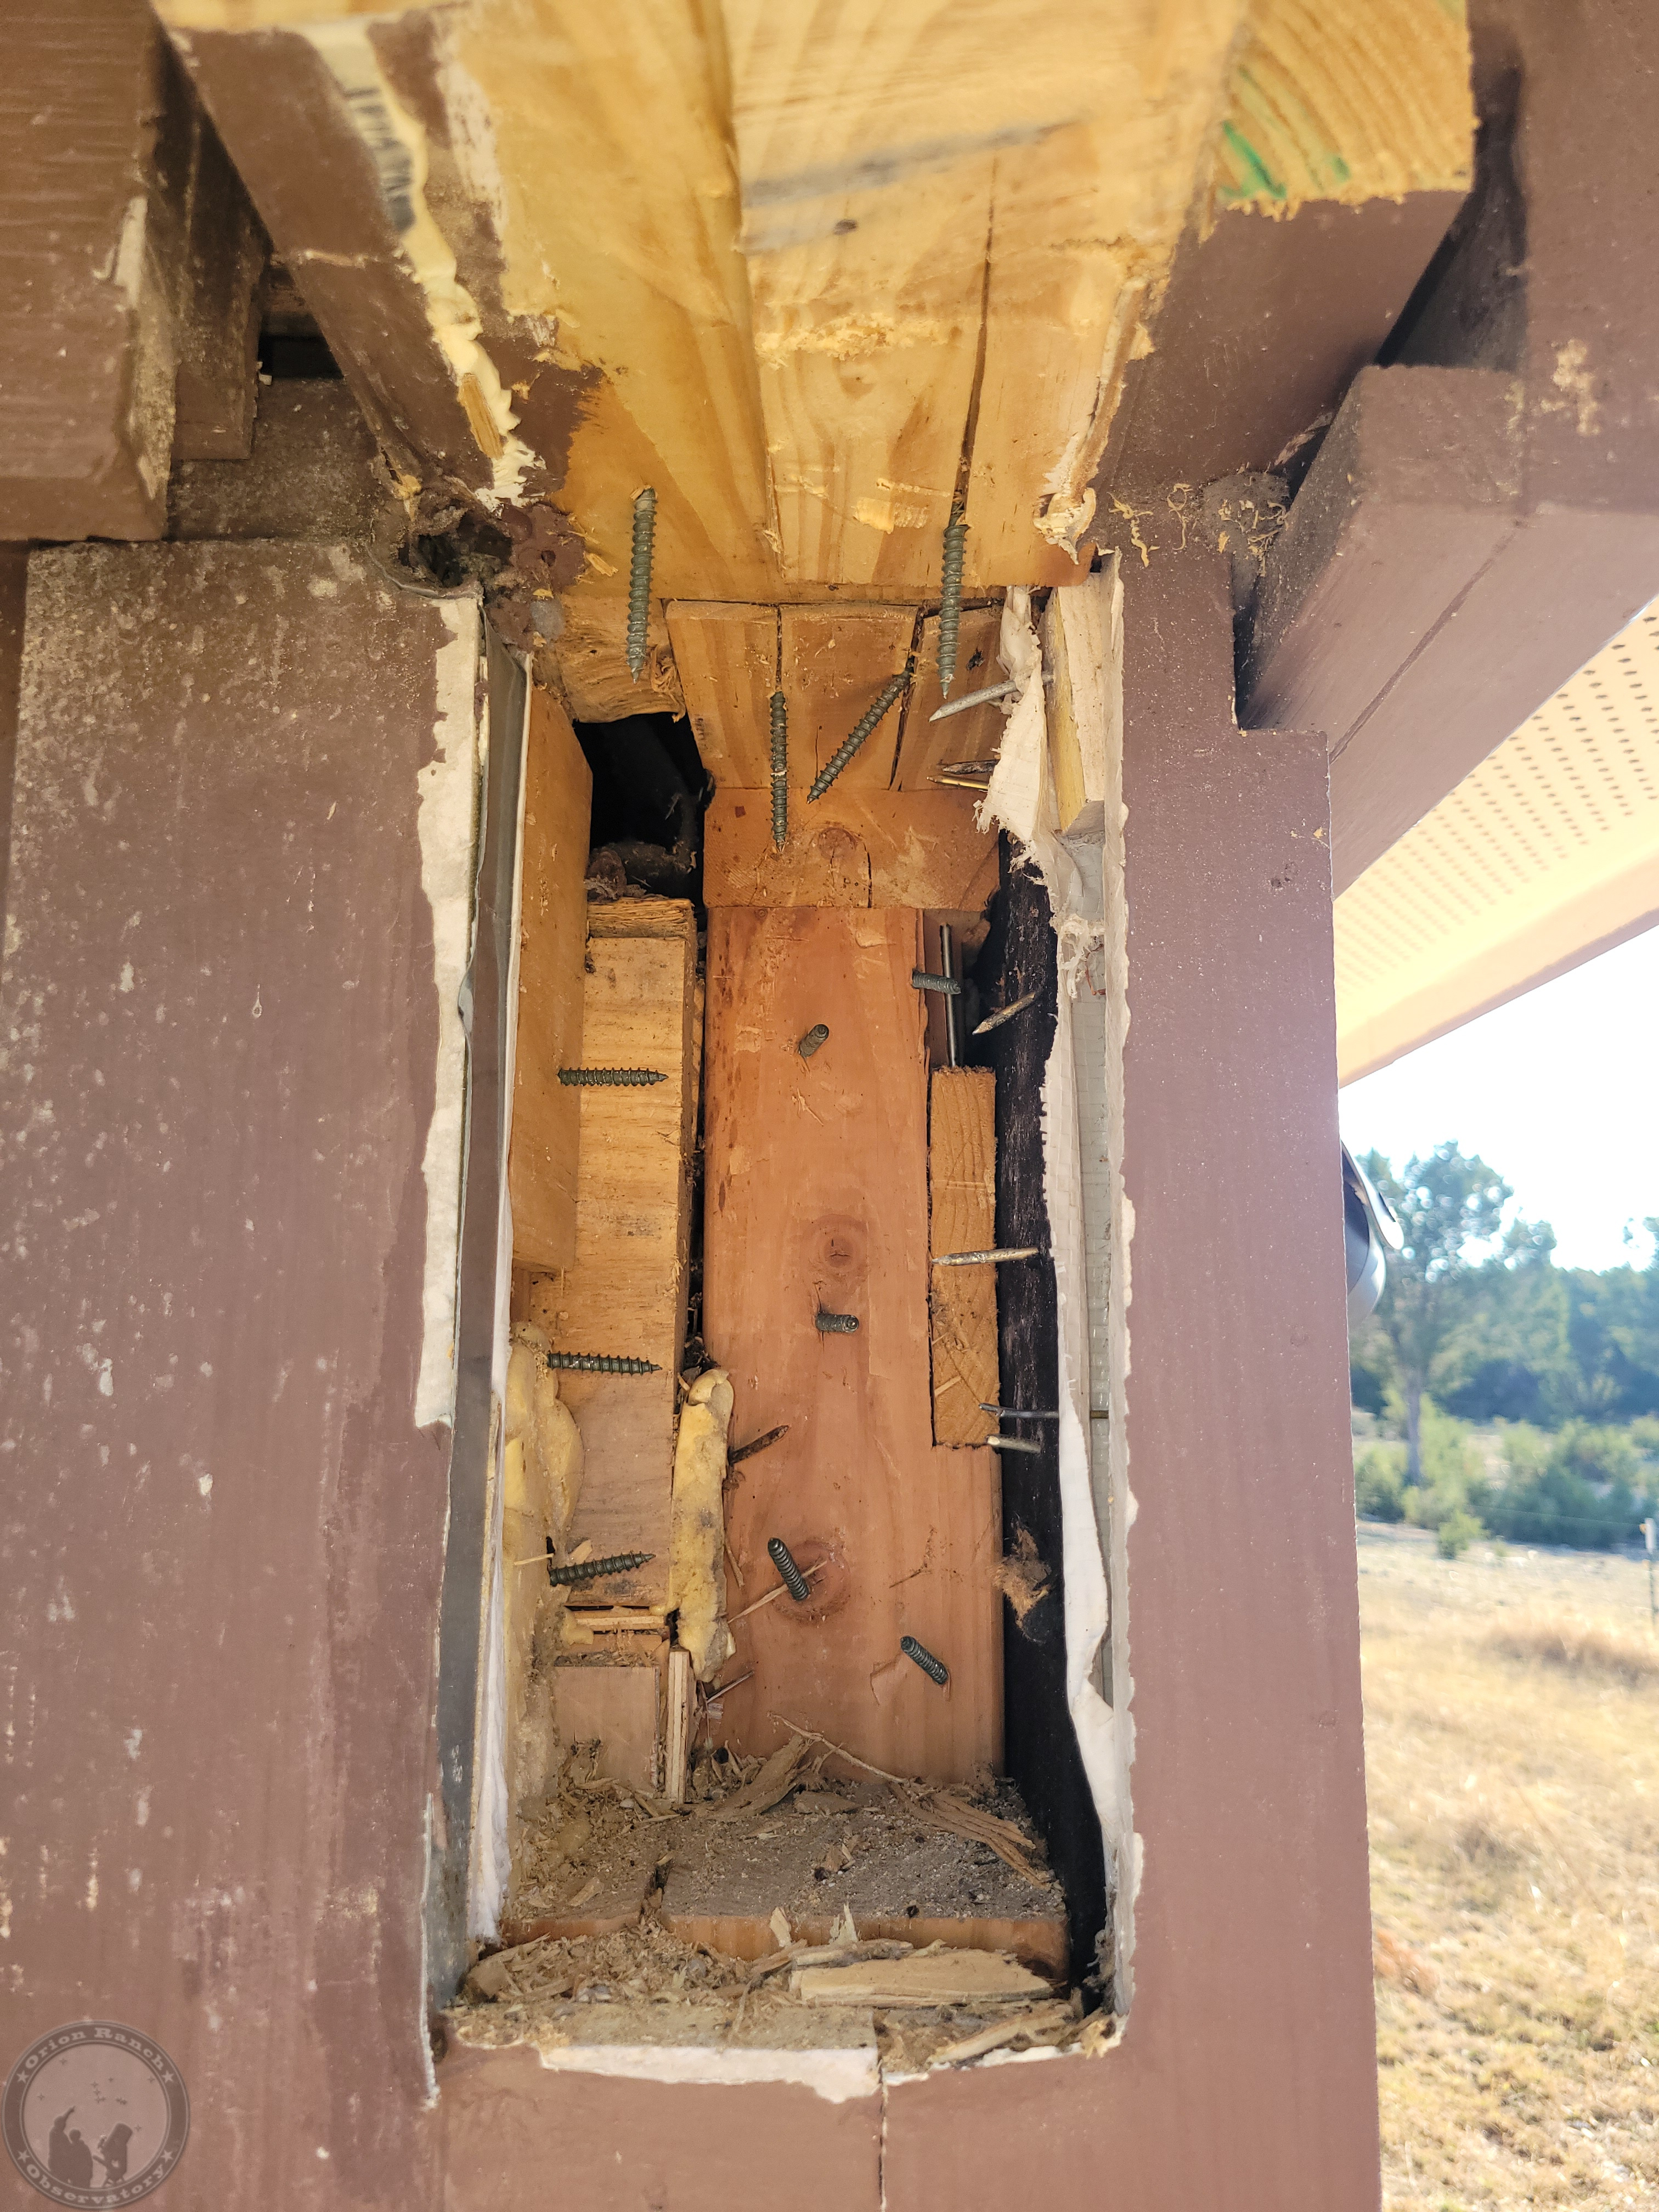
Then it was drill, chisel, drill, chisel.  Here you can see a couple of the screws holding the laminated beam together (along with the large amount of construction adhesive!).  So much for the first drill bit!

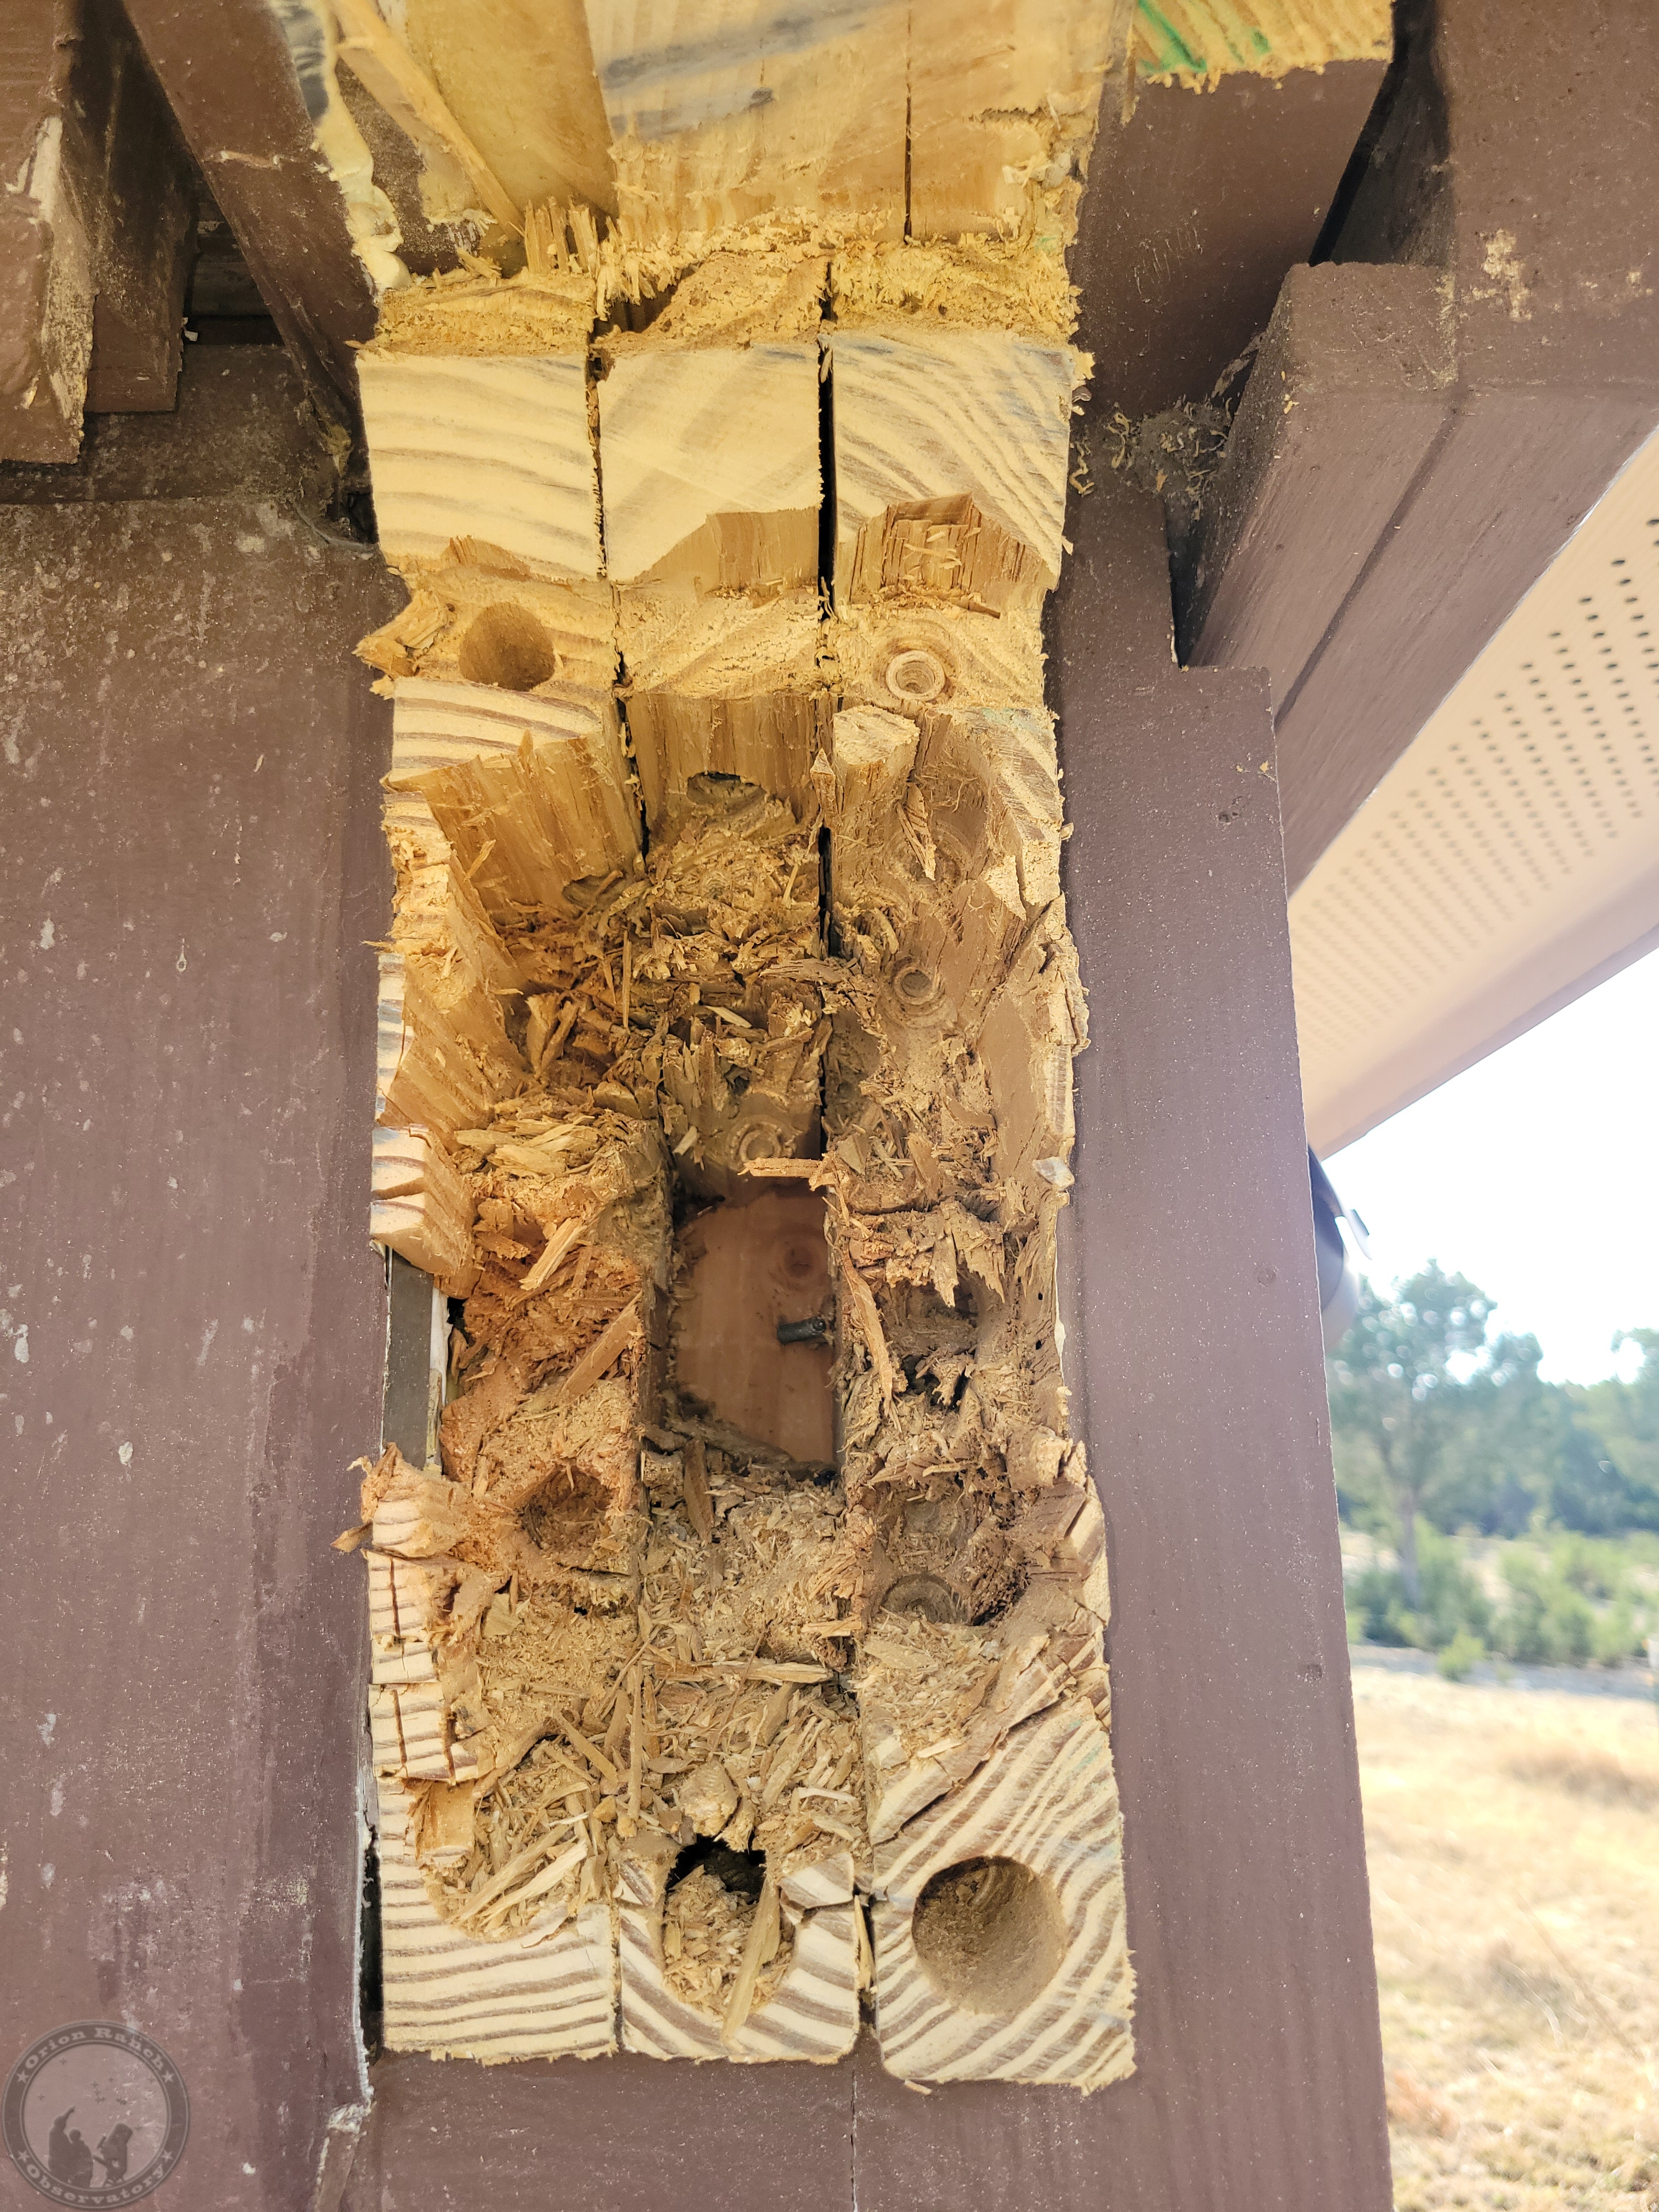
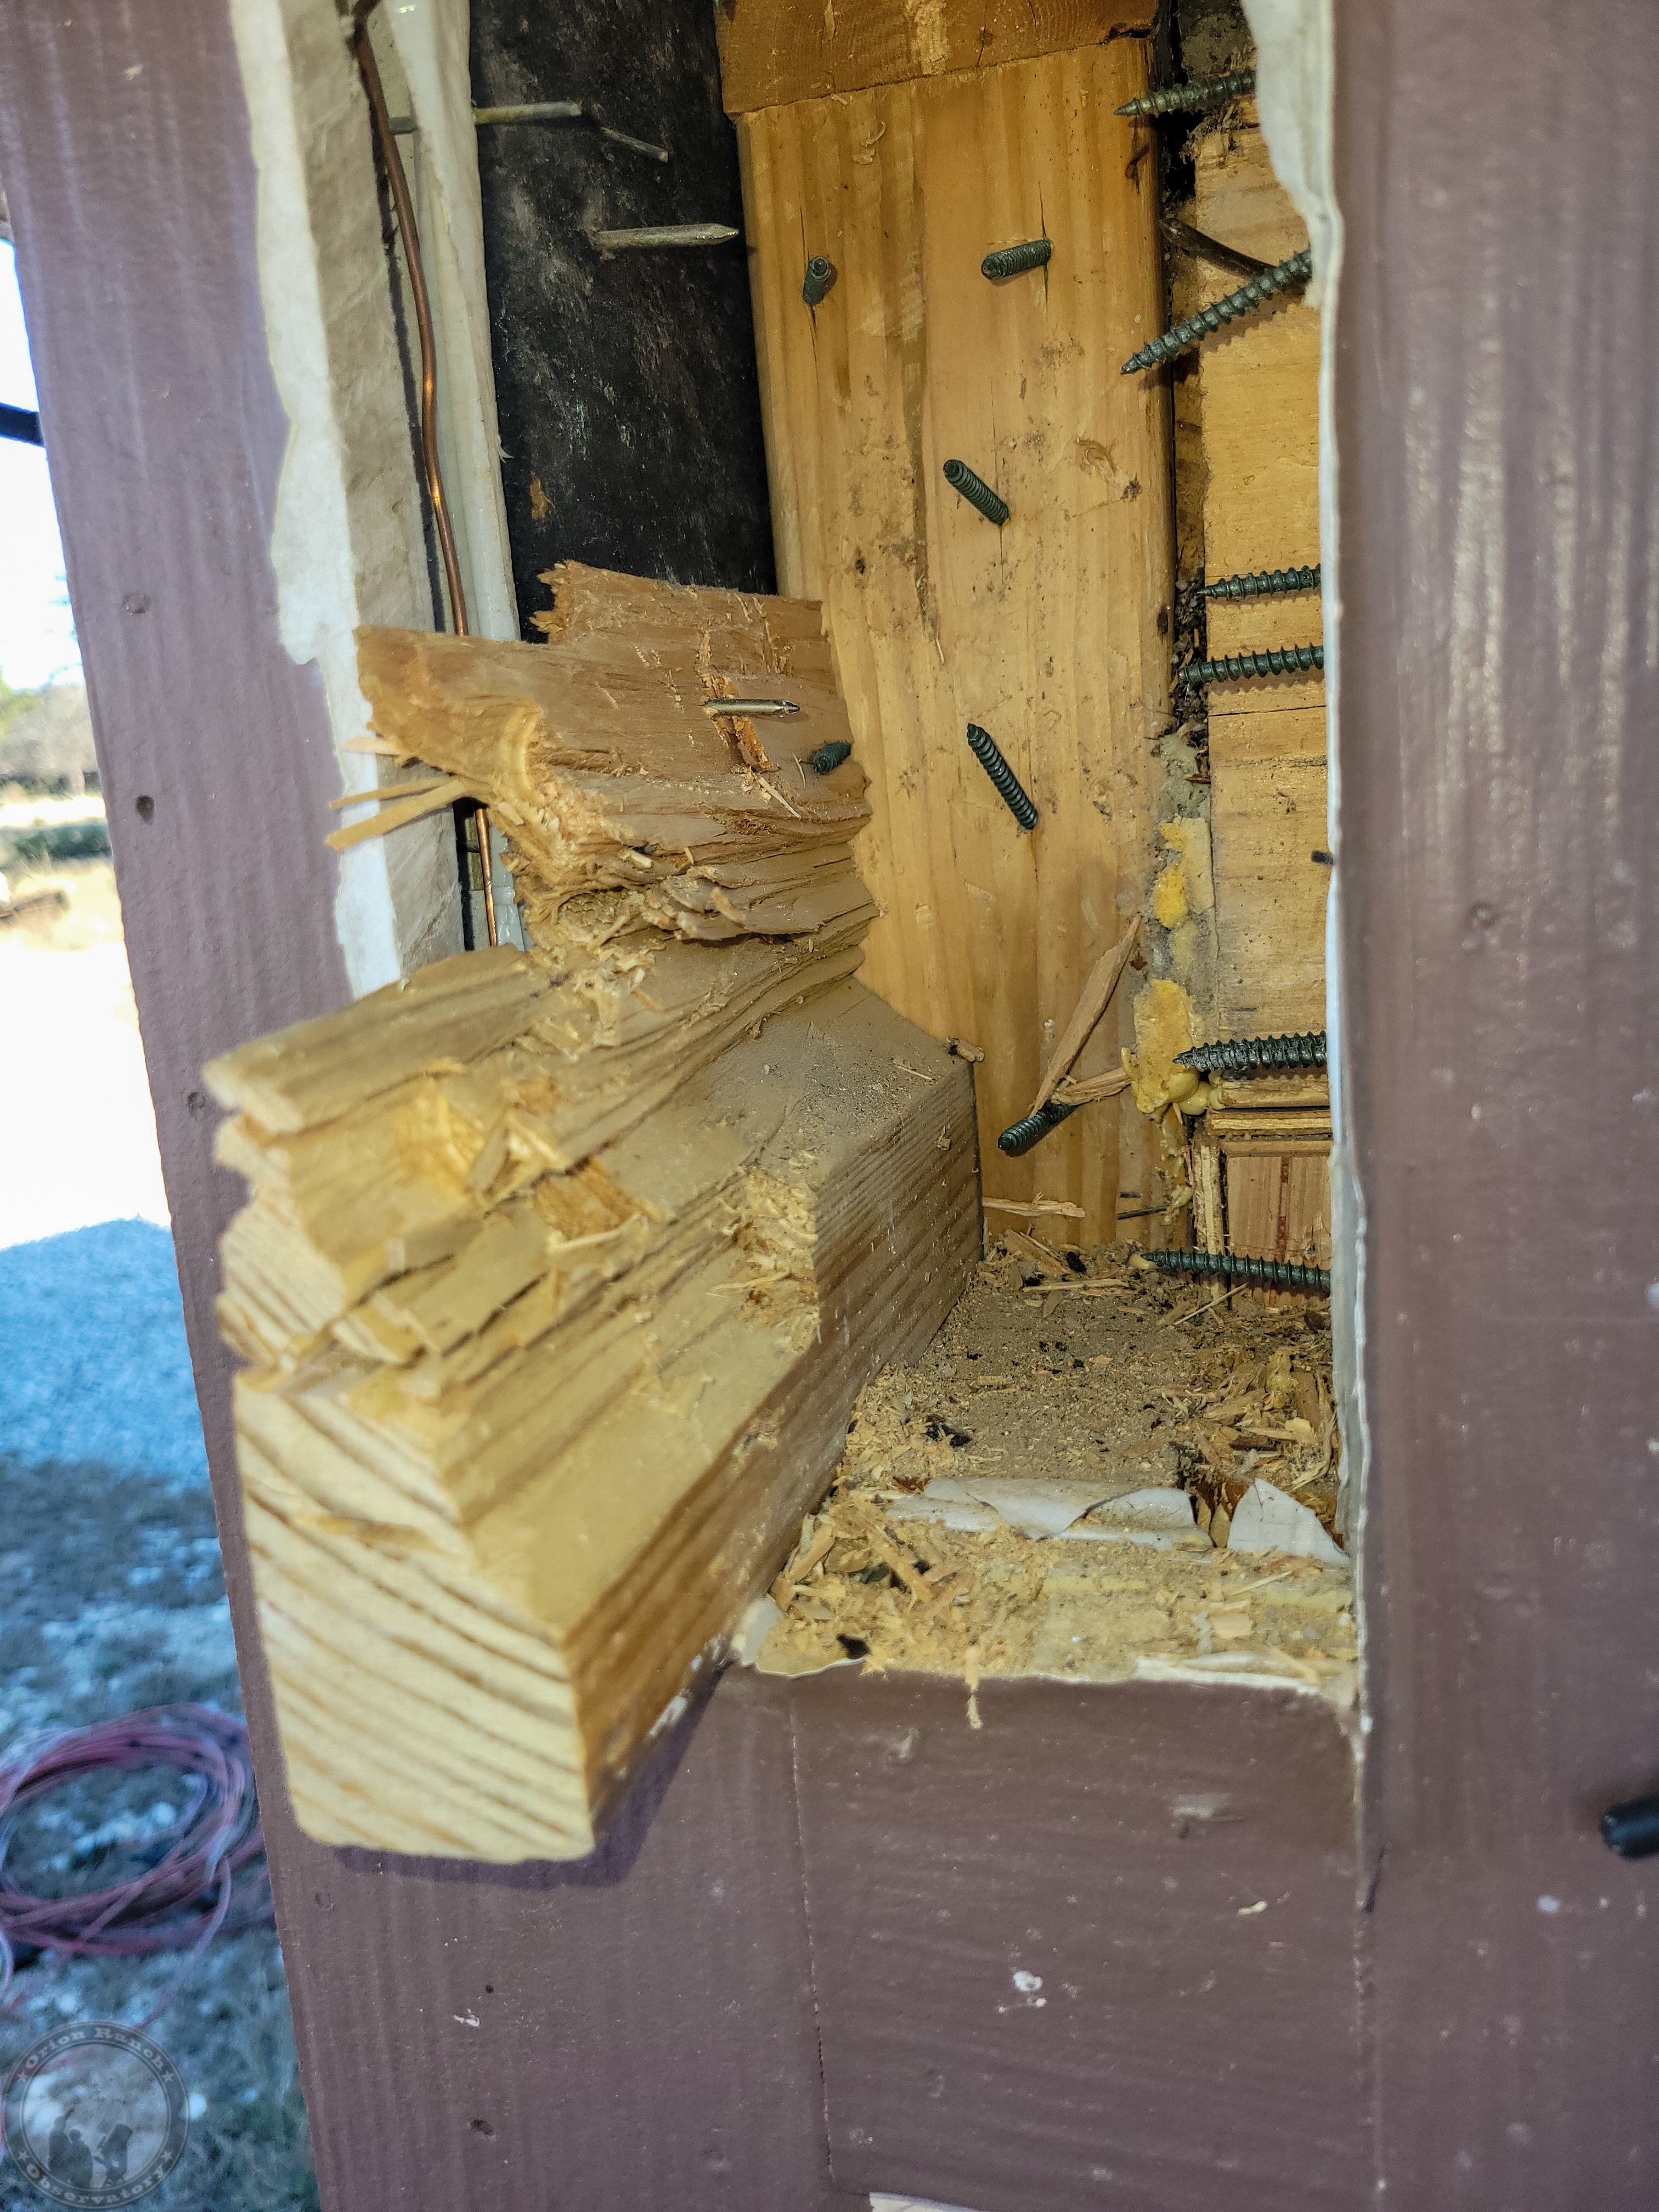
Once I got down to the back of the beam at one point, it started going a bit easier, although that outer/right 2×12 was EXTREMELY tough!  Hard to make much progress on it with the chisel.

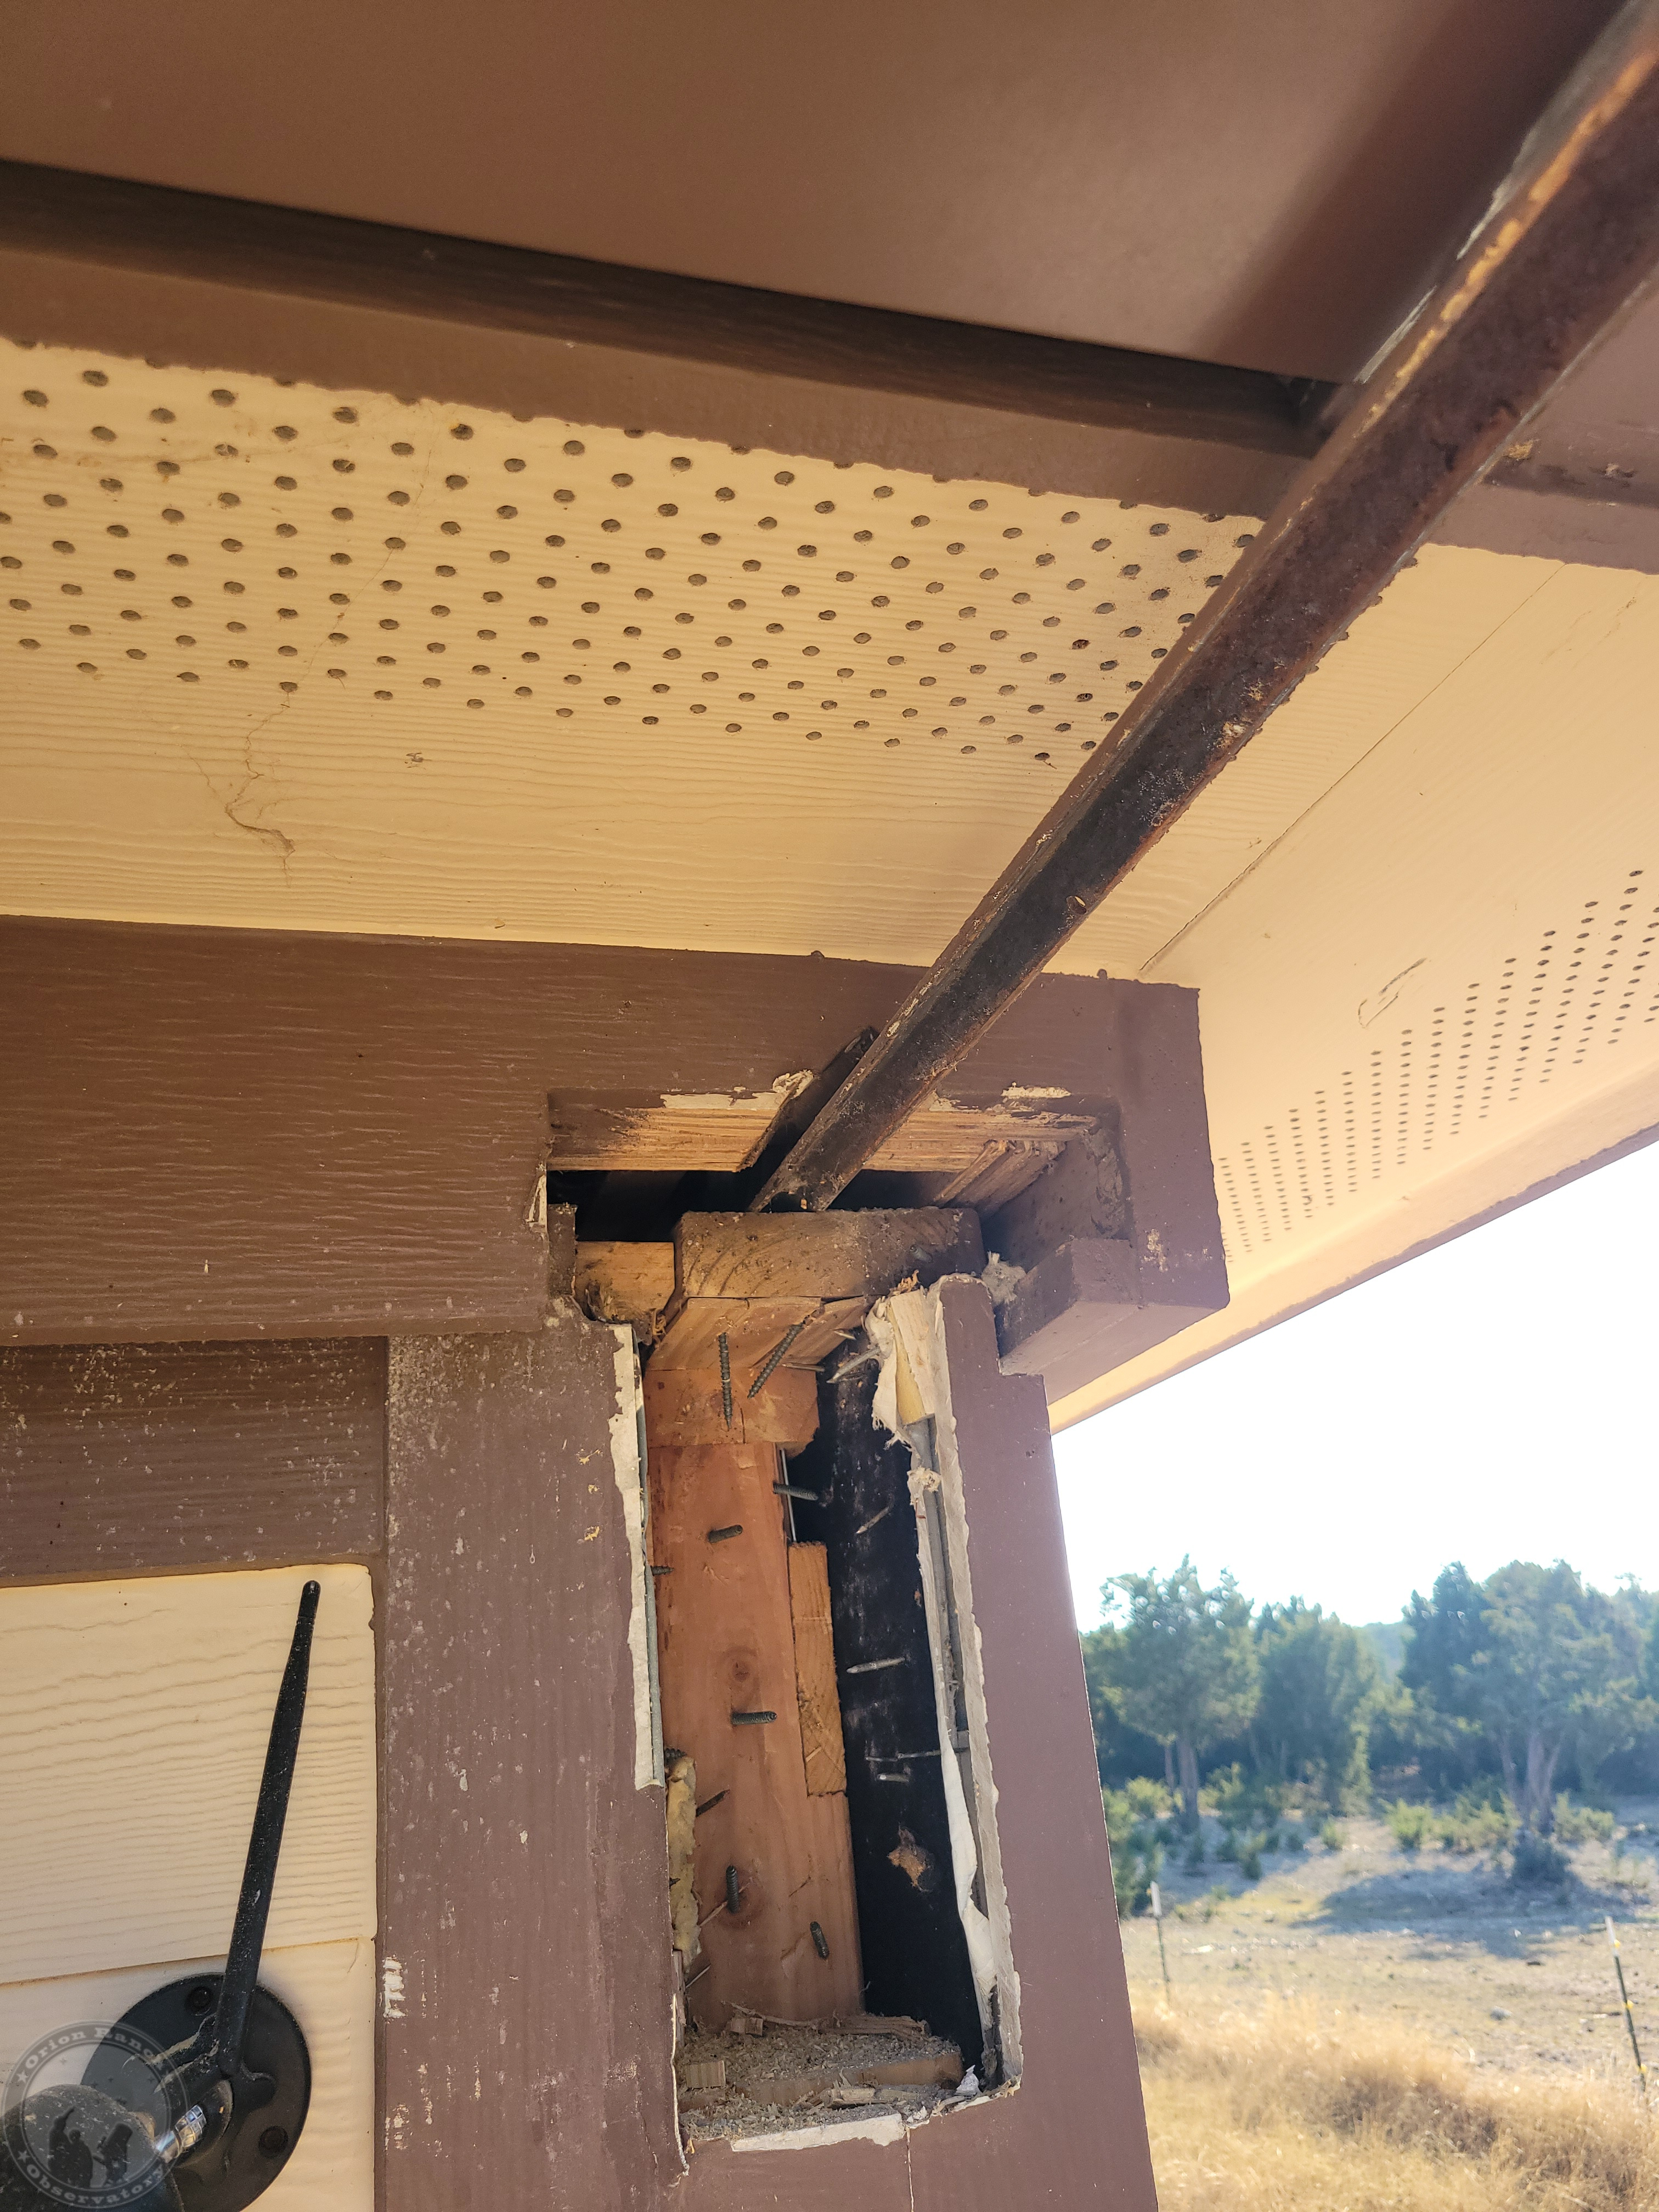
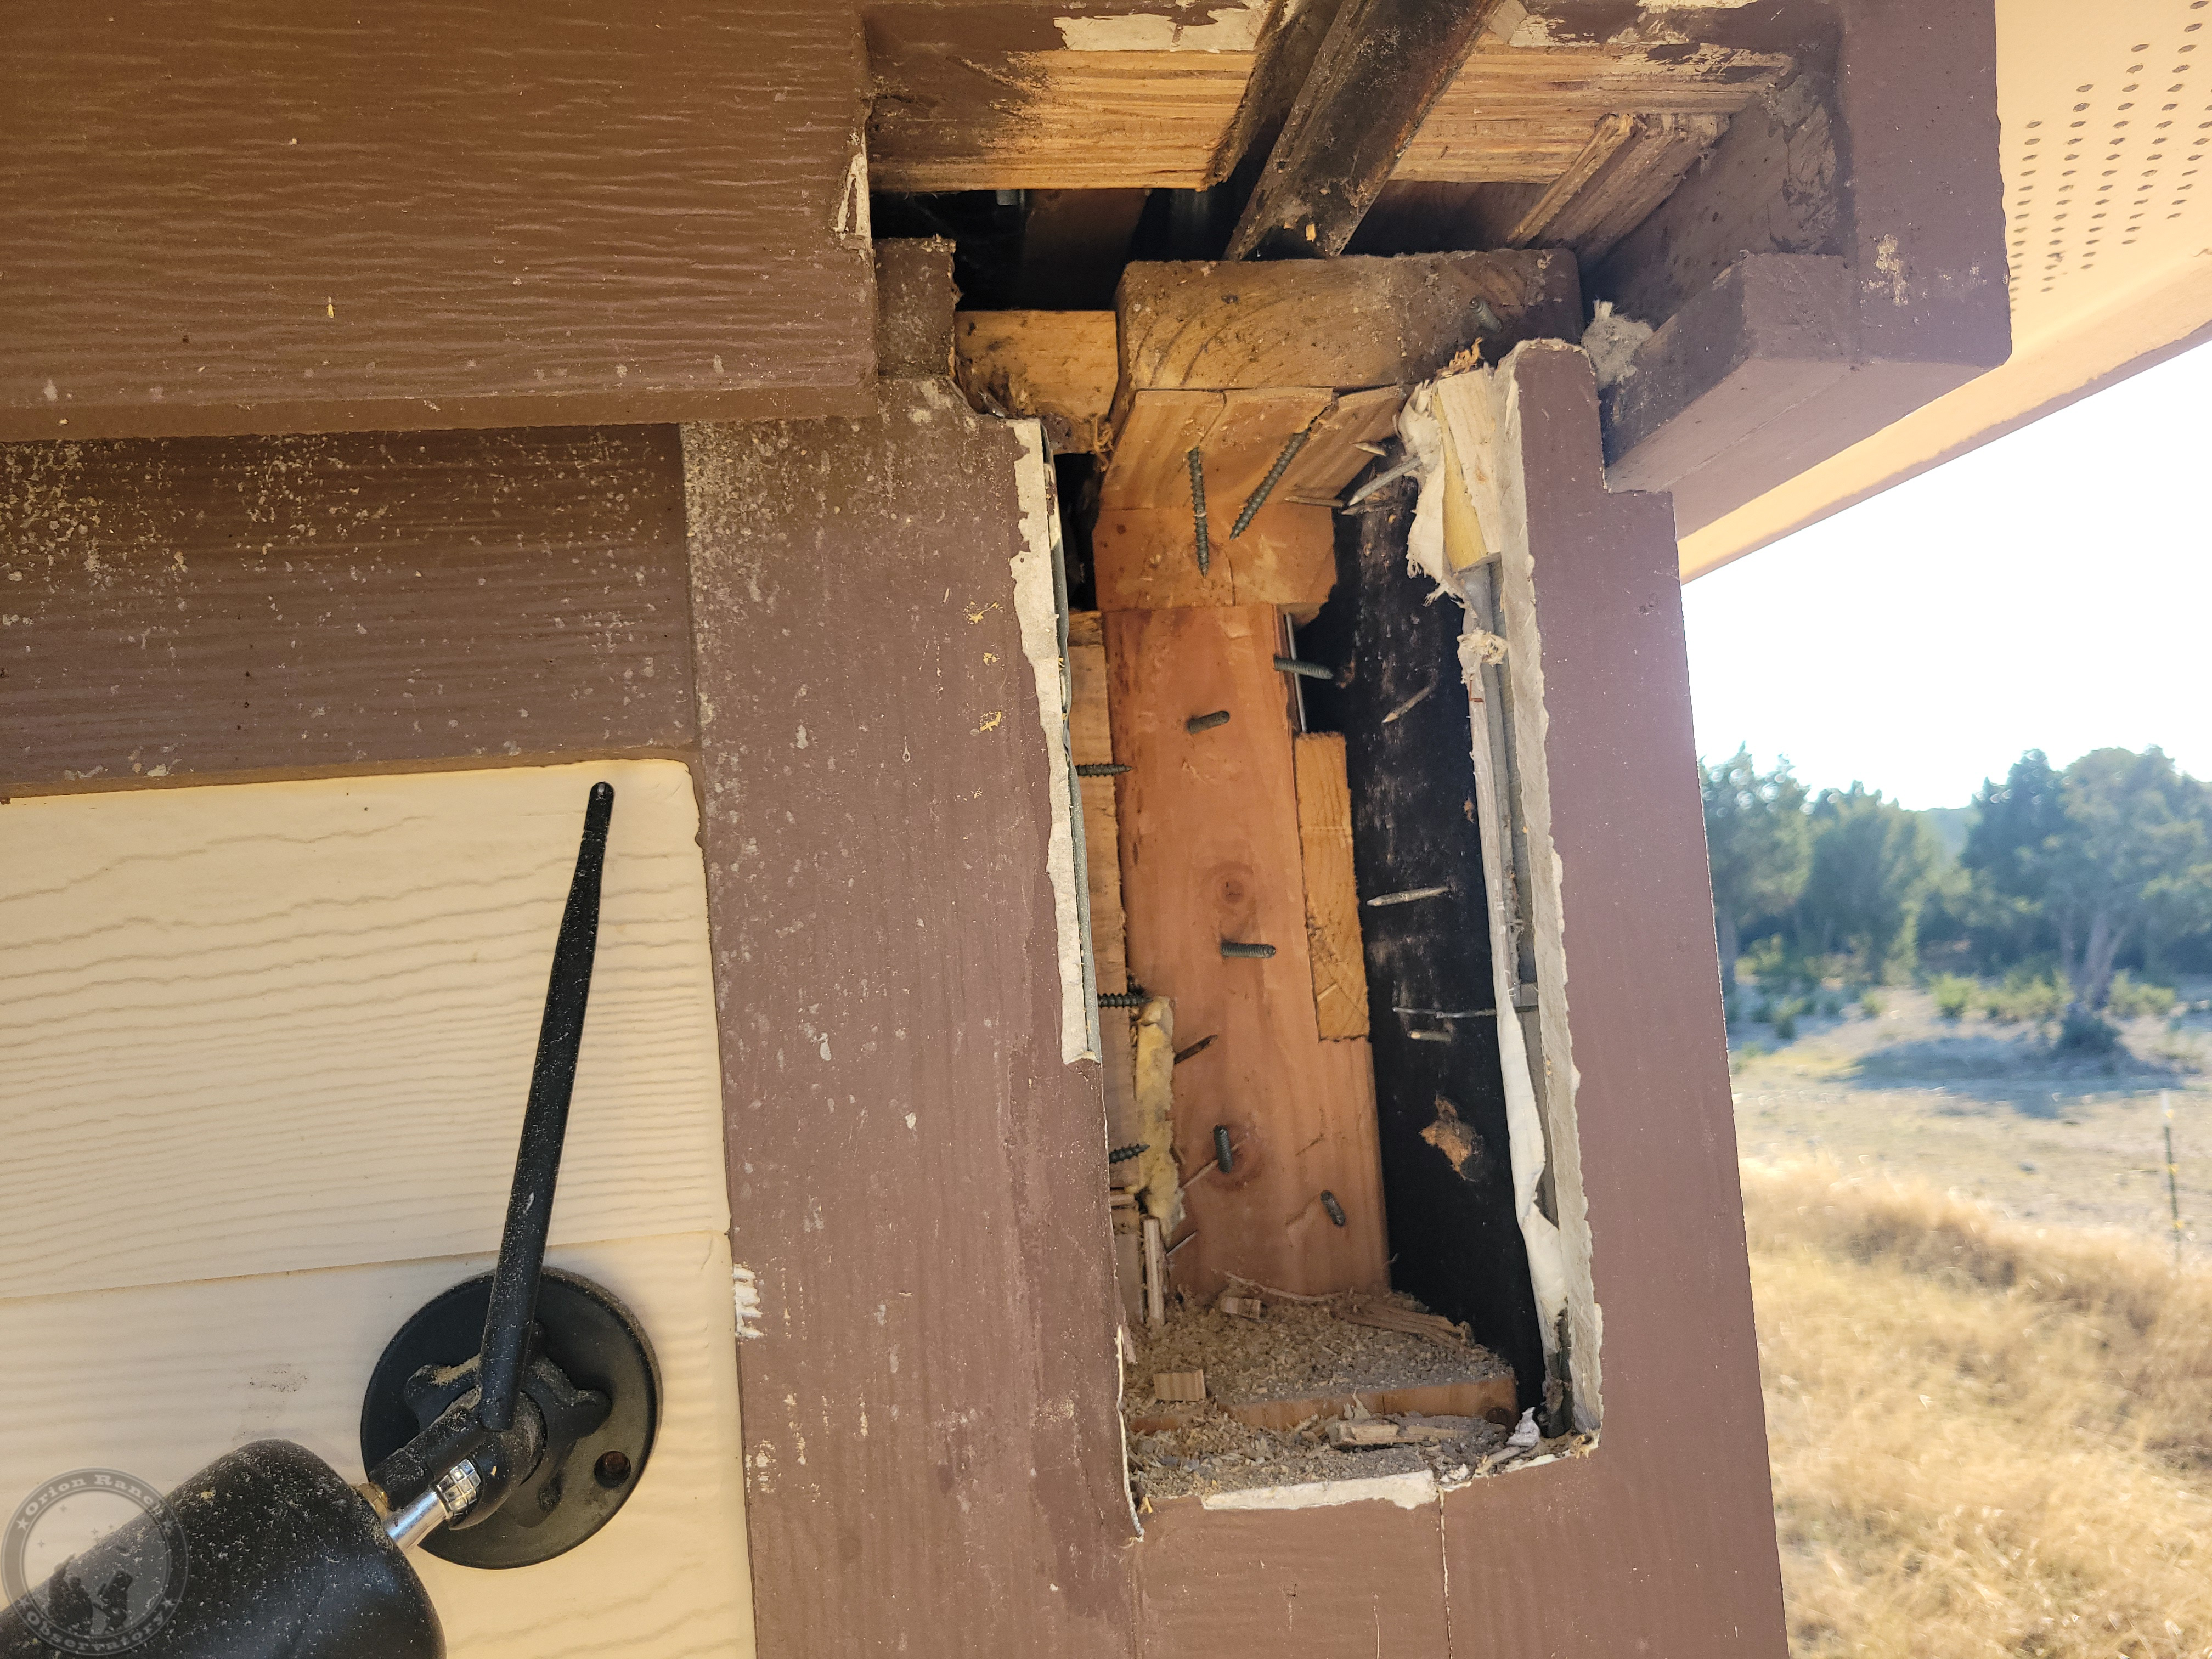
And of course there are screws and nails into this from all sides.

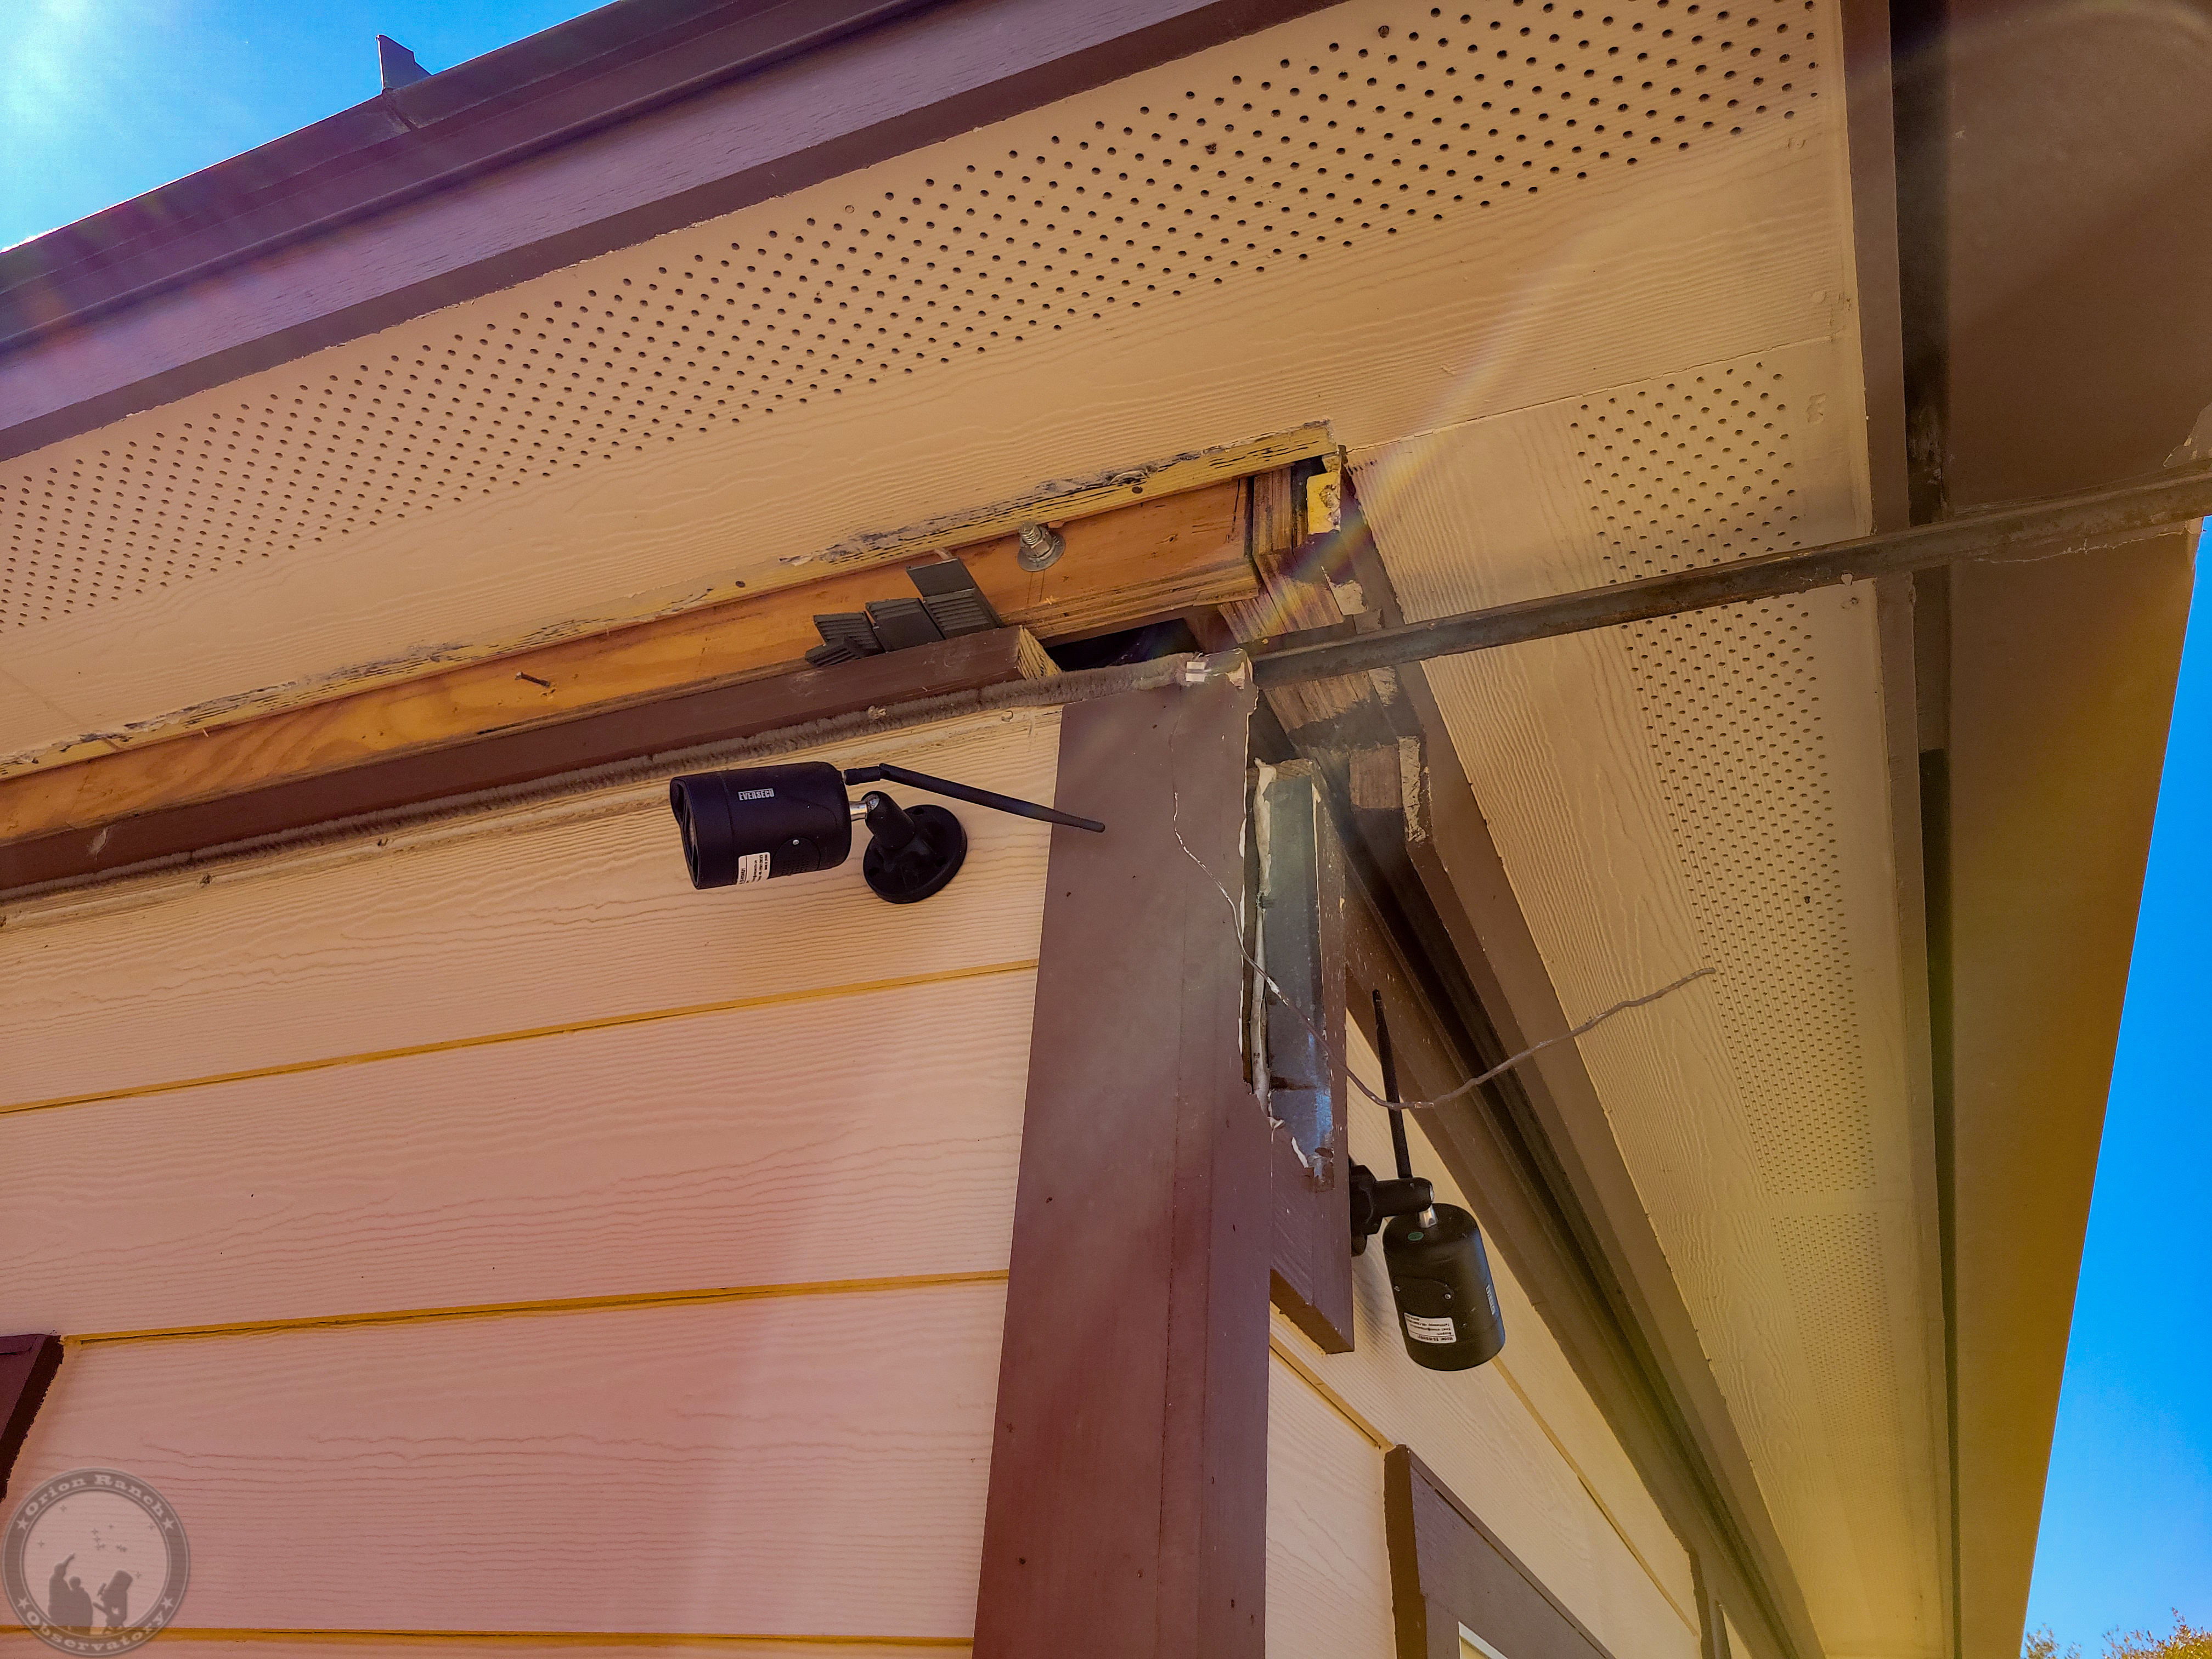
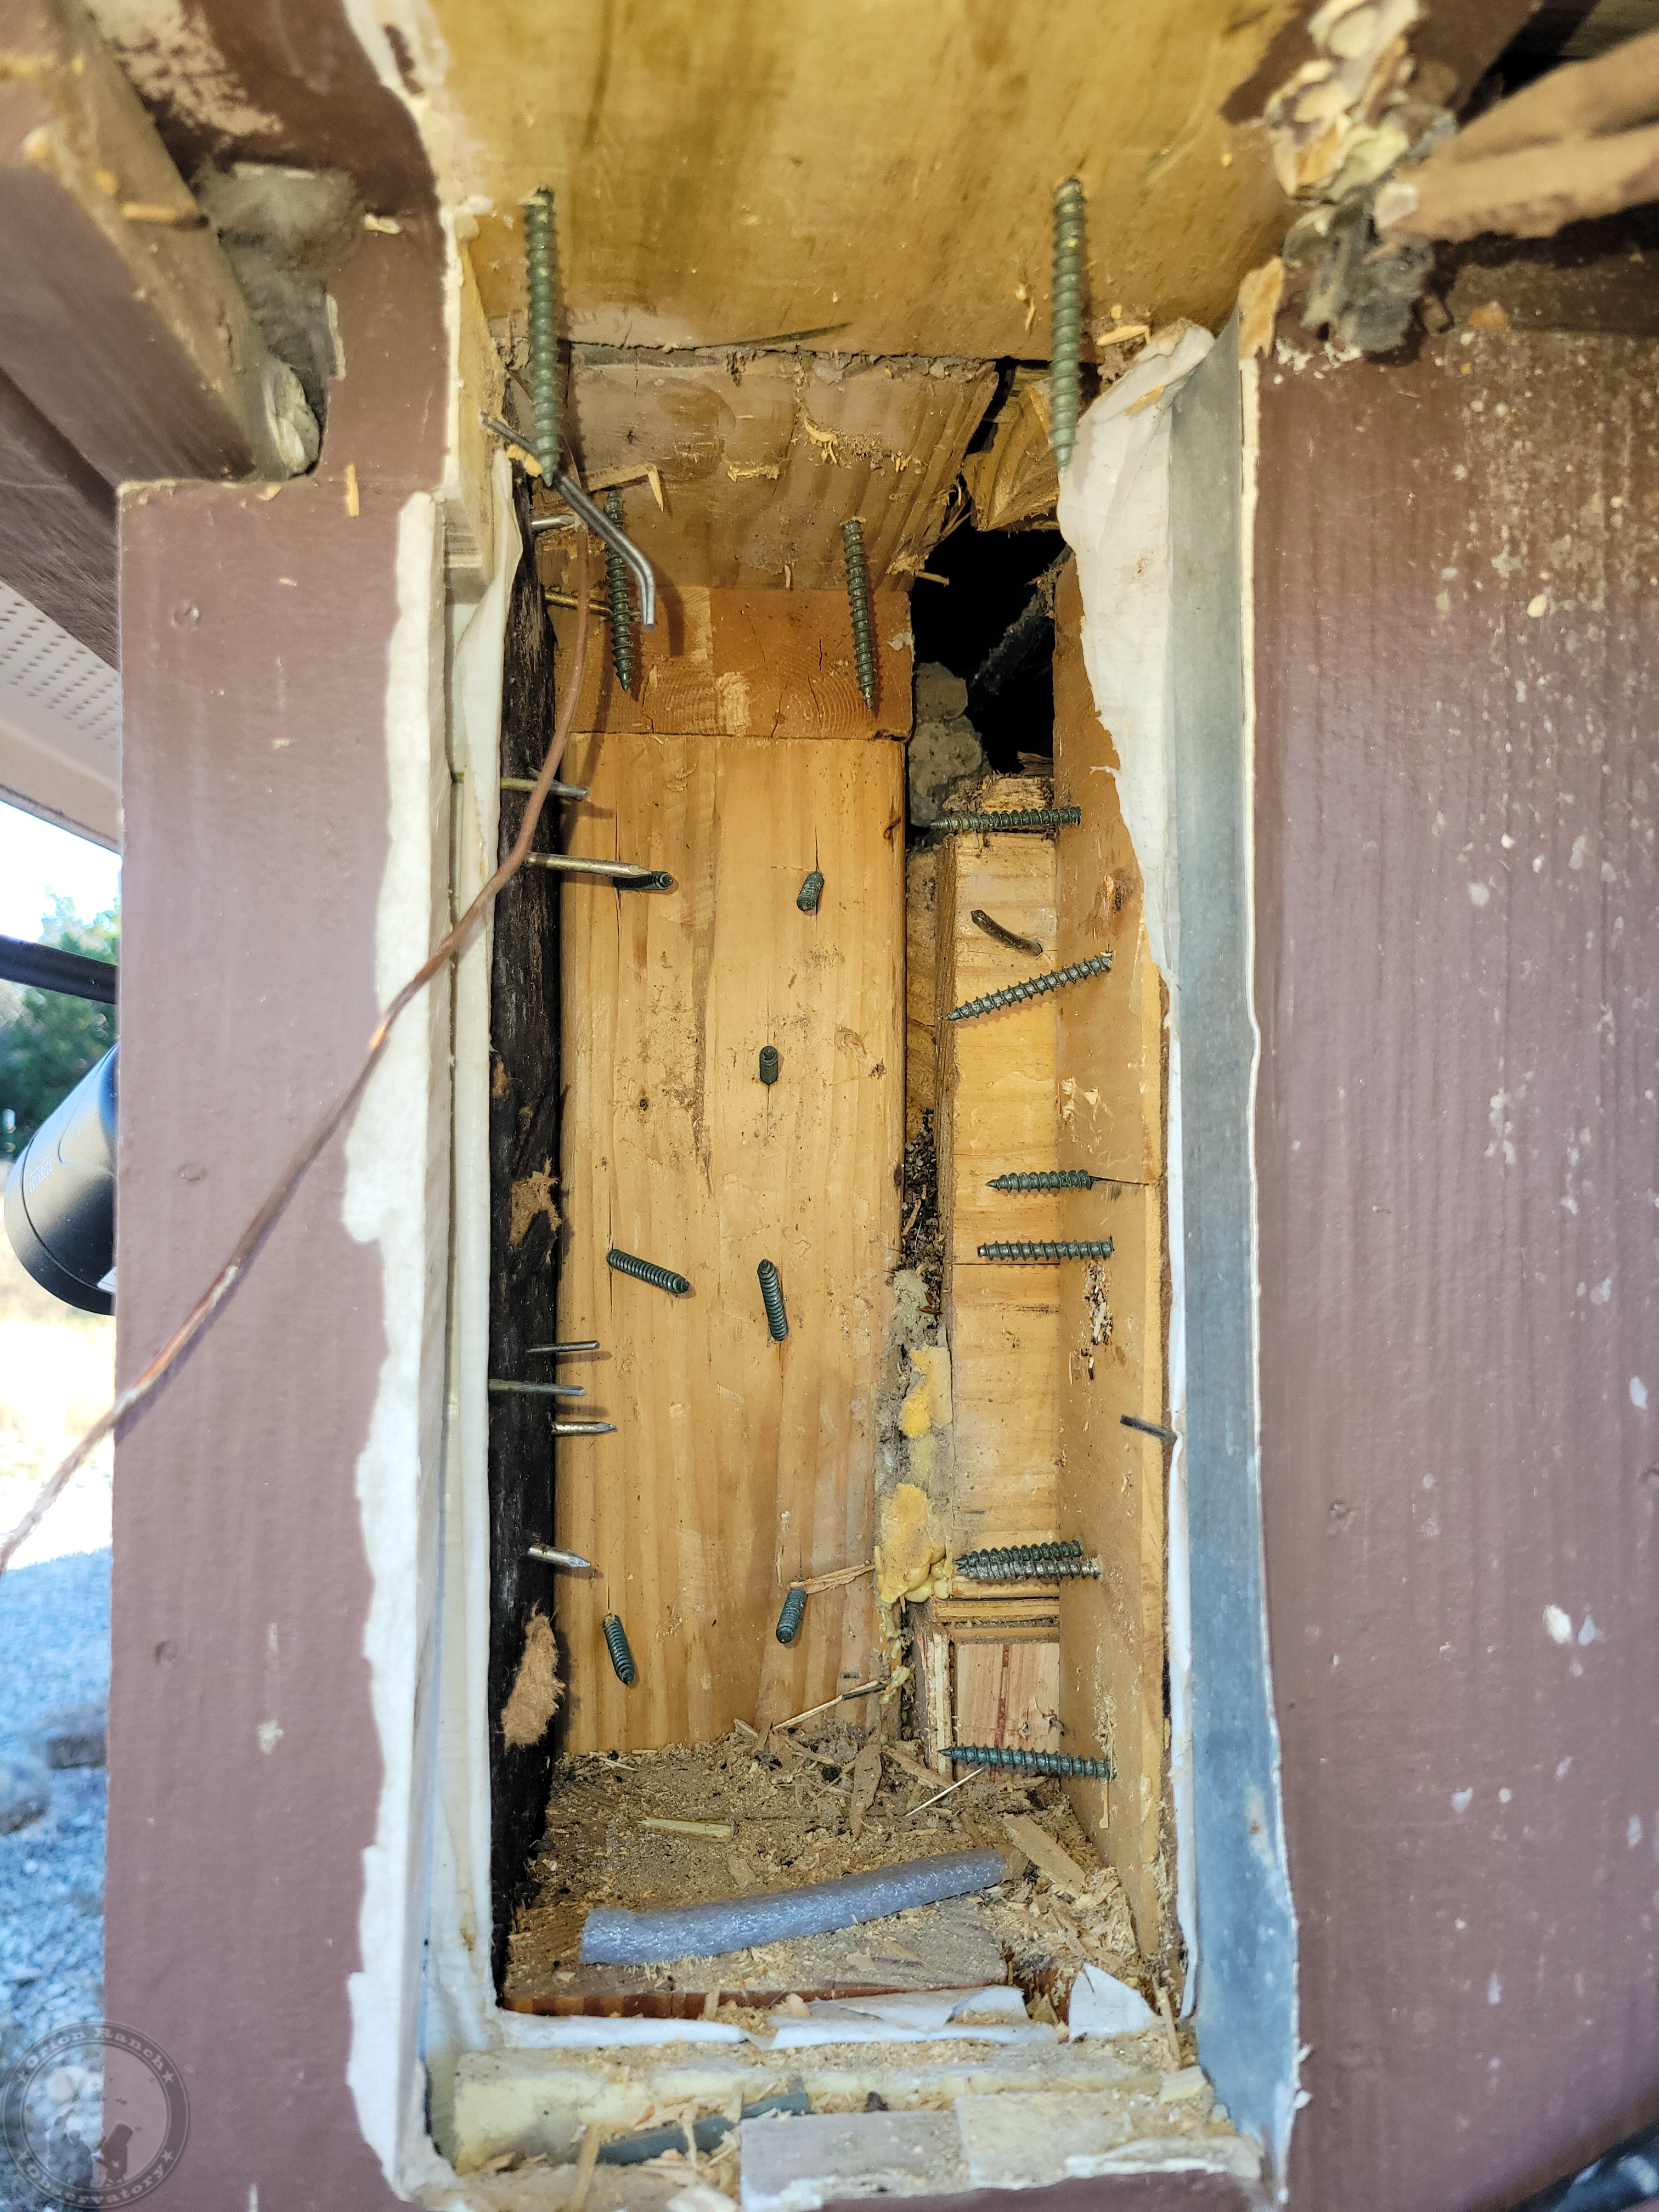
Eventually, I got the entire laminated beam out, but still needed to get the top cap loose from the four screws holding it to the angle iron.  You can see all of the nails that hold the insulating sheathing, siding, and trim to the beam.  I’ll have to cut those off and re-nail everything into a spacer board I insert after the metal beam is in place.

After lots of careful sawing around where the screws were from underneath, I eventually was able to pry the board loose without messing up the angle iron.

If this weather improves, tomorrow I’ll be out there working on the other side!  Hopefully it will go a bit faster, but we’ll see.  In the meantime, here’s a video I took while up on the ladder finishing this up.

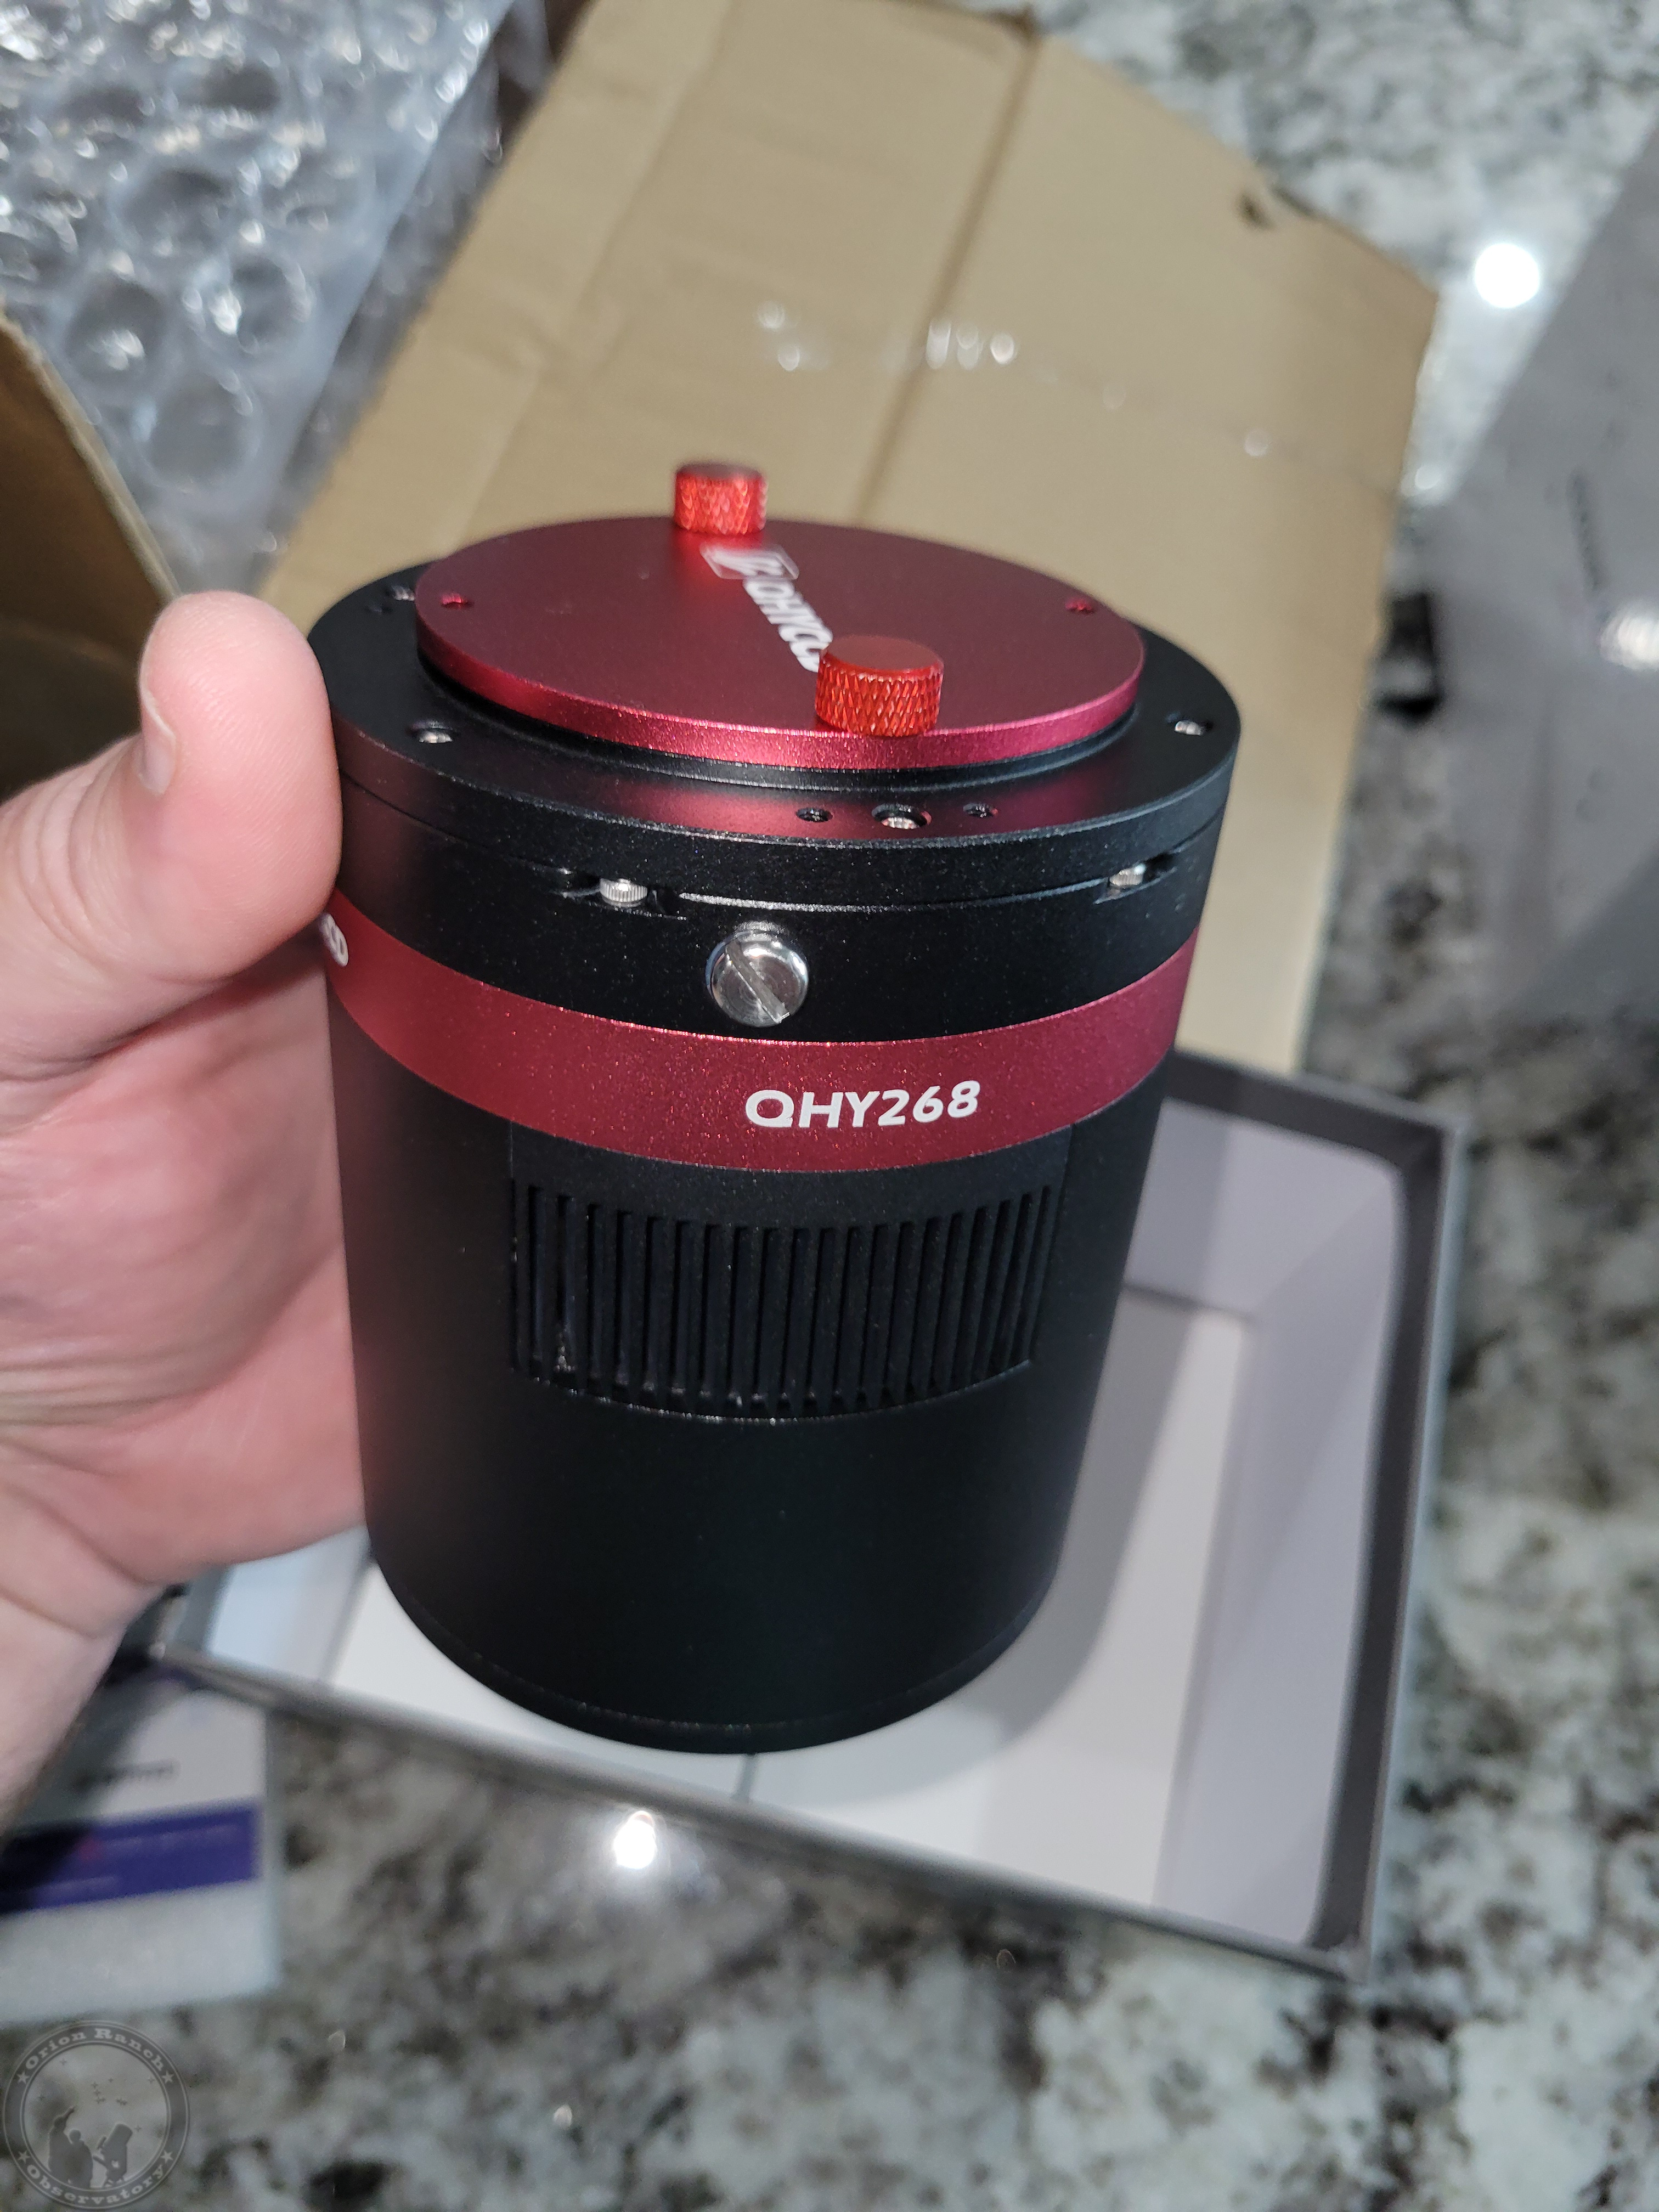
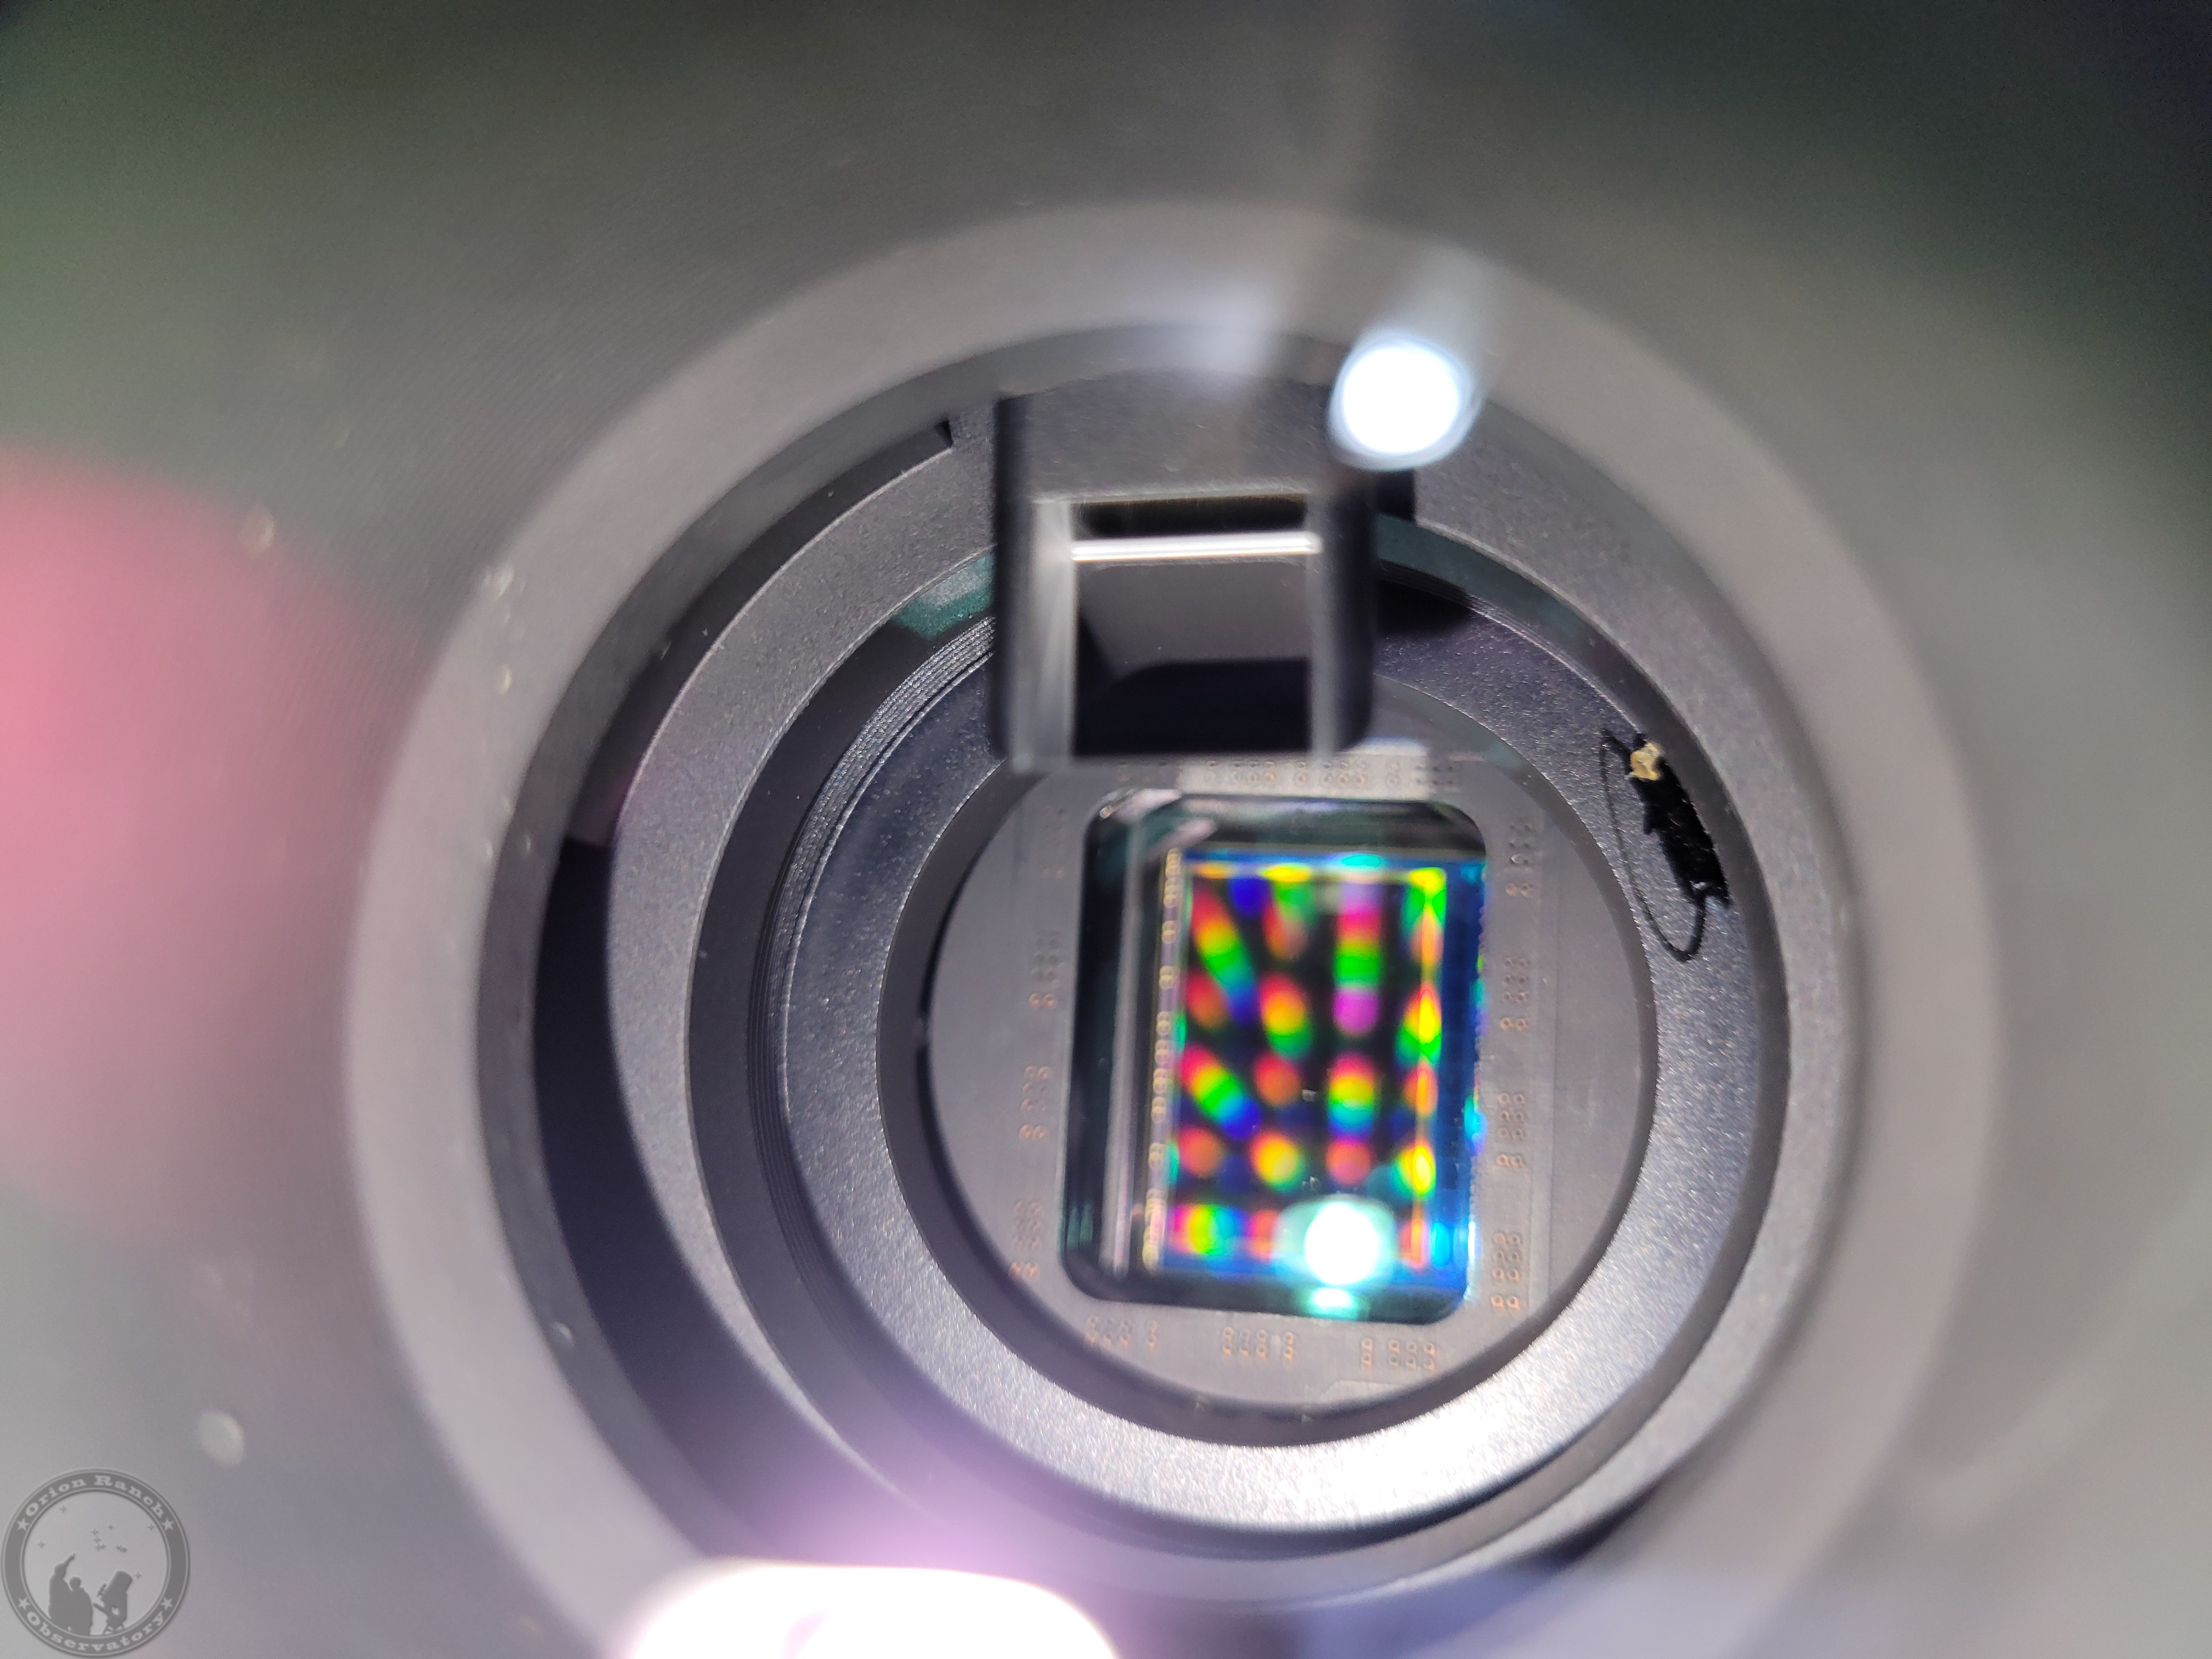
The other thing that’s been going on during this period was me working on getting my Adobe Lightroom plugin for Gallery 3 working with the latest version of Lightroom so that I could upload pictures from my new Nikon Z8 camera I bought myself for Christmas (on Black Friday!).  The site from the guy who wrote the plugin originally is down and no one can contact him, so I had to decompile the Lua script, fix all the bugs that introduced, and update it myself!

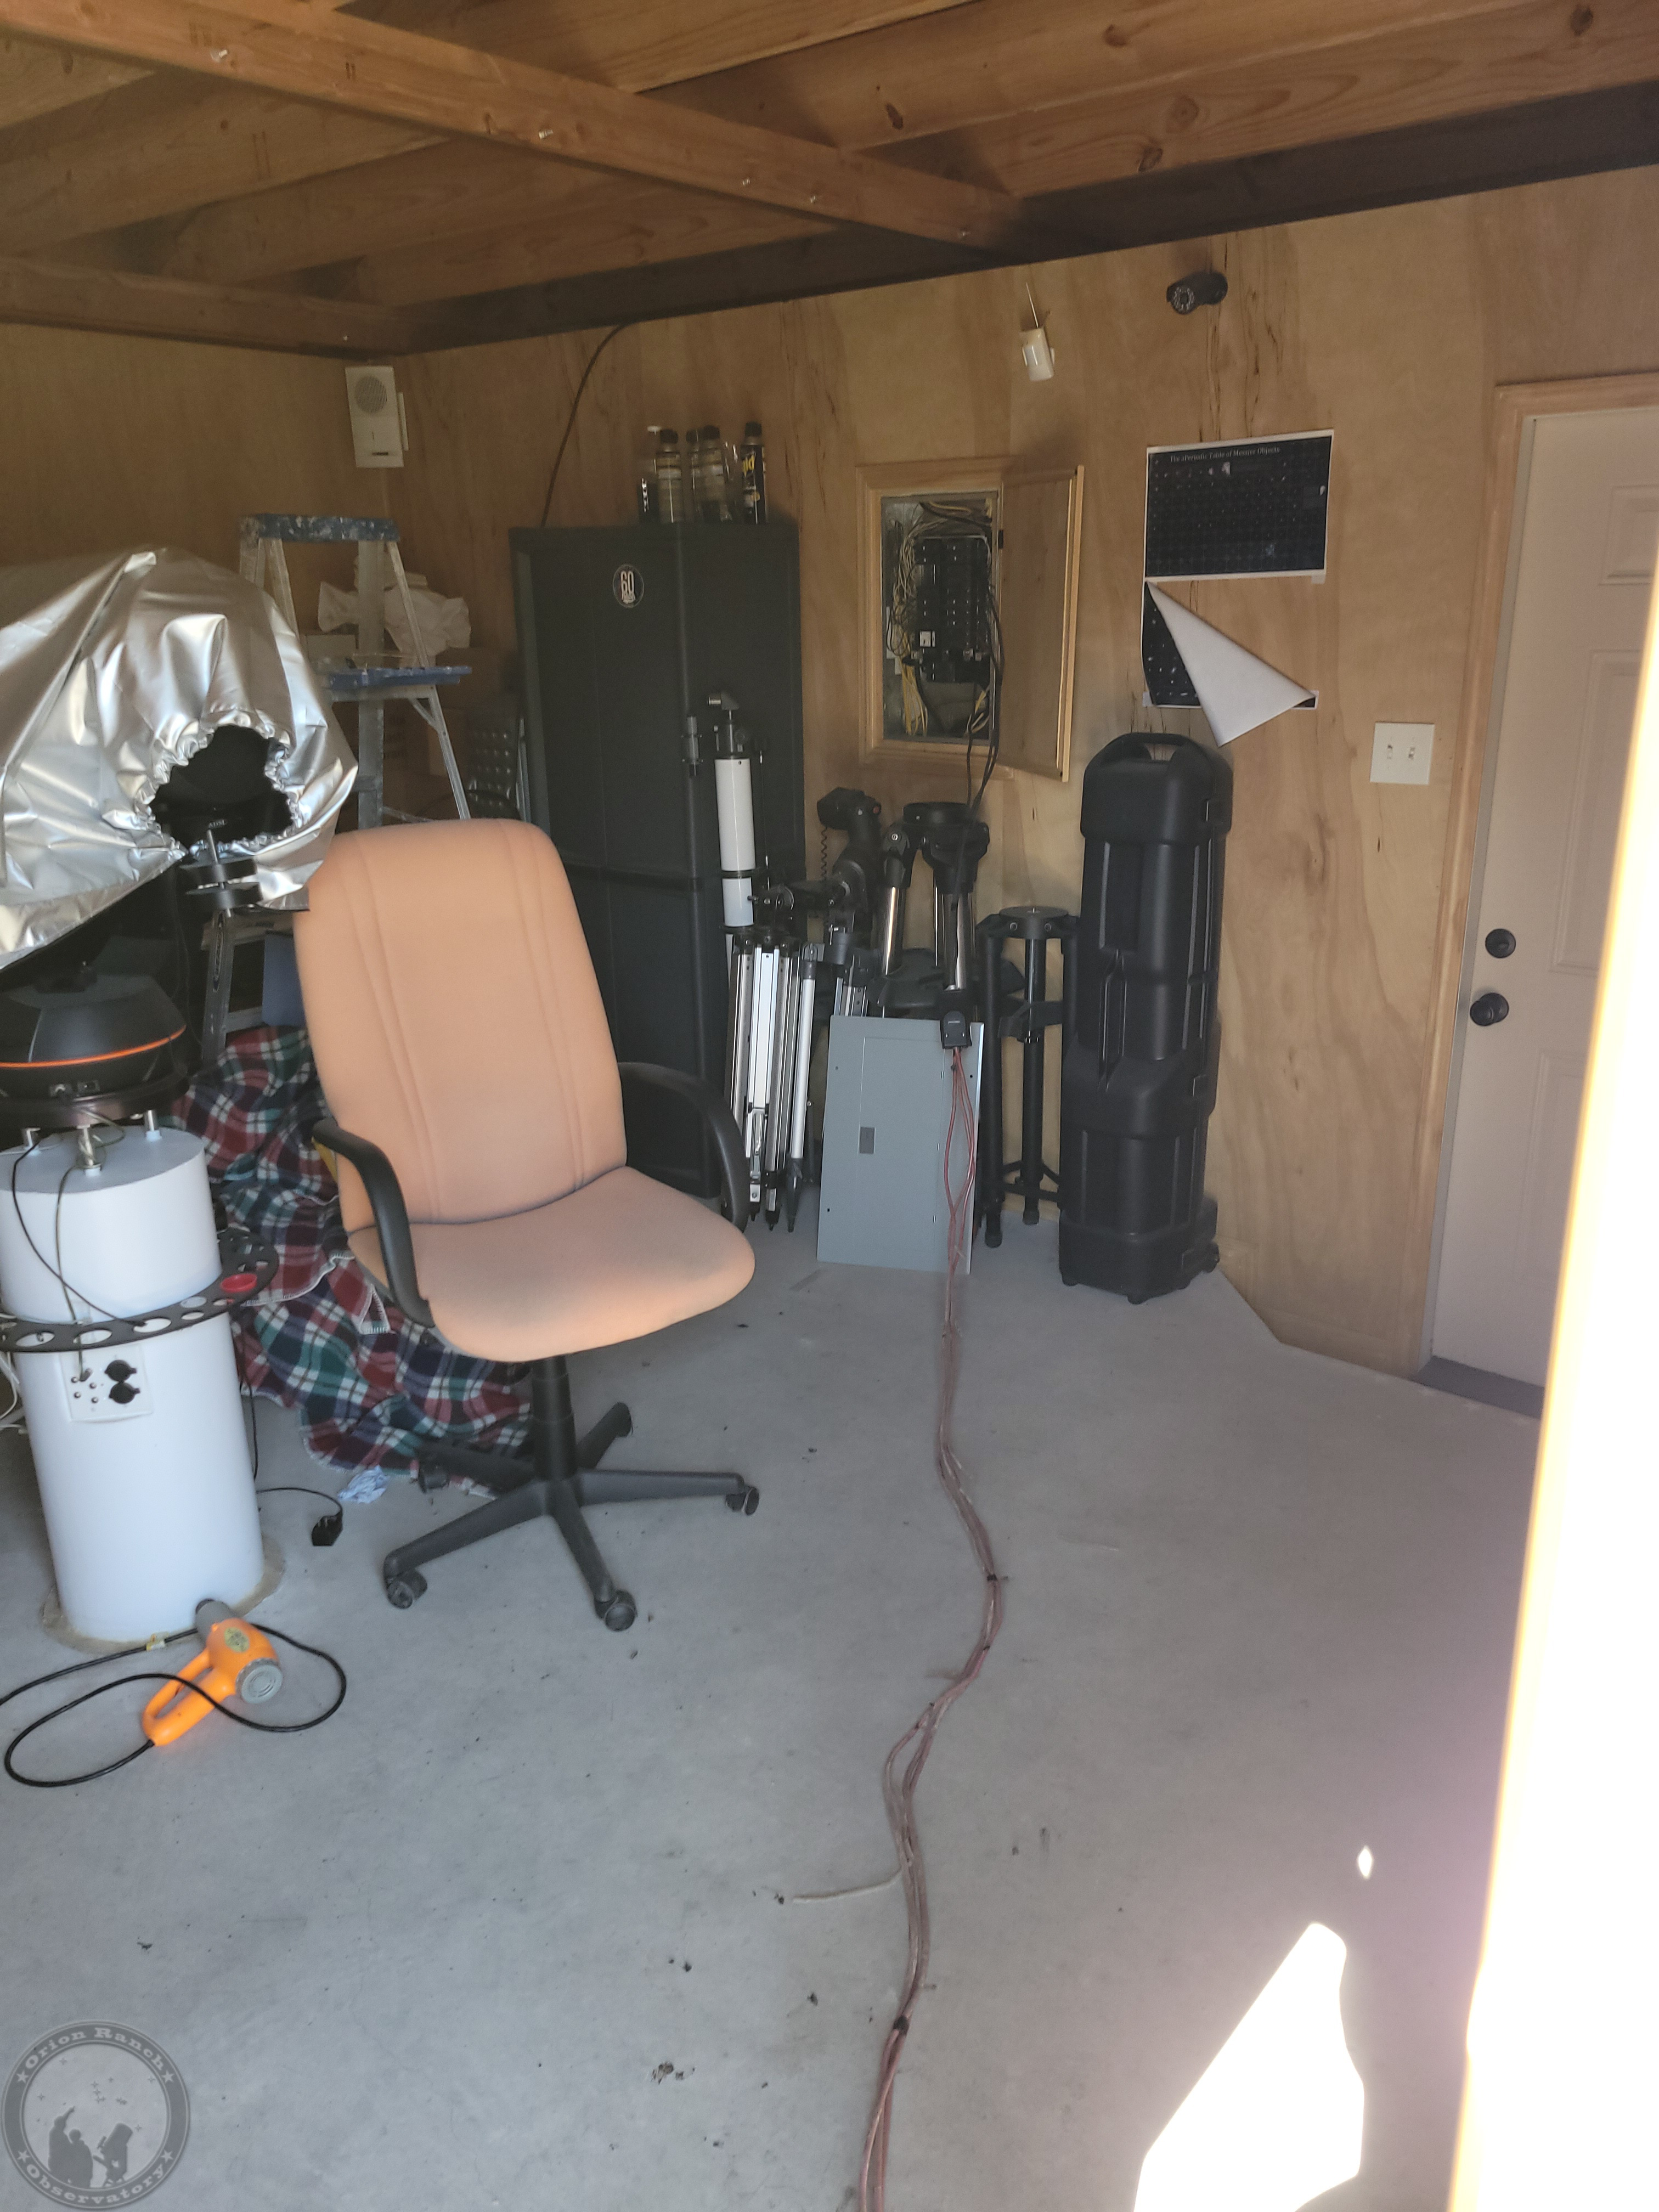
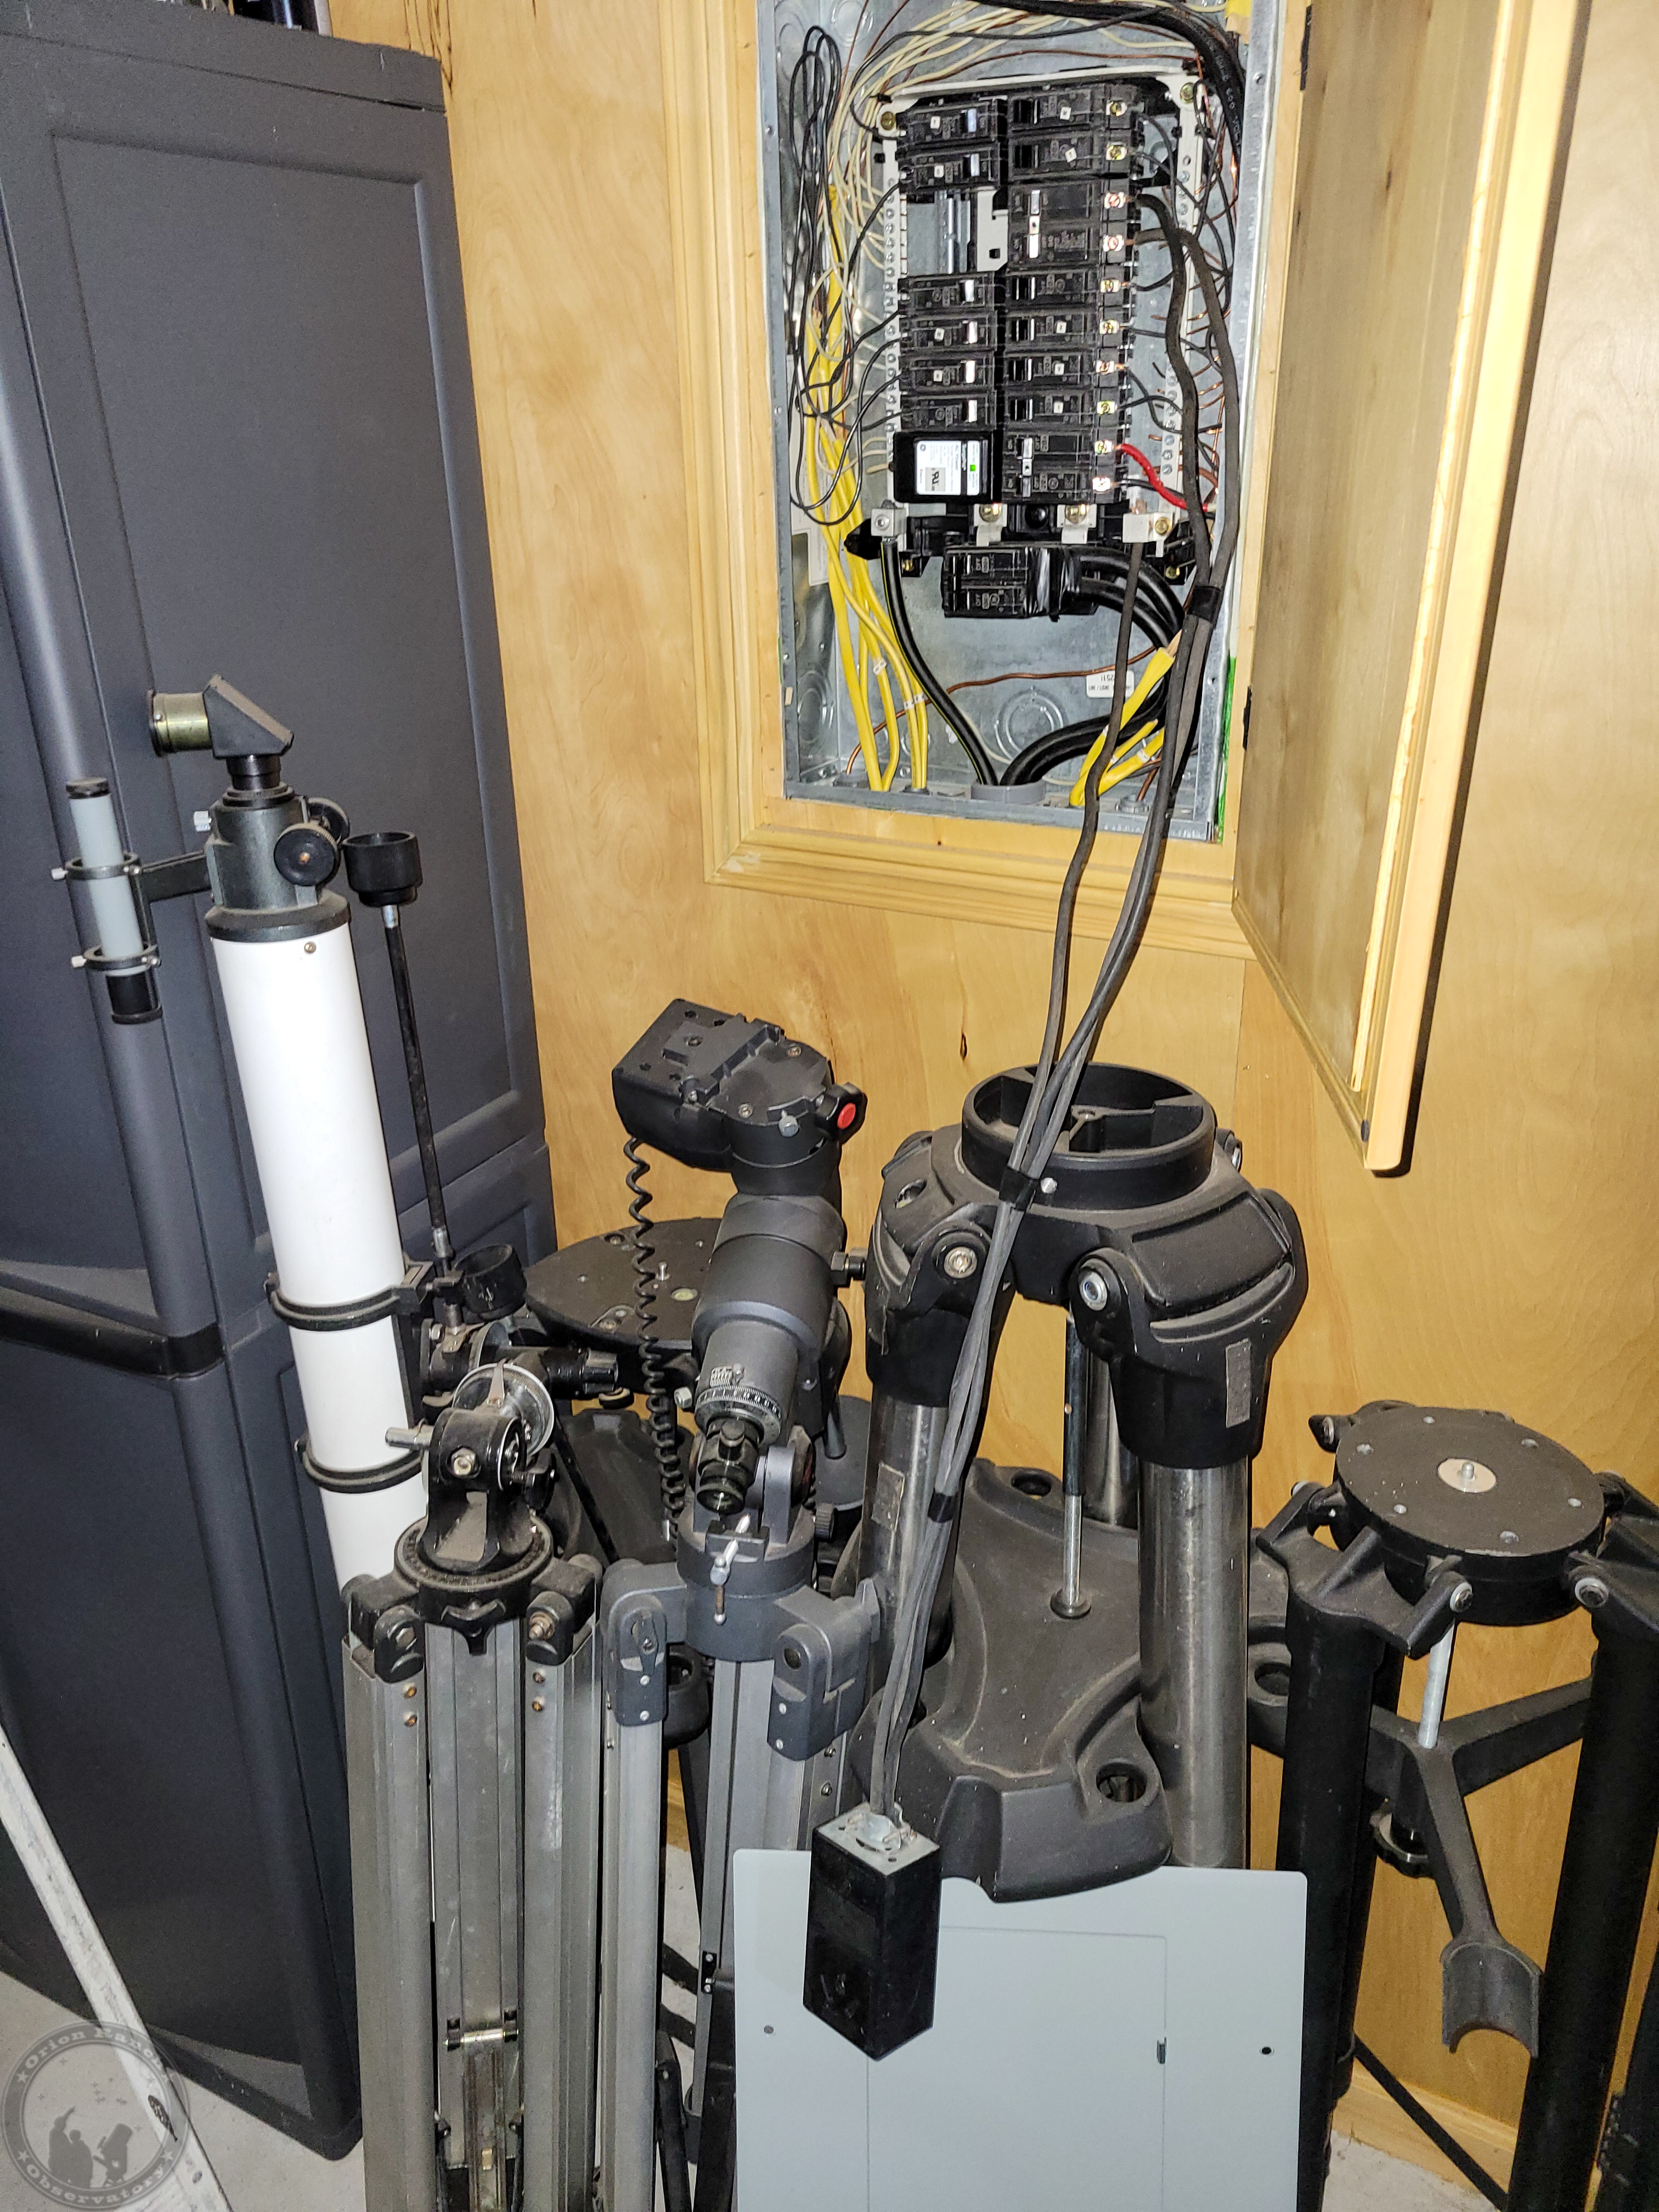
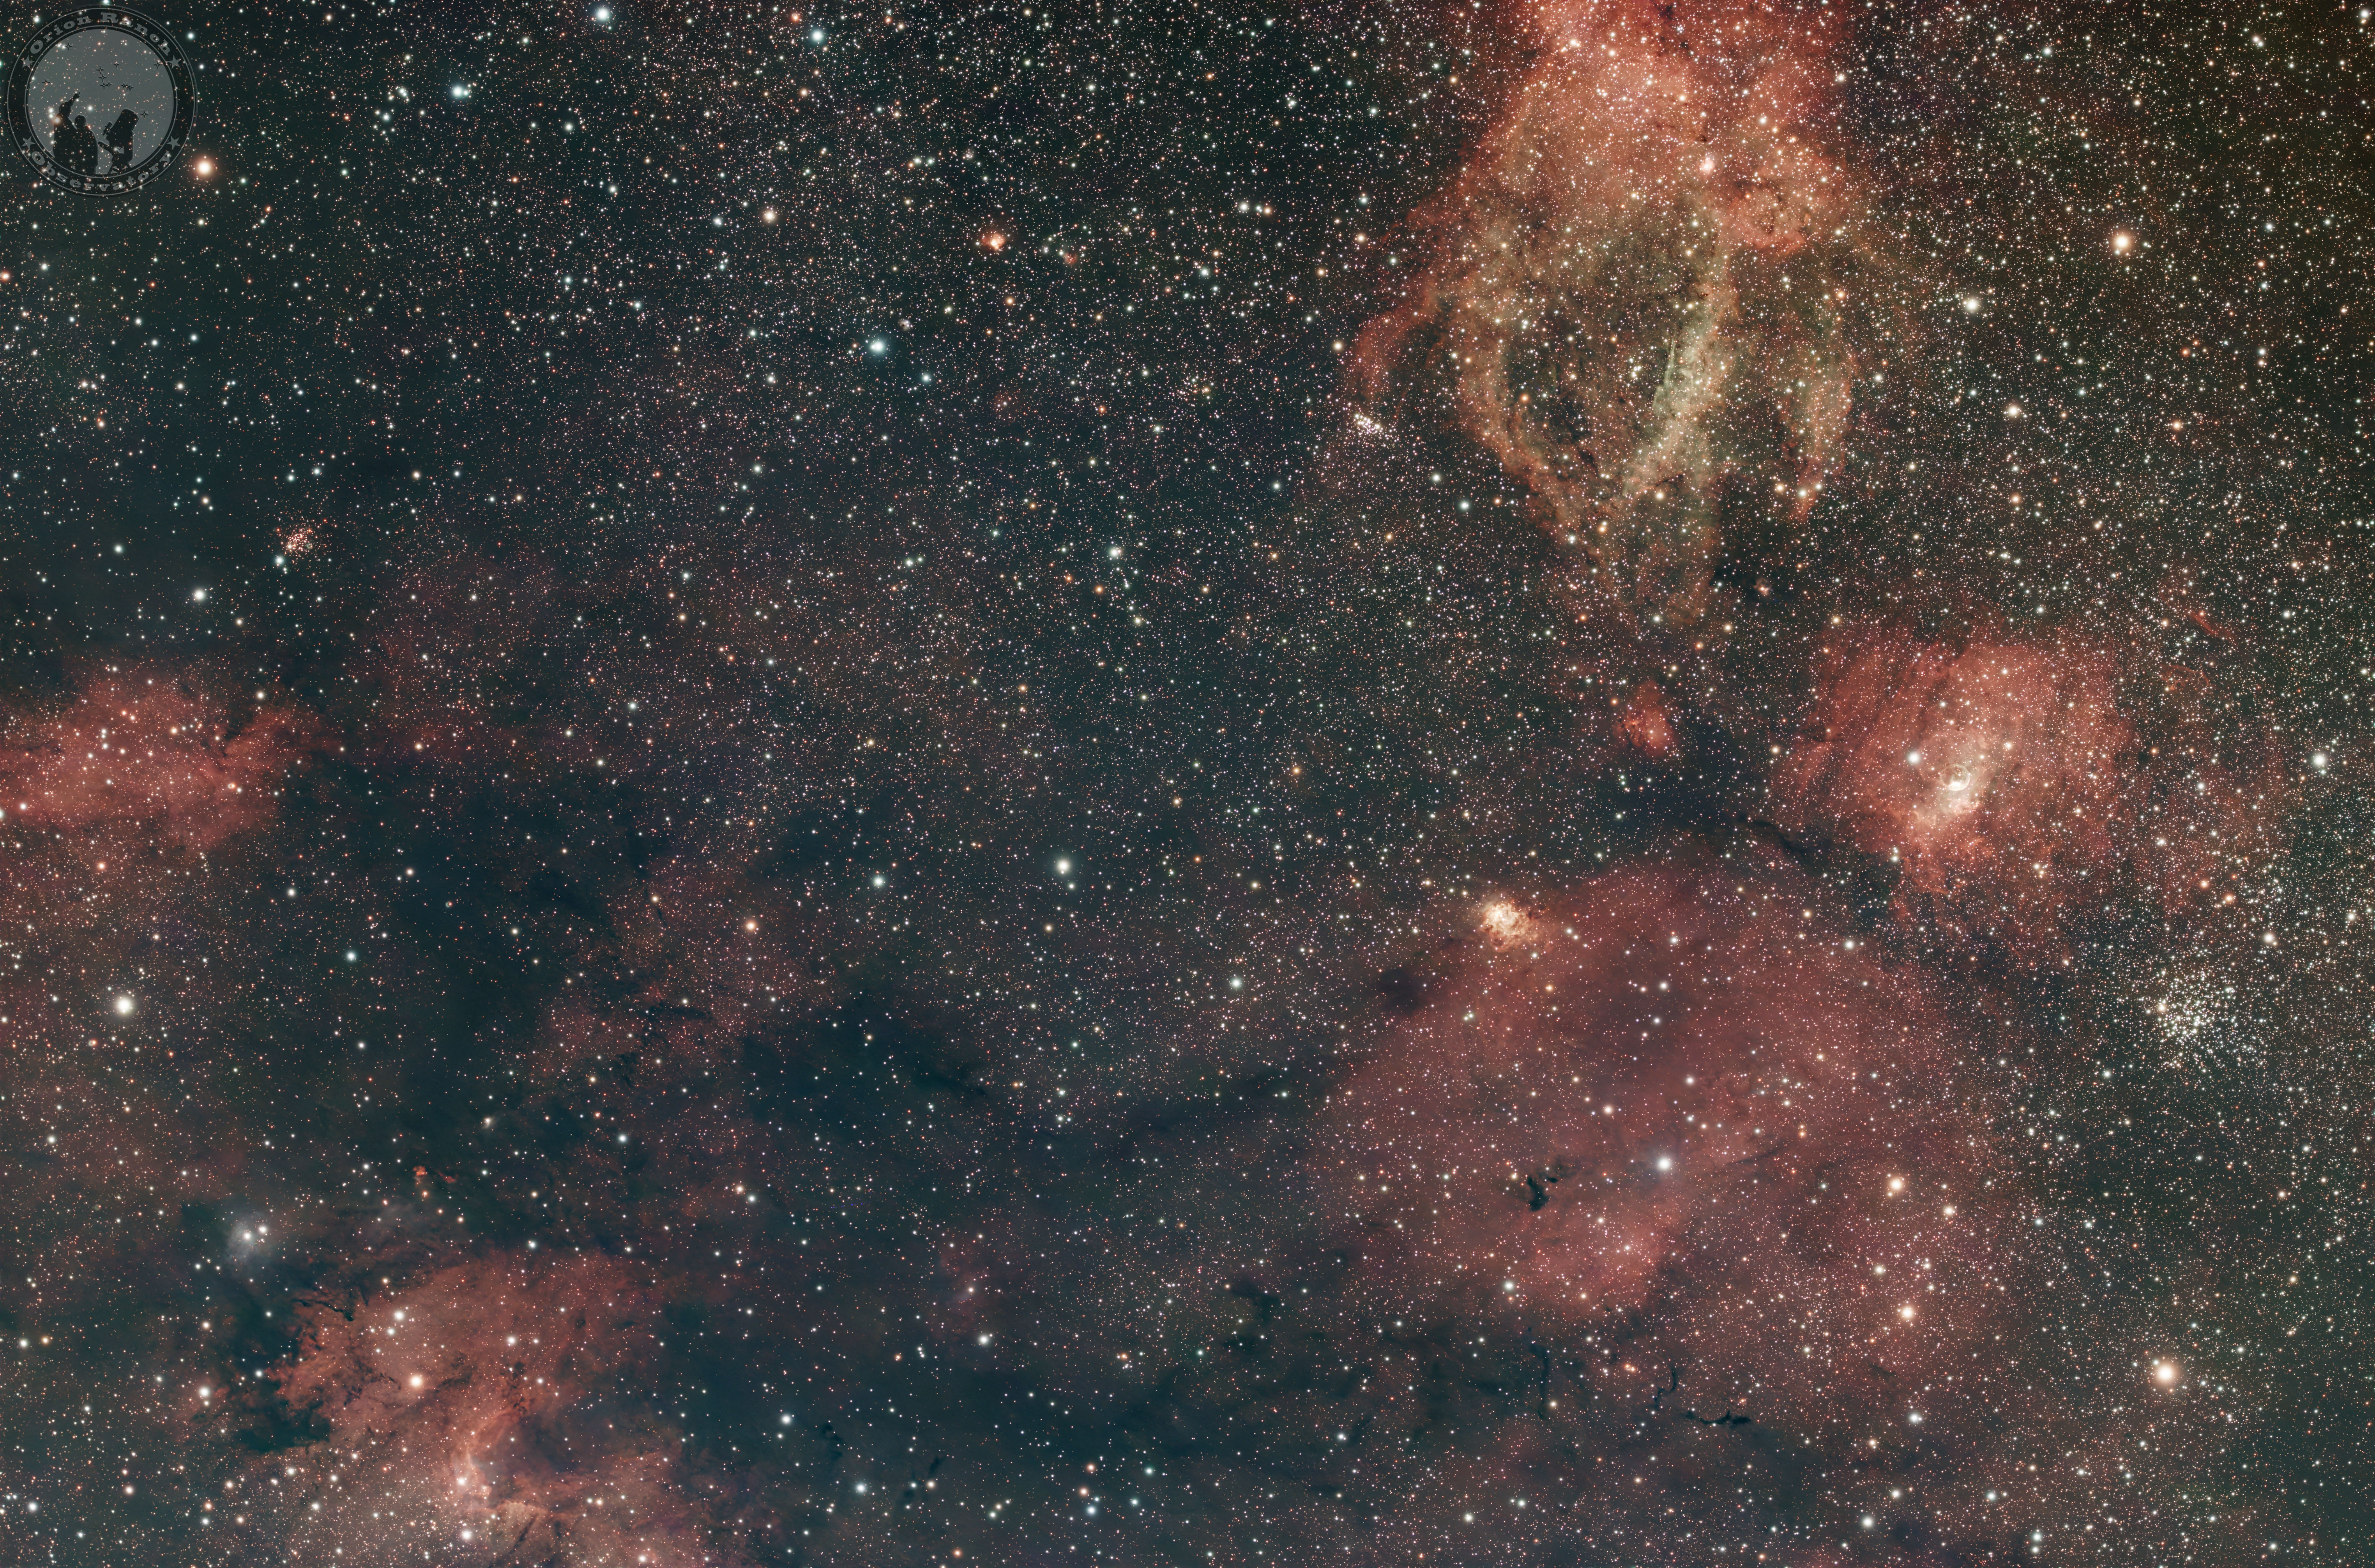
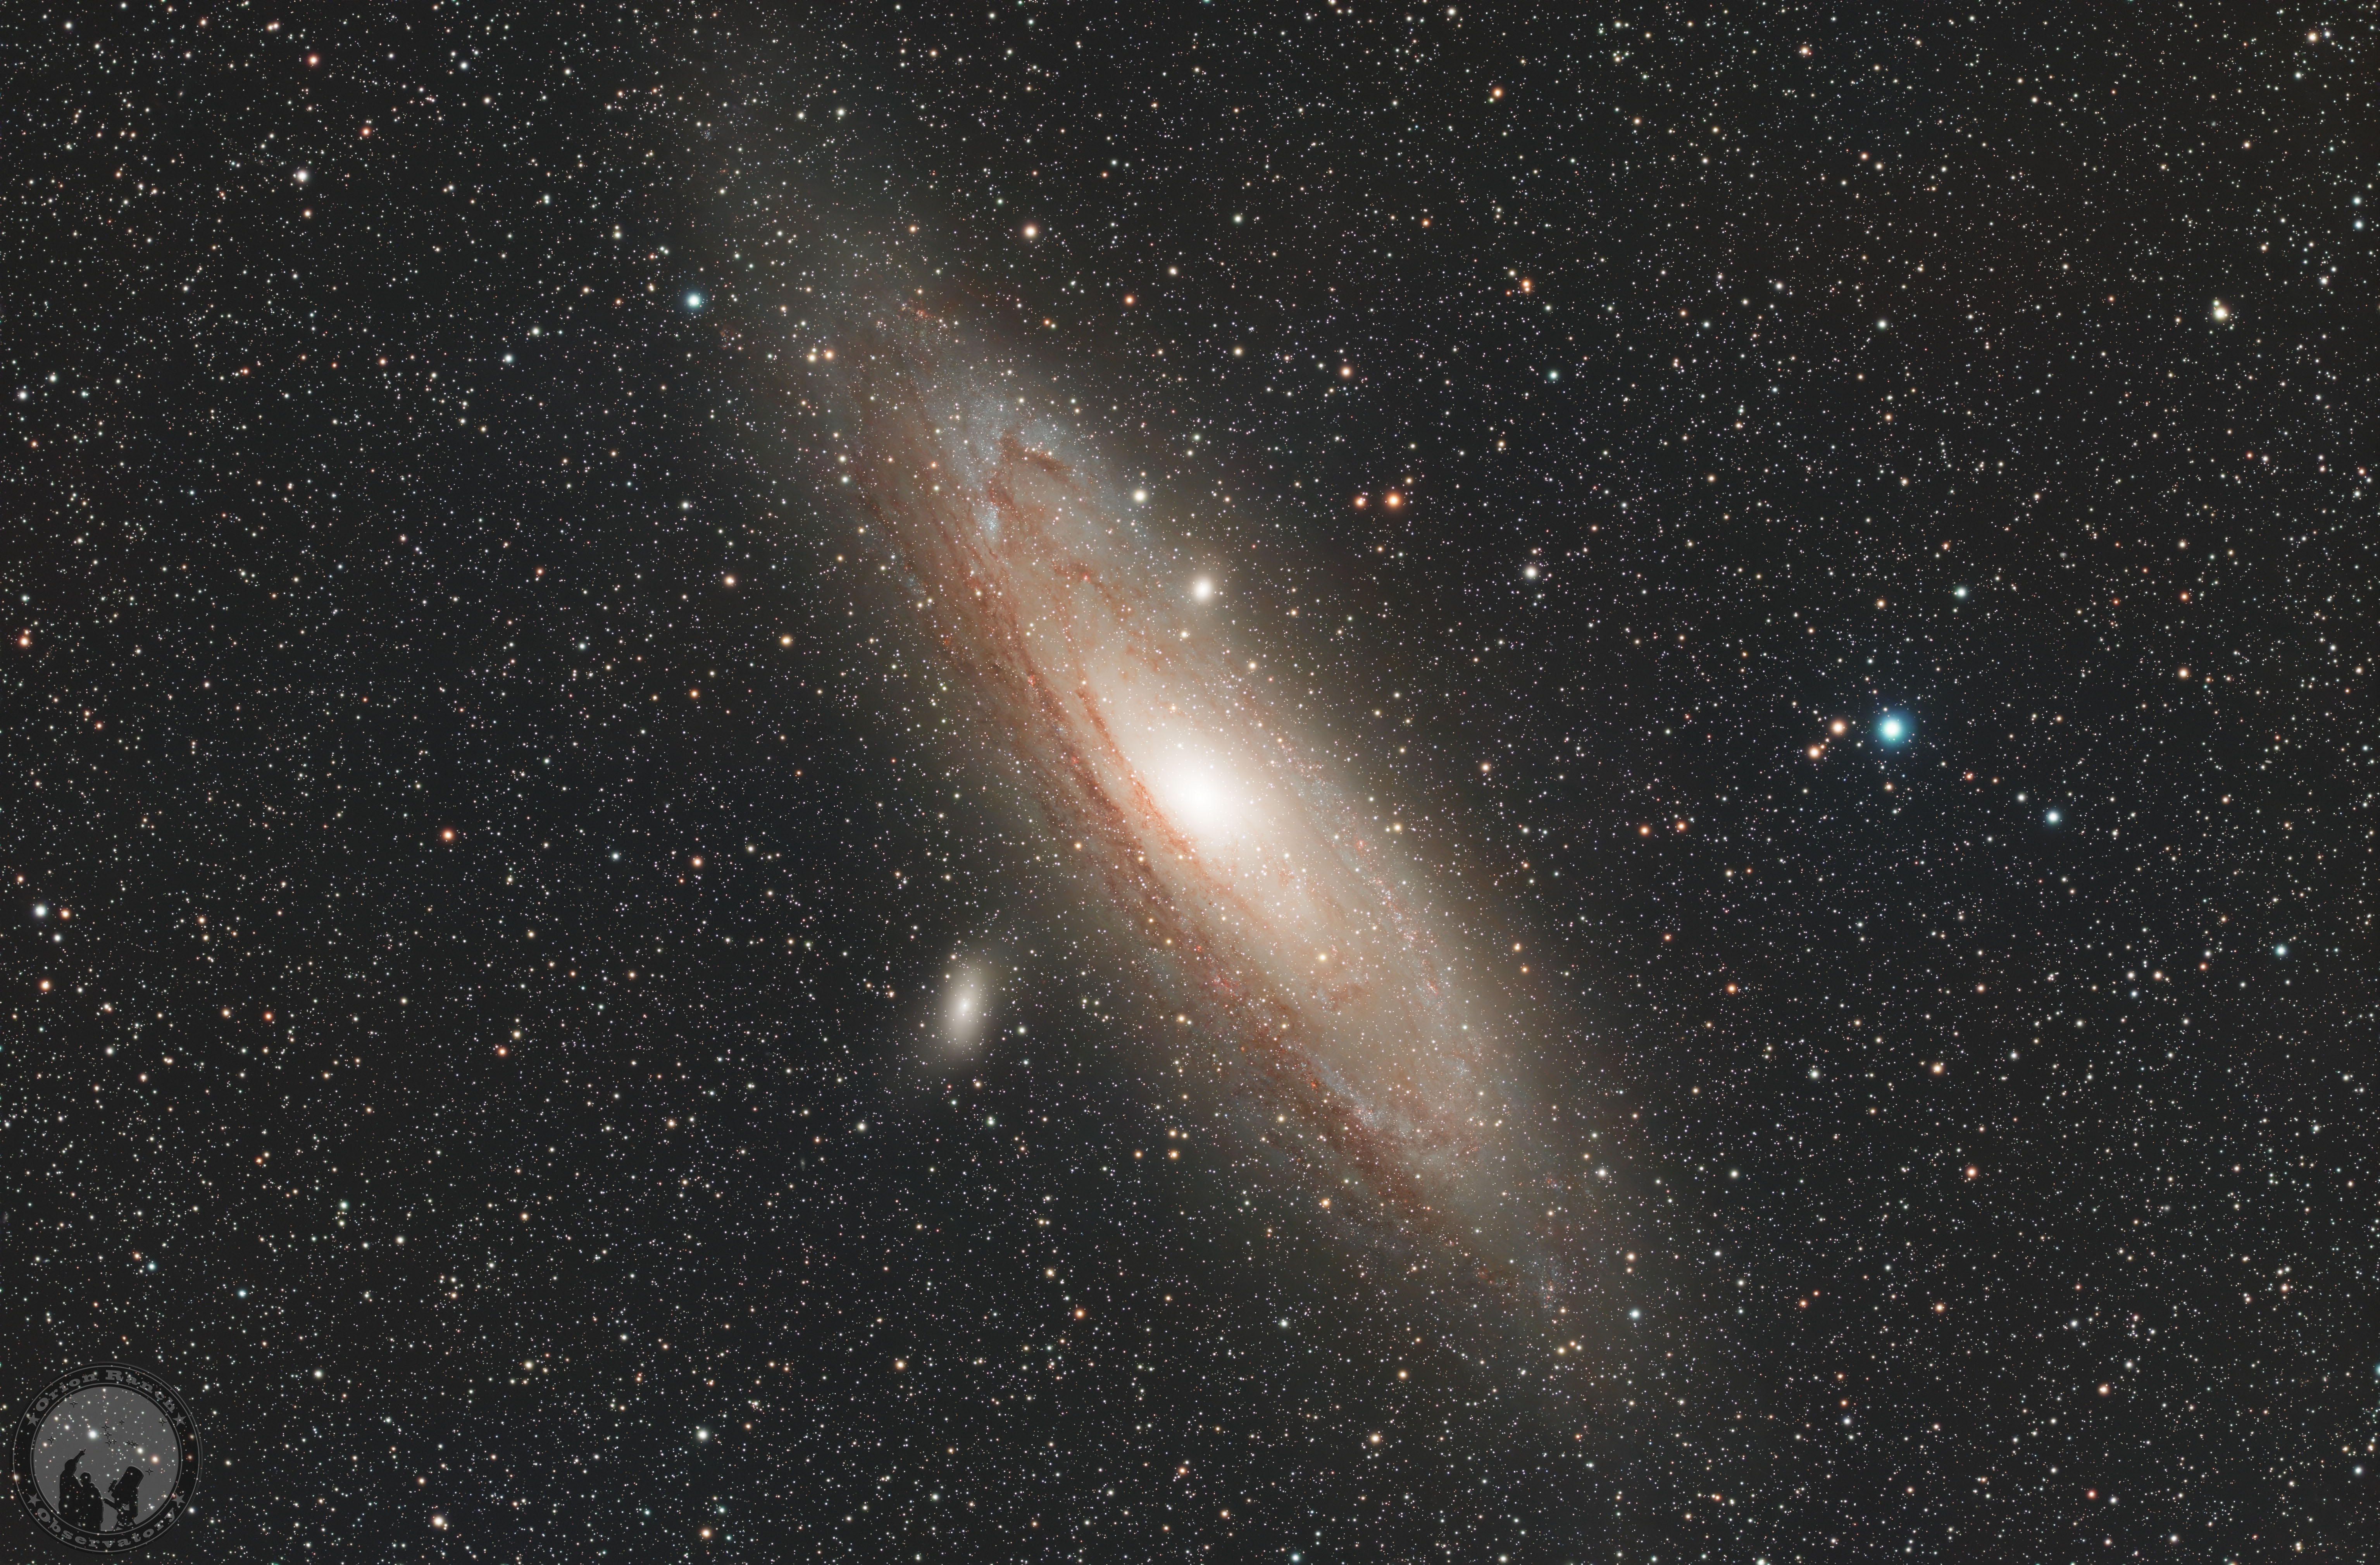
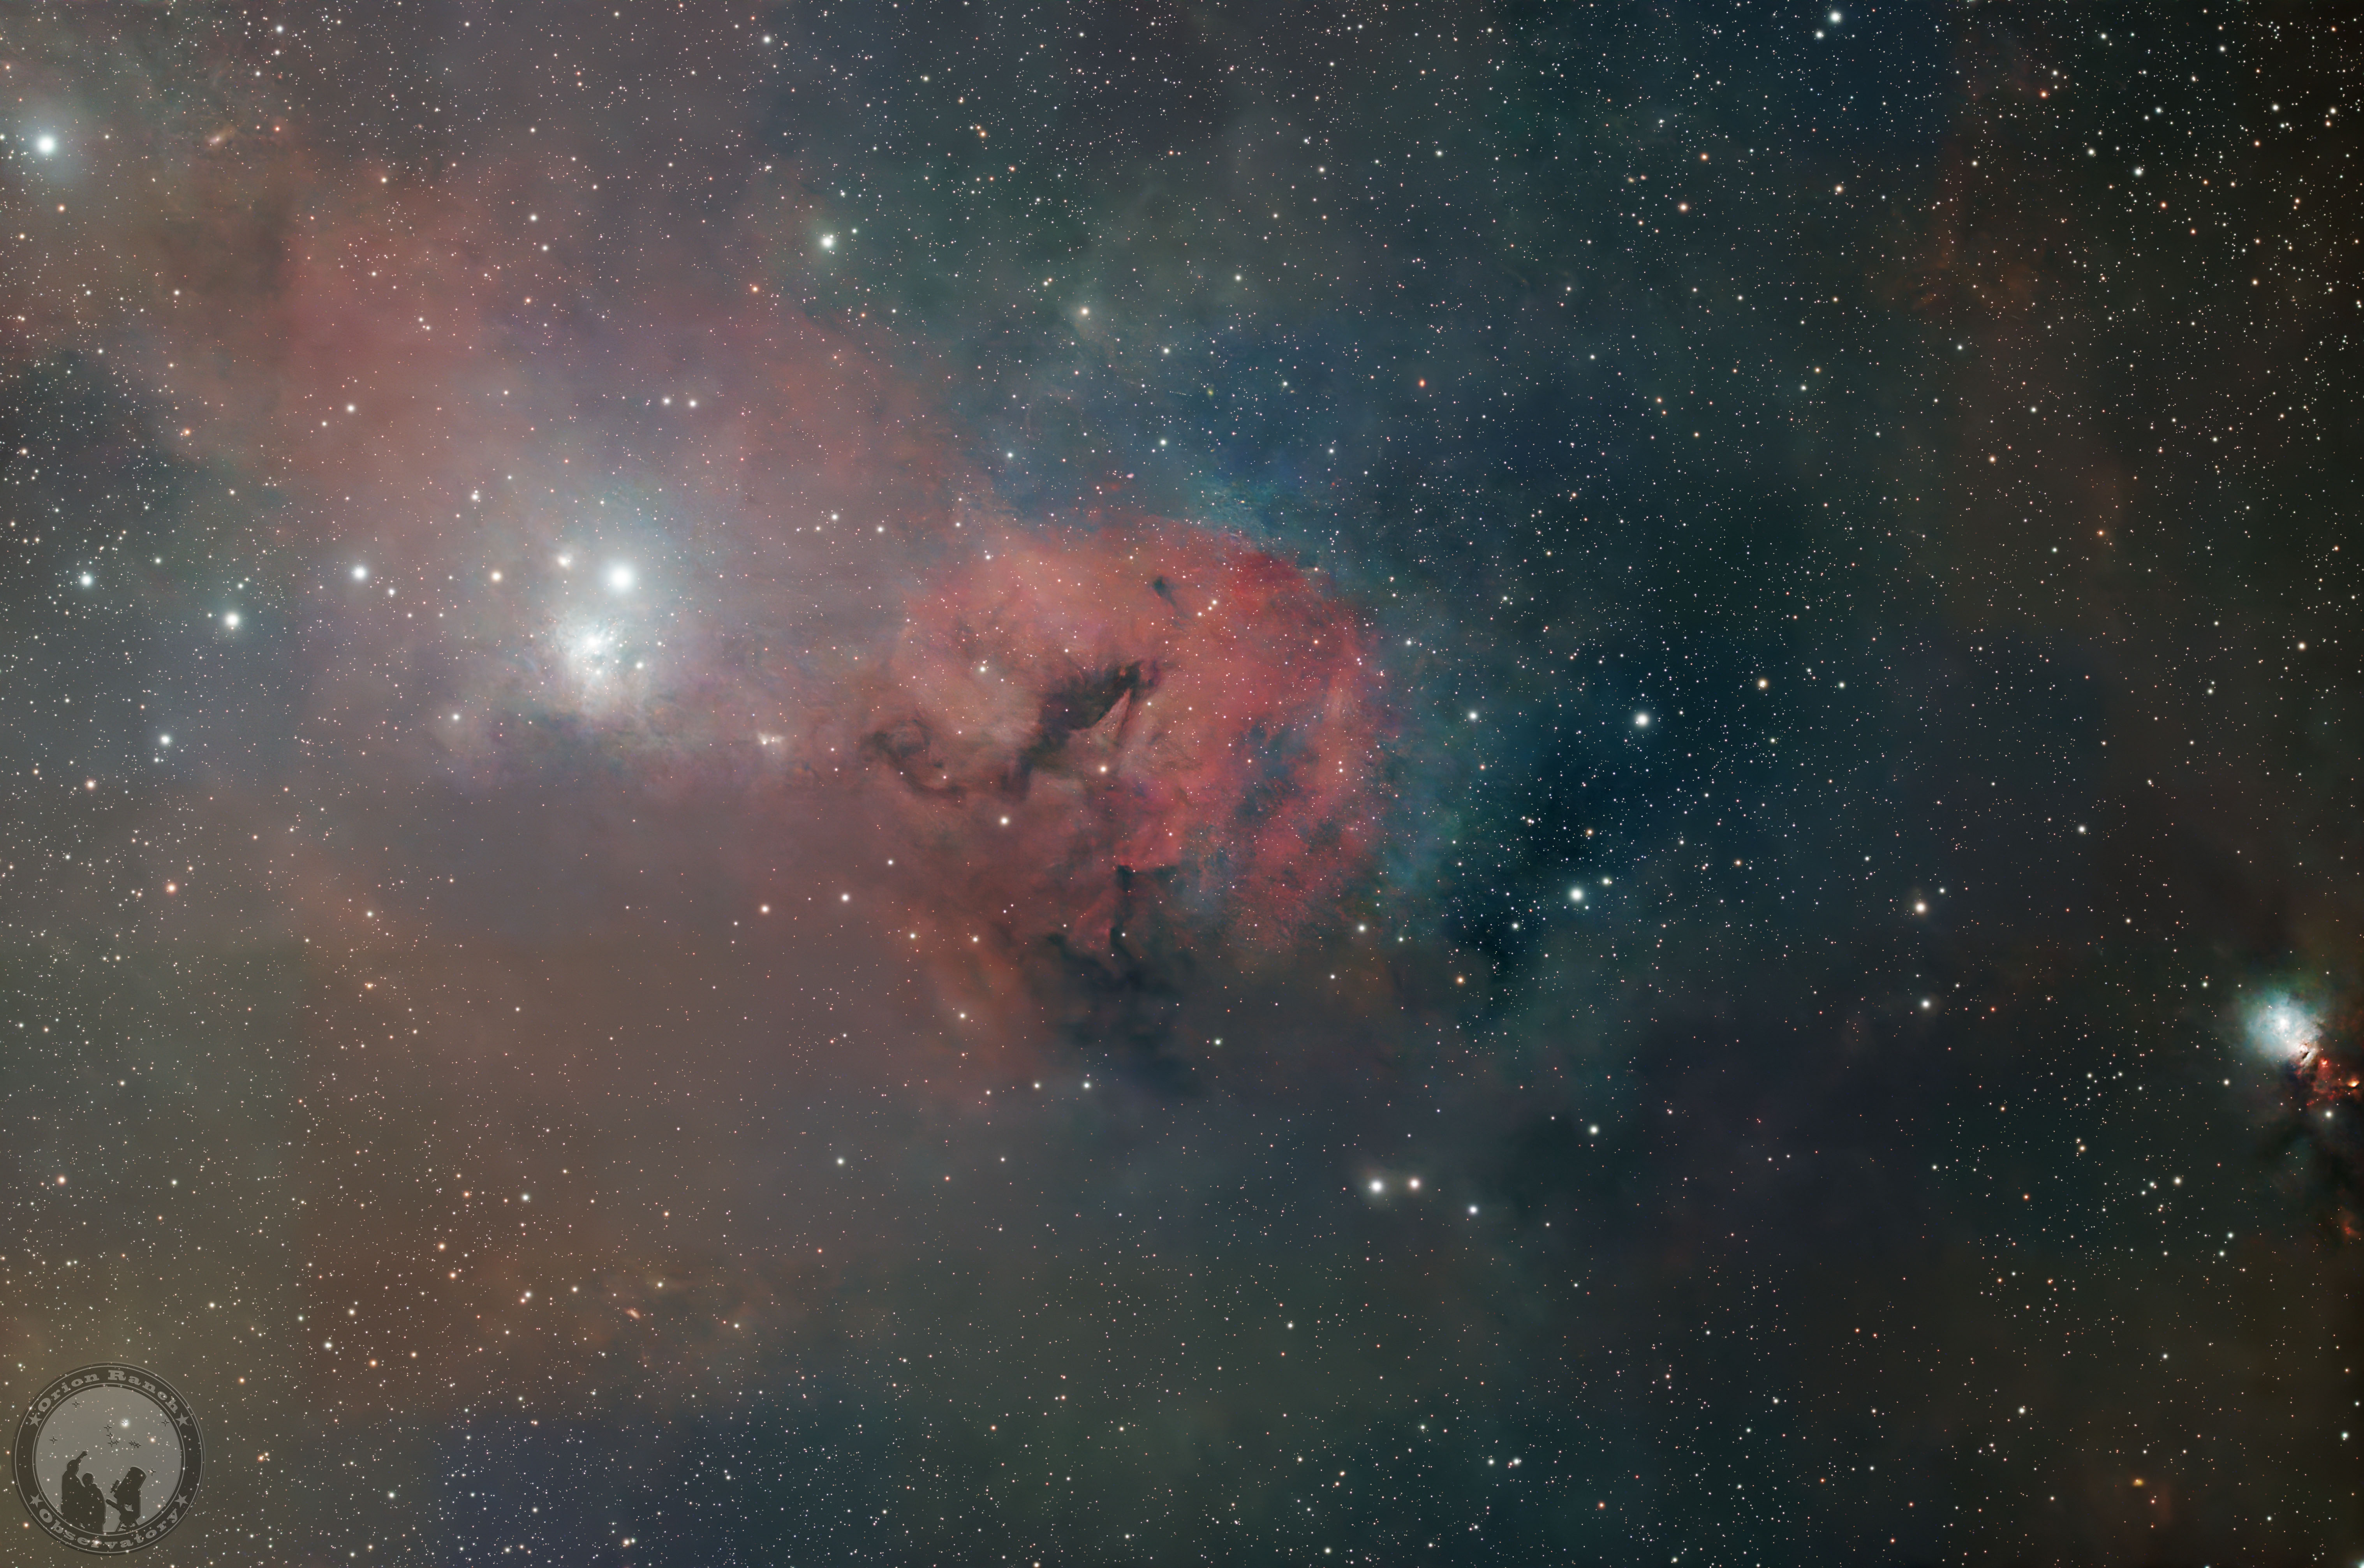
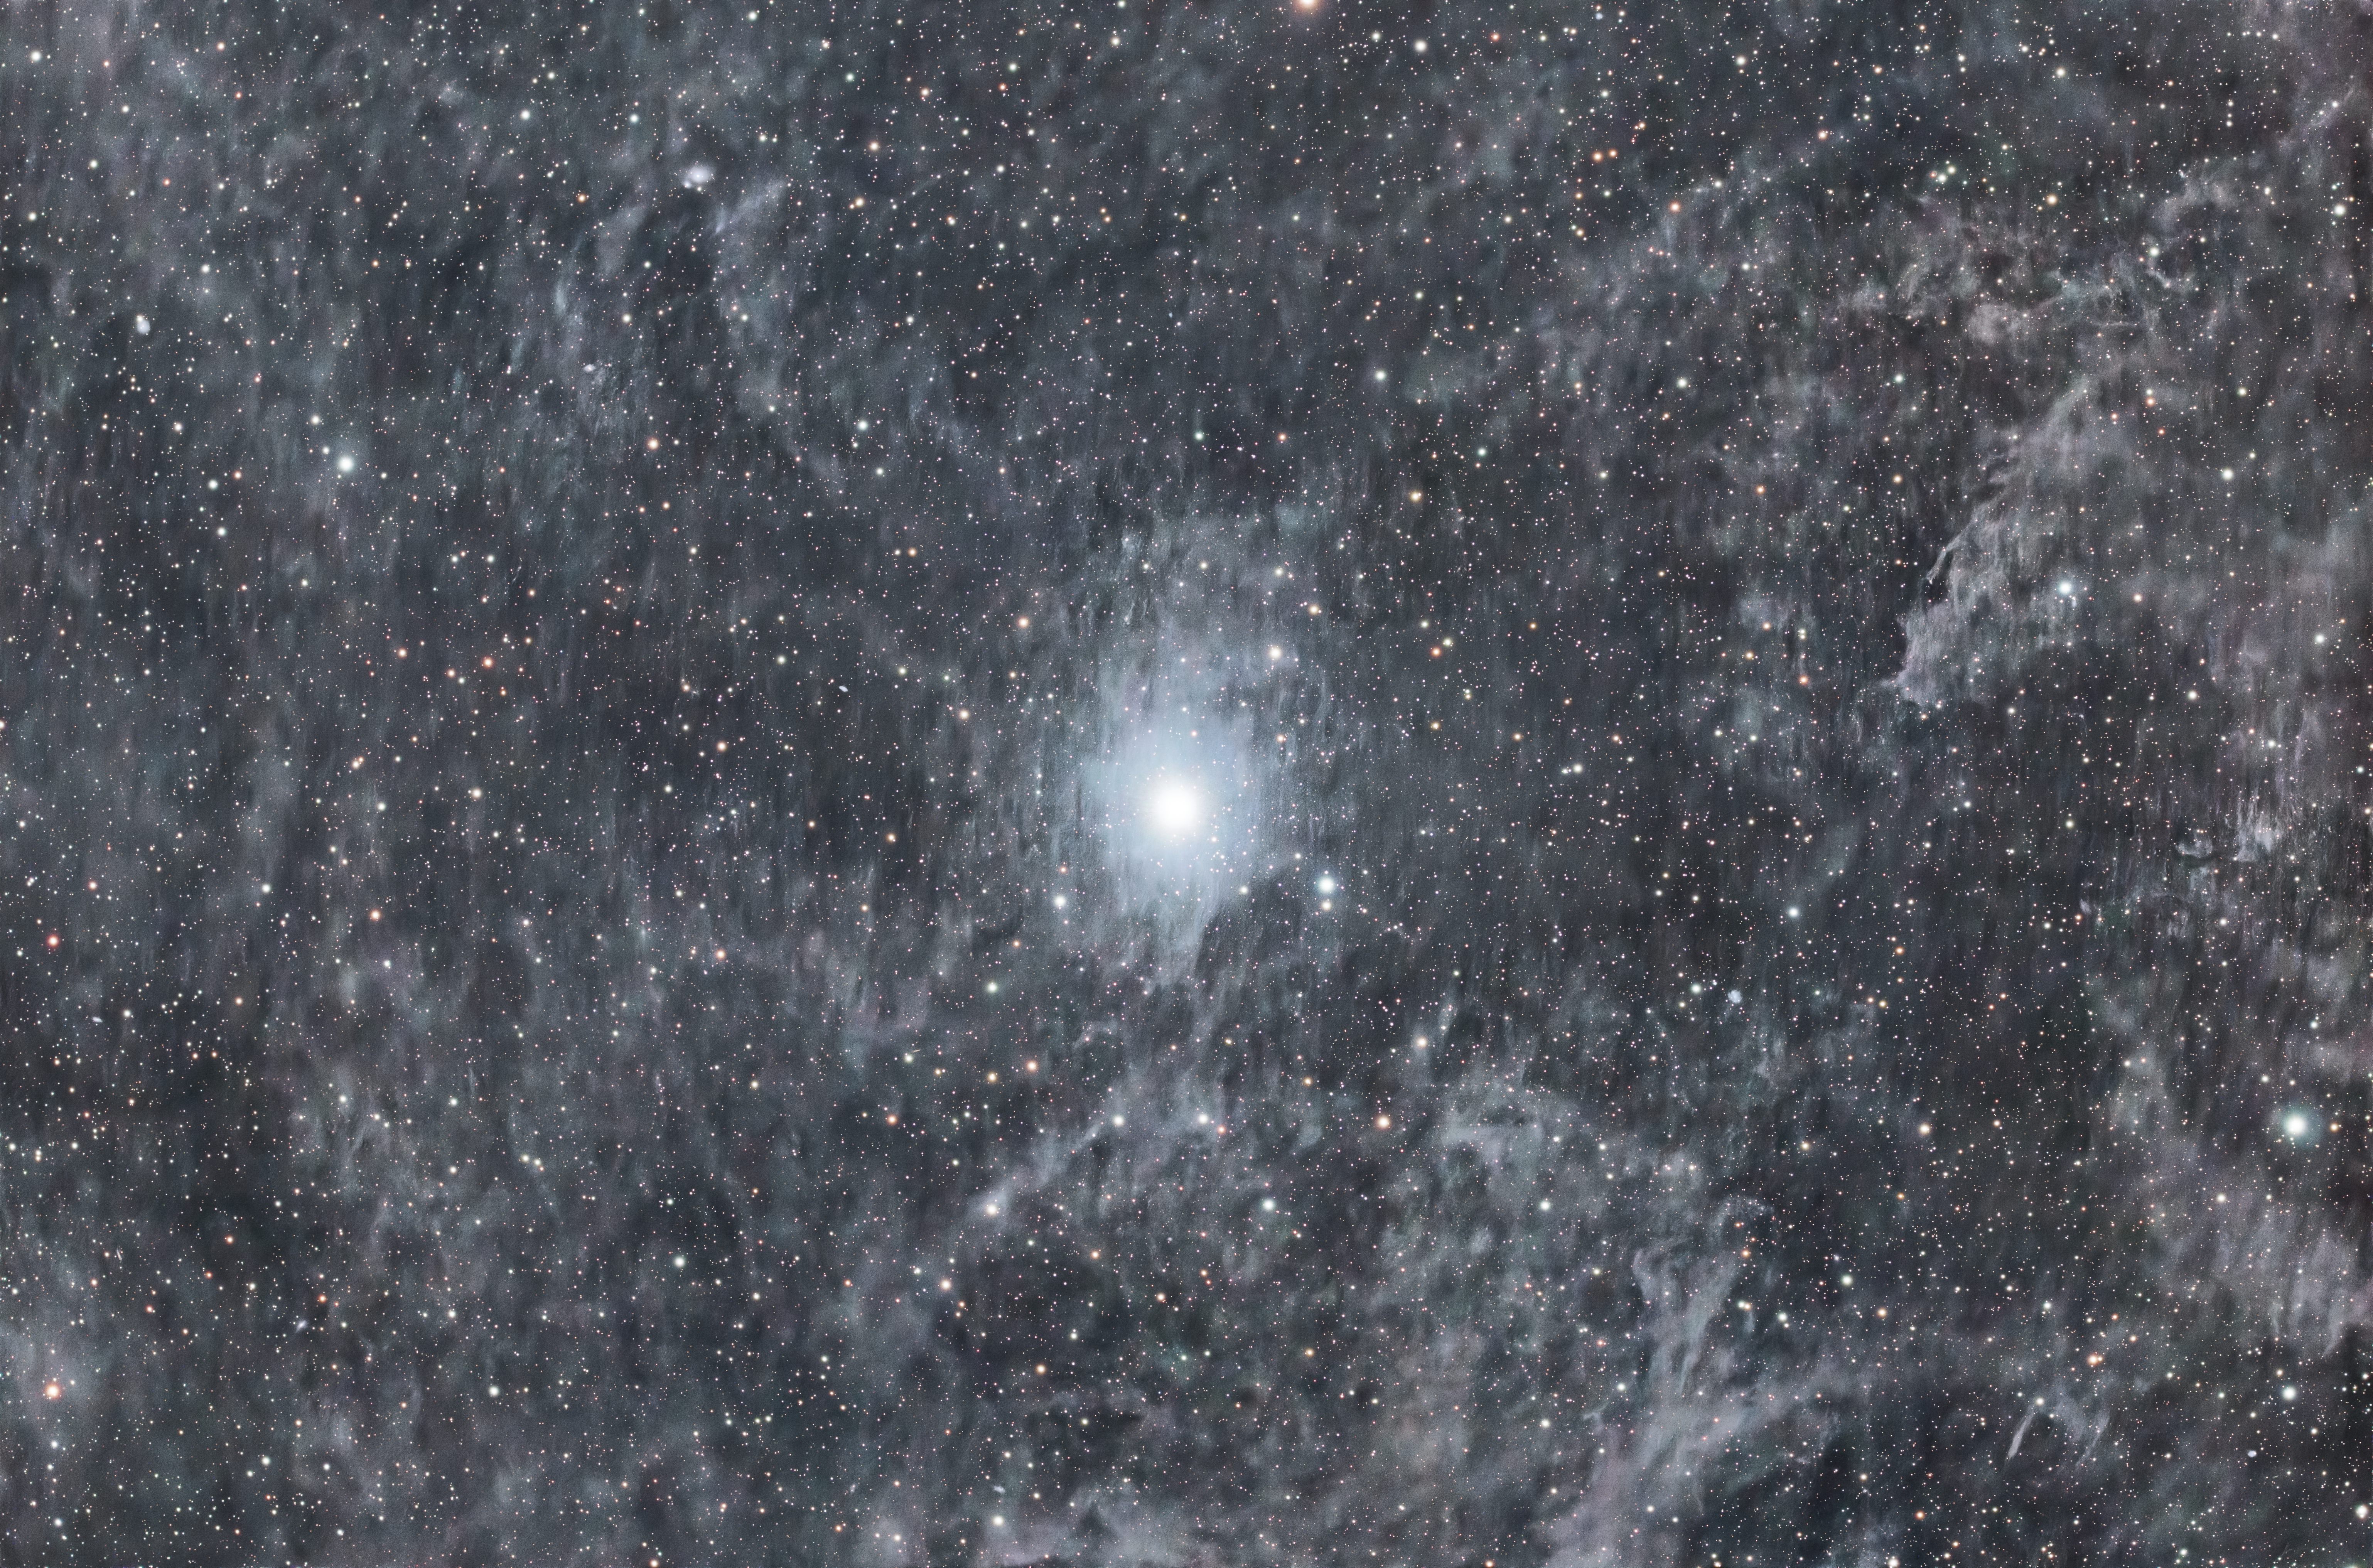
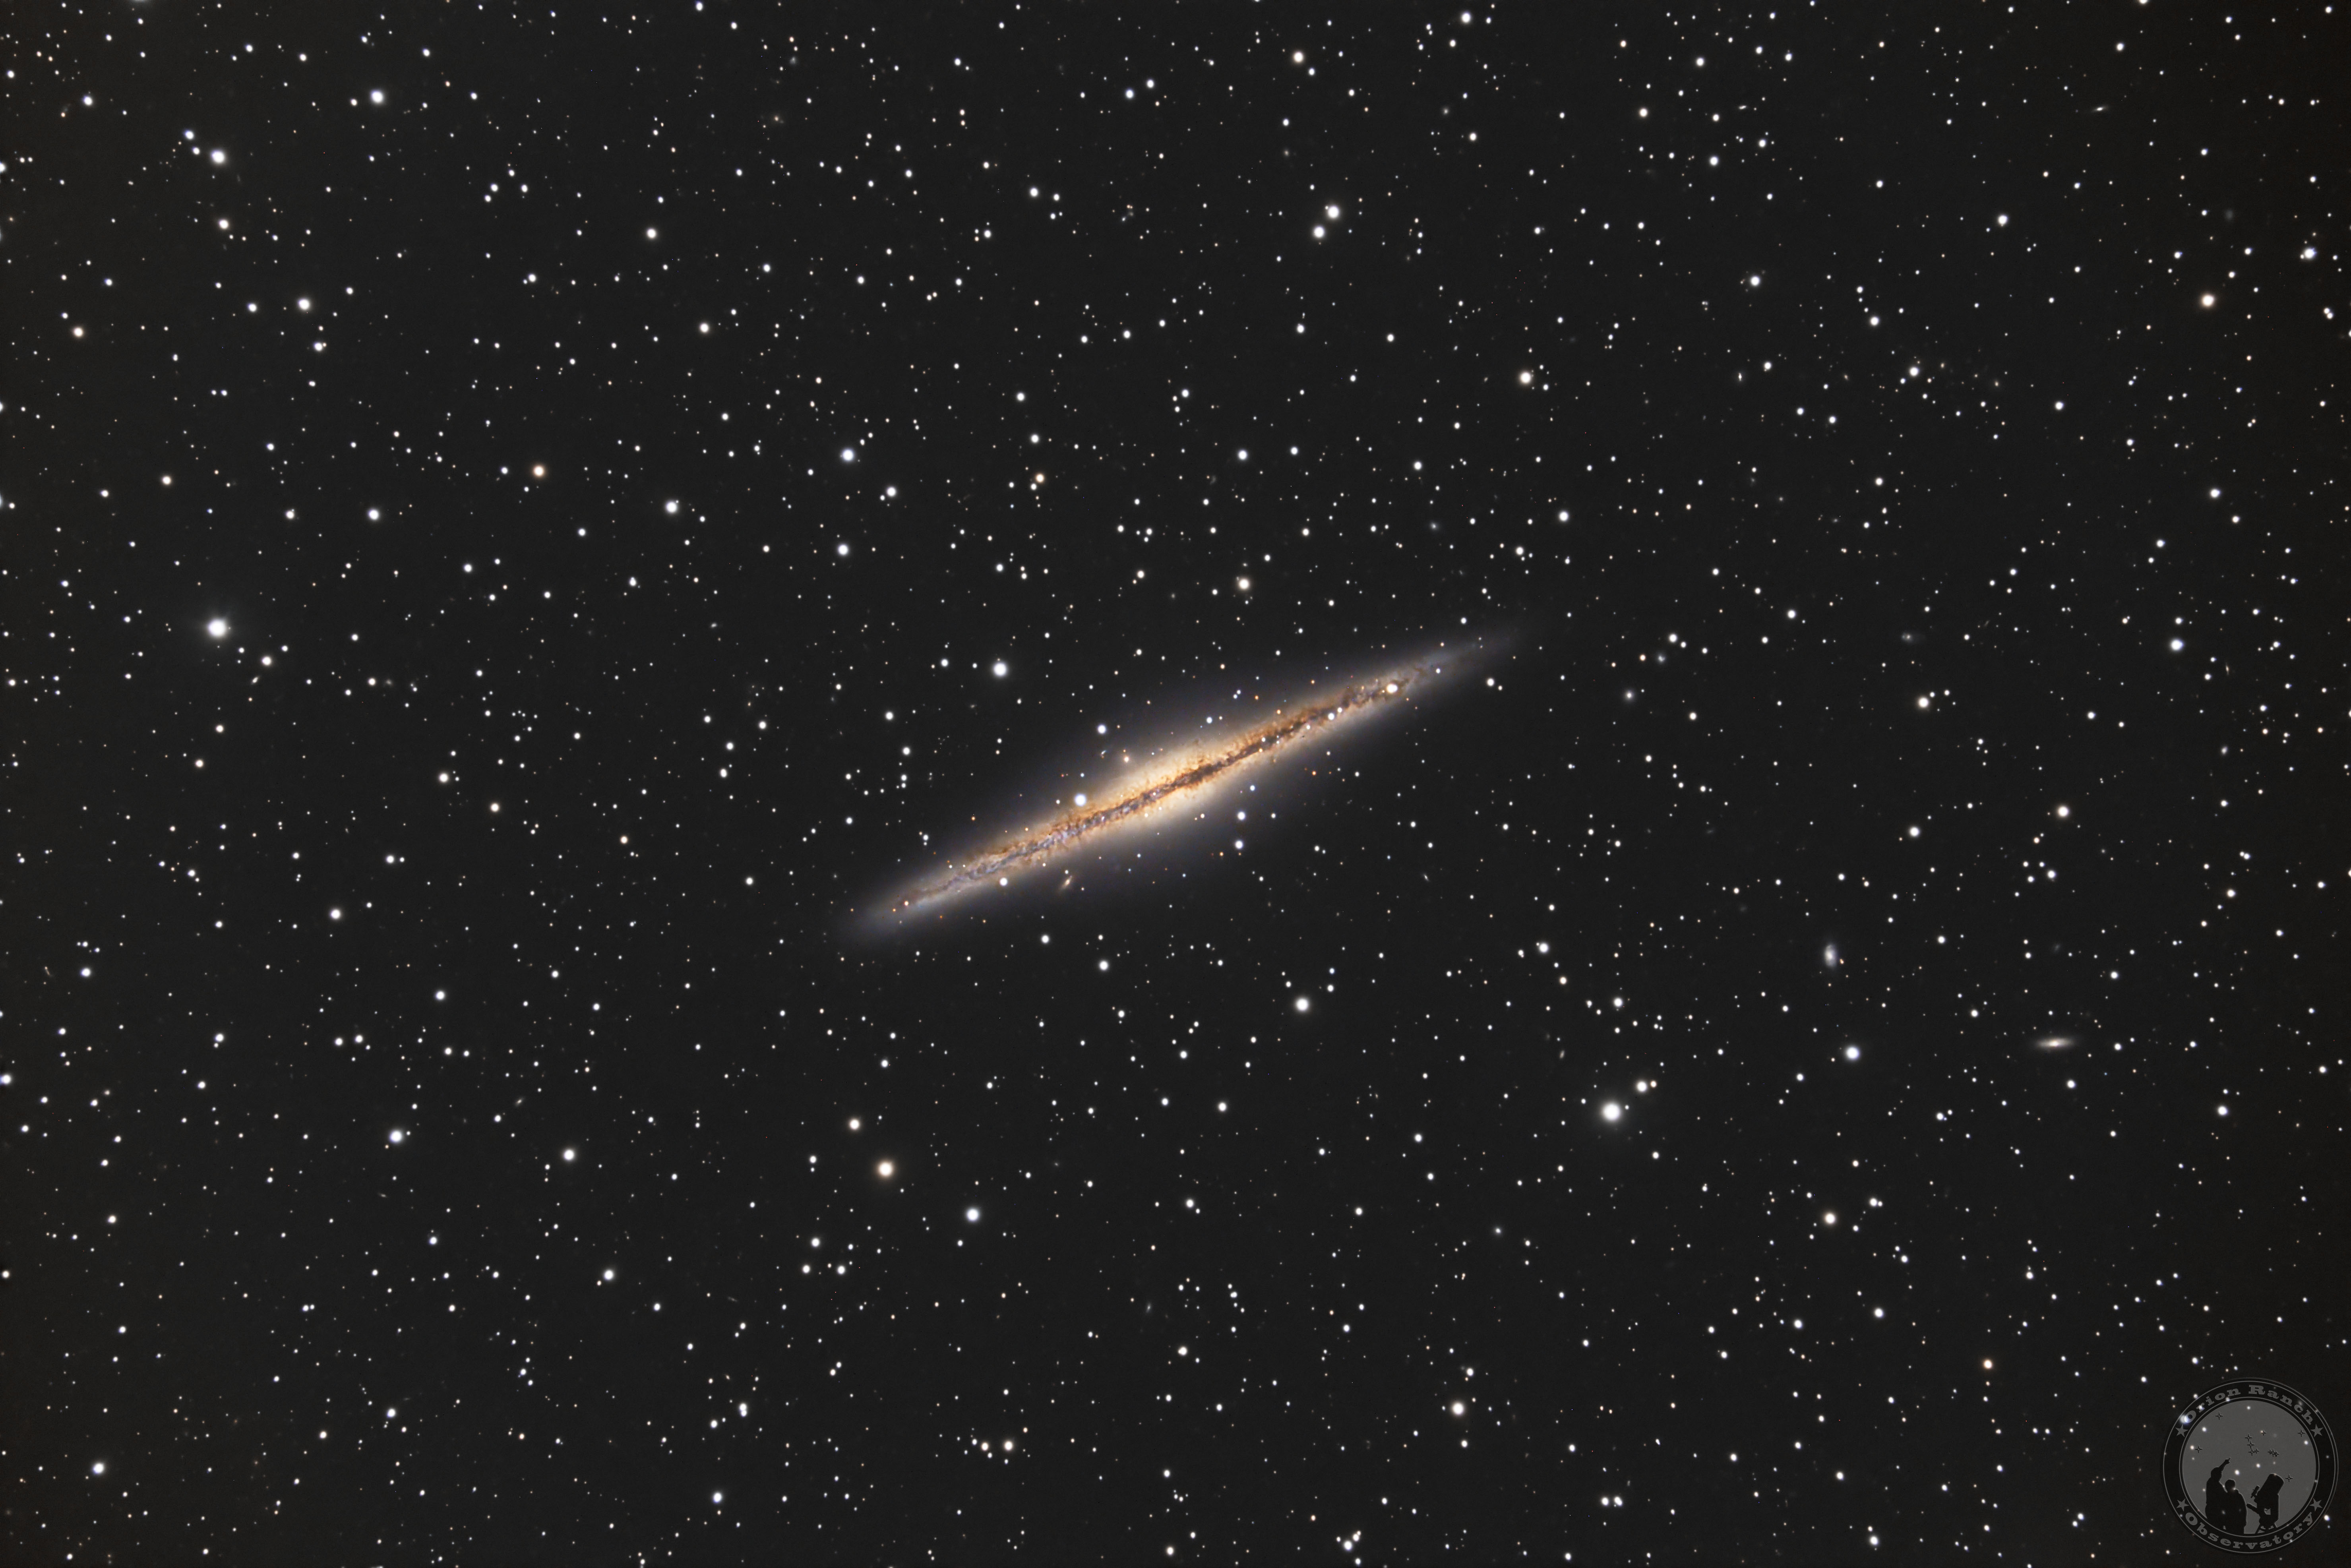
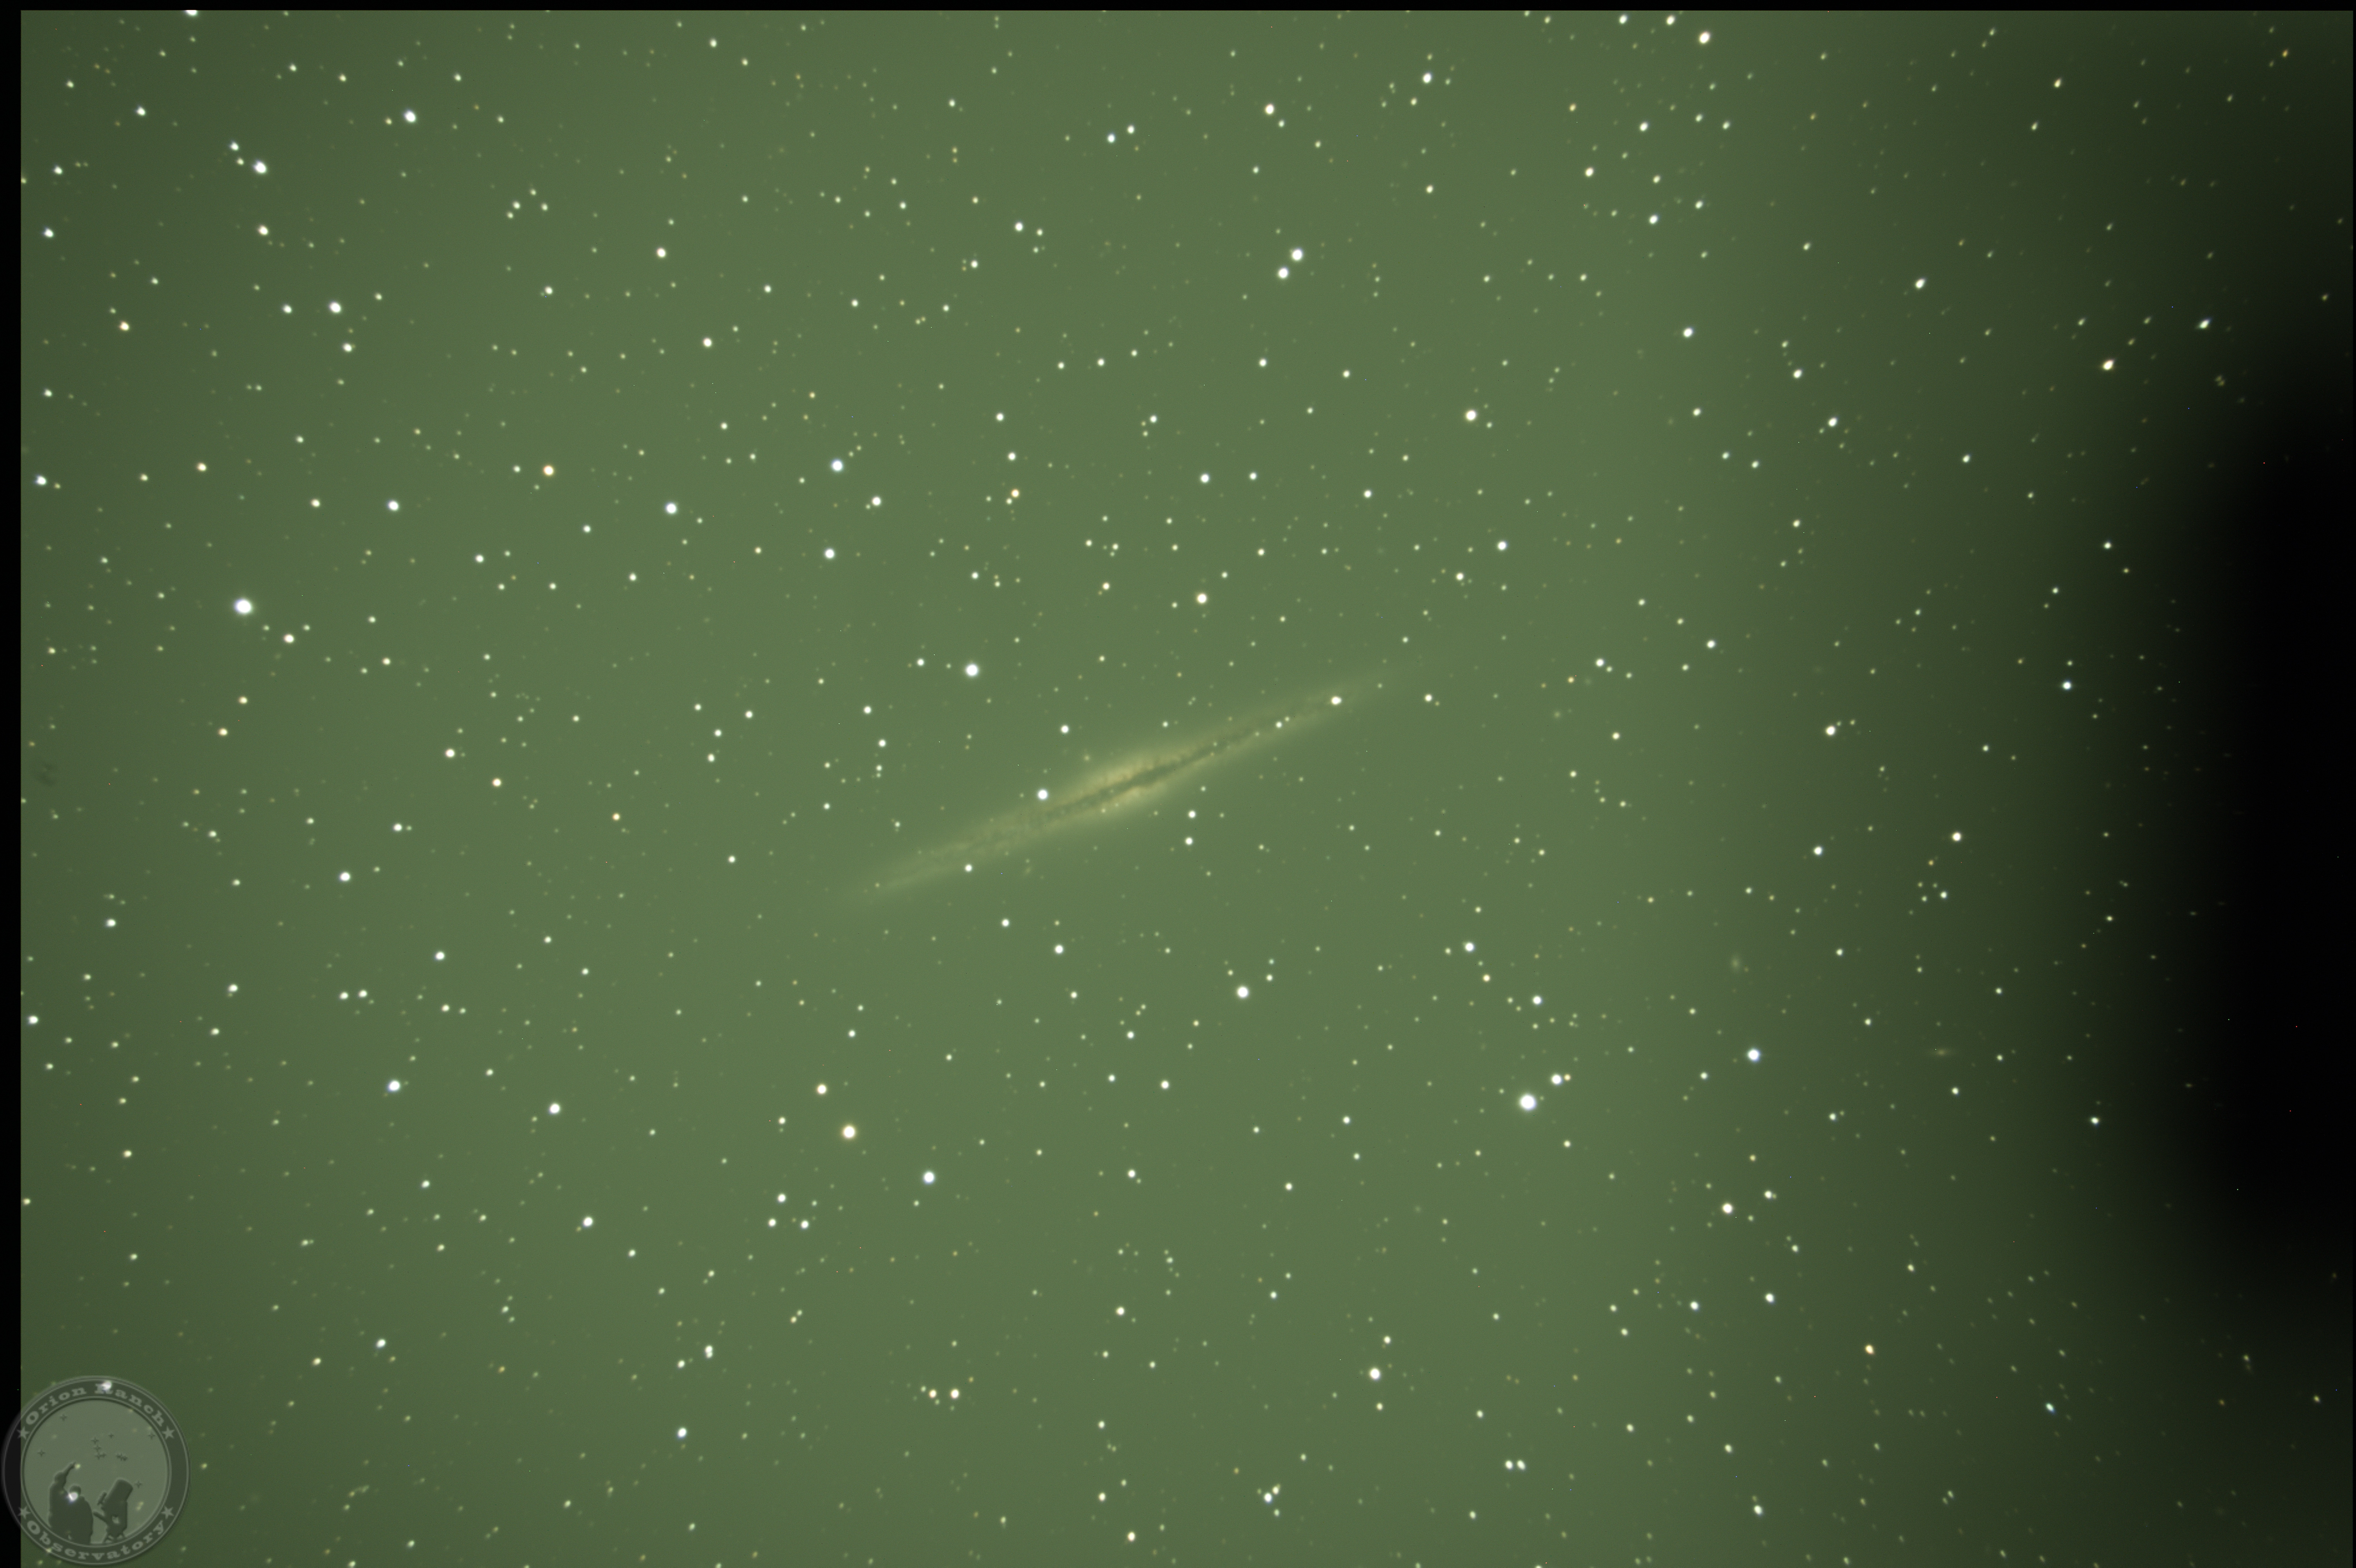
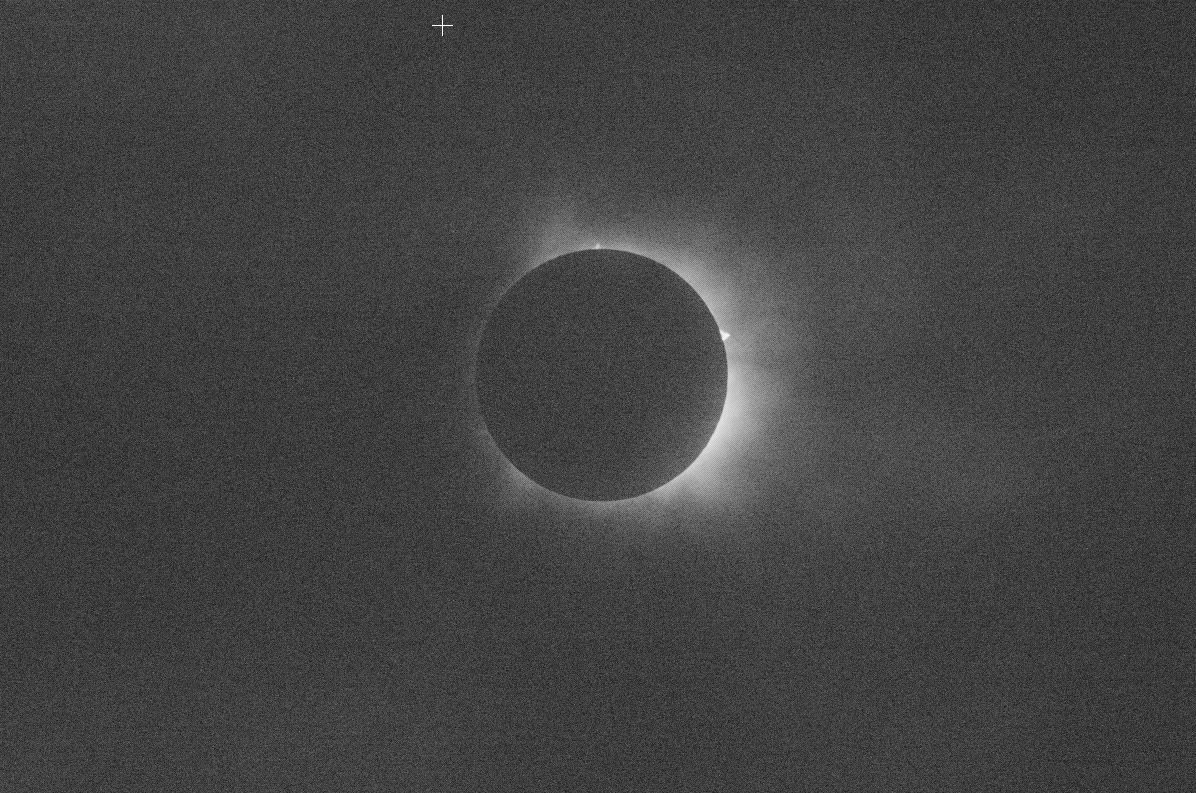
In the meantime, with the observatory shut down, I’ve really been missing any opportunity to do some observing. So, a week or so ago, on the coldest, windiest night to date, I finally brought the traveling 8se setup over from the observatory and set up to get our first look at Orion for the year.

December 30th, 2025

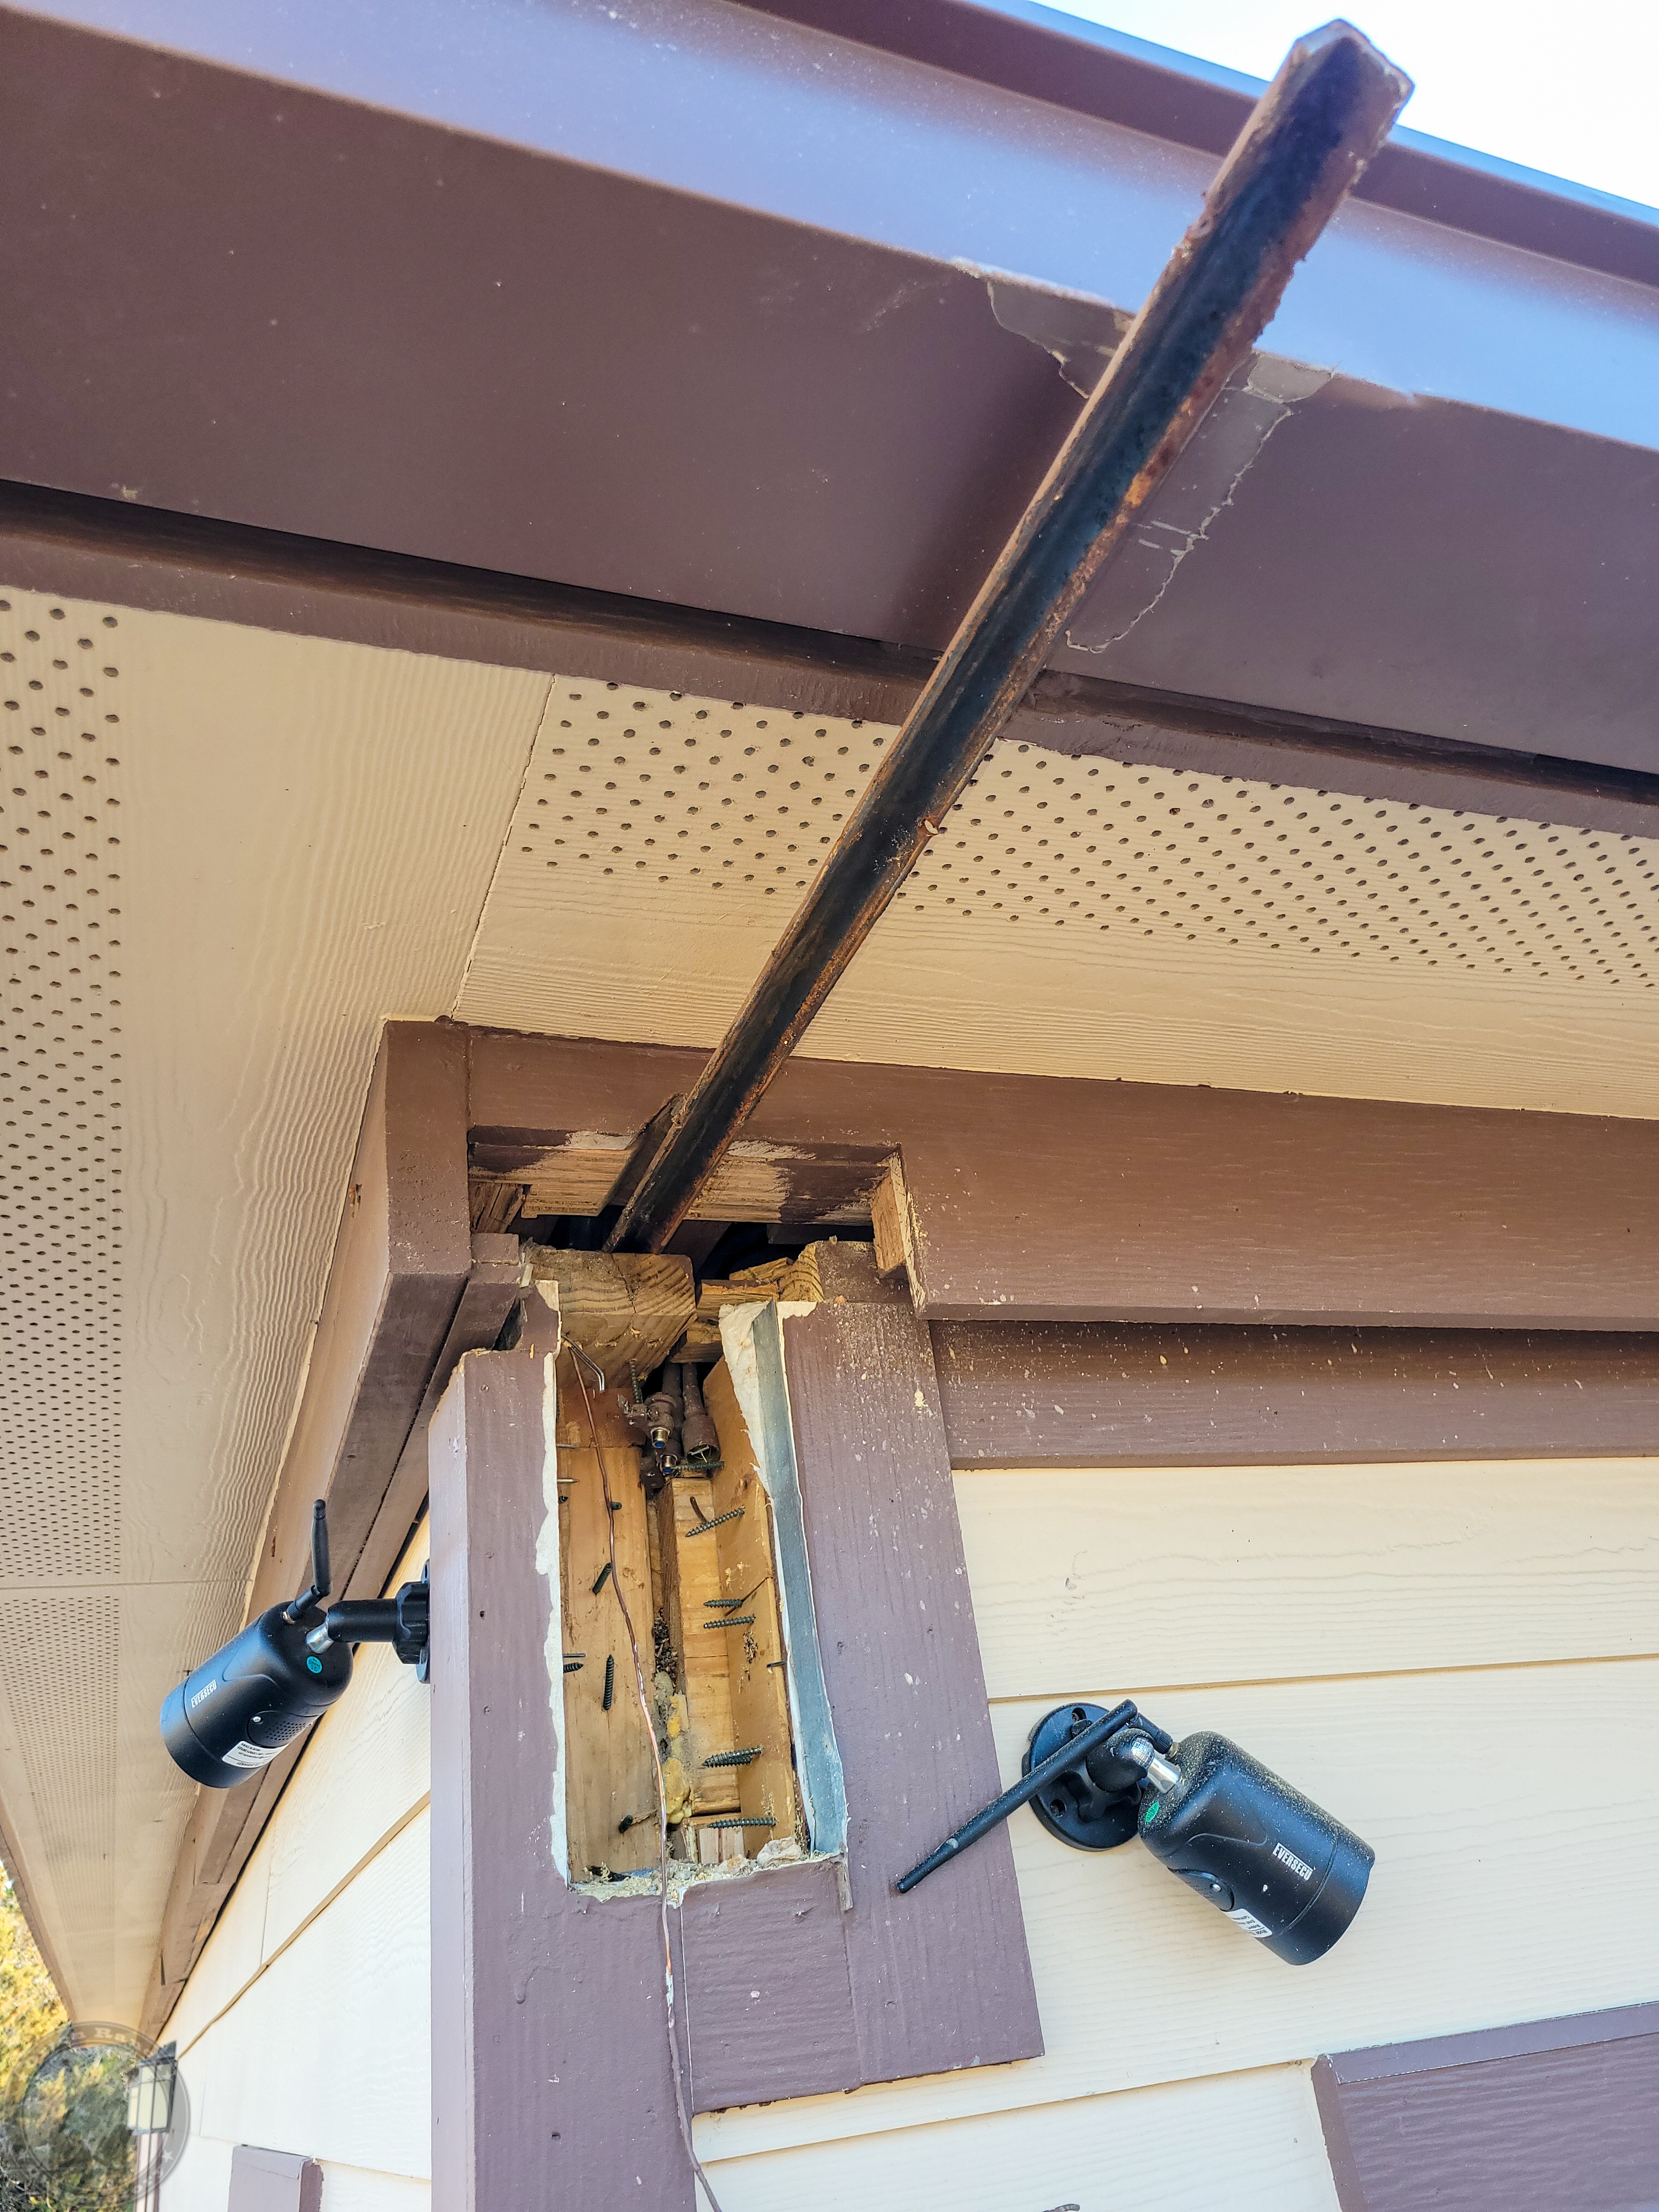
Another five hours of effort gets the other rail end out of the observatory.  Still have to deal with all of the screws, etc.

This is a cleaned up summary of the first page of my posts on Cloudy Nights in the thread, Orion Ranch Observatory Down for the Count.  As always, there are many more images in the gallery, so follow the links icon to jump to the associated page and browse from there.

Posted in Uncategorized | Leave a comment

2025 Year In Review

Well, it’s been a while since I’ve posted here, although there have been quite a few pictures added and corresponding posts on Cloudy Nights.  I’m going to attempt to summarize the events of the past year first, then bring you up to speed on the latest changes occurring now at Orion Ranch Observatory in the next post.

My last post was at the start of January, where I’d gotten my new off-axis-guider setup improved on the Edge HD 11″ OTA with the 0.7x focal reduce.  I managed to get a bit of imaging done with that rig and captured this closeup of the Flame Nebula by the end of January.  This was a stack of 53 five-minute subs (4.4 hours) out of over 200 taken.

In mid February, the RA motor on my CGE Pro again was flaking out and I opened it to find the brush holders in even worse shape than before.  The picture below is from the first time around when I discovered what was happening back in 2020.  Since I’d just taken pictures the first time around, this time I captured video of the whole repair process, but I’ve never had the time to edit it and get it posted.

After getting everything put back together, I managed to get one night of imaging before my QHY247C, which was one of the original beta sales units, failed and couldn’t be repaired.  After sending it back to QHY for several months, they eventually came back saying they couldn’t repair it either and offered me a good deal on a new QHY268C.  I had been debating getting a ZWO ASI2600MC-Duo, but this was a much better deal for the same sensor, so I stayed with QHY.

The camera finally arrived in mid June, but when I went to open the observatory to try for a first-light imaging session, I discovered that my cool new ESP32 based controller with a web interface that I’d designed for my roof drive (see Orion Ranch Observatory is Back Online!) had lost its mind and wouldn’t respond with the web page.  I eventually clambered up onto the top of the warm room to get to the drive system and pulled it to find out what happened.  Turned out that the embedded file system had become corrupted and lost the web pages.  I reprogrammed the module and got that back up and running after a second trip crawling up into the roof rafters.

After that, we were right in the middle of the 4th of July floods here in Central Texas, and were up to 14.12″ total here at Orion Ranch when I captured this rainfall total image.  I never expected the new equipment curse to be this bad!  While we desperately needed the rain to break the drought, we certainly didn’t need it all at once!  We’re the red dot in the purple area in the middle.  We had some damage to our driveway and fence lines, and lots of roads and bridges in the area were washed out or blocked with debris.  Sadly, there were also several dead and missing, although none of that was as horrible as the Camp Mystic tragedy along the Guadalupe!

After the July 4th flooding, it took a while to get any clear weather, but then as I feared, I didn’t have a short enough M54 adapter to get my OAG/focuser setup to focus with the new camera and Agena Astro was out of stock on their Blue Fireball M54 spacer set for quite a while.  I eventually decided to switch to wide field and set the camera up on my AT60ED with the 0.8 focal reducer using the M42 spacers I had.  That all worked well enough and the setup looked pretty good, thanks to my 3D printed mount for that AT60ED (it’s a LONG assembly)!

So, on the first of September, I finally reopened the observatory and got the two scopes focused (the C11 is still running the autoguider) and decide to go for the North American Nebula, which Star Tools indicated would only be a single frame on the AT60ED/0.8/268C setup.  That’s where things fell apart yet again.  Apparently my last rebuild of the RA motor on my CGE Pro just wasn’t holding.  The brush housing was just too far gone and the brushes weren’t maintaining good pressure on the motor, so my mount is shot at this point!

After debating whether to try re-forking the Edge HD C11 back on its CPC mount or try something else, I decided to buy Chad Gray’s OnStep mod to convert everything over to a stepper drive.  I would have liked to design and build my own kit, but decided I didn’t want to spend the time.  It was more about getting back up and running quickly so I could start using my new camera!

So after three days of working on the mount upgrade, I was finally able to get first light on my QHY268C with my new Antlia Triband RGB Ultra II Filter by mid September (9/12).  My QHY5III178M auto guider didn’t want to stay connected, so this image of the North American Nebula and Pelican Nebula was a stack of 141 one-minute unguided subs, processed in PixInsight.  This was also my first successful imaging session on my AT60ED with 0.8x focal reducer/flattener.  It’s pretty wide field, so I could probably have pushed the subs up and not noticed any drift.  Over the entire two+ hours of imaging, the drift was maybe 20 pixels!  This was also my first imaging session with N.I.N.A. instead of SGP.  Lots of first for this one!  There was some star distortion on the left side of the image that BlurX took care of without a problem.  Otherwise, the flattener is doing a pretty good job.  About the only issue I see in the full sized image is a diagonal striping that I might normally attribute to drift, but I don’t think it drifted that much!  Add to that, I didn’t have a chance to get flats, but after processing, you can’t tell.

This was the start of a flurry of imaging and improving my post processing workflow throughout the Fall to make up for lost time.  I never did get autoguiding working, but with this wide field setup, one minute subs were really good.  It just meant taking tons of pictures to get the necessary signal to noise ratio (SNR).  However, I’m impressed and pleased with what I’m able to get vs. longer five-minute exposures.  It also means that anything that messes up a single image has less impact on the total amount of data I capture.

Here’s my shot of the Gamma Cygni Butterfly Nebula with the Crescent Nebula in the upper left corner (9/15).  I had to restrain myself from over-brightening the image so that you could still see some stars in the result.  This image is a stack of 211 one-minute unguided subs using the same setup.

9/16 – This wide field setup allowed me to capture the entire veil nebula including the eastern and western components.  This is 133 one-minute images.

9/19 – This shot of the Flying Bat Nebula (Sh 2-129) is a stack of 282 one-minute un-guided subs.

9/21 – This wide field image in the constellation Sagittarius covers a region in the southern central Milky Way that includes the Lagoon Nebula (M8 or NGC 6523) in the top center, the Trifid Nebula (M20 or NGC 6514) to the lower left, and the open cluster M21 or NGC 6531, also known as Webb’s Cross, in the bottom middle, and is a stack of 76 one-minute exposures.

9/22 – This image of the Elephant’s Trunk Nebula (IC 1396A) is a stack of 235 one-minute un-guided subs.

With all of these options, I also decided to try my hand at another 3D image.  It turned out ok, although I should have spent a bit more time on it.

9/28 – This unnamed nebular region in Cygnus is in the middle of the northern part of the Milky Way galaxy, and includes the open clusters of NGC 6871, NGC 6883, and IC 1310, and is a stack of 182 one-minute unguided exposures.

10/1 – This wide field image contains multiple dim emission nebulae, with the brighter Bubble Nebula (NGC 7635) on the right hand side, and the open cluster, M52, just below and to the right of it.  It’s a stack of 868 on-minute subs (14.5 hours!).

10/16 – This image of the Taurus Dark Cloud is a stack of 161 unguided one-minute exposures.

10/19 – This image of the Andromeda Galaxy was a stack of 318 one-minute subs.

10/20 – This stack of 159 one-minute exposures contains the central section of the Perseus molecular cloud (Per MCld) near the star Atik (Alatik) in the left third of the image with the star forming nebula IC 348 below it and NGC 1333 at the lower right edge.

I also started a folder of starless versions for comparison.  I still have a handful of images to process or that I’m not quite happy with the process, but hopefully I’ll get there eventually.   I also tried my first shot at an integrated flux nebula (normally invisible dust outside our galaxy reflecting the light of our galaxy back to us) with this image of Polaris.  After 18.6 hours of data, I still don’t have an image I’m happy with, partly because of the lack of dithering due to not having the auto guider operational.

Unfortunately, on the evening I took the last image of the Perseus molecular cloud above, I was (luckily) out in the observatory when I opened it up and heard a wood on wood squeal as the roof bound up on the rail system.  Next morning it blew the fuses trying to close it.  Inspecting the rail system, the top cap was in pretty bad shape, so that shut me down completely until I can get the rail system repaired/replaced.

On November 11th, I just happened to pull up my all-sky camera and discover a glow on the Northern horizon that it turns out WASN’T a problem with my camera!

It’s not common to see the Northern Lights this far south!

In all, it’s been a pretty up and down year for Orion Ranch Observatory, ending with the observatory down, literally, but working to reverse that.  Stay tuned for the next post!

Posted in Uncategorized | Leave a comment

Tuning the Imaging Train

My initial setup had too much back focus from the focal reducer, resulting in distorted stars around the edge of the field of view.  The off-axis guider pick-off mirror was also shadowing the image, resulting in unusable images.  

My initial attempt was to mount the OAG directly to the camera, removing about 24 mm of back focus.

Unfortunately, even after removing the spacers on the guide camera and spacing the pick-off prism out from the center, I still couldn’t get the guider back focus short enough to match the imaging camera.

I finally had to add the camera rotation adapter which adds about 6 mm back to the camera path.  Removing the protective window off the guide camera let me get it close enough to get both cameras in focus at the same time.  I’m not thrilled about that, and don’t know how much moisture and dust may eventually infiltrate the guide camera, but that was the only way to get things to work.  However, things worked out well and with the altered orientation, the pick-off prism no longer blocks the imaging sensor.  

After adjusting the primary focus mirror and setting the Crayford about as short as possible while maintaining a few mm of adjustment, I get nice round stars to the edge of the field of view and tiny pinpoint stars on the guide camera.  Guiding is actually so good that I’ll probably have to start dithering the images to average out the few hot and dead pixels I have on the camera.  I probably need to create a new dark library to minimize those, but the results turned out pretty well.  There’s still more vignetting around the widest edges of the images, probably due to narrow throat of the SCT adapter.  I still want to find a 3.3″ adapter for the focuser, but I’m reluctant to invest in a much more expensive focuser to get the wider opening.  Below is my finished process of NGC 891.  Turned out pretty good, if I do say so myself. 

Posted in Uncategorized | Leave a comment

Orion Ranch Observatory is Back Online!

After the solar eclipse in April, it took me quite a while to get around to putting the observatory back to it’s normal nighttime viewing state.  Unfortunately, then something went wrong with the serial interface between my controlling computer and the motor drive system that moves the roof, so I haven’t been able to open it for some time.  

To top it off, the custom infrared remote control that would allow me to manually open the roof had it’s batteries leak and completely ruin the circuitry.

In order to get to the motor drive without crawling completely up into the roof framework, I needed to get that working again, so I eventually wrote some code on an Arduino Nano and replicated my command set to allow me to open and close the roof using the Arduino connected to a laptop. 

I had to hotwire the old remote to let me generate a few codes just so I could confirm the timing and format, since it has been twenty years since I developed the original protocol!

Once I had that working, I decided it was finally time to do something I’d planned to do for a long time, and developed a web based interface on an ESP32-S3 embedded microcontroller with Wi-Fi.  Now I can open the roof from any web browser on my network rather than having to remote into the one PC that was interfaced to the drive.  Now I just need to write an ASCOM driver so that Sequence Generator Pro can control it directly.  

Once I got the roll-off roof working again, I had to put my astrophotography rig back together.  For the eclipse, I remembered that I had the 0.7x focal reducer for my C11, which worked great during the eclipse, so I want to try doing some imaging through that.  About this time last year, I had developed a focus motor drive for my old Zhumell Crayford SCT focuser, but never really got the chance to test it properly.  

I still have to use the SCT thread adapter to mount that focuser as opposed to the larger 3.3″ opening on the C11, but the focus motor works quite well, letting me lock down the mirror and eliminate mirror flop.  I’d also bought a new small Askar off-axis guider to replace my old huge Taurus Tracker OAG.  By the time I got the entire optical chain set up with the heavy focal reducer, focuser, and QHY-247C camera, things were WAY off balance.  I had to add the final counterweight on the CGE Pro and shift the OTA way forward in the mount.  Balance is great now though!   

First light with the new setup (a month after the clouds rolled in the instant I got everything working and then ran through a full moon cycle), guiding is great, but the back focus is several centimeters too long and thus there’s quite a bit of field curvature around the edges of the field.  The pick-off mirror of the OAG is also causing major vignetting in the side of the image.  It needs to be rotated 90 degrees and shifted out as far as possible.  I THINK I may be able to shorten the length enough to reach the 146 mm recommended by Celestron, but that remains to be seen. 

This is a simple stretch of this first stack.  I doubt I’ll finish processing this vs. trying to improve the setup and redoing it.

Posted in Uncategorized | Leave a comment

Managed to Process a Few Frames!

I’ve managed to generate new darks and debayer all of the frames from my QHY-247C on my AT-80LE.  I’m post processing these in Photoshop and have processed the six 6-millisecond frames from totality.  I have six times that with exposures from 1-6 ms, so hopefully I can process all of those to similar levels and make a finer resolution animation.  Here it is in GIF format.  I may do a video version as well to see if it looks any better.  You can visit the gallery here.

Posted in Uncategorized | 1 Comment

It was still 50/50, but we got the right 50%!

Unprocessed and not deBayered, but here was totality!  Watch for updates in the coming week or two!

Posted in Uncategorized | Leave a comment

The Window Around Totality Is Getting Wider!

It’s still not looking great for Monday, but we’re so borderline it’s painful.  The Clear Sky Chart is showing a tiny gap right around the start of the eclipse and clouding back up after totality.  However, this morning vs. last night is showing less morning cloud and a bit wider slot overall.

Looking at the map, it’s apparent that up through Arkansas will potentially be the best viewing, but I don’t think we want to try a last minute trip.  We’re so close the back edge of this front that just a bit of shift will greatly change what happens here.  That tail edge just needs to shift a bit further south and it will miss us completely.  We’re going to keep praying for a bit more of a break in the clouds!  


Posted in Uncategorized | Leave a comment

The Observatory Is Ready!

After weeks of prep and quite a few days/evenings of cleaning, the observatory is cleaner than it’s been in years and I have both piers set up for solar observing and photography.  Test runs of photos with my QHY247C on my AT80LE look great, and all is ready to go if the weather will cooperate!

The framing isn’t perfect on the piggyback, but as long as I move it just before totality, it should be perfect for the corona shots too!


Posted in Uncategorized | Leave a comment

Time to Start Praying!

I’m not normally outspoken about my faith, especially online, but when people ask, I’ll tell them that I can’t look at the wonders and majesty of this universe and the elegance of the physics that we’ve discovered and believe that it all occurred by random chance.  I also firmly believe in the power of prayer and that God will answer the prayers of the faithful.  It may not always be the answer we want, but what could be a more amazing example of His glory than this eclipse!  So please join me in praying for good weather and safe travel and observing for all of those wishing to see this eclipse!

Posted in Uncategorized | Leave a comment